
Subscribe to Our Youtube Channel
Related Manuals for Supreme Heating NOVA-PRO290


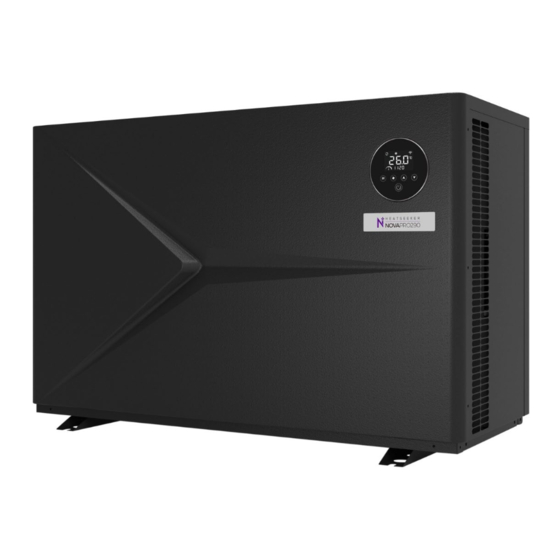
Summary of Contents for Supreme Heating NOVA-PRO290
- Page 1 NOVA-PRO290 FULL INVERTER SWIMMING POOL HEAT PUMP Installation and Instruction Manual 1300 787 978 Please read this manual carefully before installation, operation or maintenance. supremeheating.com.au...
-
Page 2: Table Of Contents
CONTENTS PREFACE ··········································································································· 1 1.1. Symbol ········································································································ 1 1.2. Safety ·········································································································· 1 1.3. Warning ······································································································ 2 1.4. Attention····································································································· 3 2. OVER VIEW OF THE HEAT PUMP ······································································ 4 2.1. Transportation ···························································································· 4 2.2. Accessories ································································································· 4 2.3. Technical Parameter ··················································································· 5 2.4. -
Page 3: Preface
1. PREFACE Thank you very much for purchasing our heat pump. We sincerely hope that the product can provide you with a comfortable user experience. by starting, please read this manual thoroughly and keep it carefully for future usage and maintenance. 1.1. -
Page 4: Warning
j. If high-temperature work is to be performed on this product, appropriate fire extinguishing device, such as dry powder or carbon dioxide fire extinguishers, should be available. k. Do not clean the machine while the power is on. Please turn off the power before cleaning. Otherwise, it may cause injury due to the high-speed fan or electric shock. -
Page 5: Attention
1.4. Attention a. Please examine the heat pump carefully and confirm whether the product has arrived in a good shape, with fixed screws, and a full range of accessories after you receive the product. b. Unpack the heat pump before formally installation by cutting the packing tape, taking off the packaging, and removing the bottom wooden pallet. -
Page 6: Overview Of The Heat Pump
2. OVERVIEW OF THE HEAT PUMP 2.1. Transportation a. When storing or moving the heat pump, always keep it in an upright position. b. Do not lift up the water union when there is a need to move the heat pump, as it will damage the internal titanium heat exchanger. -
Page 7: Technical Parameter
2.3. Technical Parameter Table 1 Model No. Novapro290-09 Novapro290-11 Novapro290-15 Novapro290-18 Advised Pool Volume m³ 20~45 30~55 40~70 40~80 Performance Condition: Air Temperature: 27°C, Inlet / Outlet Water Temperature: 26°C / 28°C, Humidity 80% Heating Capacity 2.60~9.12 3.07~11.05 4.26~15.15 5.07~18.07 Power Consumption 0.16~1.49 0.19~1.83... - Page 8 Table 2 Model No. Novapro290-21 Novapro290-25 Novapro290-28T Advised Pool Volume m³ 50~95 55~110 65~120 Performance Condition: Air Temperature: 27°C, Inlet / Outlet Water Temperature: 26°C / 28°C, Humidity 80% Heating Capacity 6.05~21.18 7.30~25.11 7.79~28.03 Power Consumption 0.37~3.44 0.45~4.15 0.48~4.59 16.35~6.16 16.22~6.05 16.22~6.11 Performance Condition: Air Temperature: 15°C, Inlet Water Temperature: 26°C, Humidity 70%...
-
Page 9: Dimension
2.4. Dimension Dimension Indication (unit: mm) Model Novapro290-09 1000 Novapro290-11 Novapro290-15 1060 Novapro290-18 Novapro290-21 Novapro290-25 1160 1070 Novapro290-28T... -
Page 10: Installation Instruction
3. INSTALLATION INSTRUCTION 3.1. Installation Distance The heat pump should be installed in a well-ventilated area. It should be installed in the place greater than the following distances: 3.2. Installation of Drain Hose The drain hose needs to be installed in the following manner to the location of the corresponding drainage outlet at the bottom of the heat pump. -
Page 11: Installation Of Water Pipe
3.4. Installation of Water Pipe Use hard pipes rather than soft pipes to connect the water union. Soft pipes will increase the resistance of the pipeline. 3.5. Layout of Water System The filter must be routinely cleansed to keep the water in the system clean and to avoid filter clogging. - Page 12 Model Power Supply Cable Specification Novapro290-09 3G 1.5mm² Novapro290-11 3G 1.5mm² Novapro290-15 3G 2.5mm² 220-240V~/ 50Hz Novapro290-18 3G 2.5mm² Novapro290-21 3G 4.0mm² Novapro290-25 3G 4.0mm² Novapro290-28T 380-415V/3N~/50Hz 5G 2.5mm² b. Electricity Connection WARNING: The heat pump must be disconnected from the power supply before any operation. Please follow the instructions below to connect the heat pump.
-
Page 13: Testing
4. TESTING WARNING: Check all wiring carefully before turning on the heat pump. 4.1. Inspection Before trial running, verify that the following items are complied with. a. The heat pump is installed properly. b. The power supply voltage is the same as the rated voltage of the unit. c. -
Page 14: Operation
5. OPERATION 5.1. Icon and Key Description of Wire Controller 5.1.1. Icon Description Icon Meaning of Icon Function Description Smart Mode It will display under Smart Mode. Silent Mode It will display under Silent Mode. Boost Mode It will display under Boost Mode. Heating Mode It will display under Heating Mode. - Page 15 It will display when electric heating is Electric Heater Icon It will flash during Wi-Fi connecting Wi-Fi Connection and display after successfully connected. It will display if the wire controller is Locked locked. It will display when the temperature Degree Celsius is set to be in Degree Celsius.
-
Page 16: Operation Instruction Of Wire Controller
5.1.3. Combination Keys Description Combination Keys Function Description Long Press “ ” and “ ” for 2 Enter Parameter Checking Interface Seconds Long Press “ ” and “ ” for 2 Enter Timer Setting Interface Seconds Search for a Wi-Fi Signal and Connect to Long Press“... - Page 17 b. Smart/Silent/Boost When the heat pump is on, short press “ ” to switch between Boost/ Silent / Smart mode. Boost→ Smart→ Silent (modes switch in circular sequence) 5.2.3. Temperature Setting When the heat pump is on, short press “ ”...
- Page 18 Operating Parameter List Code Parameter Name Unit Scope Remark Practical frequency of inverter compressor 0~150 AC current 0~50 AC voltage 0~300 DC voltage 0~500 ℃ Inlet water temperature -30~150 ℃ Outlet water temperature -30~150 ℃ Water tank temperature Not for pool heat pump -30~150 ℃...
- Page 19 Fault Code List Fault code Description Remark IPM (driver module) protection AC voltage over/shortage protection Input voltage inspection AC current over high protection Gas exhaust temperature over high protection Outside coil temperature over high protection Compressor drive protection Ambient temperature sensor fault Outside coil temperature sensor fault Gas exhaust temperature sensor fault Bus voltage over/shortage protection...
- Page 20 Outlet water temperature sensor fault Water flow switch fault Inadequate water flow protection Outlet water temperature over high protection at heating mode Outlet water temperature over low protection at cooling mode Evaporation temperature sensor (T2) fault PFC hardware F0 error Driver error PFC software over current protection Driver error...
- Page 21 (2) Power ON/OFF Timer Setting Method Long press “ ” and “ ” for 3 seconds till the icons “ ” and “1” are displayed on the right side of the screen. When the icon “1” is flashing, press “ ”...
-
Page 22: Operation Instruction Of Wi-Fi Function
5.3. Operation Instruction of Wi-Fi Function 5.3.1. APP Download Search “Smart Life” or directly scan below QR code to download. ANDRIOD system download Or scan below QR code to APPLE system download from: from: download: Smart Life Note: For Android mobiles, “Download apps from external sources” should be activated, as below shows: Open the APP and enable the authorization of its... - Page 23 5.3.2. User Registration (1). New users need to register at the first (2). Finish your registration according to the time use. instruction. (Regular user) To log in with existed account name & PIN. Complete the registration as it instructs. (New user) To register a new account 5.3.3.
- Page 24 Connect your smartphone to the available Wi-Fi (the same Wi-Fi source as the heat pump device connects). And also keep your smartphone Bluetooth open in the meanwhile. Ensure your smartphone Location Services remain “On” and also turn on “Allow Apps to Request to Track”...
- Page 25 5.3.4. Add Device Tap “+”at the right upper corner, or tap “Add device” button to add the smart devices you want to connect. Tap here to add the smart devices you want to connect. Select “Others” to enter the “Add Manually” interface. And then select “Others (Wi-Fi)”.
- Page 26 Then enter this below interface and need to input Wi-Fi account & Wi-Fi password (the same Wi-Fi source as the heat pump device connects): After inputting above information , tap the “Next” button. 5.3.5. Connection When you enter this interface , please tap button below.
- Page 27 Then, operate the controller of heat pump like this below : Using your fingers to press on these two buttons at the same time until the “Wi-Fi” icon starts flashing. Scene 1: If the icon of Wi-Fi flashes slowly on heat pump controller, please tap the “ Blink Slowly” button on your mobile phone.
- Page 28 Enter into this interface and then tap the button below. Select the WLAN source of “SmartLife-XXXX” (“XXXX” will be random combination of letters and numbers). And then get back to the Smart Life app.
- Page 29 When below page comes up, it means your mobile phone is searching the hot spot signal from heat pump controller. When this page comes up, it means the connection is successful. Then tap the “done” button to enter the Wi-Fi control interface.
- Page 30 Scene 2: If the icon of Wi-Fi flashes rapidly on heat pump controller, please tap the “ Blink Quickly” button on your mobile phone. Enter into this interface and then tap the following “+” button. After the connection is successful, tap the “done”...
- Page 31 5.3.6. Wi-Fi Control Interface You can set the target temperature of the connected heat pump by using these buttons. Tap this button to turn Tap this button to set ON or OFF of the heat the timer ON and OFF. pump.
- Page 32 5.3.7. Share Device to Your Family Members After connection, if your family members also want to control the heat pump, please let them register “Smart Life” first, and then the administrator can operate as below to share the device: Enter the phone number or email when your family member used to register the “Smart Life”...
-
Page 33: Maintenance And Winterizing
Remark: The app is subject to updates without notice. 6. MAINTENANCE AND WINTERIZING 6.1. Maintenance WARNING: Make sure the power supply is cut off before any maintenance work is performed on the unit. ① Cleaning a. Please clean the machine with household cleaners or water. Do not use gasoline, thinner or any similar fuel. - Page 34 NOTES...
- Page 35 1300 787 978 supremeheating.com.au...
Need help?
Do you have a question about the NOVA-PRO290 and is the answer not in the manual?
Questions and answers