
Related Manuals for Supreme Heating Heatseeker NovaS


Summary of Contents for Supreme Heating Heatseeker NovaS
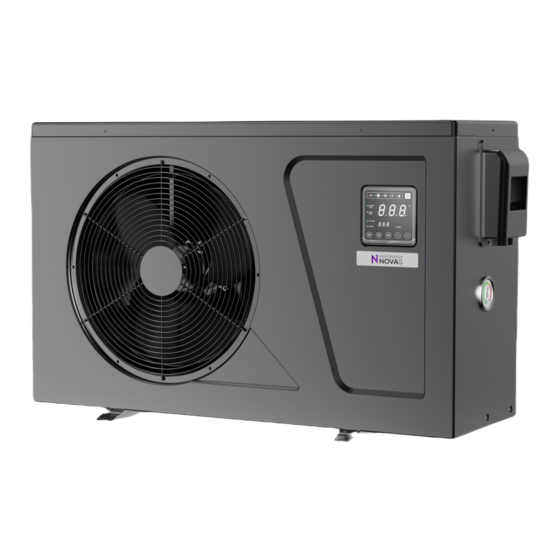
- Page 1 H E A T S E E K E R INSTALLATION & USER MANUAL Heatseeker VortexE Inverter Heat Pump Installation & User Manual...
- Page 2 National Support Office 2/19 Enterprise Drive Bundoora VIC 3083 P: (03) 9460 4200 F: (03) 9460 4900 info@supremeheating.com.au supremeheating.com.au Supreme Solar Pty Ltd ABN: 88 007 400 213 New South Wales 19/24 Anzac Avenue Smeaton Grange NSW 2567 P: (02) 4648 4766 solar.nsw@supremeheating.com.au Queensland Unit 4, 7-9 De Barnett Street...
-
Page 3: Table Of Contents
Trouble shooting guide Error codes ANCILLARY PRODUCTS NovaSwitch 8.1. Description 8.2. Operation 8.3. Heating priority 8.4. Installation instructions NovaLink 9.1. Description 9.2. Operation 9.3. Heat demand 9.4. Installation instructions Wifi Setting WARRANTY Warranty agreement Heatseeker NovaS Heat Pump Installation & User Manual... -
Page 4: General Information
1.2. OPERATING CONDITIONS AND RANGE ITEMS RANGE Operating Range Air temperature -7°C - 43°C Temperature Setting Heating 9°C - 40°C The heat pump will have ideal performance in the operation range Air 15°C - 25°C Heatseeker NovaS Heat Pump Installation & User Manual... -
Page 5: Kind Reminder
1.3.2. When moving the heat pump, do not lift the water union. This will damage the titanium heat exchanger. 1.3.3. Do not obstruct the air inlet or outlet of the heat pump. Heatseeker NovaS Heat Pump Installation & User Manual... - Page 6 1.3.6. If you detect any abnormal noises, odours, smoke or leaks from the heat pump, immediately switch off the power supply and contact your local dealer. Do not attempt to repair the heat pump yourself. Heatseeker NovaS Inverter Heat Pump Installation & User Manual...
- Page 7 1.3.7. The main power supply switch should be out of the reach of children. 1.3.8. Please disconnect the heat pump from the power supply during electrical storms. Heatseeker NovaS Heat Pump Installation & User Manual...
-
Page 8: Operations
Will display under the automatic mode (there is no limit to startup & Automatic symbol shutdown, and is optional when the unit is heating and cooling). Defrosting symbol Will display in the defrosting process. Heatseeker NovaS Heat Pump Installation & User Manual... - Page 9 When the main display area displays the water inlet temperature, the light is Water inlet symbol Setting symbol When the parameter is adjustable, it is on. Fault symbol In case of unit fault. Mute symbol When it is in silent mode. Heatseeker NovaS Heat Pump Installation & User Manual...
- Page 10 PARAMETER RANGE Set hours ON 0-23 Set minutes ON 10/20/30/40/50 Set hours OFF 0-23 Set minutes OFF 10/20/30/40/50 Timer ON 0- not enabled, 1- enabled Timer OFF 0- not enabled, 1- enabled Heatseeker NovaS Heat Pump Installation & User Manual...
- Page 11 • If the unit fails, the controller will display the corresponding code according to the fault. Refer to the fault table for the specific definition of the fault codes. For example: Press Heatseeker NovaS Heat Pump Installation & User Manual...
-
Page 12: Maintenance And Winterizing
Unscrew the water union of inlet pipe to let the water flow out. When the water in machine freezes in winter season, the titanium heat exchanger may be damaged. Heatseeker NovaS Heat Pump Installation & User Manual... -
Page 13: Technical Specification
The values indicated are valid under ideal conditions: Pool covered with an isothermal cover. Related parameters are subject to adjustment periodically for technical improvement without further notice. For details please refer to nameplate. Heatseeker NovaS Heat Pump Installation & User Manual... -
Page 14: Transportation
When storing or moving the heat pump, please ensure the unit remains in an upright position at all times. 4.2. When moving the heat pump, do not lift the water union. This will damage the titanium heat exchanger. Heatseeker NovaS Heat Pump Installation & User Manual... -
Page 15: Installation And Maintenance
ATTENTION 5.1. NOTICE BEFORE INSTALLATION 5.1.1. Plumbing connections must be made with solid PVC pipe. Usage of flexible PVC pipe is not recommended. Heatseeker NovaS Heat Pump Installation & User Manual... -
Page 16: Installation Instructions
Do not obstruct the air inlet or outlet of the heat pump. The efficiency may be reduced or even stopped. Side Discharge 400 - 800mm 500mm From Sides From Top 250 - 400mm From Back 1500 - 2500mm From Front Discharge Heatseeker NovaS Heat Pump Installation & User Manual... - Page 17 Independent System HEAT PUMP - BACK SOLAR PUMP NON RETURN VALVE 3 WAY VALVE In-line System HEAT PUMP - BACK FILTER FILTER PUMP CHLORINATOR NON RETURN VALVE 3 WAY VALVE Heatseeker NovaS Heat Pump Installation & User Manual...
- Page 18 Adjusting the Bypass HEAT PUMP - BACK FILTER FILTER PUMP CHLORINATOR NON RETURN VALVE 3 WAY VALVE Heatseeker NovaS Heat Pump Installation & User Manual...
- Page 19 Operation without a bypass or with improper bypass adjustment may result in suboptimal heat pump operation and possible damage to the heat pump. Failure to observe this ATTENTION instruction will void the warranty. Heatseeker NovaS Heat Pump Installation & User Manual...
- Page 20 HEATPUMP DIMENSIONS 5.2.2. Heatseeker NovaS 9kW 5.2.3. Heatseeker NovaS 13kW Heatseeker NovaS Heat Pump Installation & User Manual...
- Page 21 5.2.4. Heatseeker NovaS 17kW 5.2.5. Heat pump installation When the heat pump is running, condensation will occur and drain from the bottom of the unit. This is completely normal. However, consideration should be made for how to drain the condensation away. Drainage nozzle and pipe are supplied.
- Page 22 3x0.5 NOTE: The above data is adapted to power cord ≤ 10m. If power cord is >10m, wire diameter must be increased. The signal cable can be extended to 50m at most. Heatseeker NovaS Heat Pump Installation & User Manual...
-
Page 23: Trial After Installation
3 minutes, in another 30 seconds, the compressor will start to run. After pool heat pump starts up, check for any abnormal noise from the heat pump. Check the temperature setting Heatseeker NovaS Heat Pump Installation & User Manual... -
Page 24: Trouble Shooting Guide
When water inlet temperature ≥ 15°C or air temperature ≥ 1°C, heat pump will be powered off or on standby. If above solutions don’t work, please contact your installer with detailed information and your model number. ATTENTION Heatseeker NovaS Heat Pump Installation & User Manual... -
Page 25: Error Codes
E051 Comp. Overcurrent Prot. The compressor is overload of the compressor running normally Check whether the system P082 Exhaust Air over Temp Prot. The compressor is overload of the compressor running normally Heatseeker NovaS Heat Pump Installation & User Manual... - Page 26 Check and adjust the current IPM Overcurrent IPM input current is large measurement DC bus voltage>Dc bus over- Check the input voltage Inv. DC Overvoltage voltage protection value measurement Heatseeker NovaS Heat Pump Installation & User Manual...
- Page 27 Replace the chip The V15V is overload or Check the V15V input voltage in V15V over/undervoltage fault undervoltage range 13.5v~16.5v or not Please contact your installer with detailed information and your model number. ATTENTION Heatseeker NovaS Heat Pump Installation & User Manual...
-
Page 28: Novaswitch
8. NOVA SWITCH Heatseeker NovaS & Heatseeker NovaPro series heat pumps use a 240V relay and are compatable with NovaSwitch & NovaLink accessories only. These are to be installed by a qualified electrician. Previous generation VortexSwitch & VortexLink controllers are NOT CAUTION compatable. -
Page 29: Installation Instructions
Connect the heat pump control cable from the NovaSwitch to the heat pump, refer to the heat pump manufacturer’s instructions and the below diagram for the appropriate connection and note that damage caused by incorrect connections will void warranties. Heatseeker NovaS Heat Pump Installation & User Manual... -
Page 30: Novalink
9. NOVA LINK Heatseeker NovaS & Heatseeker NovaPro series heat pumps use a 240V relay and are compatable with NovaSwitch & NovaLink accessories only. These are to be installed by a qualified electrician. Previous generation VortexSwitch & VortexLink controllers are NOT CAUTION compatable. -
Page 31: Installation Instructions
Connect the Heat Control cable from the controller to the following points for the appropriate heat pump. The relay must be enclosed within the heater. Damage caused by incorrect connections will void warranties. Connections for compatible Nova heat pumps are: Heatseeker NovaS Heat Pump Installation & User Manual... -
Page 32: Wifi Setting
There is a magnet on the back of the WIFI module, it can be installed indoors or outdoors, and avoid direct sunlight; • Please scan the following QR code to download APP: Heatseeker NovaS Heat Pump Installation & User Manual... - Page 33 10.5 Functional Description 10.6 Account Login Heatseeker NovaS Heat Pump Installation & User Manual...
- Page 34 Forgot Password: When you forget your password, click 4 (Fig.2) and jump to the password forgotten interface (Fig.3). Fill in the relevant information according to the page instructions, click 5 to send the email verification code, and operate according to the page instructions. 10.7 Add Device Heatseeker NovaS Heat Pump Installation & User Manual...
- Page 35 Click 8 to enter the WIFI password for the current connection, click 9 to confirm; Jump to system settings, connect specified WIFI, click 10 to select the “Smart_AP_xxx”, click 11 to popup window (Fig.10), follow the instruction and then jump to WIFI setting interface (Fig.11); Heatseeker NovaS Heat Pump Installation & User Manual...
- Page 36 Click "OK" (Fig.15) to allow the App to use the camera for scanning the WH barcode on the heat pump unit (Fig.16); Click “OK”, device bond is done (Fig.17); After WIFI and DTU bonding is done, and jump back to My Device (Fig. 18). Heatseeker NovaS Heat Pump Installation & User Manual...
- Page 37 10.9 Device Management Heatseeker NovaS Heat Pump Installation & User Manual...
- Page 38 Heatseeker NovaS Heat Pump Installation & User Manual...
-
Page 39: Warranty
Solar Pty Ltd carry a twelve (12) month limited that part of the Product. warranty and is the only warranty given in respect of these components of the Product. Heatseeker NovaS Heat Pump Installation & User Manual... - Page 40 (i) the supplying of the services again; or 16 This warranty is governed by the laws of the (ii) the payment of the cost of having the State specified in paragraph 17(c). services supplied again. Heatseeker NovaS Inverter Heat Pump Installation & User Manual...
- Page 41 (b) Product Supreme Solar Pty Ltd solar pool heating system (c) Governing law (paragraph 16): Victoria, Australia Consumer guarantee 18 This warranty is provided in addition to consumer guarantees and does not alter, limit or replace them. Heatseeker NovaS Heat Pump Installation & User Manual...
- Page 42 NOTES Heatseeker NovaS Heat Pump Installation & User Manual...
- Page 43 Heatseeker NovaS Heat Pump Installation & User Manual...
- Page 44 1300 787 978 supremeheating.com.au Heatseeker VortexE Inverter Heat Pump Heatseeker VortexE Inverter Heat Pump Installation & User Manual Installation & User Manual...
Need help?
Do you have a question about the Heatseeker NovaS and is the answer not in the manual?
Questions and answers