Table of Contents
Advertisement
Quick Links
Advertisement
Table of Contents

Related Manuals for Eversys Cameo In Box


Summary of Contents for Eversys Cameo In Box
- Page 1 User Manual In Box...
- Page 2 The reproduction, even partially, of this document is forbidden. No part may be copied in any form, and it may not be used, edited nor transmitted by any electronic means (photocopy, photography, magnetic supports or other recording processes), without the written authorization of Eversys S.A. All rights and particularly reproduction, translation, edition, distribution and also industrial property and recording are reserved.
-
Page 3: Table Of Contents
3.3. Daily cleaning ....................... 17 3.3.1. Automatic cleaning procedure on Cameo In Box .......... 17 3.3.2. Empty and clean the Cameo In Box grounds drawer ........24 3.3.3. Clean the Cameo In-Box grounds bin drawer (machine option) ....25 3.4. Weekly cleaning ....................25 3.4.1. - Page 4 5.3.8. Cleaning and Standby settings ..............58 5.3.9. Change password ..................59 6. Technical Data ........................ 61 6.1. Cameo In Box technical specifications ..............61 6.2. Cameo In Box electrical specifications ..............61 6.2.1. General information ................... 61 6.2.2. Power supplies ..................62 6.3.
-
Page 5: Introduction
Observe the bylaws and the recognized technical rules which apply in the country of use of the machines. It is imperative to read the Eversys General Safety Instructions (page 64) before carrying out any action on the machine. In case of unclear information, please contact your local service organization. -
Page 6: Typographical Conventions
This is the first instruction of a step-by-step procedure. This is the second instruction of a step-by-step procedure. ☐ This is a checklist. OK, Save, Rinse: This is an example of software buttons. © Eversys S.A. Page 6 of 74 01.07.2024... -
Page 7: Overview And Operating
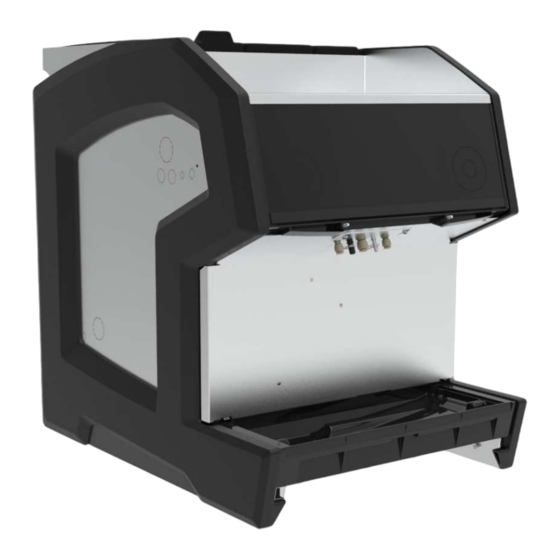
Overview and Operating 2. Overview and Operating 2.1. Overview 2.1.1. Cameo In Box overview Bean hoppers and cleaning balls access Drip tray Touchscreen Front panel Product outputs plate 01.07.2024 Page 7 of 74 © Eversys S.A. -
Page 8: Top View (Bean Hopper) Of Cameo Machines
2.1.2. Top view (bean hopper) of Cameo machines Bean hopper with lid (Left position) Coffee cleaning balls dispenser Bean hopper lid (Right position) Bean hopper (Right position) Coffee cleaning balls dispenser lid Powder chute (e.g. for specialty coffee) © Eversys S.A. Page 8 of 74 01.07.2024... -
Page 9: Touch Screen Overview (15.7" / 400 Mm)
The touch screen and the graphical user interface are touch sensitive. Stop touch button Steam wheel selector and/or button Hot water wheel selector and/or button Standby button Graphical User Interface (GUI) (products may vary according to settings and machine model) 01.07.2024 Page 9 of 74 © Eversys S.A. -
Page 10: Operating
Overview and Operating 2.2. Operating 2.2.1. Switch on a Cameo In Box Lift the drip tray (1) and remove the grounds drawer (2). Start the machine at the main power (3), switch to «1» or «I» (ON). Check that the main water inlet tap is open (4). -
Page 11: Rinse
Rinsing is not a substitute for daily cleaning! Auto rinsing is necessary to remove residue build-up in the coffee and milk systems. The coffee machine automatically rinses after certain time intervals as well as when it is switched ON or OFF. 01.07.2024 Page 11 of 74 © Eversys S.A. -
Page 12: Launch A Short Etc Calibration
Only open bags of coffee beans with as much as you need for the day. Store coffee beans in a cool and dry place. Never use coffee beans treated with additives or caramelised. © Eversys S.A. Page 12 of 74 01.07.2024... -
Page 13: Switch Off A Cameo In Box
Put the lids back to their original position. Close Open 2.2.5. Switch off a Cameo In Box Lift the drip tray (1) and remove the grounds drawer (2). Empty the grounds drawer, clean and dry it. Shut down the machine at the main power (3), switch to «0» (OFF). -
Page 14: Emergency Stop
Perform an emergency stop ONLY if the machine is completely stalled and does not respond to any command. To shut down all functions, either: • Switch off at the main power switch. • Unplug the power cord from the mains socket. © Eversys S.A. Page 14 of 74 01.07.2024... -
Page 15: Cleaning And Care
3.2.1. Refill and visually inspect Cameo cleaning balls dispenser IRRITANT PRODUCTS Everclean and Eversys cleaning ball should be considered potentially dangerous. When performing any operation on the machine, local safety regulations must be followed. It is imperative to wear protective gloves and glasses when working with potentially dangerous materials. -
Page 16: Clean The Cameo In Box Drip Tray
Cleaning and Care Put the lid back to its original position. 3.2.2. Clean the Cameo In Box drip tray • Wash inside of the drip tray with soft soap and rinse. 3.2.3. Clean the housing • Clean the housing with a damp cloth. -
Page 17: Clean The Touch Screen
The countdown allows to clean the screen without the risk of starting a product. 3.3. Daily cleaning 3.3.1. Automatic cleaning procedure on Cameo In Box It is possible to run the complete cleaning procedure at any time. Though you must run the cleaning when requested (if canceled and depending on settings, it will not be possible to make a drink unless cleaning is performed). - Page 18 • Remove the black drawer (2) and clean it with soft soap. Rinse, dry and store it for later use. • Install the red drawer (3) for the cleaning procedure. Press Continue. © Eversys S.A. Page 18 of 74 01.07.2024...
- Page 19 If using 3 litre bottle cleaning solution • Fill the empty cleaning tank (6) with 25 ml Everclean (press the pump once). • If using milk cleaning tabs • Fill the empty cleaning tank (6) with 1 tablet. 01.07.2024 Page 19 of 74 © Eversys S.A.
- Page 20 Place the milk tube inside the cleaning tank (6). Ensure that it correctly lays at the bottom of the tank. • Place the empty cleaning tank inside of the fridge. • Press Continue. © Eversys S.A. Page 20 of 74 01.07.2024...
- Page 21 Keep hands and skin away from the outlets. It takes approximately: • 12 minutes to complete the entire process with Everclean or milk cleaning balls. • 18 minutes to complete the entire process with milk cleaning tabs. 01.07.2024 Page 21 of 74 © Eversys S.A.
- Page 22 Empty the grounds drawer in a sink and clean it with soft soap. RISK OF BURNS OR SCALDING After first startup or during cleaning, the grounds drawer may contain hot water, empty it carefully. 10. Rinse and dry the grounds drawer. © Eversys S.A. Page 22 of 74 01.07.2024...
- Page 23 RISK OF BURNS OR SCALDING After first startup or during cleaning, the grounds drawer may contain hot water, empty it carefully. • Put the black drawer back (2) to its original position. 01.07.2024 Page 23 of 74 © Eversys S.A.
-
Page 24: Empty And Clean The Cameo In Box Grounds Drawer
13. Press Yes to acknowledge emptying of the grounds drawer (or No to cancel). 14. Your machine is now clean and ready for use. 3.3.2. Empty and clean the Cameo In Box grounds drawer RISK OF BURNS OR SCALDING After first startup or during cleaning, the grounds drawer may contain hot water, empty it carefully. -
Page 25: Clean The Cameo In-Box Grounds Bin Drawer (Machine Option)
Remove the bean hoppers (3) and store the beans for re-use. Clean the bean hoppers (4) with soft soap, rinse with water and dry with a soft cloth. Reassemble in the reverse order and lock the bean hoppers (5) (Open position). 01.07.2024 Page 25 of 74 © Eversys S.A. - Page 26 Cleaning and Care Fill the coffee bean hoppers. Make sure that the bean hoppers are perfectly dry before refilling with coffee beans. Close Open © Eversys S.A. Page 26 of 74 01.07.2024...
-
Page 27: Troubleshooting
4. Troubleshooting 4.1. Error message example All Eversys coffee machines are equipped with an internal troubleshooting and error message system. The following screen shows an example. If an action of the user is required, the warning sign (1) is displayed. -
Page 28: Behaviours
4.2.2. Behaviours Symbol Description Visible for operator and manager Shown repeatedly Logged in the error history 4.3. Operator error messages for Cameo (E-XXX) If the message persists, please contact your service organization. © Eversys S.A. Page 28 of 74 01.07.2024... - Page 29 The machine was in standby mode as a boiler was overheating. E-094 Please contact your service organization. E-095 Software update running. Wait until the software update has been finished. 01.07.2024 Page 29 of 74 © Eversys S.A.
-
Page 30: Operator Stop Messages For Cameo (S-Xxx)
Machine will go to standby mode. Steam boiler pressure sensor failure. E-107 Please check the pressure sensor and cable. 4.4. Operator stop messages for Cameo (S-XXX) If the message persists, please contact your service organization. © Eversys S.A. Page 30 of 74 01.07.2024... - Page 31 S-016 → Check if a cleaning ball is blocked or broken. empty? The coffee machine is blocked now until the next • Blocked or broken coffee cleaning cleaning with cleaning balls! balls? 01.07.2024 Page 31 of 74 © Eversys S.A.
- Page 32 Please refill source water tank. → Refill the source water tank. Waste water tank full. Reed switch has detected that the waste water tank is S-031 full. Please empty waste water tank. © Eversys S.A. Page 32 of 74 01.07.2024...
- Page 33 This message occurs if the steam boiler has been emptied or depressurized. S-101 Please switch off the machine. → The coffee machine has to be switched off (main switch). 01.07.2024 Page 33 of 74 © Eversys S.A.
-
Page 34: Operator Warning Messages For Cameo (W-Xxx)
Display open. S-109 Check if display is closed properly. Please close the display properly. 4.5. Operator warning messages for Cameo (W-XXX) If the message persists, please contact your service organization. © Eversys S.A. Page 34 of 74 01.07.2024... - Page 35 Top piston failure left. W-020 The machine tries to unblock the piston automatically. Top piston failure right. W-021 The machine tries to unblock the piston automatically. W-022 Bottom piston failure left. 01.07.2024 Page 35 of 74 © Eversys S.A.
- Page 36 No or too few detergent detected for a proper detergent. W-037 cleaning of the milk system. Please use Everclean! Coffee Boiler temperature sensor failure. W-038 Please check the temperature sensor and cable. © Eversys S.A. Page 36 of 74 01.07.2024...
- Page 37 To check if the machine has a problem, a rinse will be performed after pressing Continue. Grinder left (bean hopper left) could not be The left grinder could not be automatically W-080 automatically unblocked. unblocked. 01.07.2024 Page 37 of 74 © Eversys S.A.
- Page 38 The purge or tea valve is leaking. Steam wand left temperature sensor failure. W-103 Please check the temperature sensor and cable. Milk Heater temperature sensor failure. W-132 Please check the temperature sensor and cable. © Eversys S.A. Page 38 of 74 01.07.2024...
-
Page 39: Faq - Frequently Asked Questions
Check that the milk is cold enough (3 °C). Always fill the milk tank with pre-cooled milk. Check that the end of the milk in-take tube lay on the bottom of the filled milk tank. Check that the milk tube is not pinched and in good condition. 01.07.2024 Page 39 of 74 © Eversys S.A. -
Page 40: The Product Is Outside Acceptable Extraction Time Range
Select bottom right hand corner button with “timer” icon. Click Start Calibration. Wait for ETC to end. Wait for ETC Wait for ETC to end to end If message remains, contact your local service organization. © Eversys S.A. Page 40 of 74 01.07.2024... -
Page 41: Software Settings
5.2. End User (e.g. Shop employee) 5.2.1. Day counter page This page lets you check the number of products dispensed during the day. You can reset all data at any time using the Reset All button. 01.07.2024 Page 41 of 74 © Eversys S.A. -
Page 42: Page Overview
This page lets you check the number of products dispensed during a period (period = date of last reset). Reset can only be carried out by your service organization. Go to Statistics/History. Go to Product Counter. © Eversys S.A. Page 42 of 74 01.07.2024... -
Page 43: Total Counter Page
This page lets you check the number of products dispensed from the machine's installation date. Reset can only be carried out by your service organization. Go to Statistics/History. Go to Product Counter. 01.07.2024 Page 43 of 74 © Eversys S.A. -
Page 44: Cleaning History Page
Next product page (if existing) 5.2.4. Cleaning history page This page lists all cleaning operations carried out since the machine was installed. Go to Statistics/History. Go to History. Go to Cleaning History. © Eversys S.A. Page 44 of 74 01.07.2024... -
Page 45: Advanced User (E.g. Shop Manager)
This page lets you check the number of products dispensed during the day. You can reset all data at any time using the Reset All button. Go to Statistics/History. Go to Product Counter. Go to Day Counter. 01.07.2024 Page 45 of 74 © Eversys S.A. -
Page 46: Period Counter Page
This page lets you check the number of products dispensed during a period (period = date of last reset). Reset can only be carried out by your service organization. Go to Statistics/History. Go to Product Counter. Go to Period Counter. © Eversys S.A. Page 46 of 74 01.07.2024... -
Page 47: Total Counter Page
This page lets you check the number of products dispensed from the machine's installation date. Reset can only be carried out by your service organization. Go to Statistics/History. Go to Product Counter. Go to Total Counter. 01.07.2024 Page 47 of 74 © Eversys S.A. -
Page 48: Cleaning History Page
Next product page (if existing) 5.3.4. Cleaning history page This page lists all cleaning operations carried out since the machine was installed. Go to Statistics/History. Go to History. Go to Cleaning History. © Eversys S.A. Page 48 of 74 01.07.2024... -
Page 49: Product Settings (Advanced User)
This page allows you to modify some of the product settings. For fine-tuning of individual products (e.g. cake thickness), please contact your service organization. Go to Products & Keys. Select the product you want. 01.07.2024 Page 49 of 74 © Eversys S.A. - Page 50 When the volume in the cup is correct, press Stop. Place one or two cup(s) under the coffee outlet. Press Product test to dispense a product and check the quantity. If necessary, set a new value and test again. © Eversys S.A. Page 50 of 74 01.07.2024...
-
Page 51: Display Settings (Advanced User)
If necessary, set a new value and test again. 5.3.6. Display settings (Advanced User) This page allows you to modify some of the display settings. For further modifications, please contact your service organization. • Go to Display. 01.07.2024 Page 51 of 74 © Eversys S.A. - Page 52 Select the desired color, or select Off if you don't need lighting. 5.3.6.4. Adjust lighting brightness Go to Front Lighting Brightness. Use the arrows to change the lighting brightness. The change is made live on the machine. © Eversys S.A. Page 52 of 74 01.07.2024...
-
Page 53: Set Time And Date
5.3.6.6. Set Time and Date This page allows you to modify some of the date and time settings. For further modifications, please contact your service organization. Go to Display. Select Date and Time. 01.07.2024 Page 53 of 74 © Eversys S.A. - Page 54 Use the arrows to change the value. Press OK to save the change, or Cancel to cancel it. Set Time Zones Go to Time Zone. Select your preferred time zone. Use the arrows to change pages. © Eversys S.A. Page 54 of 74 01.07.2024...
-
Page 55: Set Screensaver
5.3.6.8. Import and delete language(s) This page lets you personalize your machines with additional languages. Follow the on-screen instructions to set up the .language file. Each screen must be adjusted separately. Go to Display. 01.07.2024 Page 55 of 74 © Eversys S.A. - Page 56 You can return to the manufacturer's settings at any time using the Delete Screen button. Each screen must be adjusted separately. Go to Display. Go to Import Screen. © Eversys S.A. Page 56 of 74 01.07.2024...
-
Page 57: Cameo Grinder Settings
This setting should be used in the specific case where ETC is set to OFF and Short ETC is not available. • Go to Bean & Grinder > Grinder Adjustment icon. 5.3.7.1. Page overview 01.07.2024 Page 57 of 74 © Eversys S.A. -
Page 58: Cleaning And Standby Settings
5.3.8. Cleaning and Standby settings This page is used to define the standby period. • Go to Clean/Standby. 5.3.8.1. Page overview Cleaning and standby settings Move down Back to previous page Move up © Eversys S.A. Page 58 of 74 01.07.2024... -
Page 59: Set Standby Mode
You can exit the procedure at any time by pressing the exit key. Go to Operator or Manager. Write the new password. Press the checked key to validate. Write again the new password. 01.07.2024 Page 59 of 74 © Eversys S.A. - Page 60 If the both password are similar, machine displays Confirmation successful and returns to the Password page. The new password is set. If the both password are not similar, machine displays Confirmation failed and returns to the Password page. The new password is not set. © Eversys S.A. Page 60 of 74 01.07.2024...
-
Page 61: Technical Data
Technical Data 6. Technical Data 6.1. Cameo In Box technical specifications Description Weight - Classic line 62 kg Dimensions - Classic line (W x H x D) 430 x 580 x 600 mm (16.9 x 22.8 x 23.6 in) Brew chamber... -
Page 62: Power Supplies
2800 W 1/N/PE, 220-240V~, 50/60 Hz, 25A 5600 W 1/N/PE, 220-240V~, 50/60 Hz, 25A-Ext. 5600 W United State of America 2/PE, 208V~, 60Hz, 15A 2300 W 2/PE, 208 V~, 60Hz, 30A 4300 W © Eversys S.A. Page 62 of 74 01.07.2024... -
Page 63: Cameo In Box Water Specifications
Technical Data 6.3. Cameo In Box water specifications 6.3.1. Technical data Description Inlet hose 1 x inox braided pipe G3/8" female x 2 m Drain hose 1 x Hose (Ø 22 mm x Ø 16 mm x 2 m) Flow rate >... -
Page 64: Safety, Warranty And Generalities
Eversys service organizations may only connect the machine to existing prepared connection points. Eversys appointed service organizations are neither authorized, nor responsible for carrying out any on-site installation work prior to connection. Your service organization will put your machine in operation for the first time and instruct you on its operation. - Page 65 Adjustment of the power supply frequency (Hz) is automatic. No action is required. Voltage/current specifications are as listed in the electrical specifications table in manuals (e.g. User Manual, Commissioning Manual, Installation Manual, etc.) and the e'Support center (https://support.eversys.com/hc/en-us). 01.07.2024 Page 65 of 74...
- Page 66 It is imperative to wear protective gloves and glasses when working with potentially dangerous materials. For any other materials referred to in manuals (e.g. Everclean and Eversys cleaning balls) corresponding safety data sheets should be consulted before the first use, adequate protective measures should be applied and any applicable regulations should be followed.
- Page 67 It is imperative to ensure that persons are not subject to any health hazards as a consequence of the consumption of the food items dispensed by the machine. Only use original Eversys cleaning products. Use of products that are not explicitly recommended by Eversys could damage the machine or void warranty.
- Page 68 In case of prolonged absence (short-term storage): • switch off the machine using the main power switch. • close the water tap. • leave the front door opened to avoid mold or unpleasant smells (Eversys fridges only) © Eversys S.A.
-
Page 69: Symbols On Eversys Coffee Machines
Safety, Warranty and Generalities 7.2. Symbols on Eversys coffee machines The following symbols can be found on Eversys coffee machines. Symbol Description Explanation Caution, consult accompanying documents ELECTROCUTION High voltage - Danger During maintenance work, always shut down the machine using the main switch... -
Page 70: Cameo Rating Plate
(whichever comes first) from the date of installation. Eversys will repair or replace at its discretion part or all of the product not conforming to this warranty. Eversys’ responsibility under this warranty is limited to the repair or replacement of defective parts and not to wear and tear parts and maintenance products. -
Page 71: Warranty Limitation
In order to be able to claim against our warranty you have to send us back the completed installation form for each machine. Any spare part delivered under warranty will have to be sent to Eversys within 90 days, after which Eversys will be obliged to invoice it. -
Page 72: Glossary
This is the coffee machine manufactured by Eversys S.A. Everfoam (e'Foam) The Eversys' improved Foam system provides a 2-step barista solution. This generation of Everfoam (e'foam) allows you to texture the milk by product type. This is done through the MAD system controlled electronically. - Page 73 A piccolo latte is a caffè latte made in an espresso cup. This means it has a very strong but toned-down espresso taste thanks to the steamed milk and micro foam within it. Decaf Decaffeinated coffee. 01.07.2024 Page 73 of 74 © Eversys S.A.
- Page 74 Fabian Fredriksson Marko Bachmann Arthur Zhang EVERSYS INC EVERSYS MEIA EVERSYS ROW EVERSYS UK & IREL AND 37-18 Northern Blvd, Suite 421 Indigo Central Building 6, Ecoparc de Daval A 2 Operations Centre Unit 8, Long Island City, NY 3960 Sierre...
Need help?
Do you have a question about the Cameo In Box and is the answer not in the manual?
Questions and answers
How do i disengage the hopper trays? I don't see any switch to open or close. Where is it located? The illustration is unclear on the picture.