
Subscribe to Our Youtube Channel
Related Manuals for Profitec PRO 400


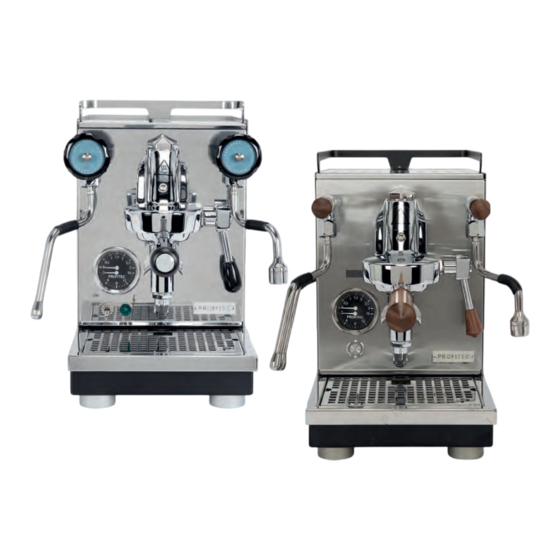
Summary of Contents for Profitec PRO 400
- Page 1 PRO 400 & JUMP Art.-Nr./item no: 10400/10450 Bedienungsanleitung - User Manual - Manuel d‘instructions...
- Page 2 Lieber Kaffeegenießer, liebe Kaffeegenießerin, Mit der PRO 400 / JUMP haben Sie eine sehr gute Wahl getroffen. Wir wünschen Ihnen viel Freude an Ihrer Espresso-Siebträgermaschine und vor allem an der Zubereitung von Espresso und Cappuccino. Wir bitten Sie, diese Bedienungsanleitung vor Gebrauch der Maschine sorgfältig durchzulesen und zu beachten.
-
Page 3: Verwendete Symbole
Verwendete Symbole Vorsicht! Wichtiger Sicherheitshinweis für den Bediener. Berücksichtigen Sie diese Hinweise, um Verletzungen zu vermeiden. Achtung! Wichtiger Hinweis zur korrekten Bedienung der Maschine. Used symbols Caution! Important notices on safety for the user. Pay attention to these notices to avoid injuries. -
Page 4: Table Of Contents
ECO-Modus aktivieren ............................18 Maschinen-Reset ..............................19 JUMP: Einstellung °C und °F ..........................21 Hinweise ................................... 22 6.8.1 PRO 400 - LED-Hinweise ............................. 22 JUMP – Display-Anzeigen ........................... 22 6.8.2 Zubereitung von Kaffee ............................23 6.9.1 Heißwasser- und Dampfentnahme ........................24 6.9.2... - Page 5 Activating ECO mode ............................43 Machine reset ................................. 45 JUMP: Einstellung °C und °F ..........................47 Indicators ................................. 48 6.8.1 PRO 400 - LED indicators ............................ 48 6.8.2 JUMP – Display-indicators ..........................48 Preparing coffee ..............................48 6.9.1 Dispensing of hot water and steam ........................49 6.9.2...
- Page 6 6.8.1 Indicateurs LED PRO 400 ............................ 73 6.8.2 JUMP – Indicateurs d'affichage ......................... 73 Préparation du café ............................... 74 6.9.1 Distribution d'eau chaude et de vapeur ......................74 6.9.2 Distribution d'eau chaude ............................ 74 6.9.3 Distribution de vapeur ............................75 NETTOYAGE ET ENTRETIEN ..........................
-
Page 7: Lieferumfang
1 Tamper 1 Filterträger mit 2 Ausläufen 1 Brühgruppenbürste 1 Eintassensieb 1 Bedienungsanleitung 1 Zweitassensieb PRO 400: 3 farbige Ventilplättchen-Paare 1 Blindsieb 2. ALLGEMEINE HINWEISE 2.1 Allgemeine Sicherheitshinweise • Sicherstellen, dass die Gerätespannung auf dem Typenschild mit der Netzspannung übereinstimmt. -
Page 8: Bestimmungsgemäße Verwendung
Ein zu spätes Entkalken kann zu erheblichen Schäden an der Maschine führen. 2.2 Bestimmungsgemäße Verwendung Die PRO 400 / JUMP darf nur für die Kaffeezubereitung, Heißwasser- und Dampfentnahme verwendet werden. Sie ist nicht für den gewerblichen Einsatz bestimmt. Jegliche Benutzung für andere Zwecke ist seitens des Herstellers untersagt und zu unterlassen. Für Schäden, die auf nicht sachgemäßen Gebrauch zurückzuführen sind, übernehmen wir keinerlei Haftung... - Page 9 DEUTSCH 15. 3-Positions-Schalter (an der Bodenplatte) JUMP Tassenablage (abnehmbar) 2. Frischwasserbehälter (unter Tassenablage) 3. Griff Dampfventil 4. Dampfrohr 5. Display 6. Doppelmanometer Kessel- / Pumpendruck 7. Ein- und Ausschalter (LED) 8. Wasserauffangschale (darunter: Halterung für das Blindsieb) 9. Griff Heißwasserventil 10.
-
Page 10: Technische Daten
3. Den Wassertank mit kalkarmem Frischwasser befüllen und die Tassenablage wieder aufsetzen. Den Stecker in die Steckdose einstecken und PRO 400: den Metall-Kippschalter auf „ON“ stellen (die grüne LED leuchtet auf). JUMP: den An-/Ausschalter drücken (LED-Ring leuchtet) Jetzt ist die Maschine eingeschaltet. -
Page 11: Betrieb Der Maschine
7. Warten Sie bitte, bis der Kesseldruck im oberen Bereich des Manometers einen Wert von ca. 1,0-1,5 bar anzeigt. 8. Eine manuelle „Kesselentlüftung“ ist nicht notwendig, da bei der PRO 400 und der JUMP ein professionelles Anti-Vakuumventil eingebaut ist, das den Kessel während der Aufheizphase entlüftet. -
Page 12: Manuelle Einstellung Des Brühdrucks
7. Nun ist die Maschine wieder betriebsbereit. 6.3 Wählen der Kesseltemperatur Das Einstellen der Kesseltemperatur Ihrer Pro 400 / JUMP können Sie vor dem Start oder bei Benutzung Ihrer Maschine vornehmen. Die jeweiligen Temperaturen wählen Sie über den 3-Positions-Schalter (siehe unten). - Page 13 DEUTSCH Die festgelegten Kesseltemperaturen der PRO 400 / JUMP liegen bei aufgeheizter Maschine und einem kurzen Flush* für die Schalterposition I bei ca. 90°C, für Schalterposition II bei ca. 94°C und für Schalterposition III bei ca. 98°C. Die gemessenen Temperaturen können abweichen, da diese von der Betriebsdauer, der Umgebungstemperatur und weiteren Faktoren abhängig sind.
-
Page 14: Preinfusion
Kaffeemehl gleichmäßig aufquellen und entstandene Kanäle schließen kann. Dadurch wird der Widerstand im Sieb homogener, was zu einer gleichmäßigeren Extraktion führt. Werkseitig ist die Preinfusion deaktiviert. 6.4.1 Preinfusion aktivieren PRO 400: JUMP: Schalten Sie die Maschine aus. 2. Versichern Sie sich, dass der Wassertank mindestens zur Hälfte... -
Page 15: Preinfusion Deaktivieren
DEUTSCH PRO 400: JUMP: 6. PRO 400: Die grüne LED blinkt. JUMP: Das Display zeigt den Hinweis „Pi“ 7. Kippen Sie den Schalter in die vordere Stellung (Position I) und dann wieder auf die mittlere Stellung (Position II). 8. PRO 400:... - Page 16 Stellung (Position II). PRO 400: JUMP: 5. Schalten Sie die Maschine PRO 400: JUMP: 6. PRO 400: Die grüne LED blinkt. JUMP: Das Display zeigt den Hinweis „Pi“ 7. Kippen Sie den Schalter in die hintere Stellung...
-
Page 17: Der Eco-Modus
Wert auf 90 min eingestellt. Der ECO-Modus schaltet die Heizung des Kessels nach 90 Minuten Inaktivität ab. PRO 400: Die grüne LED blinkt und zeigt an, dass sich die Maschine im ECO-Modus befindet. JUMP: Ein Punkt bewegt sich durch das Display, wenn sich die Maschine im ECO-Modus befindet. - Page 18 4. Stellen Sie den Schalter auf die mittlere Stellung (Position II). PRO 400: JUMP: 5. Schalten Sie die Maschine PRO 400: JUMP: 6. PRO 400: Die grüne LED blinkt. JUMP: Das Display zeigt den Hinweis „Pi“ 7. Stellen Sie den Brühhebel nach unten. JUMP: Die Maschine zeigt den Hinweis „Eco“...
-
Page 19: Eco-Modus Aktivieren
3. Stellen Sie den Brühhebel hoch. 4. Stellen Sie den Schalter auf die mittlere Stellung (Position II). PRO 400: JUMP: 5. Schalten Sie die Maschine PRO 400: JUMP: 6. PRO 400: Die grüne LED blinkt. JUMP: Das Display zeigt den Hinweis „Pi“ Deutsche Original-Bedienungsanleitung... -
Page 20: Maschinen-Reset
8. Kippen Sie den Schalter in die vordere Stellung (Position I) und dann wieder auf die mittlere Stellung (Position II). 9. PRO400: PRO 400: JUMP: Die Einstellung wird durch ein Aufleuchten (3 Sekunden an) der grünen LED bestätigt und gespeichert. - Page 21 Stellung (Position II). PRO 400: JUMP: 5. Schalten Sie die Maschine PRO 400: JUMP: 6. PRO 400: Die grüne LED blinkt. JUMP: Das Display zeigt den Hinweis „Pi“ 7. Entfernen Sie den Wassertank. 8. Setzen Sie den Wassertank wieder ein.
-
Page 22: Jump: Einstellung °C Und °F
DEUTSCH PRO 400: JUMP: 9. PRO 400: Die Einstellung wird durch ein Aufleuchten (3 Sekunden an) der grünen LED bestätigt. JUMP: Der Reset wird durch das Anzeigen des Hinweises „rSt“ auf dem Display bestätigt. 10. Ziehen Sie den Brühhebel wieder nach unten und warten Sie 5 Sekunden. -
Page 23: Hinweise
Betrieb. Ihre Einstellung wurde gespeichert. 6.8 Hinweise 6.8.1 PRO 400 - LED-Hinweise LED leuchtet dauerhaft: Maschine ist eingeschaltet. LED blinkt (2 Sekunden ein – 1 Sekunde aus): Wassertank ist leer/nicht eingesetzt. LED blinkt (3 Sekunden ein – 1 Sekunde aus): Maschine befindet sich im ECO-Modus. -
Page 24: Zubereitung Von Kaffee
DEUTSCH Wassertank ist leer / nicht richtig eingesetzt. Lauflicht auf dem Display. Die Maschine befindet sich im ECO Modus. Das Display zeigt die Aktive Preinfusion an. Das Display zeigt die Passive Preinfusion an. Ein erfolgreicher Reset wird bestätigt. Zubereitung von Kaffee Verwenden Sie bitte den Filterträger mit 1 Auslauf und das entsprechende kleinere Sieb (Eintassensieb) für die Zubereitung einer Tasse und den Filterträger mit 2 Ausläufen und das große Sieb (Zweitassensieb) für die Zubereitung von zwei Tassen. -
Page 25: Heißwasser- Und Dampfentnahme
6.9.3 Dampfentnahme Die PRO 400 / JUMP ermöglicht die Erzeugung von Dampf zum Erhitzen oder Aufschäumen von Flüssigkeiten, wie z.B. Milch oder Glühwein. Sie ist eine professionelle Espressomaschine in kompakter Form und hat ein enormes Dampfvolumen. Dies bedeutet, dass Sie innerhalb weniger Sekunden Milchschaum zubereiten können. -
Page 26: Allgemeine Reinigung
DEUTSCH Vorsicht! Vor der Reinigung die Maschine immer ausschalten (Netzschalter in unterer Position), den Stecker aus der Steckdose ziehen und das Gerät auf Raumtemperatur abkühlen lassen. Tauchen Sie die Maschine zur Reinigung niemals unter Wasser. Bei unsachgemäßer Reinigung besteht die Gefahr eines elektrischen Schlages. 7.1 Allgemeine Reinigung Tägliche Reinigung: Entfernen Sie das Sieb aus dem Filterträger und reinigen Sie Filterträger, Siebe, Wasserbehälter,... -
Page 27: Kleine Technische Servicearbeiten
DEUTSCH Bei zu häufigem Rückspülen mit einem fettlösenden Mittel kommt es zur Entfettung der Achse und der Dichtung des Brühhebels. Die Folge ist ein Quietschen der Brühgruppe und ein erhöhter Verschleiß. Das Quietschen wird nach längerer Benutzung durch das Kaffeefett gelöst. Es wird aber empfohlen, hin und wieder mit dem Blindsieb ohne fettlösendem Mittel rückzuspülen, somit werden Kaffeereste gelöst und setzen sich nicht in der Brühgruppe fest. -
Page 28: Transport Und Lagerung
Die kleine Dichtung zwischen Düse und Gewinde nicht verlieren! Die Düse anschließend wieder anschrauben. 8. TRANSPORT UND LAGERUNG 8.1 Verpackung Die PRO 400 / JUMP wird in einem Karton durch eine Kunststoffhülle und Schaumstoffplatten geschützt geliefert. Vorsicht! Verpackungsmaterial außerhalb der Reichweite von Kindern aufbewahren. -
Page 29: Ce-Konformität
DEUTSCH Dieses Produkt entspricht der EU-Richtlinie 2012/19/EU und ist laut Elektro- und Elektronikgerätegesetz (ElektroG) registriert. 10. CE-KONFORMITÄT Konformität Dieses Produkt entspricht folgenden EU-Richtlinien: • Niederspannungsrichtlinie: 2014/35/EU • Richtlinie über die Elektromagnetische Verträglichkeit (EMC): 2014/30/EU • Druckgeräterichtlinie (PED): 2014/68/EU • Richtlinie über die Beschränkung der Verwendung bestimmter gefährlicher Stoffe in Elektro- und Elektronikgeräten (ROHS): 2011/65/EU •... - Page 30 Position sitzt. (Die Seite des Schwimmers mit dem Magnetpunkt muss zur Wasser wurde nachgefüllt Innenseite der Maschine zeigen. Der Schwimmer selbst muss mit PRO 400: LED blinkt. dem Magnetpunkt nach oben Maschine ist eingeschaltet, aber eingesetzt sein.) nimmt den Betrieb nicht auf. JUMP: Das Display zeigt „Tan“...
- Page 31 DEUTSCH Problem Mögliche Ursache Behebungsvorschläge PRO 400: Kurze Betätigung des Die grüne LED blinkt (3 Brühhebels oder des Schalters. Sekunden ein – 1 Sekunde aus) Wie Sie den ECO-Modus und die Maschine heizt nicht deaktivieren, finden Sie unter mehr. Der ECO-Modus ist aktiviert Punkt 6.5.1...
-
Page 32: Empfohlenes Zubehör
Öffnungen in der Dampfdüse zu vermeiden. 12. EMPFOHLENES ZUBEHÖR Für ein perfektes Kaffee-Ergebnis benötigt man außer die richtigen Kaffeebohnen eine professionelle Mühle und das geeignete Zubehör. Dies und mehr finden Sie auf unserer Internetseite www.profitec-espresso.com. Mühle PRO T64 Sudschublade Tamper Tampermatte Milchkännchen... -
Page 33: Product Delivery
1 brew group brush 1 filter 1 cup 1 user manual 1 filter 2 cups PRO 400: 3 pairs of colored valve disclets 1 blind filter GENERAL ADVICE 2.1 General safety notes • Ensure that the local main supply voltage corresponds to the information given on the machine label on the front panel of the espresso machine. -
Page 34: Proper Use
A late descaling can cause substantial damage to the machine. 2.2 Proper use The PRO 400 / JUMP is designed to be used for the preparation of coffee, hot water and steam only. The machine is not intended for commercial use. -
Page 35: Technical Data
ENGLISH JUMP Cup heater (removable) Fresh water tank (under the cup heater) Steam valve Steam wand Display Dual pressure gauge ON/OFF switch (LED) Drip tray (underneath: Bracket for the blind filter) Hot water valve 10 Hot water wand Brew group 12 Brew lever 13 Coffee spout 14 Portafilter... -
Page 36: Machine Installation
Wait until the boiler pressure (indicated on the upper part of the gauge) shows 1.0-1.5 bar. A manual “boiler ventilation” is not necessary because the PRO 400 and the JUMP is equipped with a professional depression valve that ventilates the boiler during the heating phase. -
Page 37: Use Of The Machine
The switched off machine is to be placed into operation as follows: Fill the water tank, if necessary. PRO 400: Set the metal toggle switch to “ON” to turn on the machine (indicated by the green LED lighting up). JUMP: Press the on/off switch to turn on the machine (indicated by the LED ring lighting up). -
Page 38: Selecting The Boiler Temperature
ENGLISH 6.3 Selecting the boiler temperature You can set the boiler temperature of your Pro 400 / JUMP before starting or while using your machine. The preset temperatures are selected via the 3-position switch (see below). 120°C (248°F) 124°C (255.2°F) 128°C (262.4°F) -
Page 39: Preinfusion
This allows the grounds to evenly expand and seal any channels, ensuring consistent resistance throughout the filter. This results in a more uniform extraction of flavors from the coffee. By default, preinfusion is deactivated. 6.4.1 Activating the preinfusion PRO 400: JUMP: Switch the machine off. Translation of the original German user manual... - Page 40 (position II). PRO 400: JUMP: 5. Switch on the machine. PRO 400: JUMP: 6. PRO 400: The green LED flashes. JUMP: The display shows "Pi". 7. Set the switch to the front position (position I) and then back to the middle position (position II).
-
Page 41: Deactivating The Preinfusion
ENGLISH 9. Pull the brew group lever down again and wait 5 seconds. PRO 400: The machine returns to normal operation. JUMP: JUMP: The machine shows “ECo” for 5 seconds. To activate and deactivate Eco mode (see chapter 6.5). 6.4.2... -
Page 42: The Eco Mode
ECO mode switches off the heating of the boiler after 90 minutes of inactivity. PRO 400: The green LED flashes and indicates that the machine is in ECO mode. JUMP: A dot moves across the display indicates that the machine is in ECO mode. -
Page 43: Deactivating Eco Mode
4. Set the switch to the middle position (position II). PRO 400: JUMP: 5. Switch on the machine. PRO 400: JUMP: 6. PRO 400: The green LED flashes. JUMP: The display shows "Pi". Translation of the original German user manual... -
Page 44: Activating Eco Mode
8. Set the switch to the rear position (position III) and then back to the middle position (position II). 9. PRO 400: PRO 400: JUMP: The setting is confirmed and saved by the green LED lighting up (3 seconds). - Page 45 4. Set the switch to the middle position (position II). PRO 400: JUMP: 5. Switch on the machine. PRO 400: JUMP: 6. PRO 400: The green LED flashes. JUMP: The display shows "Pi". 7. Pull the brew group lever down. JUMP: The display shows "ECo".
-
Page 46: Machine Reset
Factory settings: • ECO mode ON (90min) • Preinfusion OFF To reset the Pro 400 / JUMP to factory settings, proceed as follows: PRO 400: JUMP: Switch the machine off. 2. Ensure that the water tank is at least half full. - Page 47 ENGLISH PRO 400: JUMP: 5. Switch on the machine. PRO 400: JUMP: 6. PRO 400: The green LED flashes. JUMP: The display shows "Pi". 7. Remove the water tank. 8. Replace the water tank. PRO 400: JUMP: 9. PRO 400:...
-
Page 48: Jump: Einstellung °C Und °F
ENGLISH 6.7 JUMP: Setting for °C und °F Switch the machine off. 2. Make sure the water tank is filled to at least half 3. Set the switch under the machine to the front position (I) to set °C and to the rear position (III) to set °F. -
Page 49: Indicators
ENGLISH 6.8 Indicators 6.8.1 PRO 400 - LED indicators LED lights up continuously: Machine is switched on. LED flashes (2 seconds on - 1 second off): Water tank is empty/not inserted. LED flashes (3 seconds on - 1 second off): Machine is in ECO mode. -
Page 50: Dispensing Of Hot Water And Steam
6.9.3 Dispensing of steam The PRO 400 / JUMP is equipped to produce significant amounts of steam for heating or frothing beverages such as milk or punch. It is a professional and compact espresso coffee machine with a large steam volume, allowing you to prepare milk froth within a few seconds. -
Page 51: Cleaning And Maintenance
ENGLISH After frothing or heating, release the steam into the drip tray to keep the holes of the steam nozzle clean. Risk of injury Always keep the steam nozzle underneath the surface of the liquid while heating or frothing to avoid being sprayed by steam. Important After every application, clean the steam nozzle and wand with a non-abrasive, damp cloth to remove possible liquid residue. -
Page 52: Maintenance
ENGLISH Let the detergent react, moving the group lever into the middle position, approx. 45°. (Do not move it into the lower position.) Move the lever into the lower position after approx. 20-60 seconds to allow the fats and oils to be discharged by the infusion cylinder. -
Page 53: Transport And Warehousing
Do not lose the small gasket situated between the steam nozzle and the thread! Afterwards, replace the steam nozzle. TRANSPORT AND WAREHOUSING 8.1 Packing The PRO 400/JUMP is delivered in a special carton and protected by a plastic cover and foam. Caution! Keep packing out of the reach of children! Important Keep packing and packing material for possible transport! Do not throw it away! 8.2 Transport... -
Page 54: Warehousing
ENGLISH 8.3 Warehousing • Keep the machine packed in a dry place. • Do not stack more than three units on top of each other. • Do not place other heavy items on the packing. DISPOSALS WEEE Reg.-Nr.: DE 97592029 This product complies with EU Directive 2012/19/EU and is registered according to WEEE (Waste Electrical and Electronic Equipment). -
Page 55: Troubleshooting
Portafilter/ brew group is clamped. dripping. Replace the group gasket (see Group gasket is broken. section 7.3) PRO 400: The green LED flashes (3 seconds on - 1 second off) indicating that the machine has Operate the brew group lever for stopped heating. - Page 56 Water was refilled, machine. The floater itself must be inserted with the magnet on PRO 400: LED flashes. the upper part of the floater.) JUMP: The display shows "tAn" The water tank is not inserted Insert the water tank properly.
-
Page 57: Recommended Accessories
12 RECOMMENDED ACCESSORIES For a perfect coffee result a professional grinder is as important as a good coffee bean. You will find professional grinders and perfect accessories to complete your set on our website at www.profitec-espresso.com Grinder PRO T64 Knockbox M (drawer) -
Page 58: Livraison Du Produit
1 brosse pour groupe d'infusion 1 filtre 1 tasse 1 manuel d'utilisation 1 filtre 2 tasses PRO 400 : 3 paires de disques de valve colorés 1 filtre aveugle CONSEILS GÉNÉRAUX 2.1 Consignes générales de sécurité • S’assurer que la tension d'alimentation locale corresponde aux indications figurant sur l'étiquette de la machine apposée sur le panneau avant de la machine expresso. -
Page 59: Utilisation Correcte
Un détartrage tardif peut entraîner des dommages importants à la machine. 2.2 Utilisation correcte Le PRO 400 / JUMP est conçue pour être utilisée uniquement pour la préparation du café, de l'eau chaude et de la vapeur. La machine n'est pas destinée à un usage commercial. -
Page 60: Caractéristiques Techniques
FRANÇAIS JUMP Chauffe-tasse (amovible) 2. Réservoir d'eau douce (sous le chauffe-tasse) 3. Valve de vapeur 4. Tige à vapeur 5. Affichage 6. Double manomètre 7. Interrupteur MARCHE/ARRÊT (LED) 8. Bac d'égouttage (en dessous : Support pour le filtre aveugle) 9. Vanne d'eau chaude 10. -
Page 61: Installation De La Machine
Attendez que la pression de la chaudière (indiquée sur la partie supérieure de la jauge) indique 1,0- 1,5 bar. Une « ventilation de la chaudière » manuelle n'est pas nécessaire car la PRO 400 et la JUMP sont équipées d'une vanne de dépression professionnelle qui ventile la chaudière pendant la phase de chauffage. -
Page 62: Utilisation De La Machine
6.9.1 Distribution d'eau chaude La PRO 400 / JUMP est dotée d'un fusible pour éviter que la machine ne se remplisse trop. Il est possible que la machine ne chauffe pas lors de sa première utilisation ou lors de la distribution de grandes quantités d'eau à... -
Page 63: Sélection De La Température De La Chaudière
La PRO 400 / JUMP est une machine à expresso à deux circuits ou à échangeur de chaleur. Dans un échangeur de chaleur, l'eau d'infusion est chauffée indirectement par la chaudière. -
Page 64: Pré-Infusion
FRANÇAIS Pour différentes torréfactions ou compositions de café, il est conseillé d'ajuster la température de la chaudière. Pour un équilibre optimal des saveurs, il est conseillé d'ajuster la température d'infusion en fonction de la profondeur de torréfaction. Plus la torréfaction est foncée, plus la température d'extraction doit être sélectionnée pour obtenir l'impression de saveur la plus équilibrée. -
Page 65: Activation De La Pré-Infusion
(position II). PRO 400 : JUMP : 5. Allumez la machine. PRO 400 : JUMP : 6. PRO 400 : La LED verte clignote. JUMP : L'écran affiche « Pi ». 7. Réglez l'interrupteur en position avant (position I), puis revenez en position médiane (position II). -
Page 66: Désactivation De La Pré-Infusion
FRANÇAIS 8. PRO 400 : PRO 400 : JUMP : Le réglage est confirmé et enregistré lorsque la LED verte s'allume (reste allumée pendant 3 secondes). JUMP : L'écran affiche « Pi » et « on ». 9. Tirez à nouveau le levier... - Page 67 FRANÇAIS PRO 400 : JUMP : 5. Allumez la machine. 6. PRO 400 : La LED verte clignote. JUMP : L'écran affiche « Pi ». 7. Réglez l'interrupteur en position arrière (position III), puis revenez en position médiane (position II).
-
Page 68: Le Mode Eco
90 min par défaut. Le mode ECO éteint le chauffage de la chaudière après 90 minutes d'inactivité. PRO 400 : La LED verte clignote et indique que la machine est en mode ECO. JUMP : Un point se déplace sur l'écran pour indiquer que la machine est en mode ECO. -
Page 69: Activation Du Mode Eco
FRANÇAIS PRO 400 : JUMP : 6. PRO 400 : La LED verte clignote. JUMP : L'écran affiche « Pi ». 7. Tirez le levier du groupe d'infusion vers le bas. JUMP : L'écran affiche « ECo ». Vous avez maintenant 5 secondes pour modifier le paramètre. - Page 70 (position II). PRO 400 : JUMP : 5. Allumez la machine. PRO 400 : JUMP : 6. PRO 400 : La LED verte clignote. JUMP : L'écran affiche « Pi ». 7. Tirez le levier du groupe d'infusion vers le bas.
-
Page 71: Réinitialisation De La Machine
Réglages d'usine : • Mode ECO activé (90 min) • Pré-infusion DÉSACTIVÉE Pour réinitialiser la Pro 400 / JUMP aux paramètres d'usine, procédez comme suit : PRO 400 : JUMP : Éteignez la machine. 2. Assurez-vous que le réservoir d'eau est au moins à... - Page 72 II). PRO 400 : JUMP : 5. Allumez la machine. PRO 400 : JUMP : 6. PRO 400 : La LED verte clignote. JUMP : L'écran affiche « Pi ». 7. Retirez le réservoir d'eau. 8. Remplacez le réservoir d'eau.
-
Page 73: Jump : Réglage °C Et °F
FRANÇAIS 10. Tirez à nouveau le levier du groupe d'infusion vers le bas et attendez 5 secondes. PRO 400 : La machine revient à un fonctionnement normal. JUMP : JUMP : L'écran affiche « ECo » pendant 5 secondes. Pour activer et désactiver le... -
Page 74: Indicateurs
Votre paramètre a été enregistré. 6.8 Indicateurs 6.8.1 Indicateurs LED PRO 400 La LED s'allume en continu : La machine est allumée. La LED clignote (2 secondes allumée - 1 seconde éteinte) : Le réservoir d'eau est vide/non inséré. La LED clignote (3 secondes allumée - 1 seconde éteinte) : La machine est en mode ECO. -
Page 75: Préparation Du Café
6.9.1 Distribution d'eau chaude et de vapeur Important ! PRO 400 : Pour protéger le joint de vapeur et la vanne d'eau chaude, veuillez vous assurer que les deux vannes ne sont pas complètement fermées. La vanne est fermée même lorsqu'elle n'est pas complètement serrée. -
Page 76: Distribution De Vapeur
6.9.3 Distribution de vapeur La PRO 400 / JUMP est équipée pour produire des quantités importantes de vapeur pour chauffer ou faire mousser des boissons telles que le lait ou le punch. C'est une machine à café expresso professionnelle et compacte avec un grand volume de vapeur, vous permettant de préparer de la mousse de lait en... -
Page 77: Nettoyage Du Groupe D'infusion
FRANÇAIS Selon l'utilisation, veuillez rafraîchir l'eau de la chaudière toutes les 2 à 3 semaines en déchargeant environ 0,8 L d'eau chaude de la buse d'eau chaude ou du groupe d'infusion. Utilisez un chiffon doux et humide pour le nettoyage. Ne jamais utiliser de détergents abrasifs ou chlorés ! Videz régulièrement le bac d'égouttage avant qu'il ne soit plein pour éviter tout déversement. - Page 78 FRANÇAIS La machine est prête à être réutilisée, comme décrit au chapitre 6 du manuel d'utilisation. Groupe d’infusion au début. Utilisez un tournevis plat pour L'écran de douche et le joint soulever soigneusement l'écran sont maintenant presque de douche et le joint retirés.
-
Page 79: Transport Et Entreposage
Ensuite, remplacez la buse de vapeur. TRANSPORT ET ENTREPOSAGE 8.1 Emballage La PRO 400/JUMP est livrée dans un carton spécial et protégée par une housse en plastique et de la mousse. Mise en garde ! Gardez l’emballage hors de portée des enfants ! Important Conserver l'emballage et le matériel d'emballage pour un éventuel transport ! Ne le jetez... -
Page 80: 11 Dépannage
FRANÇAIS • Directive 2012/19/EU relative aux déchets d'équipements électriques et électroniques (Régl. WEEE -N° : DE97592029) • Directive sur l'écoconception 2009/125/EG (ENER 25) En outre, les réglementations suivantes ont été respectées : • Règlement (CE) N° 1907/2006/EU concernant l'enregistrement, l'évaluation et l'autorisation des substances chimiques, ainsi que les restrictions applicables à... - Page 81 Le groupe porte-filtre/d’infusion s'égoutte. Remplacez le joint du groupe Le joint du groupe est cassé. (voir section 7.3) PRO 400 : La LED verte clignote (3 secondes allumée - 1 seconde Actionnez le levier du groupe éteinte) indiquant que la d'infusion pendant une courte machine a cessé...
- Page 82 être L'eau a été rechargée, tourné vers l'intérieur de la machine. Le flotteur lui-même PRO 400 : La LED clignote. doit être inséré avec l'aimant sur la partie supérieure du flotteur.) JUMP : L'écran affiche "tAn"...
-
Page 83: Accessoires Recommandés
Pour un résultat de café parfait, un moulin professionnel est aussi important qu'un bon grain de café. Vous trouverez des moulins professionnels et des accessoires parfaits pour compléter votre ensemble sur notre site Web à l'adresse www.profitec-espresso.com Moulin PRO T64 Knockbox M (tiroir) - Page 84 PROFITEC GmbH Industriestraße 57 - 61 69245 Bammental/Heidelberg Deutschland/Germany Tel.: +49 (0) 6223 9205-0 E-Mail: info@profitec-espresso.com Internet: www.profitec-espresso.com...
Need help?
Do you have a question about the PRO 400 and is the answer not in the manual?
Questions and answers