
Related Manuals for Rexing V360


Summary of Contents for Rexing V360
- Page 1 V360 Quick Start Guide クイックスタートガイド V360 Guide de démarrage rapide V360 Guida di avvio rapido V360 Guía de inicio rápido V360 V360 Schnellstartanleitung...
-
Page 2: Table Of Contents
Table of Contents page English Overview What’s in the Box Camera Overview Installation Basic Operation 日本語 概説 本製品の同梱物 カメラの概説 画面のアイコン 基本操作 Français Aperçu Que contient la Boîte Aperçu de la Caméra Conseils D’utilisation Opération De Base Italiano Descrizione Nella Confezione Descrizione Telecamera Come Si Usa Funzionamento Base... - Page 3 page Español Visión General Qué hay en la Caja Resumen de la Cámara Instalación Operación Básica Deutsch Übersicht Verpackungsinhalt Kamera Übersicht Gebrauchsanweisungen Grundbedienung...
-
Page 4: Overview
1. Overview Thank you for choosing REXING! We hope you love your new product as much as we do. If you need assistance, or have any suggestions to improve it, please contact us. You can reach us care@rexingusa.com or call us at (203) 800-4466. -
Page 5: What's In The Box
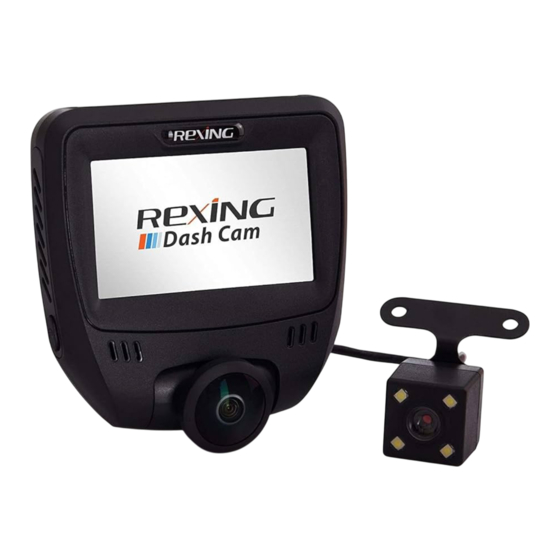
2. What’s in the Box V360 Quick Start Guide V360 クイックスタートガイド Guide de démarrage rapide V360 Guida di avvio rapido V360 Guía de inicio rápido V360 V360 Schnellstartanleitung Rexing V360 Dash Cam Car Charger (12ft) Cable Management Tool Dash Cam Mount... -
Page 6: Camera Overview
3. Camera Overview DEVICE FRONT VIEW DEVICE SIDE VIEW DEVICE BACK VIEW DEVICE TOP VIEW Touch Screen Power Button Mount Camera Mini USB Port (Power) AV Port (Rear Camera) Micro SD (TF) Card Slot Not Supported by V360... - Page 7 Screen Icons Please insert TF card Record IN VIDEO RECORDING MODE: Take Photo Library Video Recording Settings Screen Display Mode Current Date Time (24H) Lock Recording (on) Battery Charging...
-
Page 8: Installation
Wait at least 20 minutes before mounting the camera. Step 2: Insert the Memory Card The Rexing V360 accepts [Class 10/ UHS-1 or higher] Micro SD memory cards up to 256GB. You will need to insert a memory card before you can begin recording. - Page 9 Format the Memory Card Power the camera by connecting the charger to the car cigarette lighter and camera. To ensure the V360 records to your memory card properly and without error, before you start using a new memory card, you must format the card within the camera using the format function.
- Page 10 Step 4: Mount the Rear Camera Mount the rear camera as shown below. Use the provided rear camera cable to connect the rear camera to the front camera. Plug the Rear Camera into the Dash Cam...
- Page 11 Step 5: Installing the Camera onto the Windshield Place the camera on the mount and carefully route the power cable around the windscreen and tuck it under the trim. Plug the Car Charger Cable to a 12V DC power outlet or the car cigarette lighter.
-
Page 12: Basic Operation
5. Basic Operation Device Power The device will be automatically powered on when plugged into a 12V accessory socket or cigarette lighter when receives a charge (i.e.: the vehicle is started). Press and hold the Power To turn the device on manually, button to turn press and hold the Power button the device on... - Page 13 Video Recording The camera will automatically start recording when the device receives a charge. Red dot will blink red when the device is recording. Press the Record button to stop recording. The camera automatically starts recording when powered on. Video Playback Playback of videos can be done on the device or a computer.
- Page 14 Video Playback on a computer Remove the Micro SD memory card from the device. Do not remove the memory card while the device is transferring or accessing information. b. Insert the Micro SD card into an SD Card Adapter. Insert the SD Card Adapter to the Computer.
- Page 15 Taking Photos To take a photo, click the Photo button to take a photo. view photo, press the Record button to stop recording. Press the Library button to enter Playback Mode. Swipe on the screen to toggle Take Photo through your photos. Deleting Photos / Videos To delete a photo or video, stop video recording and press...
- Page 16 1. 概説 REXINGを選んでいただきありがとうございます!私たちは、お客 様が 私たちと同じくらいこの新しい商品を気に入っていただくこ とを願っていま す。 サポートが必要な場合、または改善のための提案がありました ら、是非、ご連絡ください。jpcare@rexingusa.comに電子メールを 送ることができます。当社のサポートチームができるだけ早くお返 事いたします。 常にREXINGでサプライズを。 こちらをチェックしてください。 https://www.facebook.com/rexingusa/ https://www.instagram.com/rexingdashcam/ https://www.rexingusa.com/support/registration/ ホームページ Facebook Instagram...
- Page 17 2. 本製品の同梱物 V360 Quick Start Guide V360 クイックスタートガイド Guide de démarrage rapide V360 Guida di avvio rapido V360 Guía de inicio rápido V360 V360 Schnellstartanleitung Rexing V360 ドライブレコーダー 車載充電器 (12フィート) ケーブル管理ツール ドライブレコーダーマウント 後方カメラとケーブル ケーブル接着スペーサー V360クイックスタートガイド 安全ガイド...
- Page 18 3. カメラの概説 機器の正面図 機器の側面図 機器の背面図 機器の上面図 タッチスクリーン 電源ボタン マウント カメラ ミニUSBポート (電源) AVポート (後方カメラ) マイクロSD (TF) カードスロッ ト V360ではサポートされていません...
- Page 19 画面のアイコン TFカードを挿入してく ださい ビデオ録画モードの場合 : 録画する 写真を撮る ライブラリ 録画 設定 画面表示モード 現在の日付 現在の時刻(24時間表示) ロック 録画 (オン) バッテリーの充電...
- Page 20 ドライブレコーダーの取り付 け 3Mテープをマウントに置き、 マウント スクエアを適切に車の屋根とフードラ インの方向に合わせます。 重要 ! マウン トのT-インターロックが正しい方向に 置かれていることを確認してくださ い。マウントをフロントガラスにしっか りと押し付けます。 カメラを取り付けるま で、 少なく とも20分は待ってください。 ステッ プ2 : メモリーカードを挿入します Rexing V360は、最大256GBのマイク ロSDメモリカード(Class 10/UHS-1以 上)に対応しています。 録画を開始する前にメモリーカードを 挿入する必要があります。 メモリーカ ードを挿入または取り外す前に、 まず 機器の電源が切れていることを確認し てください。 カチッという音がするまでメモリーカ ー ドを静かに押し込み、 そして、 押すとス プリングが解除されてカードを取り外 すことができます。...
- Page 21 ステップ3 : カメラの電源を入れて、 メモリー カードを初期化します 充電器 を車のシガーライターとカメラに 接続して、 カメラの電源を入れます。 V360がメモリーカードに適切に間違い なく記録するためには、 新しいメモリー カードを使用し始める前に、 初期化機能 を使用してカメラ内でカードを初期化し なければなりません。 初期化する前に常 にカードをバックアップしてください。 メモリーカードを初期化するためには、 メ モリーカードが挿入されているこ とを確 認した後、 電源に接続して、 機器の電源 を入れます。 録画ボタンを押して録画を停 止します。 その後、 設定ボタンを2回押し て、 システム設定メニューに入ります。 初期化を押した後、 0Kを押して選択を確 認します。 ここで電源を切ります。 5秒後にカメラの電 源が切れます。 カメラは次回電源を入れ た時、 自動的に録画が開始されるはずで...
- Page 22 ステッ プ4 : 背面カメラ to 後方カメラの取り 付け 以下に示すように、 後方カメラを取り 付けます。 付属の後方カメラケーブル を使用して、 後方カメラをフロントカメ ラに接続します。 後方カメラをドライブ レコーダーに差し込み ます...
- Page 23 ステップ5 : フロントガラスへのカメラの 取り付け カメラをマウントに置き、 電源ケー ブルをフロントガラスの周りに注意 して配線し、 トリムの下にしまい込 みます。 車載充電器のケーブルを12V DC電 源コンセントまたは車のシガーライ ターに差し込みます。 車載充電器をカメラに接続します。 電源を入れるとカメラは自動的に録 画を開始します。...
- Page 24 5. 基本操作 機器の電力 機器が12Vアクセサリソケッ トまたはシガ ーライターに差し込まれて、 充電されたら ( すなわち、 車のエンジンがかかった時) 、 機 器に自動的に電源が入ります。 機器の電源を手動で入れるためには、 「 よ うこそ」 の画面が表示されるまで電源ボタ 電源ボタンを長 ンを押し続けます。 押しして、 機器の 電源が入ると、 カメラは自動的に録画を 電源を手動で入 開始します。 れます。 メニューの設定 カメラの電源を入れます。 カメラが録画 中の場合、 録画ボタンを押して録画を停 止します。 モードボタンを押して、 希望のモードに切 り替えます。 モード 設定ボタンを1回押すと、 システム設定に 入ります。 設定...
- Page 25 録画 機器が充電されたら、 カメラは自動 的に録画を開始します。 機器が録画 中の時、 赤い点が点滅します。 録画ボ タンを押して、 録画を停止します。 電源が入ると、 カメラは自動的に録画 を開始します ビデオの再生 ビデオの再生は、 機器またはコンピ ューターで実行できます。 機器でビデオを再生するためには、 再生モードに切り替えます。 希望の ビデオを選択し、 それを押して再生 これらのボタンで再生を制御します します。 再生中は ボタンを使用し て、 ビデオの再生をコントロールし ます。 再生モード...
- Page 26 コンピューターでのビデオの再生 機器からMicro SDメモリーカードを 取り外します。 機器が情報を転送また はアクセスしている間は、 メモリーカ ードを取り外さないでください。 Micro SDメモリーカードをSDカード アダプターに挿入します。 SDカードアダプターをコンピュータ ーに挿入します。 コンピューター上で、 SDカードドライブに移動します。 あなたのメイ ンカメラのビデオは 「video> A」 に保存されます。 後方カメラのビデ オは 「video> B」 に保存されます。 写真は 「video> Pic」 に保存されま す。 \exeに保存されている再生ソフトウェア 「VeseeSetup」 を必ずイン ストールしてください。 再生ソフトウェアを使用して、 再生するビデオを選択します。 ビデオのロック ビデオ録画モードの時に、ロックアイコンをタップすると30秒のビデオ クリップをメモリに保存できます。 これにより、メモリーカードがいっぱ いになった時ループ録画がクリップを上書きしないことを確実にしま...
- Page 27 写真を撮る 写真を撮るためには、 写真ボタンを クリックして写真を撮ります。 写真を表示するためには、 録画ボタ ンを押して録画を停止します。 ライブ ラリボタンを押して再生モードに入 ります。 画面をスワイプして写真を切 り替えます。 写真を撮る 写真/ビデオの削除 写真またはビデオを削除するために は、 ビデオ録画を停止し、 ライブラリ ボタンを押して再生モードに切り替え します。そして、削除したいビデオと 写真に切り替えます。 選択したビデオまたは写真を長押 選択したビデオまたは写真を長押しし しして、 削除オプションに入ります。 て、 削除オプションに入ります。 OKを押して、 現在選択しているビデ オまたは写真を削除します。 OKを押して削除します...
-
Page 28: Aperçu
1. Aperçu Merci d’avoir choisi REXING! Nous espérons que vous aimez votre nouveau produit autant que nous. Si vous avez besoin d’assistance ou avez des suggestions pour l’améliorer, veuillez nous contacter. Vous pouvez nous joindre care@rexingusa.com. Notre équipe d’assistance vous répondra dans les plus brefs délais. -
Page 29: Que Contient La Boîte
Guía de inicio rápido V360 V360 Schnellstartanleitung Rexing V360 Dash Cam Chargeur de voiture (12 pieds) Outil de gestion des câbles Montage de la Dash Cam Caméra arrière et câble Cales adhésives pour câbles Guide de démarrage rapide de la V360 Guide de sécurité... -
Page 30: Aperçu De La Caméra
L’APPAREIL VUE ARRIÈRE DE VUE DE DESSUS DE L’APPAREIL L’APPAREIL Écran tactile Bouton d’alimentation Support pour montage Caméra Mini port USB (Alimentation) Port AV (Caméra arrière) Fente pour Carte mémoire Micro SD (TF) Non pris en charge par la V360... - Page 31 Icônes D’écran Veuillez insérer la carte TF EN MzODE ENREGISTREMENT Enregistrer VIDÉO: Prendre une photo Bibliothèque Enregistrement Paramètres video Mode d’affichage à l’écran Date actuelle Heure (24H) Vérouiller Enregistrement (activé) Batterie en charge...
-
Page 32: Conseils D'utilisation
Attendez au moins 20 minutes avant de monter la caméra. Étape 2: Insérez la carte mémoire La Rexing V360 accepte les cartes mémoire Micro SD [Classe 10 / UHS-1 ou supérieure] jusqu’à 256 Vous devrez insérer une carte mémoire avant de pouvoir commencer l’enregistrement. - Page 33 Alimentez la caméra en connectant le chargeur à l’allume-cigare de la voiture et à la caméra. Pour vous assurer que la V360 enregistre correctement et sans erreur sur votre carte mémoire, avant de commencer à utiliser une nouvelle carte mémoire, vous...
- Page 34 Étape 4: Montez la caméra arrière Montez la caméra arrière comme indiqué ci-dessous. Utilisez le câble de caméra arrière fourni pour connecter la caméra arrière à la caméra avant. Branchez la caméra arrière dans la Dash Cam...
- Page 35 Étape 5: Installation de la caméra sur le pare-brise Placez la caméra sur le support et passez soigneusement le câble d’alimentation autour du pare-brise et glissez-le sous la garniture. Branchez le câble du chargeur de voiture dans une prise de courant 12 V CC ou dans l’allume-cigare de la voiture.
-
Page 36: Opération De Base
5. Opération De Base Mise sous tension de l’appareil L’appareil est automatiquement mis sous tension lorsqu’il est branché sur une prise accessoire de 12 V Appuyez et ou un allume-cigare et reçoit une maintenez charge (c’est-à-dire que le véhicule est le bouton démarré). - Page 37 Enregistrement Video La caméra démarre automatiquement l’enregistrement lorsqu’elle reçoit une charge. Le point rouge clignote lorsque l’appareil enregistre. Appuyez sur le bouton « Record » pour La caméra démarre arrêter l’enregistrement. automatiquement l’enregistrement lorsqu’elle est allumée. Lecture vidéo sur l’appareil La lecture des vidéos peut être effectuée sur la caméra ou un ordinateur.
- Page 38 Lecture vidéo sur un ordinateur Retirez la carte mémoire Micro SD de l’appareil. Ne retirez pas la carte mémoire pendant que l’appareil transfère ou accède à des informations. b. Insérez la carte mémoire Micro SD dans un adaptateur de carte Insérez l’adaptateur de carte mémoire SD dans l’ordinateur.
- Page 39 Prises de vue Pour prendre une photo, appuyez sur le bouton « Photo ». Pour afficher une photo, appuyez sur le bouton « Record » pour arrêter l’enregistrement. Appuyez sur le bouton « Library Prise de » pour passer en mode lecture. Balayez l’écran pour basculer entre vos photos.
-
Page 40: Descrizione
1. Descrizione Grazie per aver scelto REXING! Speriamo ami il nuovo prodotto quanto noi. Se serve aiuto, o si hanno suggerimenti per migliorarlo, contattaci. Puoi raggiungerci tramite care@rexingusa.com. Il nostro team risponde non appena possibile. Sempre una sorpresa in Rexing. -
Page 41: Nella Confezione
2. Nella Confezione V360 Quick Start Guide V360 クイックスタートガイド Guide de démarrage rapide V360 Guida di avvio rapido V360 Guía de inicio rápido V360 V360 Schnellstartanleitung Dash Cam V360 Rexing Caricabatterie per auto (12ft) Cable Management Tool Supporto Dash Cam... -
Page 42: Descrizione Telecamera
3. Descrizione Telecamera VISTA FRONTALE VISTA LATERALE DISPOSITIVO DISPOSITIVO VISTA RETRO VISTA PARTE SUPERIORE DISPOSITIVO DISPOSITIVO Touch Screen Pulsante Power Supporto Telecamera Porta Mini USB (Alimentazione) AV (Telecamera Posteriore) Alloggiamento Scheda Micro SD (TF) Non Supportato da V360... - Page 43 Icone Schermo Inserire Scheda IN MODALITA’ Record REGISTRAZIONE VIDEO: Scatta Foto Library Registrazione Impostazioni Video Modalità Display Schermo Data Corrente Ora (24H) Blocco Registrazione (on) Caricamento Batteria...
-
Page 44: Come Si Usa
20 minuti prima di montare la telecamera. Passo 2: Inserire la Scheda di Memoria V360 Rexing accetta schede di memoria Micro SD [Classe 10/ UHS- 1 o superiore] fino a 256GB. Si deve inserire una scheda di memoria prima di poter cominciare la registrazione. - Page 45 Formattare la Scheda di Memoria Alimentare la telecamera collegando il caricabatterie all’accendisigari dell’auto e alla telecamera. Per assicurarsi che V360 registri correttamente nella scheda di memoria e senza errore, prima di iniziare a utilizzare una nuova scheda di memoria, si deve formattarla nella telecamera utilizzando la funzione format.
- Page 46 Passo 4: Montare la Telecamera Posteriore Montare la telecamera posteriore come mostrato sotto. Utilizzare il cavo fornito per collegarla alla frontale. Collegare la Telecamera Posteriore alla Dash Cam...
- Page 47 Passo 5: Installare la Telecamera sul Parabrezza Posizionare la telecamera sul supporto e indirizzare con cura il cavo di alimentazione attorno al parabrezza e infilarlo sotto il bordo. Inserire il Cavo del Caricabatterie per Auto nella presa 12V DC o nell’accendisigari.
-
Page 48: Funzionamento Base
5. Funzionamento Base Accensione Dispositivo Il dispositivo si accende automaticamente quando collegato a una presa per gli accessori o all’accendisigari e riceve una carica (il Tenere veicolo è in moto). premuto il pulsante Per accendere il dispositivo Power per manualmente, tenere premuto il accendere il pulsante POWER finché... - Page 49 Registrazione Video La telecamera automaticamente inizia a registrare quando il dispositivo riceve una carica. Il punto rosso lampeggia quando il dispositivo registra. Premere il pulsante Record per fermare la La telecamera automaticamente registrazione. inizia a registrare quando accesa. Riproduzione Video sul dispositivo La riproduzione di video può...
- Page 50 Riproduzione Video su un computer Rimuovere la scheda di memoria Micro SD dal dispositivo. Non rimuovere la scheda di memoria mentre il dispositivo trasferisce o accede a informazioni. Inserire la scheda di memoria Micro SD in un Adattatore per Schede SD. Inserire l’Adattatore per Schede SD nel computer.
- Page 51 Scattare Foto Per scattare una foto, cliccare il pulsante Photo. Per visualizzare una foto, premere il pulsante Record per fermare la registrazione. Premere il pulsante Library per entrare in Modalità Scattare Riproduzione. Scorrere sullo Foto schermo per passare tra le foto.
-
Page 52: Visión General
1. Visión General ¡Gracias por elegir REXING! Esperamos que ame su nuevo producto tanto como a nosotros. Si necesita ayuda o tiene alguna sugerencia para mejorarla, contáctenos. Puede comunicarse con nosotros a través de care@rexingusa.com. Nuestro equipo de soporte le responderá... -
Page 53: Qué Hay En La Caja
Guía de inicio rápido V360 V360 Schnellstartanleitung Dash Cam V360 Rexing Cargador de coche (12 pies) Herramienta de gestión de cables Montaje de la Dash Cam Cámara trasera y cable Separadores adhesivos para cables Guía de inicio rápido de V360 Guía de seguridad... -
Page 54: Resumen De La Cámara
VISTA FRONTAL DEL VISTA LATERAL DEL DISPOSITIVO DISPOSITIVO VISTA POSTERIOR DEL VISTA SUPERIOR DEL DISPOSITIVO DISPOSITIVO Pantalla táctil Botón de encendido Montaje Cámara Mini puerto USB (alimentación) Puerto AV (cámara trasera) Ranura para tarjeta Micro SD (TF) No compatible con V360... - Page 55 Iconos De Pantalla Por favor inserte EN MODO DE Grabar GRABACIÓN DE Tomar foto Biblioteca Grabación de vídeo Configuraciones Modo de visualización de pantalla Fecha actual Bloquear Tiempo (24H) Grabación (encendido) Carga de la batería...
- Page 56 20 minutos antes de montar la cámara. Paso 2: Inserte la Tarjeta de Memoria El Rexing V360 acepta tarjetas de memoria Micro SD [Clase 10 / UHS- 1 o superior] de hasta 256GB. Deberá insertar una tarjeta de memoria antes de comenzar a grabar.
- Page 57 Memoria Encienda la cámara conectando el cargador de la cámara al encendedor de cigarrillos del automóvil. Para garantizar que el V360 registre en su tarjeta de memoria correctamente y sin errores, antes de comenzar a usar una nueva tarjeta de memoria, debe formatear la tarjeta dentro de la cámara utilizando...
- Page 58 Paso 4: Monte la cámara trasera Monte la cámara trasera como se muestra a continuación. Use el cable de la cámara trasera provisto para conectar la cámara trasera a la cámara frontal. Enchufe la cámara trasera en la Dash Cam...
-
Page 59: Instalación
Paso 5: Instalación de la cámara en el parabrisas Coloque la cámara en el soporte y pase con cuidado el cable de alimentación alrededor del parabrisas y colóquelo debajo de la moldura. Conecte el cable del cargador del automóvil a una toma de corriente de 12 V CC o al encendedor del automóvil. -
Page 60: Operación Básica
5. Operación Básica Energía del dispositivo El dispositivo se enciende automáticamente cuando se conecta a una toma de accesorios de 12V o encendedor de cigarrillos y recibe Mantenga una carga (es decir, el vehículo ha presionado arrancado). el botón de Encendido Para encender el dispositivo para encender... - Page 61 Grabación de vídeo La cámara comenzará a grabar automáticamente cuando el dispositivo reciba una carga. El punto rojo parpadeará cuando el dispositivo esté grabando. Presione el botón Grabar para detener la grabación. La cámara comenzará a grabar automáticamente cuando se encienda.
- Page 62 Reproducción de vídeo en un ordenador Retire la tarjeta de memoria Micro SD del dispositivo. No retire la tarjeta de memoria mientras el dispositivo está transfiriendo o accediendo a información. Inserte la tarjeta de memoria Micro SD en un Adaptador de Tarjeta SD.
- Page 63 Tomando fotos Para tomar una foto, haga clic en el botón Foto para tomar una foto. Para ver una foto, presione el botón Grabar para detener la grabación. Presione el botón Biblioteca para ingresar al Tomar foto modo de reproducción. Deslice el dedo por la pantalla para alternar entre tus fotos.
-
Page 64: Übersicht
1. Übersicht Danke, dass Sie sich für REXING entschieden haben! Wir hoffen, dass Sie unser neues Produkt genauso lieben wie wir. Wenn Sie Unterstützung brauchen oder irgendwelche Empfehlungen haben wie wir unser Produkt verbessern können, wenden Sie sich bitte an uns. Sie können uns unter care@rexingusa.com. -
Page 65: Verpackungsinhalt
2. Verpackungsinhalt V360 Quick Start Guide V360 クイックスタートガイド Guide de démarrage rapide V360 Guida di avvio rapido V360 Guía de inicio rápido V360 V360 Schnellstartanleitung Rexing V360 Dash Cam Autoladegerät (12ft) Kabel Management Tool Dash Cam Halterung Rückfahrkamera Aufklebabstandhalter für Kabel... -
Page 66: Kamera Übersicht
3. Kamera Übersicht GERÄT FRONTANSICHT GERÄT SEITENANSICHT GERÄT RÜCKANSICHT GERÄT OBENANSICHT Touch-Screen Power-Taste Halterung Kamera Mini USB-Anschluss (Power) AV-Anschluss (Rückfahrkamera) Micro SD (TF) Kartenschlitz Nicht von V360 unterstützt... - Page 67 Bildschirmsymbole Bitte TF einschieben IM VIDEOAUFNAHMEMODUS: Aufnehmen Foto machen Bibliothek Videoaufnahme Einstellungen Bildschirmanzeigemodus Aktuelles Datum Zeit (24 Stunden) Sperre Aufnehmen (An) Batterie wird geladen...
-
Page 68: Gebrauchsanweisungen
Windschutzscheibe. Warten Sie mindestens 20 Minuten, bevor Sie die Kamera montieren. Schritt 2: Speicherkarte einschieben Die Rexing V360 unterstützt Micro SD-Speicherkarten [Klasse 10/ UHS- 1 oder höher] bis zu 256GB. Sie müssen eine Speicherkarte einschieben, bevor Sie mit der Aufnahme beginnen können. - Page 69 Schließen Sie das Ladegerät an den Zigarettenanzünder im Auto und die Kamera an, um die Kamera mit Strom zu versorgen. Um sicherzustellen, dass die V360 korrekt und fehlerfrei Aufnahmen auf Ihre Speicherkarte speichert, müssen Sie die Karte in der Kamera mit der...
- Page 70 Schritt 4: Rückfahrkamera montieren Montieren Sie die Rückfahrkamera wie unten abgebildet. Verwenden Sie das mitgelieferte Rückfahrkamerakabel, um die Rückfahrkamera mit der Frontkamera zu verbinden. Rückfahrkamera anschließen In die Dash Cam...
- Page 71 Schritt 5: Die Kamera an die Windschutzscheibe montieren Legen Sie die Kamera auf die Halterung und drehen Sie das Stromkabel vorsichtig um die Windschutzscheibe und stecken Sie es unter den Trimm. Schließen Sie das Autoladekabel an eine 12V DC-Steckdose oder an den Zigarettenanzünder des Autos.
-
Page 72: Grundbedienung
5. Grundbedienung Geräteleistung Das Gerät wird automatisch eingeschaltet, wenn es an eine 12V-Zubehörsteckdose oder den Zigarettenanzünder angeschlossen wird, und wird aufgeladen (d.h. das Drücken und Fahrzeug ist gestartet). halten Sie Um das Gerät manuell einzuschalten, die POWER- Taste, um das drücken und halten Sie die POWER- Gerät manuell einzuschalten. - Page 73 Videoaufnahme Die Kamera beginnt automatisch mit der Aufnahme, wenn das Gerät aufgeladen wird. Die rote Leuchte blinkt im Aufnahmeprozess. Drücken Sie die Aufnahmetaste, um die Aufnahme zu beenden. Die Kamera beginnt automatisch mit der Aufnahme, wenn sie eingeschaltet wird. Videowiedergabe auf dem Gerät Das Abspielen von Videos kann auf dem Gerät oder einem...
- Page 74 Videowiedergabe auf einem Computer Entfernen Sie die Micro SD- Speicherkarte aus dem Gerät. Entfernen Sie die Speicherkarte nicht, während das Gerät Informationen überträgt oder diese verarbeitet. Schieben Sie die Micro SD- Speicherkarte in einen SD- Kartenadapter ein. Schieben Sie den SD- Kartenadapter in den Computer ein.
- Page 75 Fotos werden aufgenommen Drücken Sie die Foto-Taste, um ein Foto zu machen Um ein Foto anzuschauen, drücken Sie die Aufnahmetaste, um die Aufnahme zu beenden. Drücken Sie die Foto aufnehmen Bibliothekstaste, um den Playback-Modus zu aktivieren. Wischen Sie mit dem Finger, um durch Ihre Fotos zu blättern.
- Page 76 This device complies with part 15 of the FCC Rules. Operation is subject to the following two conditions: (1) This device may not cause harmful interference, and (2) this device must accept any interference received, including interference that may cause undesired operation. Changes or modifications not expressly approved by the party responsible for compliance could void the user's authority to operate this equipment.
Need help?
Do you have a question about the V360 and is the answer not in the manual?
Questions and answers