Rexing V1 User Manual
Hide thumbs
Also See for V1:
- User manual (47 pages) ,
- Quick start manual (45 pages) ,
- Quick start manual (17 pages)
Table of Contents
Advertisement
Quick Links
Advertisement
Table of Contents

Related Manuals for Rexing V1


Summary of Contents for Rexing V1
- Page 1 USER MANUAL All brand and product names are trademarks or registered trademarks of SHENZHEN JIAFENG ZHUOYUE DIGITAL COMMUNICATION TECHNOLOGY CO., LTD. The information in this manual is subject to change without notice. www.rexingusa.com 03/2016R1.0 © 2015 REXING All Rights Reserved.
- Page 2 Use only manufacturer-approved batteries, chargers, accessories, and supplies. Using generic chargers may shorten the life of your device or cause the device to malfunction. They may also cause fire or cause the battery to explode. © 2015 REXING All Rights Reserved.
- Page 3 Rexing cannot be responsible for the user’s safety when using accessories or supplies that are not approved by Rexing. Do not drop the charger or device, or subject them to impact. Handle and dispose of the charger and device with care.
- Page 4 Do not handle a damaged or leaking lithium ion (Li-Ion) battery. For safe disposal of your Li-Ion battery, contact your nearest authorized service center. © 2015 REXING All Rights Reserved.
- Page 5 If you notice strange smells or sounds coming from your device, or if you see smoke or liquid leaking from the device, stop using the device immediately and take it to a Rexing Service Center. Failure to do so may result in fire or explosion.
- Page 6 Do not attempt to disassemble, repair, or modify your device. Any changes or modifications to your device can void your manufacturer’s warranty. If your device needs servicing, take it to an authorized Rexing Service Center. © 2015 REXING All Rights Reserved.
- Page 7 Do not distribute copyright-protected material. Doing so without the permission of the content owners may violate copyright laws. The manufacturer is not responsible or liable for any legal issues that result from the user’s illegal use of copyrighted material. © 2015 REXING All Rights Reserved.
- Page 8 Business users should contact their supplier and check the terms and conditions of the purchase contract. This product and its electronic accessories should not be mixed with other commercial wastes for disposal. © 2015 REXING All Rights Reserved.
- Page 9 ANY CONTENT OR SERVICE MADE AVAILABLE THROUGH THIS DEVICE AND UNDER NO CIRCUMSTANCES, INCLUDING NEGLIGENCE, SHALL REXING BE LIABLE, WHETHER IN CONTRACT OR TORT, FOR ANY DIRECT, INDIRECT, INCIDENTAL, SPECIAL OR CONSEQUENTIAL DAMAGES, ATTORNEY FEES, EXPENSES, OR ANY OTHER DAMAGES...
- Page 10 Third party services may be terminated or interrupted at any time, and Rexing makes no representation or warranty that any content or service will remain available for any period of time. Content and services are transmitted by third parties by means of networks and transmission facilities over which Rexing has no control.
- Page 11 Content may differ from the final product or from software provided by service providers, and is subject to change without prior notice. For the latest version of this manual, refer to the Rexing website at www.rexingusa.com. Available features and additional services may vary by device and software.
-
Page 12: Table Of Contents
Table of Contents PRODUCT SPECIFICATIONS GETTING STARTED Overview of your V1 Dashboard Camera Device Layout Understanding your V1 Dashboard Camera Buttons Status Icons Unpacking your V1 Dashboard Camera Package Contents Installing your V1 Dashboard Camera Installation Charging the Battery Inserting the Memory Card... - Page 13 Playback Mode Deleting Files Photo Settings Resolution Capture Mode Sequence Mode Quality Sharpness White Balance Color Exposure Anti-Shaking Quick Review Date and Time Stamp Playback Mode Updating Firmware Driving Recorder Player Instruction General Troubleshooting © 2015 REXING All Rights Reserved.
-
Page 14: Product Specifications
3 min / 5 min / 10 min / OFF Loop Recording 15 Secs / 1 min / 3 min / OFF Screen Saver 3 min / 5 min / 10 min / OFF Auto Shutdown Microphone Mute ON / OFF © 2015 REXING All Rights Reserved. -
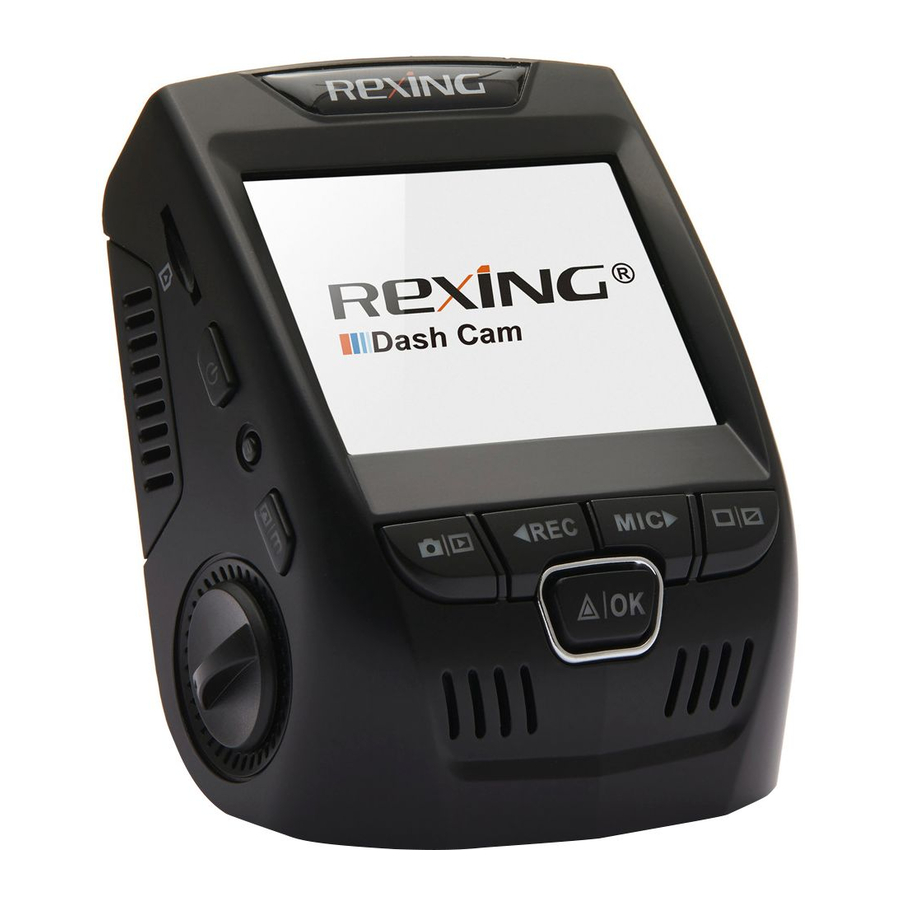
Page 15: Getting Started Overview Of Your V1 Dashboard Camera
Getting Started Overview of your V1 Dashboard Camera Device Layout 1. Mode Button MircoSD Card Slot 2. Up Navigation Button Power On/ Off Switch Record Button Reset Button 3. OK (Confirm) Button Menu Button Emergency Lock Button 10. Lens Angle Adjuster 4. -
Page 16: Understanding Your V1 Dashboard Camera
Getting Started Understanding your V1 Dashboard Camera Buttons Button Functions POWER – Press and hold to turn the device on or off Press to confirm a selection while in Setting Mode Recording Mode Hot Key: Emergency Lock (Press to manually lock the file during recording) MENU –... -
Page 17: Status Icons
Getting Started Understanding your V1 Dashboard Camera Status Icons Icon Meaning Video Resolution Wide Dynamic Range Charging via USB Charger Battery Power Level Microphone Mute Microphone On Video Recording Mode Video Playback Mode Photo Mode Loop Recording © 2015 REXING All Rights Reserved. - Page 18 Memory Card Inserted G- Sensor Sensitivity White Balance GPS Signal (Green-GPS OK, Blue-Acquiring GPS) License plate number © 2015 REXING All Rights Reserved.
-
Page 19: Unpacking Your V1 Dashboard Camera
All supplied items are designed for use only with this device and may not be compatible with other devices. Malfunctions resulting from the use of unapproved accessories are not covered by the warranty service. For more information about available accessories, refer to the Rexing website at www.rexingusa.com. © 2015 REXING All Rights Reserved. -
Page 20: Installing Your V1 Dashboard Camera
Class 10 memory card with a capacity of at least 8GB. 3. Connecting the charger to the car's 12V DC outlet Be sure to connect only the Rexing-approved charger designed and supplied specifically for use with your device. Using an incompatible charger can cause serious personal injury or damage to your device. -
Page 21: Charging The Battery
12V DC power outlet. Battery is mainly used to save files in emergency. Please always connect Rexing V1 to external power while it is in use. When device detects no power supply, it will automatically power off after 5 seconds. - Page 22 If the device is not charging properly, take the device and the charger to an authorized Rexing Service Center. Connecting the charger improperly may cause serious damage to the device. Any damage caused by misuse is not covered by the warranty.
-
Page 23: Inserting The Memory Card
Getting Started Installing your V1 Dashboard Camera Inserting the memory card Your device accepts memory cards with a maximum capacity of 32GB. Depending on the memory card manufacturer and type, some cards may not be compatible with your device. Using an incompatible card may damage the device or the memory card, or corrupt the data stored on it. -
Page 24: Removing The Memory Card
Do not remove the memory card while the device is transferring or accessing information. Doing so can result in data loss or corruption, or damage to the memory card or device. Rexing is not responsible for losses that result from the use of damaged memory cards, including the loss of data. - Page 25 Getting Started Installing your V1 Dashboard Camera Formatting the memory card (continued) 3. Press the DOWN button to navigate to the "Format" option 4. Press OK to confirm your selection 5. Press the UP button once 6. Press OK when the word...
-
Page 26: Operating Your V1 Dashboard Camera
A goodbye message will be displayed onscreen as shown in the image below. Note: The V1 Dashboard Camera will switch on and off automatically if you keep it permanently connected to the car charger. © 2015 REXING All Rights Reserved. -
Page 27: System / Video Settings
Operating your V1 Dashboard Camera System / Video Settings SYSTEM / VIDEO SETTINGS Resolution Recommend setting: 1080FHD Use the following procedure to set the recording resolution: 1. Press MENU once to enter Video Settings 2. Press the UP or DOWN button to navigate to the "Resolution" option 3. -
Page 28: Loop Recording
Operating your V1 Dashboard Camera System / Video Settings Loop Recording Recommend setting: 3 Minutes With Loop Recording Mode enabled, the device will continuously erase older video as it records new video, keeping only the images captured over a user- selected time range. -
Page 29: Time-Lapse Record
Operating your V1 Dashboard Camera System / Video Settings Time-lapse Record Recommend setting: Off Time-lapse Record is the time duplicated between 2 video clips. 1. Press MENU once to enter Video Settings 2. Press the UP or DOWN button to navigate to the " Time-lapse Record" option 3. -
Page 30: Exposure
Operating your V1 Dashboard Camera System / Video Settings Exposure Recommend setting: +0.0 Adjust the camera exposure value for brighter or darker recorded video, according to your preference. 1. Press MENU once to enter Video Settings 2. Press the UP or DOWN button to navigate to the "Exposure" option 3. -
Page 31: Date Stamp
Operating your V1 Dashboard Camera System / Video Settings Date Stamp You have the option to display the date and time in your videos. Note that the date and time stamp cannot be removed from videos if this feature was enabled at the time of recording. -
Page 32: Gravity Sensing
Operating your V1 Dashboard Camera System / Video Settings Gravity Sensing Recommend setting: Low This feature acts as an accelerometer, measuring physical and gravitational forces acting on the camera itself. In the event that such forces are detected, the device will perform an automatic file lock. (Locked video files cannot be erased during Loop Recording;... -
Page 33: Date/ Time Setup
Operating your V1 Dashboard Camera System / Video Settings Date/ Time Setup Use the following procedure to change the device’s time and date: 1. Press MENU twice to enter System Settings 2. Press the DOWN button to navigate to the "Date/Time" option 3. -
Page 34: Beep Sound
Operating your V1 Dashboard Camera System / Video Settings Beep Sound This setting allows you to turn the device's button sound effect on or off. 1. Press MENU twice to enter Setup 2. Press the UP or DOWN button to navigate to the "Beep Sound" option 3. -
Page 35: Tv Mode
Operating your V1 Dashboard Camera System / Video Settings TV Mode Recommend setting: NTSC This feature will setup video output format. 1. Press MENU twice to enter Setup 2. Press the UP or DOWN button to navigate to the "TV Mode" option 3. -
Page 36: Format
Operating your V1 Dashboard Camera System / Video Settings Format Performing this operation will format memory card. Note: any files in the memory card will be lost. 1. Press MENU twice to enter System Settings 2. Press the UP or DOWN button to navigate to the "Format" option 3. -
Page 37: Screen Saver
Operating your V1 Dashboard Camera System / Video Settings Screen Saver Recommend setting: 15 Seconds Select a time duration for the screen to stay lit after recording starts. (If you cannot find this option, please follow instructions for installing the latest firmware update, page 48.) -
Page 38: Update Time Of Gps
Operating your V1 Dashboard Camera System / Video Settings Update time of GPS This feature need GPS Logger connected, select a time zone to enable automatic update time of GPS. 1. Press MENU twice to enter System Settings 2. Press the UP or DOWN button to navigate to the "Update time of GPS"... -
Page 39: Playback Mode
Operating your V1 Dashboard Camera System / Video Settings Playback Mode You can play back recorded video on your device using the following steps: 1. Press REC to stop recording 2. Press MODE twice to switch from Recording to Playback Mode 3. -
Page 40: Deleting Files
Operating your V1 Dashboard Camera System / Video Settings Deleting Files To delete one particular file: 1. Press the UP or DOWN button to navigate through the stored video files 2. Press MENU to view options for the highlighted file: Delete/Protect/Slide Show 3. -
Page 41: Photo Settings Resolution
Operating your V1 Dashboard Camera Photo Settings PHOTO SETTINGS Resolution This option allows you to set the pixel resolution for captured images. 1. Press MODE once to enter Photo Mode 2. Press MENU once to enter Photo Settings 3. Press the UP or DOWN button to navigate to the "Resolution" option 4. -
Page 42: Sequence Mode
Operating your V1 Dashboard Camera Photo Settings Sequence Mode This feature allows you to capture a sequence of 3 quick photos with one button press. 1. Press MODE once to enter Photo Mode 2. Press MENU once to enter Photo Settings 3. -
Page 43: Sharpness
Operating your V1 Dashboard Camera Photo Settings Sharpness This feature will automatically enhance captured images for a clearer, more distinct picture. 1. Press MODE once to enter Photo Mode 2. Press MENU once to enter Photo Settings 3. Press the UP or DOWN button to navigate to the "Sharpness" option 4. -
Page 44: Color
Operating your V1 Dashboard Camera Photo Settings Color This feature allows you to choose a color effect for captured images. 1. Press MODE once to enter Photo Mode 2. Press MENU once to enter Photo Settings 3. Press the UP or DOWN button to navigate to the "Color" option 4. -
Page 45: Exposure
Operating your V1 Dashboard Camera Photo Settings Exposure This setting allows you to adjust the brightness level of captured images. The "+0.0" setting is recommended. 1. Press MODE once to enter Photo Mode 2. Press MENU once to enter Photo Settings 3. -
Page 46: Quick Review
Operating your V1 Dashboard Camera Photo Settings Quick Review Enabling this feature will allow you to immediately view each captured image for a few seconds before taking the next photo. 1. Press MODE once to enter Photo Mode 2. Press MENU once to enter Photo Settings 3. -
Page 47: Playback Mode
Operating your V1 Dashboard Camera Photo Settings Playback Mode (Photo) Follow these steps to view captured images as a continuous slide show. 1. Press MODE twice to enter Photo View Mode 2. Press the UP or DOWN button to navigate through the stored image files 3. -
Page 48: Updating Firmware
Operating your V1 Dashboard Camera Updating Firmware Updating Firmware The following procedure will allow you to use the Rexing website to update firmware for your V1 Dashboard Camera. This is necessary for enabling all available features on your device. 1. Download the firmware file to your computer from the Rexing website at firmware.rexingusa.com... -
Page 49: Driving Recorder Player Instruction
MAC OS Users: If you cannot install the software successfully, check your OS X Security & Privacy settings and allow applications downloaded from Anywhere. This will allow 3rd party applications that are not from the Mac App Store to be installed on your computer. © 2015 REXING All Rights Reserved. - Page 50 The Software Main Screen A. Menu B. Video player C. Longitude and latitude D. Speedometer E. Playlist Mini logger G. Google Map © 2015 REXING All Rights Reserved.
-
Page 51: General Troubleshooting
Operating your V1 Dashboard Camera General Troubleshooting General Troubleshooting Problem Possible Cause Solution 1. Memory card may be full 1. Reformat memory card or or malfunctioning The captured image replace with a new one 2. Image not being saved is not stored 2. - Page 52 Operating your V1 Dashboard Camera General Troubleshooting General Troubleshooting (continued) Problem Possible Cause Solution Use a compatible class- Recording stops unexpect- Incompatible memory card 10 microSD card with a edly in Video Mode is inserted capacity of at least 8GB “File error"...
Need help?
Do you have a question about the V1 and is the answer not in the manual?
Questions and answers