
Subscribe to Our Youtube Channel
Related Manuals for Kogan INFINITY KAMN34RQ18LA


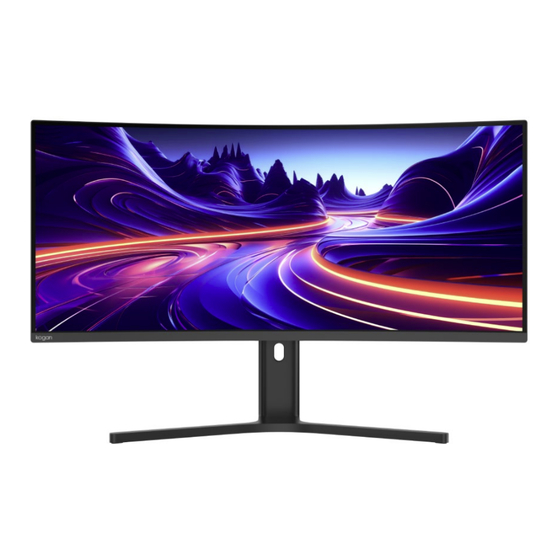
Summary of Contents for Kogan INFINITY KAMN34RQ18LA
- Page 1 INFINITY 34" CURVED ULTRAWIDE FREESYNC GAMING MONITOR USB-C, WQHD, 180HZ & 1MS (3440 X 1440) KAMN34RQ18LA...
-
Page 2: Table Of Contents
Safety & Warnings Components Overview Assembly Operation Specifications Notes... -
Page 3: Safety & Warnings
SAFETY & WARNINGS • Read all instructions before using the monitor and retain this user guide for future reference. • Ensure the ventilation holes on the back of the monitor remain unobstructed. • Do not insert objects or spray liquids into the vents. •... -
Page 4: Components
COMPONENTS Monitor Stand Arm Stand Base Screws (x4) DP Cable Power Cable Power Adapter User Guide... -
Page 5: Overview
OVERVIEW Menu button Press to display the OSD menu and enter sub-menus. Down button Move down in the menu/quickly adjust the brightness. Up button Move up/quickly adjust contextual model. Exit button Return to the previous menu/quickly adjust the input signal. Power button Press to turn the monitor on/off. -
Page 6: Assembly
ASSEMBLY Before disposing of any packaging, place all items on a soft, clean and flat surface to ensure all components are accounted for. WARNING: The panel of the monitor is fragile. Keep the foam underneath the monitor screen while assembling the stand. Stand Base Lay the monitor screen face down on a table, ensuring it remains on the packing foam for protection. - Page 7 VESA Mount VESA mounting pattern 75 x 75mm, screw size M4. Note: VESA mount and mounting accessories are not included. WARNING: If you are not confident in wall mounting this product, consult a licensed trade professional. Open the box, lay the monitor screen facing down on a table with the monitor still resting on the packing foam.
- Page 8 Follow the directions received with your mount and install the monitor on the wall or fixture as desired. Mount (not provided) Note: To prevent the monitor from falling, ensure it is securely mounted. Avoid placing or hanging any objects on the mount, and ensure the mount is installed at a height of less than 2 meters.
- Page 9 Adjustments 35° 35° Rotation angle (35°±2°~+35°±2°) -5° +15° Tilting angle Height adjustment (-5°- +15°) (120±5mm)
-
Page 10: Operation
OPERATION Powering the Monitor Connect the power adapter to the power cable. Plug the adapter into the monitor's DC port. Finally, connect the power cable to a properly grounded power outlet. DC port HDMI Connection Use the HDMI cable (not provided) to connect the computer's HDMI port to the monitor's HDMI port. - Page 11 HDMI to DVI Connection Use an HDMI to DVI cable (not provided) to connect the monitor's HDMI port to the computer's DVI port. HDMI cable (not provided) Note: Audio may not be transmitted through a DVI port. DisplayPort Connection Connect a DisplayPort cable from the computer's DisplayPort to the monitor's DisplayPort.
- Page 12 USB-C Connection Insert one end of a USB-C cable (not provided) into the computer's USB-C port and connect the other end to the monitor's USB-C port. Note: For MacBook/Mac users connecting to this monitor, the MacBook must be running at least MacOS version 14.5.
- Page 13 On-Screen Display (OSD) Menu The on-screen display (OSD) menu allows you to adjust the monitor's settings and appears on the screen once the monitor is powered on and the ‘Menu’ (M) button is pressed. Press the ‘Menu’ (M) button to activate the OSD menu. Use the directional buttons to navigate through the functions.
- Page 14 On-Screen Display (OSD) functions: The monitor's functions may vary depending on the model, and the functions described in this user guide are provided for reference only. Main Menu Sub Menu Options Standard Mode Off/On (Custom) RTS/RPG Mode Off/On (Custom) FPS Mode Off/On (Custom) MOBA Mode Off/On (Custom)
- Page 15 Off/Auto/HDR Game/HDR Movie Adaptive-Sync Off/On MPRT Off/On Dual Game Wide Screen/25”/sPX Mode Mode Colour Off/Level 1-10 Enhancement CR Enhancement Off/Level 1-5 Shadow Balance 0-100 Off/Level1/Level2/ Auto Night Vision Mode Level1/Auto Level2 Picture Enhancement Super Resolution Off/Level 1-5 Off/Level 1/Level 2/Level Dynamic OD 3/Top speed Game Rush Mode...
- Page 16 Volume 0-100 Audio Mute Off/On Audio Settings Reset Audio Off/On Settings Off/PIP Mode/PBP 2Win 1:1/PBP 2Win 2:1/ PBP PIP/PBP Mode 2Win 1:2 Sub-Signal DP/USB-C/HDMI 1/HDMI 2 Source Audio Source Auto/DP/USB-C/HDMI 1/HDMI 2 PIP/PBP PIP Position Top Right/Top Left/Bottom Right/Bottom Left PIP Size Small/Medium/Large Window Swap...
- Page 17 简体中文/English/한국어/ /ﻋﺮﺑﯽPortugues do Brasilazil/Deutsch/Nederland/Suomi/Français/ λληνικά/ Indonesia/Italiano/日本語 Language /Malaysia/Polskie/Português/Русский/ Español/ไทย/Українська/Tiếng Việt/繁體中文 /Türkçe OSD Time Out 0-60 OSD H-Position 0-100 OSD V-Position 0-100 Transparency System Hotkey1 Setting Brightness/Contrast/Volume/Audio Mute/ Settings Shadow Balance/Game Crosshair/Magnifier Mode Hotkey2 Setting /Refresh Rate/Game Time/Colour Enhancement/Night Vision Mode/Super Hotkey3 Setting Resolution/Adaptive-Sync/Picture Mode/ HDR/Dynamic OD/Input Signal/PIP/PBP...
-
Page 18: Specifications
SPECIFICATIONS Screen size 34inch Aspect ratio 21:9 Viewing angle 178° (H)/178° (V) Contrast ratio 4000:1 (TYP) Colour 16.7M Resolution 3440x1440 Refresh rate 180Hz Power input 19V-7.89A Without stand 810.4x361.5x130.2mm Product dimensions With stand 810.4x525.5x242.8mm Forward tilting: -5° (±2.0°) Tilting angle Backward tilting: 15°... -
Page 19: Notes
NOTES... - Page 20 Need more information? We hope that this user guide has given you the assistance needed for a simple set-up. For the most up-to-date guide for your product, as well as any additional assistance you may require, head online to help.kogan.com...
Need help?
Do you have a question about the INFINITY KAMN34RQ18LA and is the answer not in the manual?
Questions and answers