EG4 IV-8000-HYB-AW Quick Start Manual
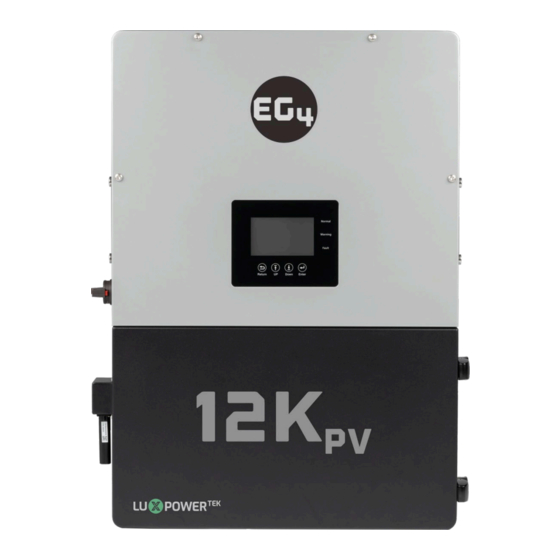
12kpv hybrid inverter
Hide thumbs
Also See for IV-8000-HYB-AW:
- Connection manual (23 pages) ,
- Connections (20 pages) ,
- Troubleshooting & maintenance manual (19 pages)
Table of Contents
Advertisement
Quick Links
E G 4 ® 1 2 k P V H Y B R I D I N V E R T E R
This guide has been created to give the end-user a simple and efficient way to install and commission
the 12kPV hybrid inverter.
©2024 EG4 ELECTRONICS, LLC. ALL RIGHTS RESERVED.
VERSION 1.2.1 | INFORMATION SUBJECT TO CHANGE WITHOUT NOTICE.
MODEL #: IV-8000-HYB-AW / IV-8000-HYB-AW-00
Q U I C K - S T A R T G U I D E
Advertisement
Table of Contents
Troubleshooting

Related Manuals for EG4 IV-8000-HYB-AW


Summary of Contents for EG4 IV-8000-HYB-AW
- Page 1 This guide has been created to give the end-user a simple and efficient way to install and commission the 12kPV hybrid inverter. ©2024 EG4 ELECTRONICS, LLC. ALL RIGHTS RESERVED. VERSION 1.2.1 | INFORMATION SUBJECT TO CHANGE WITHOUT NOTICE. MODEL #: IV-8000-HYB-AW / IV-8000-HYB-AW-00...
-
Page 2: Table Of Contents
PV CONNECTION ............................12 AC CONNECTION ............................12 SYSTEM START-UP SEQUENCE FOR COMMISSIONING ................12 ACCOUNT REGISTRATION ...........................13 FIRMWARE UPDATES ............................13 INVERTER UPDATE VIA EG4 APP ......................13 INVERTER UPDATE VIA MONITOR CENTER ..................14 BATTERY UPDATE ............................14 OPERATION GUIDE ..............................15 10.1 OPERATION MODE AND FUNCTION ....................... -
Page 3: Technical Specifications
1. TECHNICAL SPECIFICATIONS AC INPUT DATA 120/240VAC; 120/208VAC (L1/L2/N required) NOMINAL AC VOLTAGE 50/60 Hz FREQUENCY 12000W MAX. AC INPUT POWER >5000W MIN. GENERATOR SIZE 80A | 80A MAX. GEN | GRID PASSTHROUGH CURRENT AC GRID OUTPUT DATA 33.3A@240VAC | 38.5A@208VAC MAX. - Page 4 Surge Protection Device, Integrated PV Disconnect STANDARDS AND CERTIFICATIONS UL1741 SB CSA C22.2#107.1:2016 CSA C22.2#330:2017 ED 1 HECO SRD-IEEE-1547.1:2020 ED 2 RAPID SHUT DOWN (RSD) NEC 2020:690.12 FCC PART 15, CLASS B (PENDING) *See EG4 Warranty Registration for terms and conditions...
-
Page 5: Abbreviations
2. ABBREVIATIONS • AWG – American Wire Gauge • In-lbs. – Inch Pounds A – Amps kW – Kilowatt • • Ah – Amp hour(s) kWh – Kilowatt-hour • • AC – Alternating Current LCD – Liquid Crystal Display • •... -
Page 6: Inverter Safety
3. INVERTER SAFETY SAFETY INSTRUCTIONS International safety regulations have been strictly observed in the design and testing of the inverter. Before beginning any work, carefully read all safety instructions, and always observe them when working on or with the inverter. The installation must follow all applicable national or local standards and regulations. - Page 7 During operation, only the LCD and buttons should be touched. DISCLAIMER EG4 reserves the right to make changes to the material herein at any time without notice. Please refer to www.eg4electronics.com...
-
Page 8: Packing Lists
4. PACKING LISTS The items listed below will arrive with each product shipment: 12kPV:... -
Page 9: Location Selection And Installation Tools
5. LOCATION SELECTION AND INSTALLATION TOOLS 5.1 REQUIREMENTS FOR INSTALLATION LOCATION 1. The mounting wall must be strong enough to bear the weight of the inverter. 2. Maintain the minimum clearance of 7.9 in. (200 mm) between the inverter and other components of the system to allow adequate heat dissipation. -
Page 10: Installing The Inverter
5.3 INSTALLING THE INVERTER The 12kPV is designed to be wall mounted using a wall mounting bracket. The mounting location must be a vertical, solid mounting surface, such as concrete or brick, and be able to withstand the weight of the unit. The surface must be made of non-combustible material. The slots on the mounting bracket can accommodate various stud spacings from 12 in. -
Page 11: Pre-Wire Steps And Wiring (Batt, Pv, Ac)
6. PRE-WIRE STEPS AND WIRING (BATT, PV, AC) 6.1 WIRE SIZING Reference the tables below for wire size and torque recommendations depending on the type of wire and connection. Battery Wire Sizing CABLE SIZE MAX. DISTANCE TORQUE VALUES 4/0 AWG (107 mm 10 ft. -
Page 12: Bms Communications
The battery will connect directly to the inverter (shown below) via an RS485 battery communications cable or a standard CAT 5, CAT 5e, or CAT 6 cable for closed loop communications with supported non-EG4 inverters using CAN bus protocol. The table below shows the communication protocol for the inverter. For battery specific pinouts, refer to the battery user manual. - Page 13 5 seconds and 5. release to enter the “Protocol Setting” menu. 6. Select the CAN Protocol. Select EG4/LUX for closed loop communications. 7. Change the master DIP switch back to address 1 for inverter communications. Reset the BMS to register the change. See image.
-
Page 14: Pv Connection
Once the steps above are completed, the system will be in the proper state allowing for registry changes. NOTE Steps listed in section 7 are for a single inverter. If using two or more inverters, refer to the EG4 ® 12kPV Connections & Paralleling Guide. -
Page 15: Account Registration
Contact the distributor to ensure the latest firmware files are applied. 9.1 INVERTER UPDATE VIA EG4 APP 1. Open the EG4 Electronics app on a mobile device and select the “DOWNLOAD FIRMWARE” button. 2. Select the correct inverter model, then select “DOWNLOAD” on the right-hand side to download the file to a mobile device. -
Page 16: Inverter Update Via Monitor Center
9.2 INVERTER UPDATE VIA MONITOR CENTER 1. Log in to the EG4 Monitor Center. Select “Maintenance” and then select “Remote Update”. ® 2. Choose the inverter needing the update by SN and select “Standard Update.” The Monitor Center will begin updating both firmware files for the inverter. The latest version of the firmware will be displayed in the bottom-right window. -
Page 17: Operation Guide
10. OPERATION GUIDE 10.1 OPERATION MODE AND FUNCTION Self-Consumption Mode Self-Consumption mode will be the default mode upon start-up. In this mode, the order of priority for powering loads is Solar>Battery>Grid. The order of priority for solar power usage is Load>Battery. Application Scenarios Self-Consumption mode will increase the consumption rate of solar power and reduce energy bills. - Page 18 Charge First Mode The order of priority for solar power usage will be Battery>Load>Grid. During the charge first period, loads are first supplied power from the grid. If there is excess solar power after charging batteries, the excess solar will power the loads along with grid power. Application Scenarios When users want solar power to charge batteries, and the grid is used to power loads.
- Page 19 AC Charge Mode AC charge mode Users can charge batteries with grid power when electricity prices are low, then use battery power run loads or export to the grid when electricity prices are high. Application Scenarios When users have a Time of Use (TOU) rate plan.
-
Page 20: Rapid Shutdown (Rsd)
For paralleled systems, the RSD needs only to connect to the master inverter. When the switch is engaged, it will shut down all inverters in parallel. NOTE: When using supported EG4 batteries in closed-loop communications with the inverter, the ®... -
Page 21: Lcd Display And Settings
10.3 LCD DISPLAY AND SETTINGS Users can wake up the LCD screen by simply pressing the Enter button. System status, real-time power, and daily/accumulated energy information can all be conveniently viewed on the inverter’s LCD screen. Additionally, users can also check the alarm and fault record on the display for troubleshooting. -
Page 22: Setting Parameters
Detailed System Information Click on the pie icon at the bottom of the screen to view the detailed real- time solar information, battery information, grid information, and load output information. 10.4 SETTING PARAMETERS Click on the gear icon at the bottom of the screen to get into the parameter setting page for the inverter. - Page 23 Charge Settings Operating Mode: Users can decide to use state of charge (SOC) or battery voltage (Bat V) to control charge and discharge logic depending on battery type. Bat. charge current limit (A): Users can set the maximum charge current. AC Charge: If users want to use grid power to charge their battery, then they can enable “AC Charge”...
- Page 24 Operating Mode: Users can choose “Use SOC %” or “Use Bat V” to control the battery discharge state. NOTE: When using EG4 batteries with the 12kPV inverter, it is recommended to set the cut- ® off SOC to 20% to maintain the 80% Depth of Discharge (DOD).
- Page 25 IMPORTANT: The following settings may need to be adjusted by the installer after installation. Consult with your installer/distributor before making any changes to avoid conflicting settings or damage to your system! Advanced Settings Grid type: The user can choose 240/120V or 220/208V.
-
Page 26: Operating Modes
LCD or remote monitor! 11. OPERATING MODES The EG4 12kPV can work in several different modes of operation: ® Self-Consumption Mode: The inverter will operate in a pre-set priority system. In this mode, •... -
Page 27: Self-Consumption Mode
11.1 SELF-CONSUMPTION MODE Ensure the inverter is in standby mode before making any changes to the system settings. Listed below are the combination of settings to achieve Self-Consumption Mode via the mobile app or monitoring website for single inverter operations. NOTE: Ensure settings match the below selections. -
Page 28: Battery Backup Mode
11.2 BATTERY BACKUP MODE Ensure the inverter is in standby mode before making any changes to the system settings. Listed below are the combination of settings to achieve Battery Backup Mode via the mobile app or monitoring website. NOTE: Ensure settings match the below selections. If any settings are missing from the list below, contact the distributor for more information regarding commissioning. - Page 29 8. Step 8 9. Step 9 10. Step 10 11. Step 11 12. Step 12...
-
Page 30: Grid Sell Back With Ac Couple
11.3 GRID SELL BACK WITH AC COUPLE Ensure the inverter is in standby mode before making any changes to the system settings. To achieve Grid Sell Back w/ AC Couple working mode, refer to the following settings. NOTE: Ensure settings match the below selections. If any settings are missing from the list below, contact the distributor for more information regarding commissioning. -
Page 31: Double Check All Wiring/Voltages/Amps
9. Step 8 10. Step 9 12. DOUBLE CHECK ALL WIRING/VOLTAGES/AMPS Once all settings are configured to achieve the desired mode, check all voltages at all available disconnects as an added safety step before outputting power from the inverter. Ensure all circuit breakers are open (off). -
Page 32: Inverter Troubleshooting
15. INVERTER TROUBLESHOOTING See the troubleshooting information in the tables below when encountering any faults and/or errors on the inverter. 15.1 VIEWING INFORMATION AND ALARM FAULT/RECORD Home Screen Touch the LCD screen to light it up if in sleep mode. The home page will appear on the display. Users will see a system overview diagram along with real-time information of each component such as battery SOC, battery charging/discharging... -
Page 33: Regular Maintenance
15.2 REGULAR MAINTENANCE Inverter Maintenance Inspect the inverter every 6 months to check for any damaged cables, accessories, or • terminals, and inspect the inverter itself. Inspect the inverter every 3 months to verify the operating parameters are normal and there •... - Page 34 Check if the wires on load terminal and grid Load terminal and grid terminal are wired EPS connect fault terminal are wired correctly. If the fault incorrectly or reversed persists, contact the distributor. Check if the PV string voltage is within the inverter specification.
- Page 35 Alarm on the LCD and Alarm List If the dot to the left of the fault item is yellow, the fault is active. When it is grey, it means the fault is inactive. Alarm List ALARM MEANING TROUBLESHOOTING Check if the communication cable pinout is correct, and if the correct battery brand is Bat com failure Inverter fails to communicate with battery...
- Page 36 Check whether each PV string is connected correctly. PV short circuit Inverter detected a short circuit in PV input Restart inverter. If the alarm persists, contact the distributor. Restart inverter. If the alarm persists, GFCI module fault GFCI module is abnormal contact the distributor.
-
Page 37: Troubleshooting Wi-Fi Module
16. TROUBLESHOOTING WI-FI MODULE 16.1 CENTER LIGHT FLASHING Why is the middle light for the Wi-Fi module flashing? After setting the right Wi-Fi password, all three lights should be on solidly. If it is still flashing, try the following: 1. Check to see if the Wi-Fi is connected and that the correct password has been entered. - Page 38 Step 2 After ~30 seconds, the dongle’s LED status will appear as shown below. • INV LED “OFF” • Network LED “Blinking” Module LED “ON” • Step 3 Connect the mobile device/PC to the dongle’s network. The network name will match the serial number (SN) on the outer shell of the dongle.
- Page 39 Step 5 Select the “Wifi Mode Select” option on the left-hand side of the screen. From here, select “AP and Station” and “save”. See image below. Step 6 Next, select the “AP Mode Setting” on the left-hand side of the screen. Enter the dongle’s SSID and select “save”.
- Page 40 Step 7 Navigate to the “Network Setting” page. Under “Network Connection 1 Setting”, enter the following data and save. Protocol: TCP Client • • Remote Port: 4346 • Server Address (IP or domain) 3.101.7.137 Under “Network Connection 2 Setting”, enter the following data and save. See image below. Protocol: TCP Server •...
-
Page 41: Eg4 10-Year Limited Warranty
EG4 shall not be liable for any direct or indirect loss of life, including but not limited to bodily injury, illness, or death arising from the misuse or mishandling of the product, whether caused by negligence or otherwise. - Page 42 C H A N G E L O G Version 1.2.1 • Updated warranty information • Added California Prop 65 label to safety section Version 1.2 • Modified safety information for consistency. • Changed verbiage throughout document for clarity. • Modified structure of document for readability. •...
- Page 43 Notes...
- Page 44 CONTACT US support@eg4electronics.com (903) 609-1988 www.eg4electronics.com...
Need help?
Do you have a question about the IV-8000-HYB-AW and is the answer not in the manual?
Questions and answers