Table of Contents
Advertisement
Quick Links
Advertisement
Table of Contents

Related Manuals for twin busch TW445P-H3-G


Summary of Contents for twin busch TW445P-H3-G
-
Page 2: Table Of Contents
Manual triplex 3-compartment car park lift TW445P-H3-G Table of contents 1. General information ..........................1 2. Identification of the instructions for use ....................1 3. Technical data ............................1 4. Modification of the product ........................2 5. Safety-related information ........................2 5.1 Safety instructions ............................ - Page 3 Manual triplex 3-compartment car park lift TW445P-H3-G 13.5 Parts description of the lift ........................37 Further attachment: EU Declaration of Conformity ⋅ TW445P-H3-G_4-Posts_Lifts_Manual_uk_00_20240730.pdf Version: -00, 30.07.2024...
- Page 4 Manual triplex 3-compartment car park lift TW445P-H3-G Important information: ASSEMBLY You can find the assembly video for this lift on https://youtu.be/pZYL4PSJ6-M YouTube: or scan the QR code. PRODUCT PRESENTATION You can find the product presentation video for this lift on YouTube: https://youtu.be/NQ_6uhnJjp0...
- Page 5 24/7 Service Center: Our 24/7 Self-Service Center is a mobile website designed for self-diagnosis of issues with your Twin Busch lift. Here, we provide an extensive video collection covering a wide range of relevant topics for your Twin Busch lift, from fine-tuning and maintenance to component replacement.
-
Page 6: General Information
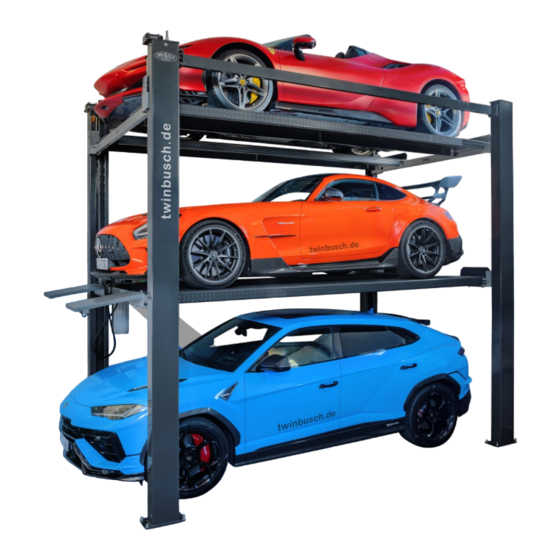
Manual triplex 3-compartment car park lift TW445P-H3-G 1. General information The TW445P-H3-G 4-post triple parking lift enables several vehicles to be parked in a small space and is suitable for private and commercial applications. It is CE-certified and complies with current safety standards. The TW445P-H3-G offers ample parking space for permanent parking or vehicle storage. -
Page 7: Modification Of The Product
Manual triplex 3-compartment car park lift TW445P-H3-G 4. Modification of the product Improper use, as well as modifications, conversions and attachments of the lift and all its components not agreed with the manufacturer are not permitted. The manufacturer will not accept any liability in the event of improper installation, operation or overloading. -
Page 8: Warnings And Symbols
Manual triplex 3-compartment car park lift TW445P-H3-G 5.2 Warnings and symbols All warning labels are clearly visible on the lift to ensure that the user uses the equipment in a safe and appropriate manner. The warning signs must be kept clean and replaced if they are damaged or missing. Please read the signs carefully and memorise their meaning for future operations. - Page 9 Manual triplex 3-compartment car park lift TW445P-H3-G Use only on level ground! When engaging on parking space 3 (top floor), make sure that all 4 latches are hooked Load specifications: SP1 - unlimited Check and lubricate ropes SP2 - 2500 kg...
-
Page 10: Conformity With The Product
Manual triplex 3-compartment car park lift TW445P-H3-G 6. Conformity with the product The TW 445P-H3-G 4-post lift is CE-certified and compliant with the Machinery Directive 2006/42/EC fulfilling the standards EN 14010:2003+A1:2009, EN 60204-1:2018 (look at: EU Declaration of Conformity, at the end of the user manual). -
Page 11: Structure Of Lifting Platform
Manual triplex 3-compartment car park lift TW445P-H3-G 8. Structure of lifting platform 8.1 Before installation Tools and equipment required: ⋅ Suitable lifting tool for bulky and heavy components ⋅ Hammer ⋅ Phillips and slotted screwdriver ⋅ Allen key ⋅ Spanner attachments ⋅... -
Page 12: Draw In Positioning
Manual triplex 3-compartment car park lift TW445P-H3-G In some cases, the reverse orientation (right plan) is necessary, especially if the power supply is on the right and close to the control unit. Otherwise, we strongly recommend the conventional installation (left plan). -
Page 13: Assembly Instructions
Manual triplex 3-compartment car park lift TW445P-H3-G #1 main column #2 column #2 column #3 column Illustration: Arrangement of the four pillars 8.5 Assembly instructions 1) Remove the packaging. Read and understand the operating instructions before proceeding. 2) Remove the crossbars and put them to one side. Loosen the transport bolts and lift out the carriageway using a forklift truck. - Page 14 Manual triplex 3-compartment car park lift TW445P-H3-G Illustration: Aligning the crossbars The carriage must be unlocked by hand for insertion. Note: The arrow shows the point at which you need to press. This is followed by the second traverse for the upper carriageway. Insert the traverse into the column in exactly the same way as before and unlock the carriage.
- Page 15 Manual triplex 3-compartment car park lift TW445P-H3-G 9) Insert the transport crossbars at the front of the main column in the same order. First the crossbar that carries the lower carriageway and then the crossbar for the upper carriageway. Note: Remember to operate the unlocking mechanism by hand again.
- Page 16 Manual triplex 3-compartment car park lift TW445P-H3-G Illustration: Rear end of the carriageway Illustration: Front of the carriageway Illustration: Steel cable installation Page | 11 Misprints, errors and changes excepted.
- Page 17 Manual triplex 3-compartment car park lift TW445P-H3-G Large window Steel cable pulley under the safety holes Cylinder under running rail Main column Ramp 15) You can now insert the track into the rear crossbar and screw it in place. Illustration: Rear traverse 16) To connect the cables, you can open the cover of the unlocking mechanism on the right-hand pillar at the rear in the direction of travel.
- Page 18 Manual triplex 3-compartment car park lift TW445P-H3-G Illustration: Hydraulic hose 18) To insert the track straight into the traverse, place a rubber block underneath. This makes it easier to guide the track onto the traverse and screw it back into place.
- Page 19 Manual triplex 3-compartment car park lift TW445P-H3-G d) Now attach the control box to the retaining plate. e) Fit the complete motor unit with control box to the main pillar. f) Finally, connect the hydraulic hose to the platform. Illustration: Hydraulic hose connection 21) Now wire the control box (see appendix: wiring diagram).
- Page 20 Manual triplex 3-compartment car park lift TW445P-H3-G Illustration: Column cover 26) Now fit the access ramps and secure them with three screws each. Fit the roll-off protection at the end of the carriageway. Illustration: Access ramps Illustration: Roll-off protection plate 27) Mounting the upper crossbars a) We use a traverse lift to assemble the upper longitudinal traverses.
- Page 21 Manual triplex 3-compartment car park lift TW445P-H3-G Illustration: Limit switch at the top of the column Illustration: Limit switch on the column next to the motor 29) You can now put the lift into operation for the first time. Caution: Any air still present in the cylinders can cause the cables to tighten jerkily.
- Page 22 Manual triplex 3-compartment car park lift TW445P-H3-G In order to be able to bolt the first upper track, the corresponding traverse must be lifted at the rear and built underneath. Illustration: Second carriageway Then place the track and screw it on lightly.
-
Page 23: Checkpoints According To The Structure
Manual triplex 3-compartment car park lift TW445P-H3-G Illustration: Both carriageways Draining without weights takes some time. If there is still space in the oil tank, you can fill it up to the maximum line. 8.6 Checkpoints according to the structure Check Are the columns vertical to the floor? (90°) -
Page 24: Commissioning
Manual triplex 3-compartment car park lift TW445P-H3-G 9. Commissioning 9.1 Safety precautions a) If the safety devices are defective or show abnormalities, the lift must not be put into operation under any circumstances! b) Check that all connections of the hydraulic lines are tight and functional. If there are no leaks, the lifting process can be started. -
Page 25: Lifting And Lowering Process Flow Chart
Manual triplex 3-compartment car park lift TW445P-H3-G Description Function UP (turn left) Raising the lifting platform DOWN (turn right) Lowering the lifting platform LOCK button (push-button) Engage the upper parking space Switches the system off in an Emergency stop switch... -
Page 26: Operating Instructions
Manual triplex 3-compartment car park lift TW445P-H3-G 9.4 Operating instructions 9.4.1 Lifting process 1. Read and understand the operating instructions before starting work. 2. Connect the power supply and switch the main switch to ON. 3. Place the vehicle on the lift with the vehicle's centre of gravity in the middle. Apply the brakes on the vehicle and engage a gear after you have parked the vehicle at the target position to prevent accidental movements while the lift is travelling up or down. -
Page 27: Troubleshooting
10. Troubleshooting Please note: Do not hesitate to contact the expert staff at Twin Busch GmbH if you are unable to rectify a fault yourself. We will be happy to help you solve the problem. In this case, please document the fault and send us pictures and a precise description of the fault so that we can identify and rectify the cause as quickly as possible. - Page 28 Manual triplex 3-compartment car park lift TW445P-H3-G The pressure cannot The directional valve is dirty. Directional valve must be cleaned or replaced. be maintained after the lift has been The drain valve is blocked. The drain valve must be cleaned or replaced.
-
Page 29: Maintenance
Manual triplex 3-compartment car park lift TW445P-H3-G 11. Maintenance Regular maintenance of your lift will ensure a long and safe service life. Suggestions for maintenance intervals and the activities to be carried out are listed below. How often you service your lift depends on the ambient conditions, the degree of soiling and, of course, the stress and load on the lift. -
Page 30: Behavior In The Event Of An Incident
If the lift malfunctions, simple faults may be the cause. Use the following list for troubleshooting *). If the cause of the error is not listed or cannot be found, please contact the expert Twin Busch GmbH team. Never attempt to carry out repairs yourself, especially on safety devices or electrical system parts. -
Page 31: Appendix
Manual triplex 3-compartment car park lift TW445P-H3-G 13. Appendix 13.1 Lifting platform dimensions (Upper height depends on the height of the vehicle). Page | 26 Misprints, errors and changes excepted. - Page 32 Manual triplex 3-compartment car park lift TW445P-H3-G Page | 27 Misprints, errors and changes excepted.
-
Page 33: Foundation Requirements And Working Area
Manual triplex 3-compartment car park lift TW445P-H3-G 13.2 Foundation requirements and working area Requirements for the concrete: - Concrete C30/37 according to DIN 1045-2 (previous designation: DIN 1045 concrete B25). - The floor must be level and have a flatness of less than 5 mm/m. - Page 34 Manual triplex 3-compartment car park lift TW445P-H3-G Other requirements: - The surrounding soil must be suitable for the load, e.g. no sandy soils, etc. - Reinforcements in the concrete are not mandatory for proper use of the lift, but are recommended.
-
Page 35: Hydraulic Plan
Manual triplex 3-compartment car park lift TW445P-H3-G 13.3 Hydraulic plan 1. Hydraulic cylinder 2. Motor 3. Gear pump 4. Pressure relief valve 5. Directional valve 6. Cylinder 7. Drain valve 8. Throttle valve 9. Oil tank Motorised fan Capacitor box... -
Page 36: Circuit Diagrams
Manual triplex 3-compartment car park lift TW445P-H3-G 13.4 Circuit diagrams Page | 31 Misprints, errors and changes excepted. - Page 37 Manual triplex 3-compartment car park lift TW445P-H3-G main switch fuse breaker fuse breaker fuse breaker AC contactor 24V/AC motor 400V/AC transformer 230V/24V bridge rectifier EMG1 emergency stop button power lamp beeper key switch up/down lock button limit switch limit switch...
- Page 38 Manual triplex 3-compartment car park lift TW445P-H3-G Page | 33 Misprints, errors and changes excepted.
- Page 39 Manual triplex 3-compartment car park lift TW445P-H3-G Page | 34 Misprints, errors and changes excepted.
- Page 40 Manual triplex 3-compartment car park lift TW445P-H3-G Page | 35 Misprints, errors and changes excepted.
- Page 41 Manual triplex 3-compartment car park lift TW445P-H3-G control box relay board Page | 36 Misprints, errors and changes excepted.
- Page 42 Manual triplex 3-compartment car park lift TW445P-H3-G 13.5 Parts description of the lift Article description Spec. Quantity 1-2-3-4 Hexagon head screw M12*35 Hexagon head screw M12*35 Page | 37 Misprints, errors and changes excepted.
- Page 43 Manual triplex 3-compartment car park lift TW445P-H3-G Article description Spec. Quantity 1-2-3-4-C1 Hexagon head screw M14*45 Hexagon head screw M14*45 Hexagon head screw M14*40 Mother Washer Page | 38 Misprints, errors and changes excepted.
- Page 44 Manual triplex 3-compartment car park lift TW445P-H3-G Article description Spec. Quantity Hexagon head screw M10*35 Cross-head screw M4*25 Cross-head screw M4*12 Hexagon head screw M8*40 Washer Cross-head screw M5*10 Washer Anchor bolt M8*65 Heavy-duty anchor M16*220 Allen screw M12*15 Page | 39...
- Page 45 Manual triplex 3-compartment car park lift TW445P-H3-G Article description Spec. Quantity Heavy-duty anchor M16*220 Page | 40 Misprints, errors and changes excepted.
- Page 46 Notes...
Need help?
Do you have a question about the TW445P-H3-G and is the answer not in the manual?
Questions and answers