dji Dock 2 Operation Manual
Hide thumbs
Also See for Dock 2:
- Quick installation manual (154 pages) ,
- User manual (42 pages) ,
- Flight manual (113 pages)
Table of Contents
Advertisement
Quick Links
Advertisement
Table of Contents

Related Manuals for dji Dock 2


Summary of Contents for dji Dock 2
-
Page 2: Table Of Contents
Table of Contents 1. INTRODUCTION 1.1. Change of the Aircraft Operation Mode 1.2. Introduction to DJI Dock 2 1.3. Introduction to DJI FlightHub 2 2. REGULATION COMPLIANCE 2.1. USA REGULATIION COMPLIANCE 2.1.1. US Regulatory Framework 2.1.2. BVLOS Waivers 2.1.3. Manufacturer Support 2.2. - Page 3 6.3. Flight Control 6.4. Situational Awareness 6.5. FlyTo Task 6.6. Gimbal Control 6.7. Shooting Settings 6.8. Infrared Settings (Applicable Only to DJI Matrice 3TD Aircraft) 6.9. Manual RTH 6.10. Media File Upload 7. Media File Management 7.1. Photo and Video File Management 7.2.
- Page 4 This operation guidebook includes installation and deployment procedures, as well as step- by-step operation instructions, recommended workflows and parameters for FlightHub 2. By reading this manual, users can quickly grasp the usage methods of the DJI Dock 2, including mission plan, mission execution, remote manual control, media management,...
-
Page 5: Introduction
In March 2024, DJI unveiled the DJI Dock 2, which takes innovation a step further with a reduced footprint, extended flight time, high-precision surveying capabilities, and more. -
Page 6: Introduction To Dji Dock
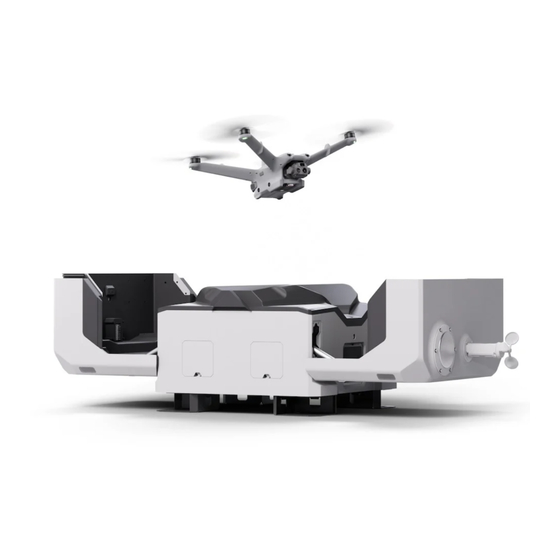
For those interested in the DJI Dock 2, this guidebook serves as a comprehensive tool to address key considerations for seamless integration, including regulatory compliance, hardware deployment, software configuration, drone data management, and device maintenance." 1.2 Introduction to DJI Dock 2 The more capable yet noticeably smaller DJI Dock 2 deploys Matrice 3D or 3TD drones with ease and security. - Page 7 Battery cycle count Integrated RTK module DJI Matrice 3D Series aircrafts come with two editions: DJI Matrice 3D and DJI Matrice 3TD. DJI Matrice 3D has a tele camera and a wide-angle camera with a mechanical shutter, meeting the needs of high-precision mapping tasks.
- Page 8 Click here or scan the QR code for specific parameters of DJI Dock 2 and DJI Matrice 3D Series aircraft.
- Page 9 1.3 Introduction to DJI FlightHub 2 DJI FlightHub 2 is a cloud-based management platform for DJI Dock 2 and supports flight task planning, device management, and cloud-based modeling for the dock. Users can configure flight task plans based on actual needs. The aircraft will automatically take off according to the preset task plans, and the media files will be automatically uploaded to DJI FlightHub 2 for cloud-based model reconstruction.
- Page 10 Remote Control With DJI FlightHub 2 or a third-party cloud platform, users can still use a keyboard and a mouse to control the flight behavior and gimbal angle of the aircraft even when the dock is deployed in a remote area.
-
Page 11: Regulation Compliance
In order to operate the DJI Dock 2 in BVLOS (beyond visual line of sight) scenarios, operators typically need to obtain special permissions or waivers from the relevant aviation authorities. -
Page 12: Usa Regulatiion Compliance
2.1 USA REGULATIION COMPLIANCE 2.1.1 US Regulatory Framework Part 107 rules for commercial operations in the US allow visual line of sight operation (VLOS) only according to 14 CFR §107.31. In order to fly beyond visual line of sight (BVLOS), a drone operator requires a waiver. -
Page 13: Manufacturer Support
FAA approval for BVLOS waivers using VO(s) up to 400 ft and standard shielding for both DJI Dock and DJI Dock 2. Waiver Safety Explanation documents are available for drone operators to use them for the preparation of their own waiver applications. -
Page 14: Eu Regulation Compliance
According to EASA Regulations (EU) 2019/947 and 2019/945, the DJI Dock 2, as an automated drone solution with remote pilot control, typically falls under the Beyond Visual Line of Sight (BVLOS) operations in the "specific category"... -
Page 15: What Is Sora
Submit a declaration based on a Standard Scenario (STS) Obtain an operational authorization following a Pre-Defined Risk Assessment (PDRA) Obtain an operational authorization following the Specific Operations Risk Assessment (SORA) procedure Acquire a Light UAS Operator Certificate (LUC) 2.2.2 What is SORA The SORA (Risk assessment of the intended operation) is the risk assessment methodology when conducting an operation not covered by a STS or a PDRA, applicants are required to conduct a risk assessment, identify mitigations and comply with safety objectives. -
Page 16: Manufacturer Support
However, BVLOS operations break this limitation, enabling drones to perform tasks over greater distances and in more complex environments. This is crucial for operating DJI Dock2. Below are the conditions required for executing BVLOS operations:... -
Page 17: Bvlos Standard Scenarios
To fly beyond visual line-of-sight (BVLOS), you must have: remotely piloted aircraft operator's certificate (ReOC) remote pilot licence (RePL) with either: a pass in the Instrument Rating or BVLOS exam operate under the direct supervision of an individual who holds a pass in one of the exams (refer CASA EX27/23) BVLOS flight authorisation. -
Page 18: Manufacturer Support
2.3.3 Manufacturer Support DJI, as the manufacturer, provides product-related documentation to assist end-users in preparing the SORA and Concept of Operations (ConOps), including: DJI Dock 2 user manual DJI Dock 2 maintenance manual DJI M3D Series –DJI Dock 2 BVLOS Operations: Safety Explanation... -
Page 19: Site Planning And Deployment
In the following section we provide the standard site selection and installation requirements to ensure the functional capabilities of the DJI Dock 2. Failure to select a site according to the requirements may lead to the malfunctioning of the dock, operational stability deterioration, shortening of the service life, unsatisfactory effects, potential safety hazards, property losses, and casualties. -
Page 20: Performing Flight Test
Avoid areas that are prone to water accumulation, severe erosion, landslides, heavy snow accumulation, or other natural disasters. Avoid installing the dock in areas with chemical plants or septic tanks upwind to prevent pollution and corrosion. If the dock is configured near coastlines, avoid installing in areas where the dock may be immersed in or splashed by seawater in order to prevent the corrosion of metal components. - Page 21 The installation of DJI Dock 2 consists of the following steps: Check the environment: Check the installation site and make sure it meets the environmental requirements of DJI Dock 2. For example, there should be stable mains supply and network conditions, no surrounding obstructions, and a strong satellite signal.
- Page 22 Make sure that the earthing resistance for the dock is less than 10 Ω. Complete base construction: Fix DJI Dock 2 on a base to raise the height of the dock, avoiding the risk of water immersion. Use a concrete base or a steel frame base.
-
Page 23: First Use
After the installation and set up process has been completed, you can proceed to bind the DJI Dock 2 to a DJI FlightHub 2 account. FlightHub 2 is an all-in-one cloud-based drone operations management platform that helps you achieve comprehensive, real-time situational awareness. - Page 24 Enter a name and description for the project.
- Page 25 ID and code as well as the project link and send them to members who want to join the project. DJI Dock 2 allows you to enable Weather-Related Flight Restriction. We recommend that you enable both Weather-Related Restriction on Cloud and Include Weather Forecast. After...
- Page 26 Administrators can enable livestream and media file sharing in Sharing Settings, and then send QR codes and links to members who want to view the livestreams and media files of the aircraft.
- Page 27 Administrators can add project members or adjust the roles of members. To view the permissions granted to each role, move the pointer over the exclamation mark next to the column name Role.
-
Page 28: Operating Area Management
4.3 Operating Area Management 4.3.1 Custom Flight Area If your flight areas are subject to certain restrictions, you can set custom flight areas. Click the Map Task Area icon. -
Page 29: Obstacle Data
4.3.2 Obstacle Data DJI Dock 2 allows you to import 3D models to set obstacle data, improving flight safety for aircraft. Based on the obstacle data, the aircraft can automatically plan an optimal flight... - Page 30 route to bypass obstacles along the flight route and ensure safe and quick arrival when performing FlyTo tasks or returning home.
-
Page 31: Aircraft Settings And Remote Debugging
4.4 Aircraft Settings and Remote Debugging After completing project and operating area settings, you still need to configure aircraft settings. Click Actions to go to the settings page. The settings include Beacons, Alternate Route Altitude, Max Flight Altitude, Max Flight Distance, Obstacle Sensing, Charging Mode, and Photo Transfer. - Page 32 Take note that aircraft settings can be modified only when Aircraft Status is set to On in the Remote Debugging window. After Remote Debugging is enabled, you can remotely restart the dock and aircraft.
-
Page 33: Automated Flight Workflow
Automated Flight Workflow DJI Dock 2 supports two flight modes: live flight controls and automated flight. This chapter describes the automated flight mode first. The automated flight workflow is as follows: Flight route planning -> plan settings -> task execution -> media file upload. -
Page 34: Area Route Planning
The first step of mapping is to select an operating area. Currently, two methods are available for mapping area planning. Manually draw a mapping area in DJI FlightHub 2 In the flight route library, click "+" in the top-right corner of the flight route list. Set Route Type to Area Route, select a model and the aircraft you want to use, and then click OK. - Page 35 Click on the map to draw a mapping area.
- Page 36 Create a mapping area by importing a KML file On the Map Annotations page, click the import icon. Select the WGS84 coordinate system and the altitude mode that is selected for creating the KML file to be imported. Disable Set Evaluation Value and Downsampling and upload the KML file.
- Page 37 5.1.1.2 Route Parameter Settings After setting the mapping area, configure the route parameters. Collection Method Select a collection method based on your actual needs. For 2D model reconstruction, select Ortho Collection. For high-quality 3D model reconstruction, select Oblique Collection. If quality requirements for 3D models are not high or no buildings or large altitude difference exists in the mapping area, you can also select the Ortho Collection mode to collect data more efficiently for 3D model reconstruction.
- Page 38 If you select Oblique Collection, we recommend that you enable Smart Oblique (supported for DJI Matrice 3D aircraft but not for DJI Matrice 3TD aircraft) to improve collection efficiency. After you enable Smart Oblique, the aircraft will fly along two mutually perpendicular s-shaped flight routes to photograph the mapping area from different angles in sequence.
- Page 39 In most cases, a safe takeoff altitude of 20 meters is sufficient. If there is a tall building near the installation site of DJI Dock 2, it is recommended to set the takeoff altitude to be at least 20 meters higher than the tall building.
- Page 40 Safe takeoff altitude higher than the altitude of the first waypoint Safe takeoff altitude lower than the altitude of the first waypoint Altitude Mode DJI Dock 2 supports three altitude modes.
- Page 41 Absolute Altitude: Set a flight altitude relative to the sea level. The aircraft will fly consistently at this altitude. Relative to Takeoff Point: Set a flight altitude relative to the takeoff point. The aircraft will fly consistently at this altitude. We recommend that you select Relative to Takeoff Point if the mapping area is flat.
- Page 42 In Above Ground Level mode, the aircraft adjusts its flight altitude to follow the terrain. In Absolute Altitude or Relative to Takeoff Point mode, the aircraft maintains a consistent flight altitude.
- Page 43 In the model library, click Import, upload an elevation model file, and then select the Display Model on Map once Imported. To upload an elevation data file generated by DJI Terra, upload the dsm.tif or gsddsm.tif file (gsddsm. tif is a downsampling file with a low resolution).
- Page 44 After uploading the file, go to the Map Models page, select the uploaded elevation model file, and then click the Load elevation data icon. Cloud-based model reconstruction in DJI FlightHub 2 (recommended): After a flight task along an area route is complete, you can use DJI FlightHub 2 to perform cloud-based...
- Page 45 model reconstruction, during which cloud computing power is utilized to generate a base map of the mapping area. Then, you can click the load icon in the map view to load the elevation data of the model. The model generated this way is based on the latest data, and therefore is more accurate than the built-in global elevation model.
- Page 46 Global Flight Speed If you use DJI Matrice 3D, we recommend that you set Global Flight Speed to the maximum allowed flight speed to improve task execution efficiency. In normal cases, the maximum allowed flight speed is 15 m/s.
- Page 47 Elevation Optimization When enabled, the aircraft will fly to the center of the mapping area and capture a series of tilt-angle photos after it finishes its flight task. The tilt-angle photos can help improve the accuracy of elevation data in the final model. We recommend that you enable this function. Advanced Settings In Advanced Settings, you can set the Side Overlap Rate/Forward Overlap Rate, Margin, Photo Mode, Custom Camera Angle, Route Start Point, and Bypass Obstacle parameters.
- Page 48 for example, an area with a flight altitude of 100 meters and a biggest altitude difference of less than 10 meters), you can decrease the side overlap rate to 60% to improve task execution efficiency. We recommend that you do not set the side overlap rate to a value less than 60%.
- Page 49 (3) Photo Mode Timed Interval Shot is used by default. In this mode, the aircraft can automatically adjust the shooting interval based on the resolution, flight speed, and forward overlap rate. You can change the shooting interval based on your needs. The shortest shooting interval is 0.7 seconds.
-
Page 50: Waypoint Route Planning
(5) Route Start Point Any of the four vertices of the flight route can be set as the route start point. These vertices are generated by the system to ensure optimal flight efficiency. The default start point of the flight route is the vertex closest to the takeoff point. We recommend that you use the default start point. - Page 51 Set a safe takeoff altitude. We recommend that you select Direct Ascent and set the safe takeoff altitude to be over 20 meters higher than nearby obstacles. Select an altitude mode. In most cases, we recommend that you select the ALT or AGL altitude mode and set a flight altitude based on your actual needs.
- Page 52 (especially for DJI Matrice 3TD aircraft, which are not equipped with mechanical shutters). To improve photo quality, we recommend that you set the flight speed to 10 m/s and then make adjustments according to the quality of the photos taken.
- Page 53 (b) If you are planning a patrolling flight route, which usually does not have a specific inspection target or has a moving inspection target, we recommend that you click the waypoint adding icon in the top-right corner of the map view and then click on the map to quickly add waypoints to generate a patrolling flight route based on your actual needs.
- Page 54 After editing the flight route, perform a safety check to ensure that a safe distance is kept between the flight route and the surrounding obstacles.
- Page 55 Set a gimbal tilt angle. After you plan a patrolling flight route, you need to set a gimbal tilt angle. At the first waypoint, click More and select Gimbal Tilt. The camera view in the bottom-right corner, coupled with the imported base map model, provides an immersive operation experience and allows you to quickly set an appropriate gimbal tilt angle.
- Page 56 Set an aircraft yaw angle. By default, the shooting angle of the aircraft is consistent with the flight route direction. If you want to adjust the shooting angle (for example, your aircraft is expected to fly along a river and take photos of the banks of the river), you need to adjust the aircraft's yaw mode first.
- Page 57 Set waypoint actions. If you want your aircraft to take photos all along the flight route, at the first waypoint, click...
- Page 58 More, select Start Timed Interval Shot, and then set an interval. At the last waypoint, click More and select End Interval Shot. Your aircraft will automatically shoot photos at the specified interval throughout the entire flight task. If you want your aircraft to take photos only at waypoints, press F on the keyboard to create shooting actions at the corresponding waypoints.
-
Page 60: Task Planning
During security patrolling flights, hovering is sometimes required for inspection. In this case, you can add the Hover action at the corresponding waypoints. The hovering duration can be set to 1 to 1,800 seconds. 5.1.3 Task Planning After flight route planning, you can create a task plan in the task plan library. - Page 61 Basic Settings Create a task plan, enter a plan name, and select a flight route and a device. Positioning Accuracy DJI Dock 2 supports two positioning modes: high-precision RTK and GNSS.
- Page 62 High-precision RTK: After takeoff, the aircraft will wait in the air until RTK data is converged before performing the flight task. This mode is recommended for mapping or detailed inspection tasks that require high accuracy. GNSS: The aircraft does not need to wait for RTK data convergence and can directly start performing the flight task after takeoff, with a shorter time of preparation.
- Page 63 Optimal RTH Route Planning If you enable this function, the aircraft will adjust the flight altitude (not the set RTH altitude) automatically to suit environmental factors such as the wind speed, wind direction, and obstacles when returning home. If the lighting is sufficient and the environment is suitable for the vision system to work properly or Obstacle Data is enabled, the aircraft will automatically plan an optimal flight route to improve task efficiency and preserve battery life.
-
Page 64: Task Execution
Signal Lost During Flight Set the action that you want the aircraft to perform if the image transmission signal is lost during a flight. For example, the image transmission signal may be blocked and lost after the aircraft flies over mountains. We recommend that you select Return to Home to ensure flight safety and data quality. - Page 65 Then, you can start the flight task. 5.1.4.2 Task Monitoring During the flight task, the console displays in real time the status of DJI Dock 2 and the aircraft as well as information such as alerts, meteorological information (wind speed, rainfall, and temperature), and flight information (battery level, searched satellites, flight altitude, and flight speed).
- Page 66 During the flight task, you can monitor the aircraft in real time. You can check the live camera view of the aircraft and the real-time location of the aircraft is displayed on the map. In special circumstances (for example, the aircraft needs to bypass obstacles in an emergency), you can click Aircraft Control in the control window to manually take over control of the aircraft.
- Page 67 After completing the task and returning to the dock, the aircraft automatically uploads the photos and videos shot during the flight to DJI FlightHub 2, where the media files will be categorized and archived based on task execution time. You can view and manage the media data on the cloud or download the data to your local device for viewing and management.
-
Page 69: Manual Flight Workflow
Manual Flight Workflow The manual flight workflow is as follows: pre-flight check -> one-click takeoff -> manual control of the aircraft -> RTH -> data upload. 6.1 Pre-flight Check Obtain control of the device. Go to the Online Devices panel and check the battery level and health status of the aircraft and whether the weather conditions are suitable for flying the aircraft. - Page 70 Set flight parameters. Click Flight Settings to set flight parameters.
-
Page 71: One-Click Takeoff
Task Altitude (ALT): The lowest altitude (relative to the takeoff point) of the aircraft when it performs FlyTo tasks. DJI FlightHub 2 will display a prompt when the aircraft's flight altitude is lower than the task altitude. RTH Altitude (ALT): The aircraft altitude relative to the dock when the aircraft is returning to the dock. - Page 72 You can monitor the takeoff progress in the live view of the security camera of the dock.
-
Page 73: Flight Control
6.3 Flight Control After takeoff, the aircraft ascends to the set task altitude. Then, you can control the flight of the aircraft using the keyboard. Control operations include: pressing W, S, A, and D keys to fly the aircraft forward, backward, leftward, and rightward, respectively;... -
Page 74: Situational Awareness
right; pressing C and Z keys to make the aircraft ascend and descend; double-clicking the left mouse button to adjust the aircraft yaw and gimbal tilt at the same time; and pressing the space bar to pause the flight. During operation, pay close attention to network latency. If the network latency is high, fly with caution. -
Page 75: Flyto Task
6.5 FlyTo Task When the destination is far away, you can create a FlyTo task. Right-click on the map to set a FlyTo destination. You can also set a marked point or a searched point as a FlyTo destination. After you set the FlyTo destination, a virtual flight route will be displayed on the map. -
Page 76: Shooting Settings
Press and hold the right mouse button and select a subject to zoom in. The camera in use will be switched from the wide-angle camera to the zoom camera when zooming in on the subject in the wide-angle view. 6.7 Shooting Settings Shooting Mode DJI Dock 2 supports four shooting modes: Record, Single, Smart, and Panorama. - Page 77 In Smart mode, the photo quality can be improved when the camera is in backlight or low ambient light (as shown in the following figures). Not in Smart mode:...
- Page 78 In Smart mode: Camera Parameter Settings You can set camera parameters such as the EV, focus mode, and focus distance. The EV setting is used to adjust the exposure compensation. The larger the EV value, the brighter the image. AFS and AFC are automated focus modes and do not require manual adjustment of the focus distance.
-
Page 79: Infrared Settings (Applicable Only To Dji Matrice 3Td Aircraft)
6.8 Infrared Settings (Applicable Only to DJI Matrice 3TD Aircraft) If you use DJI Matrice 3TD, you can click IR on the left side of the camera view to switch to the infrared camera. - Page 80 IR Palette After switching to the infrared camera, you can select a desired palette.
- Page 81 Temperature Measurement The infrared camera supports temperature measurement in two modes. In Spot Temperature Measurement mode, click any point in the camera view to measure the temperature at the point. Click the area measurement icon at the bottom of the camera view to enter the Area Temperature Measurement mode.
- Page 82 High Temperature Alarm If you enable the High Temperature Alarm function and specify an alert threshold, an alert is triggered when the temperature measured is higher than the threshold.
- Page 83 Gain Mode Infrared temperature measurement supports two gain modes: high-gain and low-gain. High-gain mode provides higher temperature measurement accuracy and supports a temperature measurement range of -20 to 150 ℃ . If you need a wider range, switch to low-gain mode, which provides a lower accuracy but supports a larger temperature measurement range (0 to 500 ℃...
-
Page 84: Manual Rth
RTH mode and RTH altitude that are set in flight settings before takeoff. 6.10 Media File Upload After the manual flight task is complete, the photos and videos shot during the flight are automatically uploaded to DJI FlightHub 2 and named in the "FLY-TO + time" format. -
Page 86: Media File Management
The media files including photos and videos generated during flight tasks are automatically saved in the folders named after the corresponding tasks. You can view and download the media files in the media library of DJI FlightHub 2. Media resource preview and markup Click a photo to enter the preview mode. - Page 87 After you mark up a photo, a tag is added to the photo details. The tag allows you to quickly find the photo. Tag generated after photo markup...
- Page 88 You can share the links and QR codes of media files generated by aircraft with other users. Then, the users can view the files without the need to register a DJI FlightHub 2 account. You can share a single file or an entire folder.
-
Page 89: Cloud-Based Modeling
7.2 Cloud-Based Modeling DJI FlightHub 2 is integrated with the same engine as DJI Terra and utilizes cloud computing power to convert data collected by aircraft during area route flights into 2D or 3D models. In the model library, click Start Mapping. - Page 90 Select a mapping type. Select 2D Mapping or 3D Mapping based on your actual needs. 2D models are in DOM and DSM formats. 3D models are in the B3DM format. Note: If quality requirements for 3D models are not high, data collected in Ortho Collection mode can also be used for 3D model reconstruction.
-
Page 91: Model Application
0.5. In rare cases where model quality requirements are extremely high, the value can be set to be higher than 0.5. 7.3 Model Application After model reconstruction is complete, you can use DJI FlightHub 2 for 2D model comparison and model marking. 2D Model Comparison... - Page 92 function is suitable for scenarios such as geological disaster detection and engineering progress management. Select a target model and click the Compare icon. The target model is automatically compared with historical models that have overlap rates of higher than 10% with the target model. Drag the button in the center to compare the models in rolling shutter mode.
- Page 93 Model Marking DJI FlightHub 2 allows you to mark points, lines, and areas in models. Click the icons in the top-right corner to add marks. For example, in a geological model, you can mark objects such as water lines, cracks, and...
- Page 94 Graph of water line changes Display of cracks marked during multiple flight tasks...
- Page 95 Vegetation marking and area measurement...
-
Page 96: Open Ecosystem
Developers can utilize the open software and hardware interfaces provided by DJI Dock 2 as well as the development tool provided by DJI to develop versatile applications and solutions based on their experience in the industry, facilitating large-scale and normalized application of DJI Dock 2 in various industries. -
Page 97: Flighthub Synchronization
After the corresponding configuration is complete in DJI FlightHub 2, media files can be directly uploaded to a third-party public cloud platform for data processing and application. This significantly reduces development costs. -
Page 98: Edge Computing
For some DJI Dock 2 application scenarios where business data needs to be preprocessed at the edge, DJI provides the Edge SDK, which allows edge computing devices to be installed on the dock. This way, more powerful computing power is used to implement functions such as data filtering, AI recognition, and video processing with lower latency in a more efficient manner. -
Page 99: Third-Party Payloads
8.4 Third-Party Payloads DJI Matrice 3D and DJI Matrice 3TD aircraft are equipped with an E-Port interface and can be connected to third-party payloads such as speakers and searchlights to implement more functions. Operators can remotely control the connected third-party payloads in DJI FlightHub 2. -
Page 100: Device Maintenance
Make sure to perform maintenance in accordance with the steps and requirements in the DJI Dock 2 – Maintenance Manual. Precautions before maintenance: Measure the voltage on the contact points of the conductors and make sure there is no risk of electric shock before touching any conductor surfaces or terminals. - Page 101 another location to install the dock if the signal obstruction becomes strong. Firmware update and system calibration: Update the firmware of the dock, aircraft, and Intelligent Flight Battery to the latest version for optimal user experience. We recommend that you perform aircraft calibration every six months to keep the aircraft in good condition.
- Page 102 DJI may adjust the above maintenance services accordingly in different areas. Please contact authorized dealers or DJI Support for the latest information. If the dock is installed in harsh environments, including but not limited to sandy or dusty environments, environments with high salinity, high temperature, or high humidity,...
- Page 103 List of maintenance tools:...
- Page 104 List of easily worn parts and recommended replacement intervals: Replace parts that can be easily damaged and worn in time to keep the dock and aircraft in good condition and reduce flight safety risks.
- Page 105 enterprise.dji.com...
Need help?
Do you have a question about the Dock 2 and is the answer not in the manual?
Questions and answers