Proceq Pundit Lab Operating Instructions Manual
Ultrasonic instrument
Hide thumbs
Also See for Pundit Lab:
- Operating instructions manual (17 pages) ,
- Operating instructions manual (20 pages)

Related Manuals for Proceq Pundit Lab


Summary of Contents for Proceq Pundit Lab
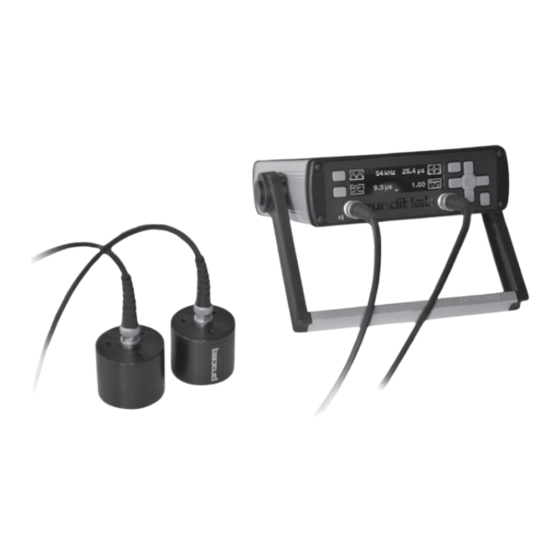
- Page 1 Operating Instructions Pundit Lab / Pundit Lab Ultrasonic Instrument ... more than 50 years of know-how you can measure! Made in Switzerland Made in Switzerland...
-
Page 2: Table Of Contents
Conversion Curves Pundit Lab Remote Control Interface Standards and Guidelines Pundit Lab complies with the following standards: EN 12504-4 (Europe), ASTM C597-02 (North America), BS 1881 Part 203 (UK), ISO1920-7:2004 (International), IS13311 (India), CECS21 (China) © 2017 by Proceq SA... -
Page 3: Safety And Liability
1.2. Liability and warranty Proceq’s “General Terms and Conditions of Sale and Delivery” apply in all cases. Warranty and liability claims arising from personal injury and damage to property cannot be upheld if they are due to one or more of the following causes: •... -
Page 4: Getting Started
Oscilloscope Batteries USB – PC / Power Supply The Pundit Lab can be powered by batteries, by the mains or by the USB connection to a PC. Front Panel The soft keys are context sensitive. The display icon shows the active function. - Page 5 Zeroing the Pundit Lab The Pundit Lab should be zeroed using the calibration rod on a regular basis and in particular if the transducer frequency is changed or if the cables are changed. The expected calibration value (µs) is marked on the calibration rod.
-
Page 6: System Settings
Automatic Gain and Voltage Setting The excitation voltage and the receiver gain can both be set to automatic. In this mode the Pundit Lab finds the optimum combination of the two parameters for a stable measurement. © 2017 by Proceq SA... - Page 7 (Refer to ASTM D 2845 - Standard Test Method for Laboratory Determination of Pulse Velocities and Ultrasonic Elastic Constants of Rock.) It also allows non-standard transducers up to 500 kHz to be used with Pundit Lab: Pulse width “p” in microseconds (µs) to be entered here is calculated from the formula...
-
Page 8: Viewing The Waveform
4. Viewing the Waveform While carrying out the measurements described in the following chapter it is possible to view the received waveform. Pundit Lab offers three possibilities to look at the waveform. Oscilloscope Connect an oscilloscope to the connector on the rear panel. A typical waveform will look like... -
Page 9: Measuring With Pundit Lab
The location of rebars should be determined using a rebar locator such as Proceq's Profoscope and ultrasonic tests should be positioned so as to avoid them. BS 1881 Part 203 gives information on the effect of rebars on the expected results. -
Page 10: Basic Measurements
Save into a file defined by an ID number. Do not save and return to the previous screen. Review List (Pundit Lab only) From the main menu, clicking on the system information key (See getting started) brings up a sub menu: Select this to key to display the system information. -
Page 11: Basic Measurement - Pulse Velocity
Adjust the gain settings. (See Chapter 3) or: Start a new measurement * Best results are obtained when the received signal level is around 75%. Use the automatic gain and voltage settings (See Chapter 3) for optimized performance. © 2017 by Proceq SA... -
Page 12: Basic Measurement - Waveform Display
Note 1: Rx gain may need reducing for vertical zoom to have a noticeable effect. Note 2: Once adjusted, trigger point does not reset automatically unless a new measurement is started in the menu “Start the measurement” Note 3: The waveform is not saved, only the transmission time. © 2017 by Proceq SA... -
Page 13: Basic Measurement - Path Length
- Transmission time - Measured path length - Received signal level Stop the measurement (Not necessary in burst mode) Save the result or: Adjust the gain settings. (See Chapter 3) or: Start a new measurement © 2017 by Proceq SA... -
Page 14: Basic Measurement - Compressive Strength (Pundit Lab+ Only)
5.6. Basic Measurement – Compressive Strength (Pundit Lab only) Prior to carrying out this measurement, a conversion curve must be created in PunditLink and uploaded to the instrument. Up to five curves may be stored on the instrument. Select the appropriate curve and set the desired compressive strength unit. -
Page 15: Compound Measurement - Surface Velocity
“t2” is measured. Stable reading is indicated by a tick and result screen is displayed. The display shows: - “t1” - “t2” - Surface velocity Save the result or press start to repeat the measurement. © 2017 by Proceq SA... -
Page 16: Compound Measurement - Perpendicular Crack Depth
“t2” is measured. Stable reading is indicated by a tick and result screen is displayed. The display shows: - “t1” - “t2” - Crack Depth Save the result or press start to repeat the measurement. © 2017 by Proceq SA... -
Page 17: Minimum Dimensions
(speed of sound) in concrete. The table below shows typical ag- gregate sizes and the corresponding maximum recommended frequency, respectively: c (m/s) 3500 4000 4500 aggregate size (mm) fmax (kHz) © 2017 by Proceq SA... -
Page 18: 250 Khz Shear Wave Transducers
Since the latter is always preceded by a relatively weak longitudinal echo (see Figure below), the transit time determined by Pundit Lab, would correspond to the longitudinal instead of the shear wave. -
Page 19: Transducer Holder Accessory
5v, <500mA directly via USB cable Mechanical Dimensions 172 x 55 x 220 mm Weight 1.3 kg (incl. batteries) Environmental conditions Operating temperature -10° to 60°C (0° to 140°F) Humidity <95% RH, non condensing IP Classification IP42 © 2017 by Proceq SA... -
Page 20: Part Numbers And Accessories
7.1. Units Part No. Description 326 10 001 Pundit Lab consisting of: Display unit, 2 transducers (54kHz), 2 BNC cables 1.5 m, couplant, calibration rod, battery charger with USB-cable, 4x AA(LR6) batteries, data carrier with software, documentation and carrying case... -
Page 21: Maintenance And Support
Support Concept Proceq is committed to providing a complete support service for this instrument by means of our global service and support facilities. It is recommended that the user register the product on www.proceq.com to obtain the latest on available updates and other valuable information. -
Page 22: Pundit Link
The menu item “File – Application settings” allows the user to select the language and the date and time format to be used. Connecting to a Pundit Connect the Pundit to a USB port, then select one of the following options: © 2017 by Proceq SA... -
Page 23: Viewing The Data
• The “Name” column allows the user to assign a name for the measurement object. • The “Date and time”. For Pundit Lab this is the time when the data is downloaded on to the PC, or in “Live view” mode, the date and time when the measurement was made. For Pundit Lab it is the date and time when the measurement was made. -
Page 24: Adjusting The Settings
Right click in the “Date & Time” column. The time will be adjusted for the selected series only. Please note, the Pundit Lab does not have an internal clock, so the date and time displayed for downloaded data, is the time at which it was downloaded. -
Page 25: Exporting Data
In both cases, the preview window shows the effects of the current output selection. Finish by clicking on export to select the file location, name the file and in the case of a graphi- cal output to set the output graphic format: .png, .bmp or .jpg © 2017 by Proceq SA... -
Page 26: Deleting And Restoring Data
“Save project” icon – Allows you to save the current project. “Print” icon – Allows you to print out the project. You may select in the printer dialog, if you want to print out all of the data or selected readings only. © 2017 by Proceq SA... -
Page 27: Live View
9.7. Live View Pundit Lab allows you to remotely control the Pundit Lab and to view the waveform directly on the PC screen. Click on the “Live view” icon. If you are not already connected to the Pundit, the connection sequence will be initiated. (See 9.1). The “Live view” window will be displayed. - Page 28 Recording time set to 0.5 ms e.g. Recording time set to 5ms Setting the trigger point manually Pundit Link gives the user the option to set the trigger point manually. See the example below. Trigger point capture automatically. © 2017 by Proceq SA...
- Page 29 The Data Logging mode allows the user to program a test sequence. Interval – between measurements. Number of events – until the test is completed. Readings per event – how many measurements are made in each interval. © 2017 by Proceq SA...
-
Page 30: Conversion Curves
Live mode The live mode allows the user to test with or without recording the data. In continuous mode, the Pundit Lab begins measuring as soon as “Start” is pressed and continues until “Stop” is pressed. If a limited number of readings only is required, this may also be set. -
Page 31: Pundit Lab Remote Control Interface
Pundit Lab 10. Pundit Lab Remote Control Interface The Pundit Lab interface is completely open for those users who do not wish to use the PunditLink software but instead wish to integrate Pundit Lab into the software they use in the laboratory such as LabVIEW.
Need help?
Do you have a question about the Pundit Lab and is the answer not in the manual?
Questions and answers