
Related Manuals for Proceq Equotip Piccolo 2


Summary of Contents for Proceq Equotip Piccolo 2
-
Page 1: Operating Instructions
Operating Instructions Portable Metal Hardness Tester Piccolink Software (only for Piccolo 2) U.S. Patent No. 8,074,496 ... more than 50 years of know-how you can measure! Made in Switzerland Made in Switzerland... -
Page 2: Table Of Contents
6. Advanced Settings 6.1. Using the DL Accessory Kit 6.2. Shore Conversion Standard 6.3. Lock Settings (Equotip Piccolo 2 only) 6.4. Fixed Number of Impacts (Equotip Piccolo 2 only) 6.5. Impact Counters (Equotip Piccolo 2 only) 7. Data Evaluation 7.1. Statistics 7.2. - Page 3 10. Maintenance and Support 10.1. Regular Device Checks 10.2. Firmware Update 10.3. Cleaning 10.4. Storage 10.5. Updating the Equotip Piccolo 2 / Bambino 2 Device Firmware 11. Troubleshooting 11.1. Battery 11.2. Empty Display 11.3. Reset 11.4. Incorrect Measurements or failed Performance Check 11.5.
-
Page 4: Equotip Piccolo 2
1.2. Liability and Warranty Proceq’s “General Terms and Conditions of Sale and Delivery” apply in all cases. Warranty and li- ability claims arising from personal injury and damage to property cannot be upheld if they are due to one or more of the following causes: •... -
Page 5: Tutorial
(0.04 inch), the impact body is released. • After the last impact of a series, press the key repeatedly to display the hardness average and, in case of the Equotip Piccolo 2, further statistics of the measurement. © 2016 by Proceq SA... -
Page 6: Testing Light Samples
When concave or convex surfaces are tested, the impact body either does not en- tirely leave the test tube or comes out too far. Replace the standard support ring by a specially suited ring to do the testing (see “Accessories” or contact your local Proceq representative). © 2016 by Proceq SA... -
Page 7: Overview
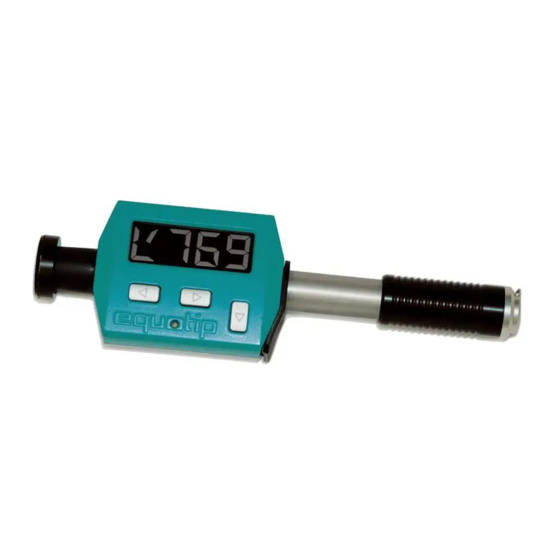
3. Overview The Equotip Piccolo 2 / Bambino 2 is used for testing the hardness typically of metallic surfaces. The tester measures the Leeb hardness HLD (HLDL with DL Accessory Kit), employing the rebound method. As a result of its compact design, measurements can be carried out quickly, on the spot and in any position and direction. -
Page 8: Device Overview
Navigates to the next menu option. • Navigates to the next menu level. «MENU» • Confirms selection in resp. menu level. «CANC» & «MENU» for at least 2 seconds • Enter advanced settings menu © 2016 by Proceq SA... -
Page 9: Basic Settings
3.5. Basic Settings © 2016 by Proceq SA... -
Page 10: Programming Advanced Settings
3.6. Programming Advanced Settings © 2016 by Proceq SA... -
Page 11: Getting Started
4. Getting Started 4.1. Power on/off The instrument is always ready for operation. To switch on the Equotip Piccolo 2 / Bambino 2, simply press a key or load the device and trigger an impact, as described in “Testing procedure”. The instru- ment displays the value as shown before shutting down. -
Page 12: Performance Check
The average setpoint hardness of the block is engraved in the block surface. The measured aver- age shall coincide with the target range. Congratulations! Your new Equotip Piccolo 2 / Bambino 2 is fully operational and you can now con- tinue with your measurements. -
Page 13: Settings
5. Settings When starting up after reset or battery depletion, the Equotip Piccolo 2 / Bambino 2 is at the Impact menu level and set to the default settings (hardness scale HLD / HLDL with impact direction cor- rection and single readings). To adjust the settings, press the key to enter the Conversion menu level. - Page 14 Equotip Piccolo 2 / Bambino 2 with impact body D: Rm * Material group 1 Steel and cast steel Tensile strength σ 1 271- 2193 Tensile strength σ 2 619- 1477 Tensile strength σ 3 451- 2 Cold worktool steel...
-
Page 15: Compensation Of Non-Vertical Impact Direction
The effect from impact directions that deviate from vertically down is always automatically compen- sated when displaying converted scales (i.e. HV, HB, HRC, HRB, HS, and, for Equotip Piccolo 2, also Rm). When displaying HLD / HLDL, the user can choose for or against automatic compensation: •... -
Page 16: Advanced Settings
Use the keys or to browse through this menu, and confirm with the key to enter one of the following setting submenus: 6.1. Using the DL Accessory Kit The Equotip Piccolo 2 / Bambino 2 can be used either with impact body D (standard) or with impact body DL (available as accessory), respectively: •... -
Page 17: Lock Settings (Equotip Piccolo 2 Only)
The number of impacts can also be set using Piccolink. 6.5. Impact Counters (Equotip Piccolo 2 only) The Equotip Piccolo 2 features two independent impact counters: • The measurement counter can be controlled by the user through Piccolink (see the Piccolink part of this manual). -
Page 18: Data Evaluation
The measurement series is automatically completed when n = 99 is exceeded. The following measurement is the first value of a new measurement series. 7.2. PC Application Software Piccolink (Equotip Piccolo 2 only) More Equotip functionality is available through the Piccolink software (see “Piccolink Software”). -
Page 19: Technical Specifications
ASTM A 370 • ISO 16859 • DIN 50156 • GB/T 17394 JB/T 9378 • ASME CRTD-91 • DGZfP Guideline MC 1 • VDI / VDE Guideline 2616 Paper 1 • Nordtest Technical Reports 424-1, 424-2, 424-3 © 2016 by Proceq SA... -
Page 20: Part Numbers And Accessories
352 10 001 Equotip Piccolo 2 Hardness Tester, unit D Equotip Piccolo 2 device with impact body D, small (D6a) and large (D6) support rings, cleaning brush, USB charger and cable, carry case, Proceq neck / wrist strap (lanyard), Equotip CD with Piccolink software and product documentation,... -
Page 21: Maintenance And Support
±6 HLD / HLDL, see section “Troubleshooting”. 10.2. Firmware Update The device firmware of the Equotip Piccolo 2 / Bambino 2 can be updated using the PqUpgrade PC software. 10.3. Cleaning •... -
Page 22: Troubleshooting
In the “Device search result and selection” dialog box, make sure the serial number of the device in the drop-down field is the device to be updated, and then click “Next”. • PqUpgrade will now search the Proceq servers for any available firmware updates. • Follow the on-screen instructions to finish the update. -
Page 23: Incorrect Measurements Or Failed Performance Check
3. Check the mounting and wear of the support ring. Check for deposits. Clean or replace if necessary. 4. If the instrument still shows excessive deviations: return the device to an authorized Proceq service centre for recalibration / inspection. •... -
Page 24: Piccolink Software (Only For Piccolo 2)
The subject of the license is the software that Proceq dispatches to the customer by electronic means, in the version as sent and in the form as received by the customer. Proceq accepts no responsibility for any properties of the software, either general or in terms of its suitability for any particular purpose. -
Page 25: Installing The Usb Driver
Logo testing. Click “Continue Anyway”. 2.3. Establishing Connection between Device and Computer • Connect the Equotip Piccolo 2 / Bambino 2 device to the computer using the USB cable. • The following messages are displayed when the device is first connected to the computer: Piccolink is now ready to communicate with the device. -
Page 26: Using The Piccolink Software
Most of the functions like “Save” , “Open“ and “Print” can be used analogously to the correspondent functions in most other Microsoft Windows applications. © 2016 by Proceq SA... -
Page 27: Editing Data
It can be pasted directly into an excel sheet. 3.6. Remote Control Equotip Piccolo 2 devices can be controlled remotely through Piccolink’s Remote Control section. © 2016 by Proceq SA... -
Page 28: Lock Device
Use the symbol in the Remote Control section, or access the “Device Settings” dialog through the “Device” menu to lock / unlock the Equotip Piccolo 2 device keys. Note: The device can also be (un-)locked using the “Advanced Settings” menu in the Equo- tip Piccolo 2 device. -
Page 29: Device Settings
Sample surfaces must be prepared very carefully. If possible, samples shall be of a size which makes coupling to a support base unnecessary. • The functioning of the Equotip Piccolo 2 device shall be verified against the Equotip test block prior to each measurement series. •... -
Page 30: Shore Conversion Standard
+ 12 HB. This curve can be found when selecting the “HB Brinell” scale and material group “6.1 Alu-AN40 (ABB)”. Note: User-defined conversions can be accessed on the Equotip Piccolo 2 through the op- tion in the selection menu of the hardness scale, see the device manual. -
Page 31: Troubleshooting
5.1. Uninstall default Drivers to install supplied USB Drivers The Piccolink software and the USB driver must be installed before the Equotip Piccolo 2 can be con- nected to the computer. If the Equotip Piccolo 2 has been connected to the computer before install- ing the supplied USB driver, default drivers may need to be uninstalled before installing Piccolink: •... - Page 32 Unit B, 19th Floor Five Continent International Mansion, No. 807 Zhao Jia Bang Road Shanghai 200032 Phone +86 21-63177479 +86 21 63175015 info-china@proceq.com www.proceq.com Subject to change without notice. Copyright © 2016 by Proceq SA, Schwerzenbach Part number: 82035201E Made in Switzerland...
Need help?
Do you have a question about the Equotip Piccolo 2 and is the answer not in the manual?
Questions and answers