
Subscribe to Our Youtube Channel
Related Manuals for Ochsner Europa Mini EWP


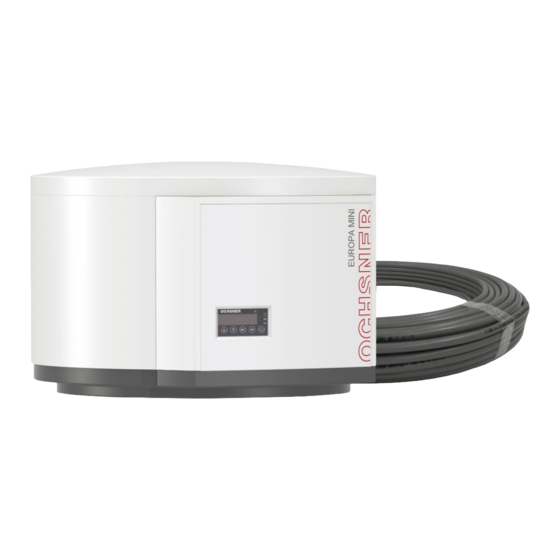
Summary of Contents for Ochsner Europa Mini EWP
- Page 1 Operating Instructions / Installation Instructions Europa Mini EWP Hot water heat pump BA_Europa Mini EWP_CC_EN_20160726_V06 1 / 32...
- Page 2 BA_Europa Mini EWP_CC_EN_20160726_V06 2 / 32...
-
Page 3: Table Of Contents
Contents NOTES ON THE DOCUMENTATION ..... 4 MALFUNCTION TABLE HEAT PUMP ....16 GUARANTEE ............4 MAINTENANCE ..........17 SAFETY INSTRUCTIONS ........4 .......... 17 ERVICE INTERVALS ..........17 ALFUNCTIONS CE L ..........5 ABELLING ......... 17 USTOMER ERVICE DESCRIPTION ............. 5 ANNEX ............. -
Page 4: Notes On The Documentation
2 Guarantee turer. All OCHSNER heat pumps carry a guarantee of 24 months, if the installation and operating instruc- All circuit breakers in the heating sys- tions are adhered to. -
Page 5: Ce Labelling
Before in- which small amounts of hot water are to be drawn stalling the EUROPA MINI EWP, check to see if the off, such as kitchens, etc. A circulation ring-pipe existing tank (if any) is sufficiently large to cover the should not be installed in order to avoid continuous short-term water consumption. -
Page 6: Heat Source Connection (Wqa)
4.5.1 Ground collector ground collector(s). Avoid frequent bending as this leads to breakage risks. The Europa Mini EWP heat pump may only be connected to ground collectors The installation is varied and dependent on the rel- which are filled with R 407C refrigerant. -
Page 7: Wall Ducting
NOTE: The construction of wall duct- The pipework must be installed at least 1.5m away ing is NOT part of OCHSNER's scope from water pipes and 1 m away from channels. If of performance. Responsibility for any layout is parallel to a building, it should be sepa- damage which may be caused by in- rated by approximately 1.2 m. -
Page 8: Connecting Pipework
5 K (flow - return). OCHSNER accepts no liability for this. 4.6.2 Connecting pipework Connection work requiring opening the connection panel is to be carried As the residual head for the connection to the water... -
Page 9: Commissioning
By strongly fluctuating water temperatures as well 5 Commissioning as high water temperatures (δ > 60°C), we recom- mend a yearly inspection by OCHSNER factory Commissioning must be carried out customer service. exclusively by an authorised firm! When decalcifying the system, adhere to the fol-... -
Page 10: Impact Water Condition
< 1 Within 5 hrs. nected from 220-240VAC 50Hz power supply. > 5 Hydrogen sulphide (H < 0,05 No limit OCHSNER accepts no liability or warranty for > 0,05 blocked charge pumps. Free (aggressive) < 5 Carbon Dioxide (CO 5-20 No limit >... -
Page 11: Input
5.5 Configuring the sensor input as switching input 2 variants are available for regulating the heat pump. The operation mode “sensor” is the factory setting. a) Regulation via sensor on input “F1“ b) Regulation via switching input on input “F1 “ - The switching contact must be suitable for electronic switching. -
Page 12: Operation
6 Operation The heat pump is monitored and regulated by means of a digital regulation apparatus. The user has for this display units and operating elements at his disposal, via which the data can be set and called up. The user can set an “operation selection“ as well as “set values“ OPERATION SELECTION Heat pump AUTOMATIC... -
Page 13: Settings
6.1 Settings Switching heat pump ON/OFF LED off: Heat pump switched off LED blinks: Heat pump running LED lit: Heat pump switched off - Standby operation The set value S1 has been reached See Point. 3 The compressor stand-still interval (20 minutes) is activated Keep button pressed for min. -
Page 14: Setting The Legionella Function
6.2 Setting the Legionella function A one-off DHW heating, which will be started at adjustable intervals (days) t1, can be programmed into the control. Here, the DHW will be heated by the heat pump up to a set value S2. Should the set value not be reached within 4 hours, the heat-up cycle will be stopped by the program. -
Page 15: Error Messages In Control Display
- Switch off power and switch back NOTE: Loss of data in EP error results from faulty grid qual- parameter memory ity. OCHSNER accepts no liability for this. Table 4: Error reports on control display BA_Europa Mini EWP_CC_EN_20160726_V06 15 / 32... -
Page 16: Malfunction Table Heat Pump
7 Malfunction table heat pump Malfunction/Display Cause Rem edy Hot w ater temprature too Water consumption too high Reduce consumption or sw itch on auxiliary heater Hot w ater desired value too low Check hot w ater desired value Value F1 not correct Check sensor F1 Circulation im permanent mode Check timer, thermostat and non-return valve... -
Page 17: Maintenance
In order to guarantee a long life it is necessary to free. It is, however, recommended to have the heat check the protective anode at regular pump examined every 1.5 to 2 years by OCHSNER intervals (at the latest after 18 months) and to re- service engineers. -
Page 18: Annex
9 Annex 9.1 Technical Data Control F1: Resistance-Sensor NTC 5 kOhm/25°C Analogue-Inputs F2: Resistance-Sensor NTC 5 kOhm/25°C Measuring accuracy relative to control at 25 C: +/-0,5 K and +/- 0,5 % from measurement range. Digital-Inputs E1: Input for 250VAV High pressure alarm, Frost protect alarm K1: Relay, 6(0,5)A 250VAC, (6A at cos=1), make on rise Switching outputs K2: Relay, 12(2,2)A 250VAC, (12A at cos=1), make on rise... -
Page 19: Control Temperature Sensors
9.2 Control temperature sensors All temperature sensors in the control have the same characteristics: NTC 5000Ω at 25°C. The sensor val- ues are itemised in Table 5. Temperature °C Resistance [Ohm] Temperature °C Resistance [Ohm] 48322,7 4029,2 43071,6 3702,3 38447,9 3405,3 34370,5 3135,1... -
Page 20: Voltage Quality In The Stand-Alone Operation
9.3 Voltage quality in the stand-alone operation Requirements on voltage quality in the stand-alone operation (the relevant Standards apply to grid opera- tion): Harmonics Maximum portion 2,0% 5,0% 1,0% 6,0% 0,5% 5,0% 0,5% 1,5% 0,5% 3,5% 0,5% 3,0% 0,5% 0,5% 0,5% 2,0% 0,5%... -
Page 21: Technical Data Heat Pump
Operating range heat pump °C Heat transfer medium Water Testing pressure Refrigerant Circuit Number of circuits piece Refrigerant R407C Filling quantity Europa Mini EWP Filling quantityt 1 evaporator circuit 0.35 Filling quantity 2 evaporator circuit 0.35 Machine data Voltage/frequence 220-240/50 V/Hz Fuse (tripping characteristic "C") -
Page 22: Schematic Diagram
9.5 Schematic diagram BA_Europa Mini EWP_CC_EN_20160726_V06 22 / 32... -
Page 23: Wiring Diagram
9.6 Wiring diagram BA_Europa Mini EWP_CC_EN_20160726_V06 23 / 32... -
Page 24: Dimensions
9.7 Dimensions LEGEND: 1) Hot water - Return 3/4" (screw connection flush-fitting) 2) Hot water - Flow 3/4" (screw connection flush-fitting) 3) Suction gas pipework (external thread) 4 Injection pipework (internal thread) 5) Control sensor F1 (NTC 5K) connection 6 Cable with plug 7) Fixing points (4 pces) on the underside for wall bracket mounting Rear view... -
Page 25: Cowling Removal
9.8 Cowling removal Removal of the cowling when the clearance to the ceiling is too small to remove the complete cowl- ing. Remove the screws on the cladding and lift the whole cowling ca. 10 cm Twist the lid of the cowling anticlockwise and lift it off Separate the cowling cladding by shifting the individual components. -
Page 26: Installation Regulations
9.9 Installation regulations BA_Europa Mini EWP_CC_EN_20160726_V06 26 / 32... -
Page 27: Declaration Of Conformity
Änderung des (der) Gerät(e)s verliert diese Erklärung Ihre Gültigkeit. certifies that the following indicated device(s) introduced into the market by Ochsner fulfill the requirements of the harmonized EU-directives, EU-safety standards and EU-standards relating to the specific product. Any modification to device(s) that have not been approved by us effectively voids this statement. -
Page 28: Directory Of Illustrations
10 Directory of Illustrations Fig 1: Connection 1st collector ........................6 Fig 2: Connection 2nd collector ........................6 Fig 3: Entry of collector pipework into building ....................7 Fig 4: Configuring the switching input ......................11 Fig 5: Display and operation elements ......................12 Fig 6: Heat pump settings ........................... - Page 29 Notice: BA_Europa Mini EWP_CC_EN_20160726_V06 29 / 32...
- Page 30 Notice: BA_Europa Mini EWP_CC_EN_20160726_V06 30 / 32...
- Page 31 Notice: BA_Europa Mini EWP_CC_EN_20160726_V06 31 / 32...
- Page 32 System installer Company ..........................Address ............................................................Tel................................Service engineer ............................ Ochsner Zentrale / Werk Wärmepumpen GmbH Ochsner Straße 1 (Firmenbuch) A-3350 Haag Krackowizerstraße 4 Tel. +43 (0)5 042458 A-4020 Linz Fax +43 (0)5 04245-349 kontakt@ochsner.at kontakt@ochsner.at www.ochsner.com...
Need help?
Do you have a question about the Europa Mini EWP and is the answer not in the manual?
Questions and answers