
Subscribe to Our Youtube Channel
Related Manuals for Ochsner AIR 80 C13A


Summary of Contents for Ochsner AIR 80 C13A
- Page 1 Operating and Installation Instructions AIR 80 C13A (OLWP 65 plus) AIR 80 C22A Air/Water Heat Pump for heating, cooling and hot water TRANSLATION OF THE ORIGINAL MANUAL BA_AIR_80_C13A_AIR_80_C22A_OTE3_SW5x_EN_V07.docx Page 1 of 68...
- Page 2 BA_AIR_80_C13A_AIR_80_C22A_OTE3_SW5x_EN_V07.docx Page 2 of 68...
-
Page 3: Table Of Contents
Description of the appliance ......5 Disposal of transport packaging ......28 Function ............5 Decommissioning ..........28 Heat pump AIR 80 C13A and AIR 80 C22A .... 5 Disposal of the appliance ......... 28 Construction ............ 5 Technical data ........... 29 3.3.1... -
Page 4: Notes On The Documentation
Pointer which, if not heeded, can lead carried out by personnel which are to an appliance malfunction and to authorised by OCHSNER. material damage (to system compo- nents, building, ...). These pointers must be heeded without fail. -
Page 5: Description Of The Appliance
(e.g. heat from the outside air) into heat of higher C22A temperatures (heating water). The heat pumps of the AIR 80 C13A (OLWP 65 The heat pump extracts from ambient plus) and AIR 80 C22A are split appliances, - ground... -
Page 6: Evaporator
Fig. 2: Titling dimension of the heat pump Installation of the inside unit The heat pumps AIR 80 C13A and AIR 80 C22A can be installed in any room, provided they are dry, not endangered by frost and noise opti- mised. -
Page 7: Installing The Free-Air System
The following installation in- structions are valid for the three-fold split evapo- rator VHS 80 with the AIR 80 C13A and both double split evaporators VHS-M 80 with AIR 80 C22A. -
Page 8: Important Installation Instructions
Fig. 6: Minimum clearances to wall for VHS 80 Fig. 9: Minimum clearance to ceiling (VHS 80, VHS-M 80) 4.5.1 Important installation instructions The higher the heating capacity of the heat pump, the greater the noise emission from the heat pump's compressor and the evaporator. Avoid installing on reverberant floors Installation between two walls can lead to increased noise levels... -
Page 9: Heating System Connection
A frost-free drain is to be constructed to drain off Heating system connection any condense water. Normally, a condensate sump or a gravel bed with drainage pipework is The installation of the appliances may to be constructed under the evaporator. only be carried out by a specialist ac- cording to local regulations and codes CAUTION: Slipping hazard... -
Page 10: Flow Rate Measurement
OCHSNER maintenance system is matched to the opera- installation guidelines. No guarantee... -
Page 11: Nominal Flow Rates In Heating System
Fig. 14: Installing a non-buried connecting pipework, using an AIR 80 C13A with a VHS 80 as an example. 1) Connecting pipework insulated against the conduit 2) Insulated against the wall... -
Page 12: Installation Of Buried Connecting Pipework
Models AIR 80 C13A and AIR 80 C22A. The diameter of the shaft must be a minimum of 1.5m and its height must be a minimum of 1.2 m (2 rings and a... - Page 13 Fig. 17: Schematic diagram of buried connection pipework with the installation shaft with AIR 80 C22A. Top: Cross section; bottom: Evaporator and installation shaft, plan view Heat pump Liquid pipework (insulated) Sealing cap Suction gas pipework with Venturi distributor (insulated) Sealing (if any ground water pressure or in flood endan- Installation shaft gered areas, a proper seal is mandatory!)
- Page 14 4.8.4 Symmetric connecting pipework AIR 80 C22A The liquid pipework to the two VHS-M 80 evaporators is to be distributed symmetrically (Fig. 18) • 1 x liquid pipework upstream of the distribution: Cu, 22x1mm • 2 x liquid pipework downstream of the distribution: Cu, 16x1mm •...
-
Page 15: Sizing The Connection Pipework
Fig. 20: Pipework lengths and max. height difference between the heat pump and the evaporator: Case 1 Valid for AIR 80 C13A and AIR 80 C22A Fig. 21: Pipework lengths and max. height difference between the heat pump and the evaporator: Case 2 Valid for AIR 80 C13A and AIR 80 C22A Sizing the connecting pipework in Case 1 (Fig. -
Page 16: Refrigerant Pipework
Fig. 22: Max. connecting pipework head of 2.5 mm Valid for AIR 80 C13A and AIR 80 C22A 4.8.6 Refrigerant pipework The refrigerant pipework must always be located on the side of the heat pump (left or right). A rear... -
Page 17: Electrical Connection
Electrical connection ATTENTION This appliance contains frequency con- The regulations of the responsible en- verters (e.g. EC circulation pumps). ergy utility and the relevant EN- Leakage currents may arise in normal standards are to be strictly adhered to. operation. In the event of faults, these components may cause DC fault cur- ATTENTION rents. -
Page 18: Cable Cross Sections
CLOCKWISE field of rotation. A short- actuators. The following guidelines are to be ob- term operation in the wrong field of served: rotation will lead to compressor dam- age. OCHSNER accepts no liability for Position Minimum this. cross sec- tion... -
Page 19: Sensor Wiring
De-icing sensor (TQA, TQE) with AIR 80 C13A: rior of the tank. Two de-icing sensors are to be installed in the fin package of the evaporator (see Chapter 9.9). A 4-... -
Page 20: Pumps, Drives 230Vac
4.9.5 Pumps, drives 230VAC Tariff without interruption In the case of tariff switching without interrupted Pumps, (heating circuit pumps, hot water charge pumps) as well as drives (mixing valves, etc.) are power supply the heat pump will be temporarily switched off by the utility. The control input EVU connected directly to the control. -
Page 21: Commissioning
Operating the circu- lation pumps with no water in the sys- tem leads to destruction of the pump. Commissioning must be carried out by OCHSNER Customer Service or a service partner authorised by OCHSNER. The OCHSNER commissioning in- structions are to be observed. -
Page 22: For The System Installer
For the system installer Work that needs to be carried out by OCHSNER: Laying and connecting the refrigerant pipe- The OCHSNER Customer Service engineer/ Cus- work tomer Service partner will execute the user- Seal of the refrigerator pipework specific settings according to the specifications in Evacuation of the refrigerant pipework the system data sheet. -
Page 23: System Operation
6 System operation Fig. 25: Basic control panel Button A Time of day Press: One step back (ESC) Hot water temperature Button A function or malfunction display System temperature Operational condition Button B function Outside temperature Button B Date Press: Confirm (ENTER) Room temperature Turn: Menu selection or setting change The heat pump operation takes place by means... -
Page 24: Running Costs
(and hot water temperatures) are to be aimed at. The max. system temperature is to be limited to 60°C for the AIR 80 C13A (OLWP 65 plus) and AIR 80 C22A. 6.2.2 Ventilation... -
Page 25: Service Work
The refrigerants used in OCHSNER heat pump are non-flammable, non-toxic and ozone neutral. Ensure that no ice is formed, especially around Heat pumps are, however, refrigeration applianc-... -
Page 26: Customer Service
Service Contract ble for possible corrections and pro- gram settings! OCHSNER offers a wide range of service con- tracts. Further information can be found at Further error reports can be found in the control www.ochsner.com. operating instructions. -
Page 27: Error Report Table
Er 49: TQA sensor defect Replace sensor Er 50: Expansion valve Check the function of the EEV (OCHSNER) Er 58: Motor protection heat source Overload, check motor protection, wiring to motor/fan, check TK Er 59: Sensor breakage TWV + TWR... -
Page 28: Decommissioning And Disposal
8 Decommissioning and disposal Disposal of transport packaging Disposal of the appliance The heat pump's transport packaging consists of The disposal of the decommissioned heat pump recyclable raw materials. Packaging should thus should be carried out according to regional envi- be sorted and recycled. -
Page 29: Technical Data
Sound pressure level/Sound power level [dBA] 50.0 / 78.0 Table 4: Performance data AIR 80 C13A All performance data to EN 14511 - ∆T 5K (EN255 - ∆T 10K); Performance data with a construction tolerance of ± 10% BA_AIR_80_C13A_AIR_80_C22A_OTE3_SW5x_EN_V07.docx Page 29 of 68... -
Page 30: Performance Data Air 80 C22A
Performance data AIR 80 C22A APPLIANCE DATA: TECHNICAL DATA: Dimensions HxWxD [mm] 1900x680x680 Phases/Nominal Voltage/Frequency [~]/[V]/[Hz] 3/400/50 Hydraulic connections [inch] 2“ cos ϕ 0.81 Weight [kg] Fuse Protection (Break Characteristic "C") tiger white 29/11289 Housing colour Max. operating current 69.6 grey RAL 7016 Max. -
Page 31: Energy Consumption Data
78,0 Class of temperature control with room Contribution [%] remote control Class of temperature control without Contribution [%] room remote control Table 6: ErP-Product data AIR 80 C13A OCHSNER AIR 80 C22A PRODUCT FICHE ErP LOW-TEMPERATURE 35 °C COLDER AVERAGE WARMER Ƞs... -
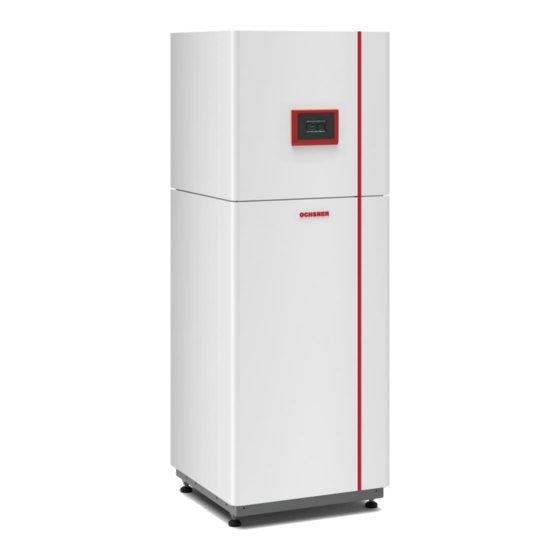
Page 32: Heat Pump Dimensions
Heat pump dimensions Fig. 26: Inside unit dimensions: Heat pump AIR 80 C13A and AIR 80 C22A (in mm) 1) Heat use system: Flow 2" (Heating/cooling) 2) Heat use system: Return 2" (Heating/cooling) 3) Heat source system Input and output BA_AIR_80_C13A_AIR_80_C22A_OTE3_SW5x_EN_V07.docx... -
Page 33: Dimensions Of Evaporator Vhs 80
Dimensions of evaporator VHS 80 Fig. 27: Evaporator dimensions: Heat pump VHS 80 with AIR 80 C13A (in mm) BA_AIR_80_C13A_AIR_80_C22A_OTE3_SW5x_EN_V07.docx Page 33 of 68... -
Page 34: Dimensions Of Evaporator Vhs-M 80
Dimensions of evaporator VHS-M 80 Fig. 28: Evaporator dimensions: Heat pump VHS-M 80 with AIR 80 C22A Roof for Split-evaporator available as option (values in mm) A) Connecting side (Liquid/suction gas pipework, electrical connection) B) Expansion valve position BA_AIR_80_C13A_AIR_80_C22A_OTE3_SW5x_EN_V07.docx Page 34 of 68... -
Page 35: Foundation For Vhs 80 (Air 80 C13A)
Foundation for VHS 80 (AIR 80 C13A) Fig. 29: Point foundation for VHS 80 evaporator (in mm) Fig. 30: Strip foundation for VHS 80 evaporator (in mm) 1) Point foundation using drainage pipes (KG-pipes) 1) Strip foundation 2) Gravel 2) Gravel... -
Page 36: Foundation For Vhs-M 80 (Air 80 C22A)
Foundation for VHS-M 80 (AIR 80 C22A) Fig. 31: Point foundation for VHS-M 80 evaporator (in mm) Point foundation KG pipes (D=315mm) gravel Drainage pipe below frost level Draw up drainage pipe (KG-pipe) system plans Fill KG pipes with concrete Set KG pipes vertical Mount evaporator on foundation BA_AIR_80_C13A_AIR_80_C22A_OTE3_SW5x_EN_V07.docx... - Page 37 Fig. 32: Strip foundation for VHS-M 80 evaporator (in mm) 1) Gravel 2) Strip foundation 3) Drainage pipe below frost depth BA_AIR_80_C13A_AIR_80_C22A_OTE3_SW5x_EN_V07.docx Page 37 of 68...
-
Page 38: Fitting The De-Icing Sensors To The Vhs 80
Fitting the de-icing sensors to the VHS 80 Fig. 33: Fitting de-icing sensors TQE and TQA The de-icing sensors (1) TQE and (2) TQA are fitted to the underside of the evaporator between the fins. The insertion depth is ca. 60 mm. BA_AIR_80_C13A_AIR_80_C22A_OTE3_SW5x_EN_V07.docx Page 38 of 68... -
Page 39: Performance Curves
-25 -23 -21 -19 -17 -15 -13 -11 -9 -7 -5 -3 -1 1 9 11 13 15 17 19 21 23 25 27 Fig. 34: Heating rating AIR 80 C13A and AIR 80 C22A X) Air temperature [°C] Y) Heating rating* [kW] *Component construction tolerance, performance tolerance ±10%... -
Page 40: Limits Of The Heat Pump Deployment
Internal pressure differential, heat pump heat use system plate heat exchanger (condenser) [m³/h] [l/min] [mbar] [mWS] Stratos Para 65/ 1-12 922462 13.0 1.02 Table 8: Heat use pump flow rates for AIR 80 C13A and AIR 80 C22A BA_AIR_80_C13A_AIR_80_C22A_OTE3_SW5x_EN_V07.docx Page 40 of 68... -
Page 41: Pump Characteristics Stratos Para
Pump characteristics Stratos Para Stratos Para 65/ 1-12 Fig. 38: Pump characteristic curve Stratos Para 65/ 1-12 BA_AIR_80_C13A_AIR_80_C22A_OTE3_SW5x_EN_V07.docx Page 41 of 68... -
Page 42: Setting The Flow Rate
Flow rate heat 23.4 l/min 21-002 ENTER ENTER Fig. 39: Reading flow rate AIR 80 C13A (OLWP 65 plus), AIR 80 C22A Flow rate sensor Type DN 50 kvs 40 Delta-p for nominal flow rate mbar 100.0 Nominal flow rate m³/h... -
Page 43: Wiring Diagram Air 80 C13A
Wiring diagram AIR 80 C13A Fig. 40: Wiring diagram AIR 80 C13A A) Evaporator terminal box (not supplied), IP67 F) Flow rate sensor 4) Supply cable to de-icing sensors TQE and TQA 9) Supply cable to flow rate sensor B) Terminal block Fan 1... -
Page 44: Wiring Diagram Air 80 C22A
Wiring diagram AIR 80 C22A Fig. 41: Wiring diagram AIR 80 C22A A) Terminal box VHS-M 80 right 1) Suction gas sensor S2 6) Voltage supply to fan 230V 11) Voltage supply to heat pump 400V A) Terminal box VHS-M 80 left 2) Step motor from EVO_L and EVO R 7) outside temperature 12) Control cable Utility switch-off... -
Page 45: Electrical Circuit Diagrams Air 80 C13A
10 Electrical circuit diagrams AIR 80 C13A BA_AIR_80_C13A_AIR_80_C22A_OTE3_SW5x_EN_V07.docx Page 45 of 68... - Page 46 BA_AIR_80_C13A_AIR_80_C22A_OTE3_SW5x_EN_V07.docx Page 46 of 68...
- Page 47 BA_AIR_80_C13A_AIR_80_C22A_OTE3_SW5x_EN_V07.docx Page 47 of 68...
- Page 48 BA_AIR_80_C13A_AIR_80_C22A_OTE3_SW5x_EN_V07.docx Page 48 of 68...
- Page 49 BA_AIR_80_C13A_AIR_80_C22A_OTE3_SW5x_EN_V07.docx Page 49 of 68...
- Page 50 BA_AIR_80_C13A_AIR_80_C22A_OTE3_SW5x_EN_V07.docx Page 50 of 68...
-
Page 51: Electrical Circuit Diagrams Air 80 C22A
11 Electrical circuit diagrams AIR 80 C22A BA_AIR_80_C13A_AIR_80_C22A_OTE3_SW5x_EN_V07.docx Page 51 of 68... - Page 52 BA_AIR_80_C13A_AIR_80_C22A_OTE3_SW5x_EN_V07.docx Page 52 of 68...
- Page 53 BA_AIR_80_C13A_AIR_80_C22A_OTE3_SW5x_EN_V07.docx Page 53 of 68...
- Page 54 BA_AIR_80_C13A_AIR_80_C22A_OTE3_SW5x_EN_V07.docx Page 54 of 68...
- Page 55 BA_AIR_80_C13A_AIR_80_C22A_OTE3_SW5x_EN_V07.docx Page 55 of 68...
- Page 56 BA_AIR_80_C13A_AIR_80_C22A_OTE3_SW5x_EN_V07.docx Page 56 of 68...
-
Page 57: Inside Unit - Preparation For Installation
12 Inside unit - preparation for installation Fig. 42: Heat pump transport on wooden palettes Disassembling the top cover - Remove the 2 screws on the rear side (in- ternal hexagonal 4mm) - Push the upper cover back a bit - Lift the upper cover up and away, BA_AIR_80_C13A_AIR_80_C22A_OTE3_SW5x_EN_V07.docx Page 57 of 68... -
Page 58: Disassembling The Top Cladding
Disassembling the top cladding - Remove the 3 screws in the control panel (internal hexagonal 4 mm) - Remove the 2 screws on the rear side (in- ternal hexagonal 4mm) - Remove 1 screw for the right-hand upper cladding component on the rear (internal hexagonal 4mm) - Remove the cladding component - Remove 1 screw for the right-hand upper... -
Page 59: Disassembling The Bottom Cladding
- Carefully remove the front cladding - Attention! Mind the cable between the control panel and the operational unit Disassembling the bottom cladding - Remove the 2 screws on the front side (in- ternal hexagonal 4mm) - Remove the 3 screws on the left front side (internal hexagonal 4mm) - Remove the 2 screws on the rear side (in- ternal hexagonal 4mm) -
Page 60: Disassembling The Wooden Palette
Disassembling the wooden palette - Remove the 16 (4x4) screws (Torx T25) on the corners of the palette. - Remove the single pieces of wood - Lift the heat pump with a palette truck - Remove the 8 (4x2) screws on the side metal brackets (counter pressure with open-end wrench) BA_AIR_80_C13A_AIR_80_C22A_OTE3_SW5x_EN_V07.docx... -
Page 61: Mounting The Adjustable Feet
- Remove both wooden side pieces Mounting the adjustable feet - Fix the adjustable feet (OCHSNER Art. Nr. 916431) to the base of the heat pump with M 16 screw nuts. - Attention! Avoid damaging the thread on the adjustable feet! As soon as the heat... -
Page 62: Declaration Of Conformity
13 Declaration of Conformity BA_AIR_80_C13A_AIR_80_C22A_OTE3_SW5x_EN_V07.docx Page 62 of 68... - Page 63 BA_AIR_80_C13A_AIR_80_C22A_OTE3_SW5x_EN_V07.docx Page 63 of 68...
-
Page 64: Erp-Data
14 ERP-Data BA_AIR_80_C13A_AIR_80_C22A_OTE3_SW5x_EN_V07.docx Page 64 of 68... - Page 65 BA_AIR_80_C13A_AIR_80_C22A_OTE3_SW5x_EN_V07.docx Page 65 of 68...
-
Page 66: Directory Of Illustrations
Hydraulic and electrical connections to the heat pump (schematic) ................. 9 Fig. 13: Installing the flow sensor ........................... 10 Fig. 14: Installing a non-buried connecting pipework, using an AIR 80 C13A with a VHS 80 as an example......11 Fig. 15: Installation shaft ............................... 12 Fig. 16: Symmetrical arrangement of buried connection pipework with the installation shaft with AIR 80 C22A. - Page 67 BA_AIR_80_C13A_AIR_80_C22A_OTE3_SW5x_EN_V07.docx Page 67 of 68...
- Page 68 Central works OCHSNER East Ochsner-Straße 1 PL 31-302 Kraków A-3350 Haag ul. Pod Fortem Nr. 19 Tel: +43 (0) 5 042458 – 0 Tel: +48 (0) 12 4214527 – 0 End-user hotline: +43 (0) 820 201000 – 0 kontakt@ochsner.pl...
Need help?
Do you have a question about the AIR 80 C13A and is the answer not in the manual?
Questions and answers