Advertisement
Quick Links
MECHANICAL INSTALLATION
Mounting Position
Mount and calibrate in vertical position for quick and easy installa-
tion on ducts, walls or ceilings and in control rooms.
Media Compatibility
Model MRX transducers are designed to be used with air or
nonconducting gases.
Use with liquids or corrosive gases will damage the unit.
Environment
The operating temperature limits of the MRX are as follows:
Operating Temperature
Compensated Temperature Range
SIMPLE 5-STEP SETUP INSTRUCTIONS -
STEP 1
For CE compliance a properly grounded shielding cable is
required.
ELECTRICAL CONNECTIONS
Rem ovable T erm inal Block for Easy Wiring
STEP 1: Wire and Power Up Unit - Follow diagrams
below for 2-wire and 3-wire configurations. After
completing wiring requirements - Apply power to
the Model MRX.
Multi-Sense Voltage
3-Wire, 0-5, 0-10 VD C C onfiguration
Model MRX
24V AC/DC
EXC
COM OUT
Nominal
Excitation
+
-
+
Power
Supply
-
13 - 30V
Multi-Sense C urrent
2-Wire, 4-20 m A C onfiguration
Model MRX
24V (DC Only)
EXC
COM OUT
Nominal
Excitation
+
-
+
Power
Supply
-
13 - 30V
Installation Guide
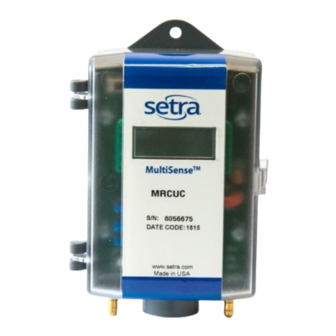
"Multi-Sense" Model MRX Series
Multi-Range Differential Pressure Transducer
32°F to 122°F (0°C to 50°C)
32°F to 122°F (0°C to 50°C)
+
+
Voltage
-
Monitor
X
Typical 250 Ohm
+
Current
Sense Resistor
-
Monitor
for 1-5V Output
Measurement
GENERAL INFORMATION
Every Model MRX has been calibrated and tested before shipment to guarantee
performance for all pressure ranges.
The Model MRX is available in two versions, which have field selectable range
capability via a slide switch. See four versions below:
MULTI-SENSE RANGE SPECIFICATIONS
MRC
Range UNI Range
BI Range
±.25"WC
A
0.25" WC
±.1"WC
B
0.1" WC
±50 Pa
E
50 Pa
±25 Pa
F
25 Pa
SIMPLE 5-STEP SETUP INSTRUCTIONS - STEPS 2 - 5
Power On - LCD Display
Display momentarily toggles thru all existing setup parameters on initial power
up. Pressure is normally indicated on display. Units are either in inches of water
column or Pascal.
*STEP 2: Select Pressure Range: Set appro-
priate full scale range using the Slide
Switch Multiplier. LCD will momentarily
indicate selected range. A-D is "W.C..
E-H is Pa.
STEP 3: Select Unidirectional
or Bi-directional mode.
**STEP 4: Select Current (mA)
or Voltage 0-5, or
0-10 VDC output range.
* * Step 4 be sure to set mA/volt
switch to volt position if using
0 to 5 or 0 to 10V outputs
STEP 5: Push Button
Zero - While at zero pressure Press and
hold the Zero Push Button for 5 sec-
onds to automatically reset output
to zero.
ZERO AND SPAN ADjUSTMENT*
The unit may be recalibrated in the field using the push button zero/span.
Zero Adjustment:
1. With unit at zero differential pressure, push zero button for 5 seconds. Units
output and display will update.
Span Adjustment:
2. Apply full scale pressure (Note: Full scale value of largest range.). Press and hold
zero button for 5 seconds. Units output and display will update.
*Zero and Span points must be within 10% of factory setting.
MRG
Range UNI Range
BI Range
±5"WC
A
5" WC
±2.5"WC
B
2.5" WC
±1"WC
C
1" WC
±.5"WC
D
.5" WC
±1000 Pa
E
1000 Pa
±500 Pa
F
500 Pa
±250 Pa
G
250 Pa
±100 Pa
H
100 Pa
RANGE:
A
B
C
D
WC
DUCT
E
F
G
H
Pa
PROBE
UNI/BI
PORT
mA/VDC
10V/5V
ZERO
Advertisement

Summary of Contents for Setra Systems Multi-Sense MR Series
- Page 1 Installation Guide “Multi-Sense” Model MRX Series Multi-Range Differential Pressure Transducer GENERAL INFORMATION Every Model MRX has been calibrated and tested before shipment to guarantee performance for all pressure ranges. The Model MRX is available in two versions, which have field selectable range capability via a slide switch.
- Page 2 No representative or person is authorized to give any warranty other than as set out above or to assume for SETRA any other liability in connection with the sale of its products. For all CE technical questions, contact Setra Systems, USA. EU customers may contact our EU representative Hengstler GmbH, Uhlandstr. 49, 78554 Aldingen, Germany (Tel: +49-7424-890, Fax: +49-7424-89500).


Need help?
Do you have a question about the Multi-Sense MR Series and is the answer not in the manual?
Questions and answers