Table of Contents
Advertisement
Quick Links
MagneMover LITE User Manual
Catalog Numbers 700-1308-xx, MMI-MML-1000M-NR-SER-
SYNCAC, MMI-MML-250M-NR-SER-SYNCAC, MMI-MML-CURV-
NR-SER-SYNCAC, 700-1708-xx, 700-1560-00, 700-1458-01,
700-1663-00, 700-1561-00, 700-1664-00, 700-1738-02, 700-
1740-03, 700-1525-00, 700-1528-00, C920600, 110-0001-00,
700-1670-xx
User Manual
Original Instructions
Advertisement
Table of Contents
Troubleshooting

Related Manuals for Rockwell Automation Allen-Bradley MagneMover LITE


Summary of Contents for Rockwell Automation Allen-Bradley MagneMover LITE
- Page 1 MagneMover LITE User Manual Catalog Numbers 700-1308-xx, MMI-MML-1000M-NR-SER- SYNCAC, MMI-MML-250M-NR-SER-SYNCAC, MMI-MML-CURV- NR-SER-SYNCAC, 700-1708-xx, 700-1560-00, 700-1458-01, 700-1663-00, 700-1561-00, 700-1664-00, 700-1738-02, 700- 1740-03, 700-1525-00, 700-1528-00, C920600, 110-0001-00, 700-1670-xx User Manual Original Instructions...
- Page 2 If this equipment is used in a manner not specified by the manufacturer, the protection provided by the equipment may be impaired. In no event will Rockwell Automation, Inc. be responsible or liable for indirect or consequential damages resulting from the use or application of this equipment.
-
Page 3: Table Of Contents
Handling Magnet Arrays ............................41 Shipping Magnet Arrays ............................42 Recycling and Disposal Information ......................... 42 RoHS and WEEE ..............................42 MagneMover LITE Transport System......................... 42 Motors ..................................42 Vehicles ................................. 43 Magnet Arrays ............................... 43 Rockwell Automation Publication MMI-UM002G-EN-P - August 2024... - Page 4 Magnet Array Length and Attractive Force ....................67 Magnet Array Use ............................68 Available Magnet Arrays ..........................68 Vehicles ................................. 68 Vehicle Gap..............................69 Vehicle Design .............................. 70 Mounting Magnet Arrays to Vehicles ......................71 Pucks ..................................71 Rockwell Automation Publication MMI-UM002G-EN-P - August 2024...
- Page 5 MagneMover LITE G4 Motors..........................105 Mechanical Specifications............................107 1000 Millimeter Motors ............................108 250 Millimeter Motors ............................116 125 Millimeter Radius 90° Curve Motors ......................124 90° Left Switches..............................132 90° Right Switches..............................135 Standard Motor Mount Bracket .........................138 V-brace Kits .................................139 Rockwell Automation Publication MMI-UM002G-EN-P - August 2024...
- Page 6 TCP/IP Communication – Node Controller to Motor................183 TCP/IP Communication – Motor to Motor ....................183 EtherNet/IP Communication – Host Controller to HLC................183 RS-232 Serial Interface Connection.........................183 RS-422 Serial Interface Connection.........................183 Node Controller to Motor..........................183 Motor to Motor..............................184 Rockwell Automation Publication MMI-UM002G-EN-P - August 2024...
- Page 7 Installing Electronics on the Transport System..................208 Mounting Power Supplies..........................209 Mounting MagneMover LITE Power Supplies..................209 Mounting Allen-Bradley Power Supplies ....................210 Connecting Motors and Electronics ........................211 RS-422 Motor Communication ........................211 Ethernet Motor Communication........................215 Digital I/O..............................217 Rockwell Automation Publication MMI-UM002G-EN-P - August 2024...
- Page 8 Software Configuration.............................243 Node Controller Software Installation.....................243 Motor Software Installation ........................243 Check-out and Power-up............................244 System Check-out..............................244 Mechanical Checks ............................244 Facility Checks ............................244 Pre-operation Checks..........................244 System Power-up...............................244 System Testing................................247 6 Operation Theory of Operation..............................249 Rockwell Automation Publication MMI-UM002G-EN-P - August 2024...
- Page 9 Return the System to Normal Operation ......................264 Precision Rail Operation ............................265 Setup ..................................265 Operation................................265 Precision Locator Operation ............................265 Setup ..................................265 Basic Operation ..............................266 Operation Using Cylinder Position Sensors ....................266 Transport System Operation ............................266 Power-up................................266 Normal Running..............................267 Shutdown................................267 Rockwell Automation Publication MMI-UM002G-EN-P - August 2024...
- Page 10 Upload Configuration Files and Restart....................296 Replace Ethernet Motors........................... 297 Remove the Existing Motor........................297 Install the New Motor..........................297 Program Ethernet Motors ..........................298 Replace Motor Rails ............................299 Replace Switch Rails............................300 Separating Magnet Arrays..........................301 Replace Pucks ..............................302 Rockwell Automation Publication MMI-UM002G-EN-P - August 2024...
- Page 11 Shipping Components ............................354 Shipping Systems or System Sections ......................354 8 History of Changes Rev. A..................................355 Rev. B ...................................355 Rev. C ...................................356 Rev. D ...................................356 Rev. E ................................... 357 Rev. F..................................358 Rev. G ...................................359 Rockwell Automation Publication MMI-UM002G-EN-P - August 2024...
- Page 12 Table of Contents This page intentionally left blank. Rockwell Automation Publication MMI-UM002G-EN-P - August 2024...
-
Page 13: Preface
NOTE: A note provides additional or explanatory information. Rockwell Automation recognizes that some of the terms that are currently used in our industry and in this publication are not in alignment with the movement toward inclusive language in technology. We are proactively collaborating with industry peers to find alternatives to such terms and making changes to our products and content. - Page 14 ATTENTION: COMPRESSED GAS HAZARD: Identifies information about practices or circumstances where a compressed gas hazard is present that could cause personal injury. Rockwell Automation Publication MMI-UM002G-EN-P - August 2024...
-
Page 15: Additional Resources
Preface Additional Resources Additional Resources These documents contain additional information concerning related products from Rockwell Automation. Before configuring or running the components, consult the following documentation. You can view or download publications at rok.auto/literature. Resource Description MagneMotion QuickStick and QuickStick HT Design Guide, This manual explains how to design and configure the track layout and transport system. - Page 16 Preface This page intentionally left blank. Rockwell Automation Publication MMI-UM002G-EN-P - August 2024...
-
Page 17: Introduction
Servo repeatability at process stations: ± 0.1 mm [0.004 in] (straight motors only). Excludes the gap between motors. Calibrated vehicles (pucks) are required. May require physical attachment of the motor to the process station. Rockwell Automation Publication MMI-UM002G-EN-P - August 2024... - Page 18 Maximum number of vehicles (pucks) per meter is determined using the standard single array puck on a straight motor. Using a dual array vehicle or a curved motor decreases the number of vehicles that fit per meter. Rockwell Automation Publication MMI-UM002G-EN-P - August 2024...
-
Page 19: Magnemover Lite Transport System Components
Glide Puck (Vehicle) with Magnet Array – Slides on the integral rails and carries the payload through the MM LITE transport system as directed. The magnet array is mounted to the vehicle (puck) and interacts with the motors, which move each vehicle independently. Rockwell Automation Publication MMI-UM002G-EN-P - August 2024... - Page 20 • System Leg (Stand System) – Used to support the MagneMover LITE transport system. • V-brace – Used to align and secure adjacent sections of the guide rail to each other. Rockwell Automation Publication MMI-UM002G-EN-P - August 2024...
-
Page 21: Magnemover Transport System Options
NOTE: Switches and “S” turns are not supported on precision rail systems. • Post Mount – Attaches to the beam support structure (or user-supplied base) providing a structural interconnecting point between the motor system and the precision rail system. Rockwell Automation Publication MMI-UM002G-EN-P - August 2024... -
Page 22: Precision Locator
X/Y Repeatability: ±0.05 mm. Z Repeatability: +0.0/-0.05 mm. Vertical load on the pallet while secured in the precision locator: 500 N [112 lbf] (higher loads possible based on pallet design). Actuator position sensor option. Rockwell Automation Publication MMI-UM002G-EN-P - August 2024... -
Page 23: Transport System Components Overview
Figure 1-6: Detailed View of MagneMover LITE Precision Locator Components • Pallet – Replaces the standard top plate on the puck and carries the payload. Can be provided by Rockwell Automation or custom designed by the user for their application. - Page 24 Vehicle with Magnet Array – Carries a payload through the transport system as directed. The magnet array is mounted to the vehicle facing the motors and interacts with the motors, which move each vehicle independently. Rockwell Automation Publication MMI-UM002G-EN-P - August 2024...
-
Page 25: Transport System Software Overview
MICS_motor_data.xml MagneMotion Comm Tool NC File Retrieval Tool Figure 1-8: Simplified View of Transport System Software Organization NOTICE: Modifications to the Image or Type files could cause improper operation of the transport system. Rockwell Automation Publication MMI-UM002G-EN-P - August 2024... -
Page 26: Utilities
Transport System Software Overview Utilities • NC Web Interface – A web-based software application that is supplied by Rockwell Automation and resident on the node controllers, for administration of the transport system components. • NC Console Interface – A serial communication software application that is supplied by Rockwell Automation and resident on the node controllers, for administration of the node controller. -
Page 27: Getting Started With The Magnemover Lite Transport System
9. If using the LSM Synchronization option, install the components of the option on the transport system and configure the SYNC IT™ controller for operation as described in the LSM Synchronization Option User Manual, publication MMI-UM005. Rockwell Automation Publication MMI-UM002G-EN-P - August 2024... - Page 28 267. When using TCP/IP communication, see the Host Controller TCP/IP Communication Protocol User Manual, publication MMI-UM003. When using EtherNet/IP communication, see the Host Controller EtherNet/IP Communication Protocol User Manual, publication MMI-UM004. Rockwell Automation Publication MMI-UM002G-EN-P - August 2024...
-
Page 29: Safety Guidelines
The MagneMover LITE components are CE-compliant. To determine if a specific component is CE-compliant, check for the CE marking on the component. If necessary, the official Declaration of Conformity (DoC), IMC-CT001C-EN-E, can be downloaded from the Rockwell Automation Literature Library. The MagneMover LITE components are UL Recognized in Canada and the United States. -
Page 30: Safety Considerations
Follow all facility, local, and national procedures for the disposal of any hazardous materials. • Ergonomic hazards can exist with certain installation or service operations that are related to the MM LITE transport system. Rockwell Automation Publication MMI-UM002G-EN-P - August 2024... -
Page 31: Equipment Safety Guidelines
Do not install or operate the MM LITE transport system if any of the components have been dropped, damaged, or are malfunctioning. • Keep cables and connectors away from heated surfaces. • Do not modify the connectors or ports. Rockwell Automation Publication MMI-UM002G-EN-P - August 2024... -
Page 32: Magnemover Lite Transport System Hazard Locations
Mechanical Hazard – Pinch Point Guideway (typical) Mechanical Hazard – Pinch Point Vehicle/Puck (typical) Mechanical Hazard – Pinch Point Magnetic Field Hazard Figure 2-1: Locations of Hazardous Points on the MagneMover LITE Transport System Rockwell Automation Publication MMI-UM002G-EN-P - August 2024... -
Page 33: Precision Rail Option Hazard Locations
Mechanical Hazard – Pinch Point Vehicle (typical) Mechanical Hazard – Pinch Point Magnetic Field Hazard Rail Mounting (typical) Mechanical Hazard – Pinch Point Figure 2-2: Locations of Hazardous Points on the Precision Rail Option Rockwell Automation Publication MMI-UM002G-EN-P - August 2024... -
Page 34: Precision Locator Option Hazard Locations
Precision Locator Option Hazard Locations Locator Arm Mechanical Hazard – Pinch Point Cover Removed Locator Drive Mechanical Hazard – Pinch Point (normally covered) Figure 2-3: Locations of Hazardous Points on the Precision Locator Option Rockwell Automation Publication MMI-UM002G-EN-P - August 2024... -
Page 35: Puck/Vehicle Hazard Locations
Puck/Vehicle Hazard Locations Pinch Point Magnetic Field Hazard Figure 2-4: Locations of Hazardous Points on the Glide Puck Pinch Point Magnetic Field Hazard Figure 2-5: Locations of Hazardous Points on the Wheeled Puck Rockwell Automation Publication MMI-UM002G-EN-P - August 2024... -
Page 36: Symbol Identification
ATTENTION: Automatic Motion Hazard – Indicates the possibility of machinery automatically starting or moving, which could cause personal injury. ATTENTION: Shock Hazard – Indicates that a severe shock hazard is present that could cause personal injury. Rockwell Automation Publication MMI-UM002G-EN-P - August 2024... - Page 37 ATTENTION: Pacemakers or Medical Implants Prohibited – Indicates that persons with medical implants are not allowed in the specified area due to the possibility of personal injury. Rockwell Automation Publication MMI-UM002G-EN-P - August 2024...
-
Page 38: Labels
LIFTING HAZARD ATTENTION: The MagneMover LITE components can weigh as much as 7.3 kg [16.1 lb]. Use proper techniques for lifting and safety toe shoes when moving any MagneMover LITE components. Rockwell Automation Publication MMI-UM002G-EN-P - August 2024... -
Page 39: Electrical Hazards
MM LITE precision locator is being used. The MagneMover LITE precision locator option is a low energy device, no additional pneumatic safety precautions are required. Rockwell Automation Publication MMI-UM002G-EN-P - August 2024... -
Page 40: Magnetic Hazards
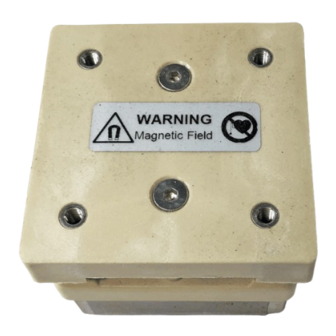
NOTICE: To avoid damage to watches, instruments, electronics, and magnetic media, keep metal tools, metal objects, magnetic media (for example, memory disks/chips, credit cards, and tapes) and electronics away from the magnet arrays. Rockwell Automation Publication MMI-UM002G-EN-P - August 2024... -
Page 41: Handling Magnet Arrays
Signage – Make sure that appropriate cautionary signage is in place in all locations where the magnet arrays are located. Signage must be in accordance with the applicable facility, local, and national safety codes for the installation site. Rockwell Automation Publication MMI-UM002G-EN-P - August 2024... -
Page 42: Shipping Magnet Arrays
Brass and Zinc with Nickel plating. • Circuit board with connectors and semiconductors, potted with Sylgard®164. • EPDM (synthetic rubber). • Silicone sealant. • Nitrile Rubber. • Igus® A350, L280 (switch only). • Tivar® 1000. Rockwell Automation Publication MMI-UM002G-EN-P - August 2024... -
Page 43: Vehicles
The MagneMover LITE system options contain the following materials and must be disposed of by following all facility, local, and national procedures for disposal: Precision Locator • Anodized Aluminum. • Stainless Steel. • SBR Rubber. Rockwell Automation Publication MMI-UM002G-EN-P - August 2024... -
Page 44: Precision Rail Lubrication Pump
The packaging for the MagneMover LITE motors and components contains the following materials. If the packaging is not being saved, it must be disposed of by following all facility, local, and national procedures for the disposal of packaging material: • Cardboard. • Polyethylene Foam. Rockwell Automation Publication MMI-UM002G-EN-P - August 2024... -
Page 45: Design Guidelines
The modular nature of the MM LITE components makes it easy to implement layout or control changes. An example of how the basic building-blocks are used is provided in the following sections: Motors, Switches, and Vehicles (Pucks) on page 46 • Paths on page 46 • Rockwell Automation Publication MMI-UM002G-EN-P - August 2024... -
Page 46: Motors, Switches, And Vehicles (Pucks)
Once all motors have been identified on the MM LITE transport system layout, the individual paths must be defined (see Figure 3-2 for an example). Path definition includes identifying all motors on the path and the direction of forward (downstream) motion. Rockwell Automation Publication MMI-UM002G-EN-P - August 2024... -
Page 47: Nodes
Simple Node – Defines the beginning of a path (that is, there is no other path that is connected at this point). • Relay Node – Connects the end of a path to the beginning of a path. Rockwell Automation Publication MMI-UM002G-EN-P - August 2024... -
Page 48: Node Controllers
Motor Communication – Identifies the communication connections between motors on the same path and between motors at path ends and the node controllers. NOTE: All motor connections at a node must be made to the same node controller. Rockwell Automation Publication MMI-UM002G-EN-P - August 2024... -
Page 49: Additional Connections
Host Controller – User-supplied controller that runs the application for monitoring and control of the transport system. Power Wiring – Identifies the power connections between motors that are connected to the same power supply. Rockwell Automation Publication MMI-UM002G-EN-P - August 2024... -
Page 50: Transport System Design
(pucks) when not moving is 3 mm [0.12 in] (see Motor Topology on page 250). Vehicle Magnet Array Integral Rail Motor Motor Mount (not visible) Figure 3-6: MagneMover LITE System, Single Array Glide Puck Rockwell Automation Publication MMI-UM002G-EN-P - August 2024... -
Page 51: Design Guidelines
Application for the MagneMover LITE system. • Desired throughput. • Maximum payload. • Total transport length. • Transport topography. • Move time. • Vehicle length. Once these characteristics are known, identify additional requirements: Rockwell Automation Publication MMI-UM002G-EN-P - August 2024... -
Page 52: Motor Types
Reduced number of node controllers. Increased limits on number of motors per path and/or vehicles per path. Foundation for enhanced condition monitoring and diagnostics. Ability to create additional paths without additional node controllers and cabling. Rockwell Automation Publication MMI-UM002G-EN-P - August 2024... -
Page 53: Available Thrust
For MagneMover LITE motors installed in a transport system, there is always a space (Motor Gap) between motors, as shown in Figure 3-7. The required Motor Gap is 1 mm, which places 1 m MM LITE motors on a 1 meter pitch. Rockwell Automation Publication MMI-UM002G-EN-P - August 2024... -
Page 54: Downstream Gap
Due to the use of an epoxy core for the motor windings, there is no cogging between the MagneMover LITE motor and the magnet array (see Motor Cogging on page 251). Motor Controllers The motor controller for each MagneMover LITE motor is located inside the MM LITE motor. Each MM LITE motor has one motor controller. Rockwell Automation Publication MMI-UM002G-EN-P - August 2024... -
Page 55: Electrical Wiring
This method reduces the voltage difference between the power supply and the motor. The second method is to limit the number of motors that are connected to one power supply. Rockwell Automation Publication MMI-UM002G-EN-P - August 2024... -
Page 56: Signal Wiring
All power supplies must be grounded to an electrical safety ground (PE) via the safety ground in the AC input connector. • All junction boxes must be grounded to an electrical safety ground (PE). Rockwell Automation Publication MMI-UM002G-EN-P - August 2024... - Page 57 Design Guidelines Transport System Design Figure 3-8: System Wiring Block Diagram, RS-422 Motor Communication Rockwell Automation Publication MMI-UM002G-EN-P - August 2024...
- Page 58 Design Guidelines Transport System Design Figure 3-9: System Wiring Block Diagram, Ethernet Motor Communication Rockwell Automation Publication MMI-UM002G-EN-P - August 2024...
-
Page 59: Ethernet Motor Communication Recommendations
• If all motors in a path are not part of the same Ethernet chain, all chains the path is a member of must connect to the same network as the node controller. Rockwell Automation Publication MMI-UM002G-EN-P - August 2024... -
Page 60: Ethernet Motor Connection Examples
Enet Motor One Path Node Node Ethernet P1M1 P1M2 P1M3 P1M4 x.y.1.1 x.y.1.2 x.y.1.3 x.y.1.4 Host Enet Controller Switch x.y.0.10 HLC & Node Controller Figure 3-12: Ethernet Motor Wiring – One Path, Ethernet Star Rockwell Automation Publication MMI-UM002G-EN-P - August 2024... - Page 61 Host Enet Controller Switch x.14.0.10 HLC & Node Enet Controller Router x.15.0.1 Ethernet Enet Switch x.15.0.10 Node Controller Figure 3-14: Ethernet Motor Wiring – Two Paths, Ethernet Star, Multiple Node Controllers Rockwell Automation Publication MMI-UM002G-EN-P - August 2024...
- Page 62 The following figures show simplified connection diagrams of the different methods for connecting a multiple-path transport system using Ethernet. The specific connection method that is used depends on the application for the motors. Rockwell Automation Publication MMI-UM002G-EN-P - August 2024...
-
Page 63: Using Both Rs-422 And Ethernet Motors
P1M1 P1M2 P2M1 P2M2 Ethernet RS-422 x.y.1.1 x.y.1.2 Host Enet x.y.0.10 Controller Switch RS-422 HLC & Node Controller Ethernet RS-422 Figure 3-20: Ethernet Motor Wiring – Two Paths, Ethernet Chain and RS-422 Chain Rockwell Automation Publication MMI-UM002G-EN-P - August 2024... - Page 64 P1M6 P1M3 P1M5 P1M4 x.y.1.6 x.y.1.3 x.y.1.5 x.y.1.4 Enet Enet Motor Motor Enet Motor Enet Motor Ethernet RS-422 Figure 3-22: Ethernet Motor Wiring – Three Paths, Ethernet Chain Main Loop, RS-422 Spur Rockwell Automation Publication MMI-UM002G-EN-P - August 2024...
-
Page 65: Ethernet Motor Mics File
For a large transport system, it is typically useful to organize the IP structure that includes the path/motor information in as shown in Ethernet Motor Communication Recommendations on page Rockwell Automation Publication MMI-UM002G-EN-P - August 2024... -
Page 66: Magnet Arrays
Figure 3-23: Standard MagneMover LITE Magnet Array, 1 Cycle, 3 Poles NOTICE: Even though the magnet arrays are covered with a stainless steel cover the magnets can still be damaged and are subject to corrosion if damaged. Rockwell Automation Publication MMI-UM002G-EN-P - August 2024... -
Page 67: Magnet Array Length And Attractive Force
Other variables are the vehicle gap and the downstream gap. These other variables and their effect on available thrust are discussed later in this chapter. Rockwell Automation Publication MMI-UM002G-EN-P - August 2024... -
Page 68: Magnet Array Use
All vehicles on connected guideways must be the same size and use the same type of magnet array. Vehicle Payload Mounting Surface Magnet Array Suspension Wheel Vehicle Vehicle Guide V-brace Motor Guideway Motor Mount Figure 3-24: Typical Vehicle on Guideway Rockwell Automation Publication MMI-UM002G-EN-P - August 2024... -
Page 69: Vehicle Gap
NOTE: The vehicle gap must be such that any deviations in the flatness of the vehicle suspension surface do not allow the magnet array on the vehicle to touch down on either the guide rails or the motors. Rockwell Automation Publication MMI-UM002G-EN-P - August 2024... -
Page 70: Vehicle Design
The area under the vehicle magnet array must be clear of aluminum as the aluminum can create eddy currents, which create a breaking force. Wheel Materials Some examples of commonly used wheel materials and key considerations: Rockwell Automation Publication MMI-UM002G-EN-P - August 2024... -
Page 71: Mounting Magnet Arrays To Vehicles
For proper operation, the payload on the puck must fit within the payload envelope that is shown in Figure 3-27. When using payloads that exceed the limits that are shown, refer to Puck Limits on page Rockwell Automation Publication MMI-UM002G-EN-P - August 2024... - Page 72 For proper operation, the payload on the puck and the velocity of the puck must fit within the curve that is shown in Figure 3-28. Single Array Glide Puck Max Velocity Velocity (m/s) Figure 3-28: Single Array Glide Puck Payload vs. Velocity Rockwell Automation Publication MMI-UM002G-EN-P - August 2024...
-
Page 73: Dual Array (Tandem) Glide Puck
Figure 3-30: Dual Array (Tandem) Glide Puck Payload Envelope For proper operation, the payload on the puck and the velocity of the puck must fit within the curve that is shown in Figure 3-31. Rockwell Automation Publication MMI-UM002G-EN-P - August 2024... -
Page 74: Single Array 4 Wheel Puck
3-33. If the payload is within the weight specification but outside the envelope specification that is shown, refer to Puck Limits on page 88 or contact your Motion Solution Consultant or TechConnect (rockwellautomation.custhelp.com). Rockwell Automation Publication MMI-UM002G-EN-P - August 2024... - Page 75 For proper operation, the payload on the puck and the velocity of the puck must fit within the curve that is shown in Figure 3-34. Single Array 4 Wheel Puck Max Velocity High Payload Switch Curve Motors Velocity (m/s) Figure 3-34: Single Array 4 Wheel Puck Payload vs. Velocity Rockwell Automation Publication MMI-UM002G-EN-P - August 2024...
-
Page 76: Dual Array (Tandem) Wheeled Puck
Figure 3-36: Dual Array (Tandem) Wheeled Puck Payload Envelope For proper operation, the payload on the puck and the velocity of the puck must fit within the curve that is shown in Figure 3-37. Rockwell Automation Publication MMI-UM002G-EN-P - August 2024... - Page 77 Puck Body Suspension Wheels Lateral Guide Wheels DIRECTION OF TRAVEL Magnet Array Figure 3-38: Single Array 2 Wheel Puck Rockwell Automation Publication MMI-UM002G-EN-P - August 2024...
-
Page 78: Precision Rail Vehicles
Design Guidelines Transport System Design Precision Rail Vehicles Preconfigured vehicles for use with the precision rail system are available from Rockwell Automation, see Precision Rail on page Figure 3-55, Precision Rail These vehicles are available in a version with one magnet array for payloads up to 2.5 kg [5.5 lb] (see... - Page 79 For proper operation, the payload on the vehicle and the velocity of the vehicle must fit within the curve that is shown in Figure 3-40. Dual Array Precision Rail Vehicle Max Velocity Velocity (m/s) Figure 3-42: Dual Array Precision Rail Vehicle Payload vs. Velocity Rockwell Automation Publication MMI-UM002G-EN-P - August 2024...
-
Page 80: Guideways
• The guideway must provide features to allow the vehicle to maintain its position on the guideway (see Figure 3-24 Figure 3-43). • The guideway must provide proper grounding to provide static dissipation. Rockwell Automation Publication MMI-UM002G-EN-P - August 2024... -
Page 81: Guideway And Support Materials
Design the mounts to make sure that the motor is securely fastened and cannot move. • Make sure that all motor mount locations are used and all bolts for the mounts are fully secured. Rockwell Automation Publication MMI-UM002G-EN-P - August 2024... -
Page 82: Motor Mounting Methods
MM LITE 1000 mm Motor Mounting Plate Clearance Holes for Motor Connections M6 Mounting Hardware Figure 3-44: Motor Mounting to Flat Surface Rockwell Automation Publication MMI-UM002G-EN-P - August 2024... - Page 83 This mounting method provides easy adjustment of the motor position once the motor is installed. MM LITE 1000 mm Motor Mounting Bracket Hardware Track Motor Mounting Bracket M6 Mounting Hardware Figure 3-45: Motor Mounting Using Custom Brackets Rockwell Automation Publication MMI-UM002G-EN-P - August 2024...
- Page 84 3. Make sure that the tops of all motors are coplanar to each other. Align and Secure Motors 4. Treating each motor to motor interface as a separate operation, tighten the motor mounts. See and Switches for details of the mounting procedure. Rockwell Automation Publication MMI-UM002G-EN-P - August 2024...
-
Page 85: System Stands
Figure 3-48. [9.8] TYPICAL Puck Top [9.47] Motor 240.5 Motor Mount Beam System Height Table 4-4 Leg Height ±12 Floor [4.9] [2.0] Stand Width Table 4-5 Figure 3-47: System Stand Rockwell Automation Publication MMI-UM002G-EN-P - August 2024... -
Page 86: Custom Motor Mounting
The following motor mounting guidelines are provided when designing a custom motor mounting surface (replacing the leg and beam system) for the MagneMover LITE motors. Also use these guidelines when designing a custom motor mount instead of using the motor mounting system (replacing the Rockwell Automation supplied motor mounts). M6 x 12 mm Screw... - Page 87 Custom Motor Mounting 1. Mount the motors to the custom motor mounts (or Rockwell Automation supplied motor mounts) with M6 screws. Loosely attach the motor to motor mount hardware and the motor mount to custom motor mounting surface. Make sure that the motors have a small amount of movement relative to each other.
-
Page 88: Puck Limits
This erratic behavior becomes worse as the mass or velocity is increased. Use a high payload switch (shown in Figure 4-27 Figure 4-30) to help avoid some of the erratic motion when moving through a switch. Rockwell Automation Publication MMI-UM002G-EN-P - August 2024... -
Page 89: Transport System Options
Precision Rails Spine Plate Support Post Post Mount Figure 3-51: Precision Rail Option Rockwell Automation Publication MMI-UM002G-EN-P - August 2024... -
Page 90: Precision Rails
Figure 3-52: Precision Rails NOTICE: The precision rails must always be lubricated with a thin coating of oil to provide proper operation and environmental protection, see Lubricate the Precision Rails on page 232. Rockwell Automation Publication MMI-UM002G-EN-P - August 2024... -
Page 91: Spine Plates
Straight to Curve Left Joint Straight to Curve Right Joint Curve to Curve Left Joint Curve to Curve Right Joint Straight, Joint Straight, No Joint 180º Curve No Joint Figure 3-53: Precision Rail Spine Plates Rockwell Automation Publication MMI-UM002G-EN-P - August 2024... -
Page 92: Support Post Assembly
3-52. This assembly is used to make sure that the precision rails are held the correct distance from the MagneMover LITE railless motors. Spine Plate Mounting Surface Support Post Support Post Mount Figure 3-54: Precision Rail Support Post Rockwell Automation Publication MMI-UM002G-EN-P - August 2024... -
Page 93: Precision Rail Vehicles
The interval to resupply the lubrication depends on the duty cycle and environmental factors. Mounting Plate Vehicle Body Bearings Magnet Array Figure 3-55: Precision Rail Single Array Vehicle Mounting Plate Vehicle Body Bearings Magnet Array Figure 3-56: Precision Rail Dual Array Vehicle Rockwell Automation Publication MMI-UM002G-EN-P - August 2024... -
Page 94: Precision Rail Installation
49.00 [1.929] Single Array Vehicle 1.50 [0.059] Rail Array Motor Support Post Assembly Motor Mount All Dimensions in Millimeters [Inches] Figure 3-57: Precision Rail to Motor Reference Diagram Rockwell Automation Publication MMI-UM002G-EN-P - August 2024... -
Page 95: Precision Rail Lubrication
Figure 3-58 shows the single array vehicle with one lubricator. This configuration requires a second vehicle with a lubricator for the other side of the rail. Lubricator Figure 3-58: Lubricator on Single Array Vehicle Rockwell Automation Publication MMI-UM002G-EN-P - August 2024... - Page 96 Install a lubrication pump system such as catalog number C920600 as shown in Figure Lubrication Pump System on page 232. Lubrication Port (2X One Each Side) Lubrication Distribution Tubing Lubrication Pump Figure 3-59: Precision Rail System with Lubrication Pump System Rockwell Automation Publication MMI-UM002G-EN-P - August 2024...
-
Page 97: Precision Locator
All versions of the stand are available in versions that support single or multiple precision locators. When placing a large vertical load on the pallet in the precision locator, locate the stand directly above a vertical support member (leg) for the transport system. Rockwell Automation Publication MMI-UM002G-EN-P - August 2024... -
Page 98: Pallet
The pallet is used to carry the payload and provides features for precision locating that align with the pins in the rocker arms on the precision locator. The pallet replaces the top plate on the standard glide puck. Rockwell Automation sells a standard pallet (see Figure 4-54, Precision Locator Glide Puck with Basic Pallet Mechanical Drawing, on page 162). - Page 99 SECTION C-C BUSHING MOUNT FEATURES ROTATED 90° CW SKI MOUNT FEATURES Ø9.10 30.00 90° (2.3) 3.25 Ø4.5 Ø8.50 SECTION B-B ROTATED 90° CW MAGNET ARRAY FEATURES Figure 3-61: Precision Locator Pallet Design Details Rockwell Automation Publication MMI-UM002G-EN-P - August 2024...
-
Page 100: Precision Locator Installation
[70° F] @ sea level. The compressed air system and the piping to the locators must be designed to support this requirement. A pneumatic block diagram for the precision locator that uses a 5/2 valve is provided in Figure 3-63. Operation of the valve is described after the figure. Rockwell Automation Publication MMI-UM002G-EN-P - August 2024... -
Page 101: Transport System Configuration
As the cylinder moves, air returns from the cylinder to Port 2 and exhausts at Port 3. Transport System Configuration All examples that are provided are for horizontal track layouts unless otherwise specified. The motor with puck is shown in Figure 3-6. Rockwell Automation Publication MMI-UM002G-EN-P - August 2024... -
Page 102: Straight Track Configuration
Motor Gap Top View Figure 3-65: Curve Track Configuration • Node types at the beginning of a path: Simple, Relay, Terminus, Gateway. • Node types at the end of a path: Relay, Terminus, Gateway. Rockwell Automation Publication MMI-UM002G-EN-P - August 2024... -
Page 103: Switch Configuration
Node Types at switch: Merge, Diverge. • Provides a diverge from one path into two (single entry, curve exit, straight exit). • Provides a merge of two paths into one (straight entry, curve entry, merged exit). Rockwell Automation Publication MMI-UM002G-EN-P - August 2024... - Page 104 Design Guidelines This page intentionally left blank. Rockwell Automation Publication MMI-UM002G-EN-P - August 2024...
-
Page 105: Specifications And Site Requirements
†. Nominal vehicle gap (distance between the magnet array and the motor) is 1 mm for G3 magnet arrays and 1.5 mm for G4.2 and later magnet arrays. Rockwell Automation Publication MMI-UM002G-EN-P - August 2024... - Page 106 700-1708-04 1 m, Straight None 700-1708-05 1 m, Straight Aluminum 700-1708-03-AC 1 m, Straight Stainless Steel 700-1708-04-AC 1 m, Straight None 700-1708-05-AC 250 mm, Straight Aluminum 700-1708-20 250 mm, Straight Stainless Steel 700-1708-21 Rockwell Automation Publication MMI-UM002G-EN-P - August 2024...
-
Page 107: Mechanical Specifications
Switch, High Payload, Right Aluminum 700-1708-62 Mechanical Specifications All drawings within this manual are generic and do not reflect specific configurations of the MagneMover LITE components. To Rockwell Automation Support). obtain current drawings, (see Rockwell Automation Publication MMI-UM002G-EN-P - August 2024... -
Page 108: 1000 Millimeter Motors
Dow Corning® Silicone 737 and 734. • A286 SS. • EPDM (synthetic rubber). • 300 Series SS, Passivated. • A4 SS. • 303 SS. • 304L SS, Nickel plate (SS rails). • 304 SS. Rockwell Automation Publication MMI-UM002G-EN-P - August 2024... - Page 109 Dow Corning Silicone 737 and 734. • 303 SS. • EPDM (synthetic rubber). • 304 SS. • A4 SS. • 303 SS, Nickel plate (air ports). • 316 SS. • Steel, Zinc plate (air port plug). Rockwell Automation Publication MMI-UM002G-EN-P - August 2024...
- Page 110 Copper alloy, Nickel plate. • 316L SS, Passivated. • Zinc, Nickel plate. • A286 SS. • 300 Series SS, Passivated. • Dow Corning Silicone 737 and 734. • A4 SS. • 303 SS. Rockwell Automation Publication MMI-UM002G-EN-P - August 2024...
- Page 111 A286 SS. • Dow Corning Silicone 737 and 734. • 300 Series SS, Passivated. • A4 SS. • 303 SS. • 303 SS, Nickel plate (air ports). • Steel, Zinc plate (air port plug). Rockwell Automation Publication MMI-UM002G-EN-P - August 2024...
- Page 112 A286 SS. • Dow Corning Silicone 737 and 734. • 300 Series SS, Passivated. • EPDM (synthetic rubber). • 303 SS. • A4 SS. • 304 SS. • 304L SS, Nickel plate (SS rails). Rockwell Automation Publication MMI-UM002G-EN-P - August 2024...
- Page 113 Dow Corning Silicone 737 and 734. • 303 SS. • EPDM (synthetic rubber). • 304 SS. • A4 SS. • 303 SS, Nickel plate (air ports) • 316 SS. • Steel, Zinc plate (air port plug). Rockwell Automation Publication MMI-UM002G-EN-P - August 2024...
- Page 114 • 316L SS, Passivated. • Brass, Nickel plate. • A286 SS. • Zinc, Nickel plate. • 300 Series SS, Passivated. • Dow Corning Silicone 737 and 734. • 303 SS • A4 SS. Rockwell Automation Publication MMI-UM002G-EN-P - August 2024...
- Page 115 Zinc, Nickel plate. • 303 SS. • Dow Corning Silicone 737 and 734. • 303 SS, Nickel plate (air ports). • A4 SS. • Steel, Zinc plate (air port plug). • 316L SS, Passivated. Rockwell Automation Publication MMI-UM002G-EN-P - August 2024...
-
Page 116: 250 Millimeter Motors
Dow Corning Silicone 737 and 734. • A286 SS. • EPDM (synthetic rubber). • 300 Series SS, Passivated. • A4 SS. • 303 SS. • 304L SS, Nickel plate (SS rails). • 304 SS. Rockwell Automation Publication MMI-UM002G-EN-P - August 2024... - Page 117 Dow Corning Silicone 737 and 734. • 303 SS. • EPDM (synthetic rubber). • 304 SS. • A4 SS. • 303 SS, Nickel plate (air ports). • 316 SS. • Steel, Zinc plate (air port plug). Rockwell Automation Publication MMI-UM002G-EN-P - August 2024...
- Page 118 Copper alloy, Nickel plate. • 316L SS, Passivated. • Zinc, Nickel plate. • A286 SS. • Dow Corning Silicone 737 and 734. • 300 Series SS, Passivated. • A4 SS. • 303 SS. Rockwell Automation Publication MMI-UM002G-EN-P - August 2024...
- Page 119 A286 SS. • Dow Corning Silicone 737 and 734. • 300 Series SS, Passivated. • A4 SS. • 303 SS. • 303 SS, Nickel plate (air ports). • Steel, Zinc plate (air port plug). Rockwell Automation Publication MMI-UM002G-EN-P - August 2024...
- Page 120 A286 SS. • Dow Corning Silicone 737 and 734. • 300 Series SS, Passivated. • EPDM (synthetic rubber). • 303 SS. • A4 SS. • 304 SS. • 304L SS, Nickel plate (SS rails). Rockwell Automation Publication MMI-UM002G-EN-P - August 2024...
- Page 121 Dow Corning Silicone 737 and 734. • 303 SS. • EPDM (synthetic rubber). • 304 SS. • A4 SS. • 303 SS, Nickel plate (air ports) • 316 SS. • Steel, Zinc plate (air port plug). Rockwell Automation Publication MMI-UM002G-EN-P - August 2024...
- Page 122 • 316L SS, Passivated. • Brass, Nickel plate. • A286 SS. • Zinc, Nickel plate. • 300 Series SS, Passivated. • Dow Corning Silicone 737 and 734. • 303 SS. • A4 SS. Rockwell Automation Publication MMI-UM002G-EN-P - August 2024...
- Page 123 Zinc, Nickel plate. • 303 SS. • Dow Corning Silicone 737 and 734. • 303 SS, Nickel plate (air ports). • A4 SS. • Steel, Zinc plate (air port plug). • 316L SS, Passivated. Rockwell Automation Publication MMI-UM002G-EN-P - August 2024...
-
Page 124: 125 Millimeter Radius 90° Curve Motors
Dow Corning Silicone 737 and 734. • A286 SS. • EPDM (synthetic rubber). • 300 Series SS, Passivated. • A4 SS. • 303 SS. • 304 SS. • 304L SS, Nickel plate (SS rails). Rockwell Automation Publication MMI-UM002G-EN-P - August 2024... - Page 125 Dow Corning Silicone 737 and 734. • 303 SS. • EPDM (synthetic rubber). • 304 SS. • A4 SS. • 303 SS, Nickel plate (air ports). • 316 SS. • Steel, Zinc plate (air port plug). Rockwell Automation Publication MMI-UM002G-EN-P - August 2024...
- Page 126 Copper alloy, Nickel plate. • 316L SS, Passivated. • Zinc, Nickel plate. • A286 SS. • Dow Corning Silicone 737 and 734. • 300 Series SS, Passivated. • A4 SS. • 303 SS. Rockwell Automation Publication MMI-UM002G-EN-P - August 2024...
- Page 127 A286 SS. • Dow Corning Silicone 737 and 734. • 300 Series SS, Passivated. • A4 SS. • 303 SS. • 303 SS, Nickel plate (air ports). • Steel, Zinc plate (air port plug). Rockwell Automation Publication MMI-UM002G-EN-P - August 2024...
- Page 128 A286 SS. • Dow Corning Silicone 737 and 734. • 300 Series SS, Passivated. • EPDM (synthetic rubber). • 303 SS. • A4 SS. • 304 SS. • 304L SS, Nickel plate (SS rails). Rockwell Automation Publication MMI-UM002G-EN-P - August 2024...
- Page 129 Dow Corning Silicone 737 and 734. • 303 SS. • EPDM (synthetic rubber). • 304 SS. • 303 SS, Nickel plate (air ports). • A4 SS. • 316 SS. • Steel, Zinc plate (air port plug). Rockwell Automation Publication MMI-UM002G-EN-P - August 2024...
- Page 130 • 316L SS, Passivated. • Brass, Nickel plate. • A286 SS. • Zinc, Nickel plate. • 300 Series SS, Passivated. • Dow Corning Silicone 737 and 734. • 303 SS • A4 SS. Rockwell Automation Publication MMI-UM002G-EN-P - August 2024...
- Page 131 Zinc, Nickel plate. • 303 SS. • Dow Corning Silicone 737 and 734. • 303 SS, Nickel plate (air ports). • A4 SS. • Steel, Zinc plate (air port plug). • 316L SS, Passivated. Rockwell Automation Publication MMI-UM002G-EN-P - August 2024...
-
Page 132: 90° Left Switches
• 303 SS. • Dow Corning Silicone 737 and 734. • 304 SS. • EPDM (synthetic rubber). • 440 SS. • A4 SS. • 18-8 SS. • 303 SS, Nickel plate (SS rails). Rockwell Automation Publication MMI-UM002G-EN-P - August 2024... - Page 133 304 SS. • Dow Corning Silicone 737 and 734. • 440 SS. • EPDM (synthetic rubber). • 400 Series SS. • A4 SS. • 18-8 SS. • 303 SS, Nickel plate (SS rails). Rockwell Automation Publication MMI-UM002G-EN-P - August 2024...
- Page 134 Dow Corning Silicone 737 and 734. • A286 SS. • EPDM (synthetic rubber). • Black Oxide Finish Alloy Steel. • White Vinyl Nitrile Rubber. • Tivar® 1000. • A4 SS. • Nitrile Rubber. • 316 SS. Rockwell Automation Publication MMI-UM002G-EN-P - August 2024...
-
Page 135: 90° Right Switches
• 303 SS. • Dow Corning Silicone 737 and 734. • 304 SS. • EPDM (synthetic rubber). • 440 SS. • A4 SS. • 18-8 SS. • 303 SS, Nickel plate (SS rails). Rockwell Automation Publication MMI-UM002G-EN-P - August 2024... - Page 136 304 SS. • Dow Corning Silicone 737 and 734. • 440 SS. • EPDM (synthetic rubber). • 400 Series SS. • A4 SS. • 18-8 SS. • 303 SS, Nickel plate (SS rails). Rockwell Automation Publication MMI-UM002G-EN-P - August 2024...
- Page 137 Dow Corning Silicone 737 and 734. • A286 SS. • EPDM (synthetic rubber). • Black Oxide Finish Alloy Steel. • White Vinyl Nitrile Rubber. • Tivar 1000. • A4 SS. • Nitrile Rubber. • 316 SS. Rockwell Automation Publication MMI-UM002G-EN-P - August 2024...
-
Page 138: Standard Motor Mount Bracket
9.00[0.354] THRU .625 15.88 All Dimensions in Millimeters [Inches] Figure 4-31: Standard Motor Mount Bracket Mechanical Drawing Exposed Materials • 6063-T5 AL, Anodized per MIL-A-8625F, Type II, Class 2. • 304 Stainless Steel. Rockwell Automation Publication MMI-UM002G-EN-P - August 2024... -
Page 139: V-Brace Kits
6061-T6 Aluminum, Hardcoat Anodized Merge end of G4 high payload switch Includes one 200-2450-00 key & two M6 x 12 mm per MIL-A-8625-F, Type III, Class 1, MMI-ML-KVHPS-0 (long flipper) with aluminum rails screws Non-dyed. Rockwell Automation Publication MMI-UM002G-EN-P - August 2024... -
Page 140: Stand System
Table 4-4 60 ±12 All Dimensions in Millimeters Figure 4-33: Stand System Mechanical Drawing Exposed Materials • Galvanized Steel. • Zinc, Electrophoretically coated. • 6060 T66 Aluminum, Anodized. • PA6 Nylon. • Rubber. Rockwell Automation Publication MMI-UM002G-EN-P - August 2024... - Page 141 1050 mm [41.3 in] 200-1991-4X 1300 mm [51.2 in] 200-1991-5X Maximum number of motors supported, minimum motor spacing is 250 mm center-to-center. † The “X” in the catalog number represents the stand height (see Table 4-4) Rockwell Automation Publication MMI-UM002G-EN-P - August 2024...
-
Page 142: Glide Pucks
RUNNING SURFACES Weight: 0.43 kg [0.9 lb] All Dimensions in Millimeters [Inches] Figure 4-34: Glide Puck Mechanical Drawing (G5) Exposed Materials • Stainless Steel. • 316/316L/316L #2 Stainless Steel. • PEEK/PTFE. • UHMW Polyethylene. Rockwell Automation Publication MMI-UM002G-EN-P - August 2024... -
Page 143: Wheeled Pucks
7075-T651 Aluminum, Anodized per MIL-A8625, Type III, Class 2, Black. • 6061-T6 Aluminum, Natural. • 174-PH/18-8/304/316/440C Stainless Steel. • PEEK. • Polyurethane. • Stainless Steel. • 316L/316L #2 Stainless Steel. • UHMW Polyethylene. Rockwell Automation Publication MMI-UM002G-EN-P - August 2024... - Page 144 7075-T651 Aluminum, Anodized per MIL-A8625, Type III, Class 2, Black. • 6061-T6 Aluminum, Natural. • 174-PH/18-8/304/316/440C Stainless Steel. • PEEK. • Polyurethane. • Stainless Steel. • 316L/316L #2 Stainless Steel. • UHMW Polyethylene. Rockwell Automation Publication MMI-UM002G-EN-P - August 2024...
-
Page 145: Tandem Glide Pucks
All Dimensions in Millimeters [Inches] Figure 4-37: Tandem Glide Puck Mechanical Drawing (G5) Exposed Materials • Stainless Steel. • 316/316L/316L #2 Stainless Steel. • PEEK/PTFE. • UHMW Polyethylene. • Delrin® FG150. • Acetal. Rockwell Automation Publication MMI-UM002G-EN-P - August 2024... -
Page 146: Tandem Wheeled Pucks
6061-T6 Aluminum, Anodized per MIL-A8625, Type III, Class 2, Black. • 304 Stainless Steel. • 174-PH/18-8/304/316/440C Stainless Steel. • PEEK. • Polyurethane. • Igus® L280. • 316L/316L #2 Stainless Steel. • UHMW Polyethylene. Rockwell Automation Publication MMI-UM002G-EN-P - August 2024... -
Page 147: Magnet Arrays
24.1±0.4 [0.657±0.012] 16.7±0.3 Weight: 0.37 kg [0.8 lb] All Dimensions in Millimeters [Inches] Figure 4-39: Magnet Array Mechanical Drawing (G4.2) Exposed Materials • Stainless Steel. • 316L/316L #2 Stainless Steel. • UHMW Polyethylene. Rockwell Automation Publication MMI-UM002G-EN-P - August 2024... -
Page 148: Mm Lite Power Supply
All vents must be clear for unobstructed airflow. Ingress Protection Rating: IP30. Exposed Materials The power supply provides openings for airflow and must not be located where harsh conditions exist. Rockwell Automation Publication MMI-UM002G-EN-P - August 2024... -
Page 149: Precision Rail Option
Figure 4-41: Precision Rail Mechanical Drawing NOTICE: The precision rails must always be lubricated with a thin coating of oil to provide proper operation and environmental protection. Exposed Materials • 420 Series Stainless Steel or High Carbon Steel. Rockwell Automation Publication MMI-UM002G-EN-P - August 2024... -
Page 150: Precision Rail Single Array Vehicle
23.00 DIRECTION OF MOTION [4.553] 115.64 [1.024] 26.00 [0.803] 20.40 [1.201] 30.51 [1.937] 49.21 Weight: 0.8 kg [1.6 lb] All Dimensions in Millimeters [Inches] Figure 4-42: Precision Rail Single Array Vehicle Mechanical Drawing Rockwell Automation Publication MMI-UM002G-EN-P - August 2024... -
Page 151: Precision Rail Dual Array Vehicle
Figure 4-43: Precision Rail Dual Array Vehicle Mechanical Drawing NOTICE: The bearings on the precision rail vehicles must always be lubricated with a thin coating of oil to provide proper operation and environmental protection. Rockwell Automation Publication MMI-UM002G-EN-P - August 2024... -
Page 152: Precision Rail Support Post Assembly
• 6061-T6 AL, Powder coated. • MIC 6 AL, Powder coated. • 18-8 Stainless Steel. • Steel, Zinc plate. • 304 Stainless Steel. • A2 Stainless Steel. • 304 Stainless Steel. • Galvanized Steel. Rockwell Automation Publication MMI-UM002G-EN-P - August 2024... -
Page 153: Spine Plates
6X R4 125.0° 2X 54.98 64.98 141.5° 94.99 114.98 R169.88 138.90 Left 150.0 128.5° [0.25] 6.35 700-1622-03 Right All Dimensions in Millimeters Figure 4-45: Precision Rail Straight to Curve, Spine Plates, Mechanical Drawing Rockwell Automation Publication MMI-UM002G-EN-P - August 2024... - Page 154 700-1622-01 110.30 114.2° 98.92 2X 95.00 76.40 75.00 141.5° R169.88 35.00 11.08 Left 128.5° [0.25] 6.35 700-1622-04 Right All Dimensions in Millimeters Figure 4-46: Precision Rail Curve to Curve, Spine Plates, Mechanical Drawing Rockwell Automation Publication MMI-UM002G-EN-P - August 2024...
- Page 155 Figure 4-47: Precision Rail Straight, No Joint, Spine Plate, Mechanical Drawing 700-1622-05 125.0° 2X 54.98 64.98 73.58 141.5° 124.98 132.0 [0.25] 6.35 All Dimensions in Millimeters Figure 4-48: Precision Rail Straight, With Joint, Spine Plate, Mechanical Drawing Rockwell Automation Publication MMI-UM002G-EN-P - August 2024...
- Page 156 Specifications and Site Requirements Mechanical Specifications 700-1622-06 114.2° 110.30 100.42 2X 95.00 76.40 141.5° R169.88 9.58 128.5° [0.25] 6.35 All Dimensions in Millimeters Figure 4-49: Precision Rail Curve, 180°, No Joint, Spine Plate, Mechanical Drawing Rockwell Automation Publication MMI-UM002G-EN-P - August 2024...
-
Page 157: Precision Rail Lubrication System
• Kluber 4 UH1-68N oil. • Technical Polymer. • Fluoropolymer Tubing. • Nitrile rubber. • 304 SS. • Brass, Nickel plate. • Brass. • Nylon Plastic. • Plastic. • Drive housing with LCD. Rockwell Automation Publication MMI-UM002G-EN-P - August 2024... -
Page 158: Precision Locator Option
18-8 (A2) Hardened Stainless Steel with Thin Dense Chrome plating. • UHMW, WHITE • SBR Rubber. • IGUS iglide L280. • Music Wire. • 18-8 (A2) Stainless Steel. • Neoprene Rubber. • Steel, Zinc and Clear Chromate. Rockwell Automation Publication MMI-UM002G-EN-P - August 2024... -
Page 159: Stand Assembly
700-1677-03 Shroud Kit, 4-up, 100 mm pitch 700-1677-04 Stand Assembly 700-1666-XX 159.8 112.0 182.1 96.0 Weight: 1.1 kg [2.5 lb] All Dimensions in Millimeters [inches] Figure 4-52: Standard Precision Locator Stand Mechanical Drawing Rockwell Automation Publication MMI-UM002G-EN-P - August 2024... - Page 160 Stand Style Catalog # 1-up, 1 Puck 700-1666-01 2-up, 2 Pucks, 100 mm pitch 700-1666-02 3-up, 3 Pucks, 100 mm pitch 700-1666-03 4-up, 4 Pucks, 100 mm pitch 700-1666-04 1-up, Tandem Puck 700-1666-09 Rockwell Automation Publication MMI-UM002G-EN-P - August 2024...
-
Page 161: Adjustable Motor Mount Bracket
All Dimensions in Millimeters [Inches] Figure 4-53: Adjustable Motor Mount Bracket Mechanical Drawing Exposed Materials • 6063-T5 AL, Anodized per MIL-A-8625F, Type II, Class 2. • 304 Stainless Steel. • 18-8 Stainless Steel. • Nylon. Rockwell Automation Publication MMI-UM002G-EN-P - August 2024... -
Page 162: Pallet
6061-T6 Aluminum, Hardcoat Anodized per MIL-A8625-F, Type III, Class 2, Black. • 18-8 (A2) Hardened Stainless Steel with Thin Dense Chrome plating. • Stainless Steel. • 316/316L/316L #2 Stainless Steel. • PEEK/PTFE. • UHMW Polyethylene. Rockwell Automation Publication MMI-UM002G-EN-P - August 2024... - Page 163 6061-T6 Aluminum, Hardcoat Anodized per MIL-A8625-F, Type III, Class 2, Black. • 18-8 (A2) Hardened Stainless Steel with Thin Dense Chrome plating. • Stainless Steel. • 316/316L/316L #2 Stainless Steel. • PEEK/PTFE. • UHMW Polyethylene. Rockwell Automation Publication MMI-UM002G-EN-P - August 2024...
-
Page 164: Electrical Specifications
Contact TechConnect (rockwellautomation.custhelp.com) for questions about power supply size based on the motor application and the size of the magnet array. Rockwell Automation Publication MMI-UM002G-EN-P - August 2024... - Page 165 NOTICE: Any user-supplied power supply must be NRTL/ATL approved. NOTICE: Hot-plugging of either power source to the motors is not recommended. Rockwell Automation Publication MMI-UM002G-EN-P - August 2024...
-
Page 166: Straight And Curve Motors
Micro-Mizer®, 8-Pin, Plug The Sync Option Connector is only present if the Synchronization option is installed. If the Sync Option connector is not installed, a low-profile cap is installed to cover the connector mounting hole. Rockwell Automation Publication MMI-UM002G-EN-P - August 2024... - Page 167 TxD- Table 4-12: MagneMover LITE Motor Power Pinouts Keyway Mini-Conn-X, 4-Pin, Plug V+ Propulsion V+ Logic V- Return Table 4-13: MagneMover LITE Sync Pinouts Keyway Micro-Mizer, 8-Pin, Plug SIMO SCLK SOMI — RESET Rockwell Automation Publication MMI-UM002G-EN-P - August 2024...
- Page 168 Micro-Mizer, 8-Pin, Plug The Sync Option Connector is only present if the Synchronization option is installed. If the Sync Option connector is not installed, a low-profile cap is installed to cover the connector mounting hole. Rockwell Automation Publication MMI-UM002G-EN-P - August 2024...
- Page 169 — Table 4-16: MagneMover LITE Motor Power Pinouts Keyway Mini-Conn-X, 4-Pin, Plug V+ Propulsion V+ Logic V- Return Table 4-17: MagneMover LITE Sync Pinouts Keyway Micro-Mizer, 8-Pin, Plug SIMO SCLK SOMI — RESET Rockwell Automation Publication MMI-UM002G-EN-P - August 2024...
-
Page 170: Switches
+36V DC ±10%, 1.5 A typical, 5.0 A max Mini-Conn-X, 4-Pin, Plug Ethernet – 10/100/1000 Base-Tx RJ45, Socket, IP-67 Table 4-19: MagneMover LITE Switch RS-422 Pinouts M8 Nano-Mizer, 4-Pin, Plug RxD+ RxD- TxD+ TxD- Rockwell Automation Publication MMI-UM002G-EN-P - August 2024... - Page 171 Electrical Specifications Table 4-20: MagneMover LITE Switch Power Pinouts Keyway Mini-Conn-X, 4-Pin, Plug V+ Propulsion V+ Logic V- Return Table 4-21: MagneMover LITE Switch Ethernet Pinout LAN – RJ45, Socket — — — — Rockwell Automation Publication MMI-UM002G-EN-P - August 2024...
- Page 172 M12 Eurofast, FKFDD, Socket (10/100/1000 Base-Tx) +36V DC ±10%, 1.5 A typical, 5.0 A max Mini-Conn-X, 4-Pin, Plug Table 4-23: MagneMover LITE Switch Power Pinouts Keyway Mini-Conn-X, 4-Pin, Plug V+ Propulsion V+ Logic V- Return Rockwell Automation Publication MMI-UM002G-EN-P - August 2024...
-
Page 173: Mm Lite Power Supply
MagneMover LITE transport system is identified. NOTE: Rockwell Automation recommends that no more than 20 motors be powered from one MM LITE Power supply (10 per 300 W DC output). - Page 174 5x20 mm, 250V, 10 A time-lag fuse Table 4-28: MM LITE Power Supply DC Power Pinouts Individual Terminals V+ Propulsion Black V+ Logic White V- Return Green Rockwell Automation recommends tying V- Return to RTN. Rockwell Automation Publication MMI-UM002G-EN-P - August 2024...
-
Page 175: Ac Power Cable
ATTENTION: There is a potential shock hazard if the MM LITE power supply chassis and cover are not connected to an electrical safety ground via the safety ground in the AC input connector. Rockwell Automation Publication MMI-UM002G-EN-P - August 2024... -
Page 176: Motor Power Cables
Figure 4-61: MM LITE DC Power Cables Table 4-30: DC Power Cable Pinouts Keyway Keyway Individual Terminals Mini-Mizer, 4-Pin, Socket Mini-Mizer, 4-Pin, Plug Mini-Conn-X, 4-Pin, Socket V+ Propulsion Black V+ Logic White V- Return Green Rockwell Automation Publication MMI-UM002G-EN-P - August 2024... -
Page 177: Dc Enable
The DC Enable jumper plug is used when remote control and monitoring of the motor propulsion power is not required. This jumper (provided by Rockwell Automation) is used in place of the DC Enable cable and is permanently plugged into J4 on the MM LITE power supply. -
Page 178: Precision Rail Lubrication Pump
Table 4-33: Precision Rail Optional Lubricator Pump Indicators Label Description Indicator Type — Display — Status Precision Rail Lubrication Pump Connector The pinouts for the connector on the lubrication pump and the mating cable are provided in Table 4-34. Rockwell Automation Publication MMI-UM002G-EN-P - August 2024... -
Page 179: Precision Rail Lubrication Pump Controls And Indicators
The electrical connections that are shown in Figure 4-65 are only available if the sensor option is installed. Cylinder Up Sensor Connection Cylinder Down Sensor Connection Figure 4-65: Precision Locator Electrical Connections Rockwell Automation Publication MMI-UM002G-EN-P - August 2024... -
Page 180: Pneumatic Specifications
Figure 4-66: Air-cooled Motor Pneumatic Connections Table 4-38: Air-cooled Motor Pneumatic Connectors Label Description Connector Type Air In 12 mm OD one-touch fitting, 10 mm hex Air Out 12 mm OD one-touch fitting, 10 mm hex Rockwell Automation Publication MMI-UM002G-EN-P - August 2024... -
Page 181: Air Cooling
For maximum service life, always actuate these devices from arm up to arm down in no less than 100 ms (accomplished by adjusting the flow controls on the user-supplied pneumatic valve for the locator). Open Close Figure 4-67: Precision Locator Pneumatic Connections Rockwell Automation Publication MMI-UM002G-EN-P - August 2024... -
Page 182: Communication
IP address of each additional node controller must be changed to a unique address to avoid IP conflicts. The TCP/IP address that is used on the node controllers must be configured as specified in the Node Controller Interface User Manual, publication MMI-UM001. Rockwell Automation Publication MMI-UM002G-EN-P - August 2024... -
Page 183: Tcp/Ip Communication - Node Controller To Motor
4-pin M8 socket at any of the RS-422 ports. These cables connect to the last MM LITE motor in a path with a 4-pin M8 socket on the end of the cable that plugs into the downstream communication port. Rockwell Automation Publication MMI-UM002G-EN-P - August 2024... -
Page 184: Motor To Motor
This cable is a standard pin-to-pin straight through cable with a 4-pin M8 socket on one end and a 4-pin M8 socket on the other end. One M8 socket plugs into the downstream communication port on the motor and the other M8 socket plugs into the upstream communication port on the next motor. Rockwell Automation Publication MMI-UM002G-EN-P - August 2024... -
Page 185: Ethernet Interface Connection
Manual, publication MMI-UM005, for cable and connection details. There is no need to construct the sync cables as all cabling is Rockwell Automation available for the transport system. Contact Technical Support for additional or replacement cables (see Support). Rockwell Automation Publication MMI-UM002G-EN-P - August 2024... -
Page 186: Site Requirements
When operating in a high altitude environment with lower air pressure, both the operating temperature range and the cooling capacity has to be derated compared to that of sea level. For the air-cooled motors, a rule-of-thumb formula for derating the cooling capacity is: Derating Factor = 1 - (H/17500) Rockwell Automation Publication MMI-UM002G-EN-P - August 2024... -
Page 187: Lighting, Site
NOTE: The Exclusion Zones that are shown are for the MagneMover LITE transport system components only. Additional exclusion zones may be required based on the design of a custom vehicle and the material that the MM LITE transport system is moving. Rockwell Automation Publication MMI-UM002G-EN-P - August 2024... - Page 188 Specifications and Site Requirements This page intentionally left blank. Rockwell Automation Publication MMI-UM002G-EN-P - August 2024...
-
Page 189: Installation
190; inspect and verify the contents against the shipping documents. Report any damage immediately to the shipper and to Rockwell Automation®. One set of shipping documents is attached to the outside of the main shipping crate for easy access. -
Page 190: Unpacking And Moving
LIFTING HAZARD ATTENTION: The MagneMover LITE components can weigh as much as 7.3 kg [16.1 lb]. ATTENTION: Use proper techniques for lifting and safety toe shoes when moving any MagneMover LITE components. Rockwell Automation Publication MMI-UM002G-EN-P - August 2024... -
Page 191: Transport System Installation
000-0616-00 – Motor Alignment Fixture, ML. Installation Overview – User-Supplied Mounting The following sequence provides an overview of the installation of the MagneMover LITE motors, switches, and other components on user equipment or a custom stand system. Rockwell Automation Publication MMI-UM002G-EN-P - August 2024... -
Page 192: Installation Overview - Supplied Mounting
4. Attach cable chase cover brackets to curve and switch motor mounts (see Installing Cable Chase Cover Brackets page 201). 5. Attach the motor mounts to all motors and switches (see Installing Motor Mounts on Motors and Switches on page 202). Rockwell Automation Publication MMI-UM002G-EN-P - August 2024... -
Page 193: Installation Overview - Precision Rails
NOTE: Loosely fasten all precision rail hardware (finger-tighten then back off one-half turn) to allow for alignment and final adjustments once all components within the system have been assembled. 8. Attach the precision rails to the support posts (see Attach Rails to Spine Plates on page 226). Rockwell Automation Publication MMI-UM002G-EN-P - August 2024... -
Page 194: Installation Overview - Precision Locator
237). 5. Install the pneumatic controls for the precision locators (see Install the Pneumatic Controls on page 238). 6. Install the covers on the precision locators (see Install the Covers on page 239). Rockwell Automation Publication MMI-UM002G-EN-P - August 2024... -
Page 195: Stand System Installation
2. Attach the single path legs at the appropriate locations (if not already installed) as shown in Figure 5-2. NOTE: Orient the feet as required to allow proper final installation of the beam. Rockwell Automation Publication MMI-UM002G-EN-P - August 2024... - Page 196 NOTE: The Loctite must cure for 2 hours at 22° C [72° F] before using the transport system. 3. Attach the parallel path legs at the appropriate locations (if not already installed) as shown in Figure 5-3. Rockwell Automation Publication MMI-UM002G-EN-P - August 2024...
- Page 197 NOTE: Make sure that the angle bracket is configured for 50 mm use by placing the inserts into the bracket with the hole in the insert to the outside of the bracket as shown in Figure 5-4. Rockwell Automation Publication MMI-UM002G-EN-P - August 2024...
- Page 198 NOTE: The Loctite must cure for 2 hours at 22° C [72° F] before using the transport system. 4. Verify that all legs are perpendicular to the beams using a machinist square. 5. Once the stand assembly is complete, make sure that the transport system is properly located. Rockwell Automation Publication MMI-UM002G-EN-P - August 2024...
-
Page 199: Leveling The Magnemover Lite
B. Adjust the feet on the legs as required to reach the required height with a 14 mm Hex wrench. C. Lock the feet into position by tightening the jam nut against the leg with a 17 mm Hex wrench. D. Repeat for each foot. Rockwell Automation Publication MMI-UM002G-EN-P - August 2024... -
Page 200: Securing The Transport System
Secure the feet on the MagneMover LITE transport system to the facility floor to help prevent system movement. Drill a hole through each of the indicated locations on the feet being secured and install an appropriate fastener. Rockwell Automation Publication MMI-UM002G-EN-P - August 2024... -
Page 201: Motor Installation
2. Install a curve bracket on one side of the switch motor mount with two M5 screws and tighten to 1.6 N•m [14 in•lb] with a Phillips bit. 3. Install a switch bracket to the other side of the switch motor mount with two M5 screws and tighten to 1.6 N•m [14 in•lb] with a Phillips bit. Rockwell Automation Publication MMI-UM002G-EN-P - August 2024... -
Page 202: Installing Motor Mounts On Motors And Switches
(see Precision Locator Installation on page 235). If motors or switches are being mounted to supports other than the MagneMover LITE stand system, make sure that the motors are flat and level once assembled. Rockwell Automation Publication MMI-UM002G-EN-P - August 2024... - Page 203 125 mm R 90° Curve Motor Center of beam Left or Right Switch Center of beam Make sure that the beam is oriented so that all internal fastening hardware is on the bottom of the beam. Rockwell Automation Publication MMI-UM002G-EN-P - August 2024...
-
Page 204: Align And Secure Motors And Switches
V-brace (see V-brace Kits on page 139) is attached over the alignment features on both rails on each motor. NOTE: To align and secure railless motors, see Align and Secure Railless Motors on page 207. Rockwell Automation Publication MMI-UM002G-EN-P - August 2024... - Page 205 Figure 5-13 Figure 5-14. Use standard v-braces (200-2002-xx) for all other rail connections. NOTICE: Moving the rails on the switches can affect the operation of the switch and requires recalibration of the switch. Rockwell Automation Publication MMI-UM002G-EN-P - August 2024...
- Page 206 1. Loosen the M6 bolt used to secure the switch to the motor mount for all switches being adjusted if necessary. 2. For aluminum rails, install the appropriate V-braces at all guide rail joints using M6 x 12 mm screws and tighten finger-tight to pull the rails together. Rockwell Automation Publication MMI-UM002G-EN-P - August 2024...
-
Page 207: Align And Secure Railless Motors
4. Align the straight to curve motor joints, make sure that the tops of the motors are coplanar. Tighten the two M6 x 10 mm screws on each V-brace at that motor joint to 3.4 N•m [30 in•lb] with a T30 Torx bit. Rockwell Automation Publication MMI-UM002G-EN-P - August 2024... -
Page 208: Verify Motor And Switch Installation
Locate the network switches close to the node controllers they are responsible for to minimize the length of all wiring. See the network switch user documentation for mounting information, making sure that any service and exclusion zones are maintained. Rockwell Automation Publication MMI-UM002G-EN-P - August 2024... -
Page 209: Mounting Power Supplies
M8 Screw (2X) M8 Lock Washer (2X) Bracket (2X) M8 T-Nut (2X) Power Supply Screw (6X) M5 Screw Cable Tie Holder M5 T-Nut Figure 5-16: Power Supply Mounting Rockwell Automation Publication MMI-UM002G-EN-P - August 2024... -
Page 210: Mounting Allen-Bradley Power Supplies
Figure 5-17. 250V AC (125V DC), 10 A ceramic slow blow fuses (Littelfuse 326 or equivalent) V+ Propulsion V+ Logic 1606-XLS480 Power Supply V- Logic Figure 5-17: Fusing for Allen-Bradley Power Supplies Rockwell Automation Publication MMI-UM002G-EN-P - August 2024... -
Page 211: Connecting Motors And Electronics
MagneMover LITE transport system as damage to internal components can result. NOTICE: The NC LITE only supports the custom +18V DC Power over Ethernet (PoE) used by Rockwell Automation. Never connect the NC LITE to a standard PoE network as damage to internal components can result. - Page 212 However, all connections to the motors at the ends of all paths that meet in a node must be made to the same node controller. See the MagneMotion System Configurator User Manual, publication MMI-UM046, for more information about nodes and paths. Rockwell Automation Publication MMI-UM002G-EN-P - August 2024...
- Page 213 (downstream) ports on the node controller. Record the node controller IP address from the transport system layout and the port number from the node controller for entry into the Node Controller Configuration File. Rockwell Automation Publication MMI-UM002G-EN-P - August 2024...
- Page 214 6. Bundle and dress all cables (use nylon cable-ties) as required to keep all cable routing clean. 7. Make sure that each node controller is properly grounded. 8. See Facilities Connections on page 239 for external communication connections. Rockwell Automation Publication MMI-UM002G-EN-P - August 2024...
-
Page 215: Ethernet Motor Communication
However, all connections to the motors at the ends of all paths that meet in a node must be made to the same node controller. See the MagneMotion System Configurator User Manual, publication MMI-UM046, for more information about nodes and paths. Rockwell Automation Publication MMI-UM002G-EN-P - August 2024... - Page 216 The motors at the end of a chain must not have their downstream Ethernet port connected. 5. Bundle and dress all cables (use nylon cable-ties) as required to keep all cable routing clean. 6. See Facilities Connections on page 239 for external communication connections. Rockwell Automation Publication MMI-UM002G-EN-P - August 2024...
-
Page 217: Digital I/O
If node controllers with digital I/O are being used, wiring for discrete digital inputs and outputs can be connected to the node controllers and used for E-stops, interlocks, light stacks, and general-purpose I/O. See the Node Controller Hardware User Manual, publication MMI-UM013, for the digital I/O connection locations and wiring diagrams. Rockwell Automation Publication MMI-UM002G-EN-P - August 2024... -
Page 218: Installing Motor Power Cables
MM LITE power supply (600 W). Rockwell Automation recommends that a maximum of 10 motors be connected to J1 or J2 on the power supply at one time (20 motors per power supply). -
Page 219: Installing Magnet Arrays/Pucks
NOTICE: To avoid damage to watches, instruments, electronics, and magnetic media, keep metal tools, metal objects, magnetic media (for example, memory disks/chips, credit cards, and tapes) and electronics away from the magnet arrays. Rockwell Automation Publication MMI-UM002G-EN-P - August 2024... -
Page 220: Magnet Array Installation
MM LITE transport system is installed. NOTE: Rockwell Automation recommends installing all pucks before completing the motor installation on a closed-loop system by sliding them onto the transport system at the end of an installed motor and then sliding them out of the way. - Page 221 3. Locate an outer curve cover against the motor mount on the outside of the curve. 4. Install two M5 x 8 mm screws to secure the cover. 5. Tighten the four M5 screws to 1.6 N•m [14 in•lb] with a Phillips bit. Rockwell Automation Publication MMI-UM002G-EN-P - August 2024...
- Page 222 3. Locate two inner covers against the bracket on the inside of the switch. 4. Install two M5 x 8 mm screws each to secure each cover. 5. Tighten the six M5 screws to 1.6 N•m [14 in•lb] with a Phillips bit. Rockwell Automation Publication MMI-UM002G-EN-P - August 2024...
-
Page 223: Option Installation
NOTE: Loosely fasten (finger-tighten then back off one-half turn) all parts when installing the precision rail structural components. This loose assembly provides the parts a small amount of movement relative to each other to allow for final adjustments once the entire precision rail system is in place. Rockwell Automation Publication MMI-UM002G-EN-P - August 2024... -
Page 224: Assemble Precision Rail Support Posts
4. Position the support post base 38 mm [1.50 in] from the end of the connector plate on the post mount as shown in Figure 5-30. Tighten the M8 screws to 26 N•m [230 in•lb] with a 6 mm Hex wrench. 38.0 [1.5] Figure 5-30: Precision Rail Support Post to Post Mount Spacing Rockwell Automation Publication MMI-UM002G-EN-P - August 2024... -
Page 225: Attach Precision Rail Support Posts To The Beam
NOTE: Make sure that the rail mounting edge of the spine plate is oriented towards the motor. Rockwell Automation Publication MMI-UM002G-EN-P - August 2024... -
Page 226: Attach Rails To Spine Plates
Figure 5-33. NOTE: The adjustment key is inserted for connecting straight rail to curved rail sections only. The adjustment key is not required for other rail to rail connections. Rockwell Automation Publication MMI-UM002G-EN-P - August 2024... - Page 227 Before attaching the final rail within a closed loop system, install all vehicles onto the rails. See Replace Precision Rail Vehicles on page 328. Rockwell Automation Publication MMI-UM002G-EN-P - August 2024...
-
Page 228: Align And Secure Rails To Spine Plates
Once all rails have been loosely attached to the spine plates, they must be aligned and secured to the plates. The alignment sequence is: Straight Rail to Curved Rail Joints Curved Rail to Curved Rail Joints Straight Rail to Straight Rail Joints Curved Rail, No Joint Locations Straight, No Joint Locations Rockwell Automation Publication MMI-UM002G-EN-P - August 2024... - Page 229 2. Once the rails are aligned, tighten each screw to 1.8 N•m [16 in•lb] following the sequence shown in Figure 5-36. 3. Repeat Step 1 through Step 2 for all curved rail to curved rail joints in the system. Rockwell Automation Publication MMI-UM002G-EN-P - August 2024...
- Page 230 1. Once the rail is aligned, tighten each screw to 1.8 N•m [16 in•lb] following the sequence shown in Figure 5-38. 2. Repeat Step 1 for all 180° curved rails at the mid-point. Rockwell Automation Publication MMI-UM002G-EN-P - August 2024...
-
Page 231: Secure Spine Plates To Support Posts
3. Tighten the second M6 screw on the spine plate to 3.2 N•m [28 in•lb] with a 5 mm Hex wrench. 4. Select to the next closest spine plate and repeat Step 1 through Step 3. Continue securing each spine plate to its support post until all spine plates are secure. Rockwell Automation Publication MMI-UM002G-EN-P - August 2024... -
Page 232: Install The Precision Rail Vehicles
These plugs help prevent oil from leaking during shipment. Remove these plugs to connect the distribution tubes. The pump fittings contain a check valve to help prevent backflow when a replacement reservoir is installed. See the manufacturers documentation for detailed information. Rockwell Automation Publication MMI-UM002G-EN-P - August 2024... - Page 233 Observe the clearance requirements that are shown in Figure 5-42. NOTE: The power connection can be routed to a digital output on the host controller to provide remote switching of the pump. Rockwell Automation Publication MMI-UM002G-EN-P - August 2024...
-
Page 234: Initial Lubrication Using The Pump System
NOTE: It is normal for some of the oil to become black, but you must not see signs of rusting or burnt grease, which is a sign of missing lubrication. Rockwell Automation Publication MMI-UM002G-EN-P - August 2024... -
Page 235: Lubrication Using The Pump System During Normal Operation
Back Plate Stand Rib M8 x 30 mm Bolt (1X per Rib) M8 Lock Washer (1X per Rib) Pneumatic M6 x 25 mm Screw Connections (4X) Figure 5-43: MagneMover LITE Precision Locator Option, Standard Rockwell Automation Publication MMI-UM002G-EN-P - August 2024... -
Page 236: Install Pallets And Pucks
The precision locators are installed on the stands before installing the stands to provide ease of assembly. The precision locators can be removed or installed on the stands once the stand is installed in the transport system, however it is more difficult to access the mounting screws for the locator. Rockwell Automation Publication MMI-UM002G-EN-P - August 2024... -
Page 237: Install The Precision Locator Assemblies
With the puck manually pinned into position on the stand, verify proper access to the pallet by the remote equipment. 7. Tighten the M8 bolts that secure the stand ribs to the beam to 26 N•m [230 in•lb]. Rockwell Automation Publication MMI-UM002G-EN-P - August 2024... -
Page 238: Install The Pneumatic Controls
If the sensors are installed, verify that they are in the correct positions and adjust if necessary. To adjust, loosen the 2.5 mm set screw, adjust the position of the sensor, and tighten the set screw. Rockwell Automation Publication MMI-UM002G-EN-P - August 2024... -
Page 239: Install The Covers
The following procedure provides the information that is required to make all network communication and PoE connections to the node controllers as shown in Figure 5-46. See Figure 5-18 Figure 5-19 for RS-422 motor and network connections and Figure 5-21 Figure 5-22 for Ethernet motor and network connections. Rockwell Automation Publication MMI-UM002G-EN-P - August 2024... -
Page 240: Electrical Connections
See Electrical Specifications on page 164 for electrical requirements. Make sure that all electrical connections are for the appropriate voltage and power rating. Rockwell Automation Publication MMI-UM002G-EN-P - August 2024... - Page 241 Plug the power supply into the power distribution from the main power disconnect for the facility. Then, connect the cable from the SYNC IT power supply to the SYNC IT. Make sure that the SYNC IT controllers are mounted to grounded surfaces. Rockwell Automation Publication MMI-UM002G-EN-P - August 2024...
-
Page 242: E-Stop Circuit
And, creation of host controller software to direct vehicle movement for the particular application and to monitor transport system performance. Rockwell Automation provides software tools to simplify the creation of the Node Controller Configuration File, for system testing, and for system monitoring. See Transport System Software Overview... -
Page 243: Software Overview
All software running on the MagneMover LITE transport system must be part of the same release. See the Release Notes that are provided with the software for additional information. Only qualified personnel or personnel that are directed by Rockwell Automation should make alterations or changes to the software. -
Page 244: Check-Out And Power-Up
After the MagneMover LITE transport system has been installed, all connections must be checked. Then, an initial power-up must be performed before proceeding any further with the installation process. This section describes the procedure for the initial installation check-out. Rockwell Automation Publication MMI-UM002G-EN-P - August 2024... - Page 245 Do not attempt to operate the MagneMover LITE transport system until all setup procedures that are described in this chapter have been completed. The indicators on the components of the MagneMover LITE transport system light as shown in Table 5-5. Rockwell Automation Publication MMI-UM002G-EN-P - August 2024...
- Page 246 – a series of slow moves then a series of rapid moves). 13. Review the log files for each node controller to make sure that the system has been programmed and configured properly (see the Node Controller Interface User Manual, publication MMI-UM001). Rockwell Automation Publication MMI-UM002G-EN-P - August 2024...
-
Page 247: System Testing
8. Move vehicles individually or create a Demo Script for repetitive testing (see the NCHost TCP Interface Utility User Manual, publication MMI-UM010). 9. Monitor transport system operation with the NCHost TCP Interface Utility. Rockwell Automation Publication MMI-UM002G-EN-P - August 2024... - Page 248 Installation This page intentionally left blank. Rockwell Automation Publication MMI-UM002G-EN-P - August 2024...
-
Page 249: Operation
Motor Secondary Motor Primary “Unrolling” a Rotary Motor Motor Secondary Vehicle (Puck) Motor Secondary Movement (Perm Magnets) Motor Primary MagneMover LITE Linear Synchronous Motor (Coils) Figure 6-1: Linear Synchronous Motor Derived From Rotary Motor Rockwell Automation Publication MMI-UM002G-EN-P - August 2024... -
Page 250: Magnemover Lite Transport System Advantages
3 mm [0.12 in] when not moving. However, this dimension is variable depending upon the vehicle edge location relative to the block boundary. The anti-collision feature in the MagneMover LITE motor software keeps two vehicles from occupying the same motor block. Rockwell Automation Publication MMI-UM002G-EN-P - August 2024... -
Page 251: Motor Operation
In the linear motor, these forces tend to pull the vehicle forward or backward at specified intervals along the motor. The MagneMover LITE linear motors do not use an iron core. As such, they do not exhibit any cogging forces. Rockwell Automation Publication MMI-UM002G-EN-P - August 2024... -
Page 252: Motor Blocks
6-4. When trying to create stations that put vehicle next to each other, the vehicle positions and the space that a vehicle occupies in a motor block must be considered, as shown in Figure 6-4. Rockwell Automation Publication MMI-UM002G-EN-P - August 2024... -
Page 253: Block Release
This stopping distance can be found by dividing the square of the current velocity of a vehicle by twice its acceleration (V /2a). +Alimit Time -Alimit Vlimit Time Destination Time Figure 6-5: Vehicle Movement Profile Rockwell Automation Publication MMI-UM002G-EN-P - August 2024... -
Page 254: Thrust Limitations
• A vehicle is commanded to move with a velocity of zero. • A vehicle is commanded to move with an effective PID set equal to zero. Rockwell Automation Publication MMI-UM002G-EN-P - August 2024... -
Page 255: Vehicle Length Through Curves And Switches
(Vehicle Signal = 0) when monitoring the vehicle status through the Host Communication Protocols (see either the Host Controller TCP/IP Communication Protocol User Manual, publication MMI-UM003, or the Host Controller EtherNet/IP Communication Protocol User Manual, publication MMI-UM004). Rockwell Automation Publication MMI-UM002G-EN-P - August 2024... -
Page 256: Electrical System
20 Seconds Minimum Figure 6-7: Power Cycle Timing To make sure that the soft start circuit resets for the next turn on: • Wait a minimum of 20 seconds from turn on to turn on. Rockwell Automation Publication MMI-UM002G-EN-P - August 2024... -
Page 257: Power-Related Faults
Normal operation resumes once the internal propulsion bus rises back up to +28V DC. This fault is likely due to excessive +36V DC power cable and 36V DC return cable resistance from the power source to the motor. Rockwell Automation Publication MMI-UM002G-EN-P - August 2024... -
Page 258: Power-Related Fault Resolution
All node controllers constantly communicate with the node controller configured as the HLC through a LAN. Additionally, the node controller that is designated as the HLC communicates with the host controller through the same network. Rockwell Automation Publication MMI-UM002G-EN-P - August 2024... -
Page 259: Controls And Indicators
This display can only be used if there is a Track file for the specific configuration. See the MagneMotion System Configurator User Manual, publication MMI-UM046, to create the Track file. See the NCHost TCP Interface Utility User Manual, publication MMI-UM010, to use the Graphics Window. Figure 6-8: The Graphics Window Rockwell Automation Publication MMI-UM002G-EN-P - August 2024... -
Page 260: Synchronization
Stopping time for each vehicle is dependent on the load on the vehicle and the acceleration setting of the current motion command for the vehicle. See the Node Controller Hardware User Manual, publication MMI-UM013, for additional details and equivalent circuits. Rockwell Automation Publication MMI-UM002G-EN-P - August 2024... -
Page 261: Interlocks
I/O terminals on the node controller. The host controller can then issue commands to set the value of the digital outputs, or read the value of the digital inputs. See the Node Controller Hardware User Manual, publication Rockwell Automation Publication MMI-UM002G-EN-P - August 2024... -
Page 262: Transport System Simulation
NOTE: The Simulated Vehicle is a simulated version of the vehicle that is defined in the Vehicle section of the Motor Defaults. A. Open the copy of the Node Controller Configuration File in the MagneMover LITE Configurator (see the MagneMotion System Configurator User Manual, publication MMI-UM046). Rockwell Automation Publication MMI-UM002G-EN-P - August 2024... -
Page 263: Running A Simulation
• SYNC IT is not simulated. • Jams are not simulated. • E-stops are not simulated. • Interlocks are not simulated. • Wide vehicles are not simulated. • Programming motors is not simulated. Rockwell Automation Publication MMI-UM002G-EN-P - August 2024... -
Page 264: Stopping A Simulation
E. In the Configured Functions section, make sure that This box is the High Level Controller is selected as appropriate. F. Select Apply Changes. The selected changes are applied. G. Select Reboot Controller on the Main Menu. The Reboot Controller page is displayed. H. Select Reboot Controller. Rockwell Automation Publication MMI-UM002G-EN-P - August 2024... -
Page 265: Precision Rail Operation
The precision locator option provides a small pneumatic fixture for precisely locating and securing a puck at a process station. Setup Install the precision locator as described in Precision Locator Installation on page 235 and Teach the Precision Locator Position page 239. Rockwell Automation Publication MMI-UM002G-EN-P - August 2024... -
Page 266: Basic Operation
MM LITE transport system, the transport system accepts commands from the host controller through the network connection. NOTICE: All network switch settings, communication connections, and power connections must be made before power is applied. Rockwell Automation Publication MMI-UM002G-EN-P - August 2024... -
Page 267: Normal Running
9. Turn off the main power disconnect for the MagneMover LITE transport system. NOTE: This procedure only shuts down facilities to the MagneMover LITE motors, their subsystems, and the host controller. Any user equipment remains powered up. Rockwell Automation Publication MMI-UM002G-EN-P - August 2024... - Page 268 Operation This page intentionally left blank. Rockwell Automation Publication MMI-UM002G-EN-P - August 2024...
-
Page 269: Maintenance
This chapter provides maintenance schedules and procedures for the MagneMover® LITE components. Only trained, qualified personnel should perform maintenance or troubleshooting on the MM LITE™ transport system. Rockwell Automation provides training in the troubleshooting and repair of the MM LITE transport system. -
Page 270: General Cleaning
3. Initiate the IP65 washdown of compatible components (motors, switches) or material in transport. Maximum water volume: 12.5 liters [0.26 gallons] per minute. Rockwell Automation Publication MMI-UM002G-EN-P - August 2024... -
Page 271: Glide Puck Cleaning
Required Tools and Equipment • Disposable gloves. • Microfiber cleaning cloth. • Deionized water. • Isopropyl alcohol. Procedure 1. Remove the glide puck from the MagneMover LITE transport system (see Replace Pucks on page 302). Rockwell Automation Publication MMI-UM002G-EN-P - August 2024... -
Page 272: Puck Wear Surface Maintenance
MAGNETIC FIELD HAZARD: Strong magnets in use. ATTENTION: To avoid severe injury, people with pacemakers and other medical electronic implants must stay away from the magnet array on the vehicles (pucks). Rockwell Automation Publication MMI-UM002G-EN-P - August 2024... - Page 273 The wear indicator shows the maximum wear that is allowed before touchdown starts becoming a risk. 4. Replace the pucks on the MM LITE transport system (see Replace Pucks on page 302). Rockwell Automation Publication MMI-UM002G-EN-P - August 2024...
-
Page 274: Wheeled Puck Cleaning
2. Wear gloves and clean the rolling surface of all wheels with clean cotton tipped swabs slightly dampened with Isopropyl alcohol. Run the swabs over the wheels in a back-and-forth motion in the direction of travel (see Figure 7-3). NOTE: Squeezing the swab does not cause any alcohol to drip. Rockwell Automation Publication MMI-UM002G-EN-P - August 2024... -
Page 275: Wheeled Puck Wear Surface Maintenance
MAGNETIC FIELD HAZARD: Strong magnets in use. ATTENTION: To avoid severe injury, people with pacemakers and other medical electronic implants must stay away from the magnet array on the vehicles (pucks). Rockwell Automation Publication MMI-UM002G-EN-P - August 2024... - Page 276 If any wheels are showing excessive friction or tread damage, replace the wheel set, see Replace Wheeled Puck Wear Surfaces, 4-Wheel Pucks on page 314. 3. Replace the puck on the transport system (see Replace Pucks on page 302). Rockwell Automation Publication MMI-UM002G-EN-P - August 2024...
- Page 277 If any wheels are showing excessive friction or tread damage, replace the wheel set, see Replace Tandem Wheeled Puck Wear Surfaces on page 319. 4. Replace the puck on the transport system (see Replace Pucks on page 302). Rockwell Automation Publication MMI-UM002G-EN-P - August 2024...
-
Page 278: Cable Connection Inspection
Log files can be transferred from the node controller or SysLog server to a network server so they can be archived or e-mailed to Technical Support, see the Node Controller Interface User Manual, publication MMI-UM001. Rockwell Automation Publication MMI-UM002G-EN-P - August 2024... -
Page 279: Cleaning Magnet Arrays
• Use adhesive tape to capture the ferrous particles on the magnet arrays. • To combat accumulated debris, keep magnet arrays not being used in their original container. Rockwell Automation Publication MMI-UM002G-EN-P - August 2024... -
Page 280: Clean Or Replace The Mm Lite Power Supply Air Filter
A replacement 60 mm x 60 mm filter can be ordered from a hardware supplier, such as McMaster-Carr (#19155K7). 6. Replace the air filter in the power supply by positioning it and snapping the cover into place over it. 7. Return the power supply to normal operation. Rockwell Automation Publication MMI-UM002G-EN-P - August 2024... -
Page 281: Manually Lubricate The Precision Rails
• Do not place any body parts (for example, fingers) between a magnet array and any ferrous material or another magnet array. • Vehicles (pucks) and magnet arrays not being used must be secured individually in isolated packaging. Rockwell Automation Publication MMI-UM002G-EN-P - August 2024... - Page 282 See Figure 7-8 for an illustration of the lubricator housing. Lubricator Felt Applicator Concentric Bearings Eccentric Lubricator Felt Applicator Bearings Figure 7-7: Precision Rail Vehicle Lubricator Location Rockwell Automation Publication MMI-UM002G-EN-P - August 2024...
- Page 283 Oil Fill Portal Figure 7-9: Precision Rail Single Array Vehicle Lubrication Portal 4. Replenish the oil in the felt applicator. Do not overfill the reservoir. 5. Return the MM LITE transport system to normal operation. Rockwell Automation Publication MMI-UM002G-EN-P - August 2024...
-
Page 284: Refill The Lubrication Pump Reservoir For Precision Rail Systems
• Do not place any body parts (for example, fingers) between a magnet array and any ferrous material or another magnet array. • Vehicles (pucks) and magnet arrays not being used must be secured individually in isolated packaging. Rockwell Automation Publication MMI-UM002G-EN-P - August 2024... -
Page 285: Concentric Bearings
Figure 7-11. Table 7-2: Precision Rail Vehicle Drag Vehicle Type Maximum Drag Single Array 2.80 N [10.1 ozf] Dual Array 5.86 N [21.1 ozf] Rockwell Automation Publication MMI-UM002G-EN-P - August 2024... - Page 286 6. Apply Loctite 290 to the threads of the nut on the top of the carriage. NOTE: The Loctite must cure for 3 hours at 22° C [72° F] before using the vehicle. Rockwell Automation Publication MMI-UM002G-EN-P - August 2024...
-
Page 287: Precision Locator Maintenance
See Motion Control Troubleshooting on page 289 Vehicles producing excessive noise. See Precision Rail Option Troubleshooting on page 291 See Light Stack Troubleshooting on page 291 The light stack does not function as expected. Rockwell Automation Publication MMI-UM002G-EN-P - August 2024... -
Page 288: Power-Related Troubleshooting
Reset. off. 3. Issue a reset to the paths that failed so they can complete including the homing of the flipper on the switch. Rockwell Automation Publication MMI-UM002G-EN-P - August 2024... -
Page 289: Node Controller Troubleshooting
Material slips while the vehicles are in motion. Make sure that the vehicle acceleration is correct. Motion configuration issue. Make sure that the vehicle speed is correct. Make sure that the PID values are correct. Rockwell Automation Publication MMI-UM002G-EN-P - August 2024... - Page 290 Otherwise, consider adjusting the Control Off final destination? Position Tolerance found on the Motor Advanced Parameters. If the value of these parameters is within a certain window (depending on load, gains and friction) it could make that effect. Rockwell Automation Publication MMI-UM002G-EN-P - August 2024...
-
Page 291: Precision Rail Option Troubleshooting
Any corrective actions performed (for example, system reset, replaced parts, loaded software, power cycle). Describe the results of those actions. Any special system environmental conditions (for example, vacuum, high heat, high humidity). Any potential causes of the issue (for example, power outage, mechanical interference, host failure). Rockwell Automation Publication MMI-UM002G-EN-P - August 2024... -
Page 292: Repair
Any product-related faults and error messages observed through the system host, NCHost, the web interface, and so 6. Include any other information that can assist our specialist. Rockwell Automation Support 7. Contact Rockwell Automation TechConnect (rockwellautomation.custhelp.com). See on the back cover of this publication. -
Page 293: Replace Rs-422 Motors
5. Turn off all electrical and pneumatic power to the section of the MM LITE transport system where the motor is being replaced. 6. Label the cables that are connected to the motor. 7. Disconnect all cables. 8. Remove the bolts that secure the motor. 9. Remove the motor from the transport system. Rockwell Automation Publication MMI-UM002G-EN-P - August 2024... -
Page 294: Install The New Motor
MagneMover LITE components. 10.Store the motor in a secure location. 11. See Shipping on page 352 to return the motor to Rockwell Automation. Install the New Motor 1. See Motor Installation on page 201 for detailed installation instructions. -
Page 295: Replace Rs-422 Motors With Ethernet Motors
Host Enet Node Relay Controller Switch Node Controller P1M5 P1M6 RS-422 Motor RS-422 Motor Ethernet RS-422 Figure 7-13: Basic RS-422 Loop with Motors Removed 3. Remove all communication cables for the removed motors. Rockwell Automation Publication MMI-UM002G-EN-P - August 2024... -
Page 296: Install New Ethernet Motors
4. Program the new motors with the current Motor image files, see Program RS-422 Motors on page 294. 5. Revise the host controller application to account for the new path in the transport system. 6. Resume motion on the MagneMover LITE transport system. Rockwell Automation Publication MMI-UM002G-EN-P - August 2024... -
Page 297: Replace Ethernet Motors
MagneMover LITE components. 10.Store the motor in a secure location. 11. See Shipping on page 352 to return the motor to Rockwell Automation. Install the New Motor 1. See Motor Installation on page 201 for detailed installation instructions. -
Page 298: Program Ethernet Motors
NOTE: Restart the node controller for the changes to take effect. 5. Reset the paths where the motors were programmed (use the host controller or the NCHost TCP Interface Utility, see the NCHost TCP Interface Utility User Manual, publication MMI-UM010, for details). Rockwell Automation Publication MMI-UM002G-EN-P - August 2024... -
Page 299: Replace Motor Rails
V-brace screws (2X) and tighten to 3.4 N•m [30 in•lb]. NOTE: The Loctite must cure for 2 hours at 22° C [72° F] before using the transport system. 4. Return the MM LITE transport system to normal operation. Rockwell Automation Publication MMI-UM002G-EN-P - August 2024... -
Page 300: Replace Switch Rails
A. When replacing Stainless Steel rails, apply Loctite 243 to the M6 x 10 mm rail mounting screws and the M6 x 12 mm V-brace screws (2X). Rockwell Automation Publication MMI-UM002G-EN-P - August 2024... -
Page 301: Separating Magnet Arrays
• Magnet arrays that become stuck to each other should only be separated by trained personnel. Returning stuck magnet arrays to Rockwell Automation for separation is recommended, see Contact Rockwell Automation Technical Support page 291. -
Page 302: Replace Pucks
(for example, memory disks/chips, credit cards, and tapes) and electronics away from the magnet arrays. Required Tools and Equipment • Torque wrench with the following bits: 4 mm Hex. T30 Torx. • Loctite 243, Thread locker, Anaerobic Adhesive, Blue. Rockwell Automation Publication MMI-UM002G-EN-P - August 2024... -
Page 303: Remove Pucks
B. Remove the two M6 x 10 mm screws that secure the guide rail to the motor. C. Lift the guide rail off the motor. 3. Install pucks and slide them onto the adjacent motors. Rockwell Automation Publication MMI-UM002G-EN-P - August 2024... -
Page 304: Replace Glide Puck Wear Surfaces
NOTICE: To avoid damage to watches, instruments, electronics, and magnetic media, keep metal tools, metal objects, magnetic media (for example, memory disks/chips, credit cards, and tapes) and electronics away from the magnet arrays. Rockwell Automation Publication MMI-UM002G-EN-P - August 2024... - Page 305 Glue Dot, Adhesive, Hi-Tack, Semi-Perm, Lo-profile, 0.250. Screw, FHC, M4 X 22 mm Long, A4 SS, w/Dri-Loc 204, 5 mm DL (2X). Tools • Torque wrench. • Loctite 243, Thread locker, Anaerobic Adhesive, Blue. • Isopropyl Alcohol. Rockwell Automation Publication MMI-UM002G-EN-P - August 2024...
- Page 306 NOTE:Do not stretch the protective strip. Stretching reduces the life of the adhesive, which causes the strip to peel away from the array. E. Press the strip into place. Use a burnisher and make sure that there are no bubbles. Rockwell Automation Publication MMI-UM002G-EN-P - August 2024...
- Page 307 Dri-Loc and tighten to 1.5 N•m [13 in•lb]. The Loctite must cure for 2 hours at 22° C [72° F] before using the puck. 9. Replace the puck on the MM LITE transport system (see Replace Pucks on page 302). Rockwell Automation Publication MMI-UM002G-EN-P - August 2024...
-
Page 308: Replace Tandem Glide Puck Wear Surfaces
Washer, Spring, Belleville, for 0.190" /M5, Acetal (2X). Replace Glide Puck Wear Surfaces • procedure on page 304. • Linkage Plate Assembly, Plastic, ML High Payload Puck, Tandem. • Fixture, Tandem Linkage Plate Installation. Rockwell Automation Publication MMI-UM002G-EN-P - August 2024... -
Page 309: Disassemble Tandem Puck Assembly
Figure 7-20: Place Tandem Glide Puck in Fixture 4. Remove the two screws and washers that secure the linkage plate to the two pucks as shown in Figure 7-21 and dispose of properly. Rockwell Automation Publication MMI-UM002G-EN-P - August 2024... - Page 310 Do not move one puck over, or near, the other puck. 9. Service the glide pucks as required, see Puck Wear Surface Maintenance on page 272 and Replace Glide Puck Wear Surfaces on page 304. Rockwell Automation Publication MMI-UM002G-EN-P - August 2024...
-
Page 311: Reassemble Tandem Puck Assembly
• Do not place any body parts (for example, fingers) between a magnet array and any ferrous material or another magnet array. • Vehicles (pucks) and magnet arrays not being used must be secured individually in isolated packaging. Rockwell Automation Publication MMI-UM002G-EN-P - August 2024... - Page 312 6. Secure the linkage plate to the top of the pucks using new washers (dome side up) and new M4 x 6 mm shoulder screws. Tighten each screw to 0.9 N•m [8 in•lb]. NOTE: The Loctite must cure for 2 hours at 22° C [72° F] before using the puck. Rockwell Automation Publication MMI-UM002G-EN-P - August 2024...
- Page 313 NOTE: If the tandem puck is not being reinstalled on the transport system, store it in its original packaging or wrapped in bubble-wrap to help protect the puck and to minimize any safety risks. Rockwell Automation Publication MMI-UM002G-EN-P - August 2024...
-
Page 314: Replace Wheeled Puck Wear Surfaces, 4-Wheel Pucks
Screw, Shoulder, SS, 1/4” Ø x 9/16” L,10-32, Dri-Loc (4X). • Washer, Shim, SST, 1/4” ID x 3/8” OD x 0.115” L (4X). • Screw, Mach, Flat, Hex, SS, M2 x 0.4 x 5, Dri-Loc (2X). Rockwell Automation Publication MMI-UM002G-EN-P - August 2024... - Page 315 302). 2. Place the puck on a non-metallic work surface with the magnet array down. Keep the magnet array at least 1 m [3 ft] away from metal objects and tools. Rockwell Automation Publication MMI-UM002G-EN-P - August 2024...
- Page 316 K. Secure the puck body to the magnet array with the new M4 x 23.5 mm shoulder screws with Dri-Loc and tighten to 1.4 N•m [12 in•lb]. 3. Replace the puck on the transport system (see Replace Pucks on page 302). Rockwell Automation Publication MMI-UM002G-EN-P - August 2024...
-
Page 317: Replace Wheeled Puck Wear Surfaces, 2-Wheel Pucks
Screw, Shoulder, SS, 1/4” Ø x 9/16” L,10-32, Dri-Loc (4X). • Screw, Mach, Flat, Hex, SS, M2 x 0.4 x 5, Dri-Loc (2X). • Torx T7 wrench. • 1/8 in hex wrench. • Metric hex wrench set. Rockwell Automation Publication MMI-UM002G-EN-P - August 2024... - Page 318 E. Locate the new wheels and secure using the new #10-32 screws with Dri-Loc and tighten to 2.8 N•m [25 in•lb]. NOTE: The Loctite must cure for 2 hours at 22° C [72° F] before using the puck. Rockwell Automation Publication MMI-UM002G-EN-P - August 2024...
-
Page 319: Replace Tandem Wheeled Puck Wear Surfaces
• Do not place any body parts (for example, fingers) between a magnet array and any ferrous material or another magnet array. • Vehicles (pucks) and magnet arrays not being used must be secured individually in isolated packaging. Rockwell Automation Publication MMI-UM002G-EN-P - August 2024... - Page 320 Fixture, Tandem Linkage Plate Installation. • 10005809492 – ICD, Wheeled Puck, Assy, Linkage Plate Detail (Ref). • Metric hex wrench set. • Torque wrench. • Loctite 243, Thread locker Anaerobic Adhesive, Blue. • Isopropyl Alcohol. Rockwell Automation Publication MMI-UM002G-EN-P - August 2024...
-
Page 321: Disassemble Tandem Puck Assembly
4. Remove the two M6 shoulder screws and the washers that secure the linkage plate to the two pucks with a 4 mm hex wrench as shown in Figure 7-28 and dispose of properly. 5. Lift the linkage plate off the pucks. Rockwell Automation Publication MMI-UM002G-EN-P - August 2024... - Page 322 8. Remove the remaining puck from the fixture and store it wrapped in bubble-wrap to help protect the puck and to minimize any safety risks. Do not move one puck over, or near, the other puck. 9. Service the pucks as required, see Replace Wheeled Puck Wear Surfaces, 2-Wheel Pucks on page 317. Rockwell Automation Publication MMI-UM002G-EN-P - August 2024...
-
Page 323: Reassemble Tandem Puck Assembly
• Do not place any body parts (for example, fingers) between a mag- net array and any ferrous material or another magnet array. • Vehicles (pucks) and magnet arrays not being used must be secured individually in isolated packaging. Rockwell Automation Publication MMI-UM002G-EN-P - August 2024... - Page 324 8. Secure the linkage plate to the top of the pucks using new M6 screws. Tighten each screw to 2.8 N•m [25 in•lb]. NOTE: The Loctite must cure for 2 hours at 22° C [72° F] before using the puck. Rockwell Automation Publication MMI-UM002G-EN-P - August 2024...
- Page 325 NOTE: If the tandem puck is not being reinstalled on the transport system, store it in its original packaging or wrapped in bubble-wrap to help protect the puck and to minimize any safety risks. Rockwell Automation Publication MMI-UM002G-EN-P - August 2024...
-
Page 326: Replace Mm Lite Power Supply Fuses
ATTENTION: 115V AC, 6.8 A or 230V AC, 3.4 A AC power must be disconnected before servicing. SHOCK HAZARD ATTENTION: The power supply is double pole/neutral fused. AC power must be disconnected before servicing. Rockwell Automation Publication MMI-UM002G-EN-P - August 2024... -
Page 327: Ac Fuse
Make sure that it is not at an angle before inserting and slides straight in. 7. Close the power entry module and make sure that the cover snaps into place. 8. Return the power supply to normal operation. Rockwell Automation Publication MMI-UM002G-EN-P - August 2024... -
Page 328: Dc Fuses
NOTICE: To avoid damage to watches, instruments, electronics, and magnetic media, keep metal tools, metal objects, magnetic media (for example, memory disks/chips, credit cards, and tapes) and electronics away from the magnet arrays. Rockwell Automation Publication MMI-UM002G-EN-P - August 2024... -
Page 329: Vehicle Orientation
C. Secure the rail to the corresponding spine plates using M5 SHC screws. Tighten each screw to 1.8 N•m [16 in•lb], follow the sequence that is shown in Align and Secure Rails to Spine Plates on page 228. 5. Return the MM LITE transport system to normal operation. Rockwell Automation Publication MMI-UM002G-EN-P - August 2024... -
Page 330: Installing Vehicles With Rails Removed
7-36. NOTE: Once vehicles are removed from the transport system, they must be stored in their original packaging or wrapped in bubble-wrap to help protect the vehicle and to minimize any safety risks. Rockwell Automation Publication MMI-UM002G-EN-P - August 2024... - Page 331 Maintenance Repair Figure 7-36: Remove Precision Rail Vehicle From Rail 6. Return the MM LITE transport system to normal operation. Rockwell Automation Publication MMI-UM002G-EN-P - August 2024...
-
Page 332: Installing Vehicles Without Removing Rails
284. 8. Reattach the lubricator to bottom of the vehicle. See Install/Replace the Lubricators on Precision Rail Vehicles on page 333. 9. Return the MM LITE transport system to normal operation. Rockwell Automation Publication MMI-UM002G-EN-P - August 2024... -
Page 333: Install/Replace The Lubricators On Precision Rail Vehicles
Required Tools and Equipment • Screwdriver, Phillips #1. • Loctite 243, Thread locker Anaerobic Adhesive, Blue. • 68 viscosity EP mineral oil (Kluber 4 UH1-68N). • Syringe or other injector. Rockwell Automation Publication MMI-UM002G-EN-P - August 2024... - Page 334 To maintain consistency between vehicles, and to apply lubricant evenly to both sides of the rail system, Rockwell Automation recommends that half the vehicles be installed with the lubricator between the concentric bearings and the other half between the eccentric bearings.
-
Page 335: Replace Magnet Arrays On Precision Rail Vehicles
• Do not place any body parts (for example, fingers) between a magnet array and any ferrous material or another magnet array. • Vehicles (pucks) and magnet arrays not being used must be secured individually in isolated packaging. Rockwell Automation Publication MMI-UM002G-EN-P - August 2024... - Page 336 5. Grasp the array firmly with one hand while holding the vehicle firmly with the other hand. Lift the vehicle off the array and place the array in the original shipping container, or wrap it in bubble-wrap, for protection. Rockwell Automation Publication MMI-UM002G-EN-P - August 2024...
- Page 337 NOTE: The Loctite must cure for 2 hours at 22° C [72° F] before using the vehicle. 11. Replace the vehicle, see Replace Precision Rail Vehicles on page 328. 12. Restart the path. 13. Dispose of the removed magnet array appropriately. Rockwell Automation Publication MMI-UM002G-EN-P - August 2024...
-
Page 338: Dual Array Vehicles
Maintenance Repair Dual Array Vehicles M4 x 12 mm Screw (4X) Dual Array Carriage Magnet Array Shim, 1 mm (2X) Assembly Fixture Figure 7-43: Dual Array Precision Rail Vehicle Assembly Rockwell Automation Publication MMI-UM002G-EN-P - August 2024... - Page 339 NOTE: The Loctite must cure for 2 hours at 22° C [72° F] before using the vehicle. 14. Replace the vehicle, see Replace Precision Rail Vehicles on page 328. 15. Restart the path. 16. Dispose of the removed magnet array appropriately. Rockwell Automation Publication MMI-UM002G-EN-P - August 2024...
-
Page 340: Replace Bearings On Precision Rail Vehicles
NOTICE: To avoid damage to watches, instruments, electronics, and magnetic media, keep metal tools, metal objects, magnetic media (for example, memory disks/chips, credit cards, and tapes) and electronics away from the magnet arrays. Rockwell Automation Publication MMI-UM002G-EN-P - August 2024... -
Page 341: Replace Concentric Bearings
Top Nut (2X) Washer (2X) Bearing Nut (2X) Concentric Bearing (2X) Figure 7-45: Precision Rail Vehicle Concentric Bearings Disassembly/Assembly Rockwell Automation Publication MMI-UM002G-EN-P - August 2024... -
Page 342: Replace Eccentric Bearings
Bearings). If concentric bearings are to be replaced on this vehicle, perform that procedure first (see Figure 7-46 shows a dual array vehicle, however the same process is used for single array vehicles. Rockwell Automation Publication MMI-UM002G-EN-P - August 2024... - Page 343 Make sure that the orientation of the eccentric bearing is the same as the orientation of the removed bearing. The center of the eccentric bearings must be further apart than the center of the concentric bearings as shown Figure 7-47. Rockwell Automation Publication MMI-UM002G-EN-P - August 2024...
- Page 344 11. If concentric bearings are to be replaced on this vehicle, see Replace Concentric Bearings on page 341. 12. See Replace Precision Rail Vehicles on page 328 to return the vehicle to the precision rail. Rockwell Automation Publication MMI-UM002G-EN-P - August 2024...
-
Page 345: Replace Wear Surfaces On Pallet
• Glue Dot, Adhesive, Hi-Tack, Semi-Perm, Lo-profile, 0.250. • Spacer, Magnet Array, ML-PL (2X). • Isopropyl Alcohol. • Strip, Protective, Puck Bottom, Wide, UHMW (Optional). • Torque wrench with the following bits: 2.5 mm Hex. Rockwell Automation Publication MMI-UM002G-EN-P - August 2024... - Page 346 C. Remove the backing from the new protective strip and place it on the magnet assembly by centering the round hole at the end of the strip over one of the threaded standoffs. Fold the strip around the bottom of the magnet assembly and Rockwell Automation Publication MMI-UM002G-EN-P - August 2024...
-
Page 347: Replace Bushings On Pallet
• Do not place any body parts (for example, fingers) between a magnet array and any ferrous material or another magnet array. • Vehicles (pucks) and magnet arrays not being used must be secured individually in isolated packaging. Rockwell Automation Publication MMI-UM002G-EN-P - August 2024... - Page 348 5. Use Isopropyl alcohol to clean the surfaces of the pallet and remove any debris. 6. Use an arbor press to install the new dowel pins in the pallet, if necessary. 7. Use an arbor press to install the new bushings in the pallet. Rockwell Automation Publication MMI-UM002G-EN-P - August 2024...
-
Page 349: Replace Pins On Precision Locator Arms
Required Tools and Equipment • Pin, Spherical Contact, Precision Locator (2X). • Isopropyl Alcohol. • Torque wrench with the following bits: Pinning Locator, Installation Tool, ML-PL. 2 mm Hex Wrench. Rockwell Automation Publication MMI-UM002G-EN-P - August 2024... - Page 350 E. Thread the new spherical contact pin into the arm. F. Use a 2 mm Hex wrench to tighten the spherical contact pin to 2.3 N•m [20 in•lb]. 5. Return the MM LITE transport system to normal operation. Rockwell Automation Publication MMI-UM002G-EN-P - August 2024...
-
Page 351: Replace Z-Datums On Precision Locator Stand
2. Remove the M4 screws that secure the z-datums to the inner and outer supports as shown in Figure 7-51 and remove the z-datums. 3. Clean the z-datum mounting surfaces of the stand with Isopropyl alcohol to remove any debris. Rockwell Automation Publication MMI-UM002G-EN-P - August 2024... -
Page 352: Ordering Parts
Shipping If a MagneMover LITE component must be shipped, either for return to Rockwell Automation or to another location, it must be packaged properly to make sure that it arrives undamaged. The following procedure provides the correct method for handling and packaging MM LITE components for shipment. -
Page 353: Packing Procedure
Packing Procedure When any of the MagneMover LITE components are shipped, either for return to Rockwell Automation for service or to another location, they must be properly packaged to make sure that they arrive undamaged. The following procedure provides the correct method of handling and packaging the MagneMover LITE components for shipment. -
Page 354: Shipping Components
Magnetic Field Hazard. 3. When shipping to Rockwell Automation, make sure that the RMA number is clearly visible on the outside of the container. Shipping Systems or System Sections 1. -
Page 355: History Of Changes
Updated the descriptions for the standard node controller E-stop and interlock. Chapter 7, Maintenance, the • Updated, and moved to puck replacement procedure. Updated the fuse replacement procedures. Updated the Glossary. • Rockwell Automation Publication MMI-UM002G-EN-P - August 2024... -
Page 356: Rev. C
Added and the Chapter 4, Specifications and Site Requirements, added • mechanical drawings for the railless motors, the G4.2 and G4.3 pucks, the G4.2 and G4.3 tandem pucks, and the G4.2 magnet array. Rockwell Automation Publication MMI-UM002G-EN-P - August 2024... -
Page 357: Rev. E
Restructured the manual to identify clearly that the precision rails are an option. Chapter 1, Introduction, updated the Transport System Software Overview • to include the Virtual Scope. Chapter 3, Design Guidelines, clarified the description of the Gateway Node. • Rockwell Automation Publication MMI-UM002G-EN-P - August 2024... -
Page 358: Rev. F
Maintenance, added wheeled puck maintenance procedures. Added lubrication procedures and the Precision • Locator Maintenance Replace Motor Rails procedure. Added Ethernet motor replacement procedures. Added procedures to Replace Switch Rails. Added tandem glide puck, and wheeled puck maintenance and replacement procedures. Rockwell Automation Publication MMI-UM002G-EN-P - August 2024... - Page 359 Removed all references to the MagneMover LITE G3 motors. • Removed all references to ICT Customer Support, these now refer to the Rockwell Automation Technical Support Center and TechConnect. Removed all detailed information for the node controllers and Ethernet switch. This information is now in the Node Controller •...
-
Page 360: Rev. G
Glossary (see MMI-RM003), references to MagneMotion when it’s not software, Transport System Limits (see MMI-UM001), Rockwell Automation Transport and Software Overview Diagrams (see MMI-UM001), references to ICT and MMI Support (see Support) • Replaced front and back covers. Rockwell Automation Publication MMI-UM002G-EN-P - August 2024... - Page 361 Cleaning wheeled puck Communication Cables Ethernet installation RS-422 Sync option Communication Cables, identification Equipment Safety Computer Requirements E-stop Configuration File, see Node Controller Configuration File connection Configurator Utilitysee MagneMotion System Configurator operation Connections Rockwell Automation Publication MMI-UM002G-EN-P - August 2024...
- Page 362 IP Rating locations on system – motor, 1 m magnetic – motor, 250 mm mechanical – motor, 90° curve pneumatic power supply High-Level Controller – switch, left configure – switch, right identification Rockwell Automation Publication MMI-UM002G-EN-P - August 2024...
- Page 363 Magnet Array Type File, description secondary Magnet Array, identification magnet_array_type.xml, see Magnet Array Type File temperature range theory of operation Maintenance transport system layout adjust precision rail vehicle bearings cleaning Rockwell Automation Publication MMI-UM002G-EN-P - August 2024...
- Page 364 T cable RS-422 connections Power Cables, identification NC-12 Power over Ethernet Wiring Diagram description Power Supply Ethernet connections connections RS-422 connections NC-E DC enable description dimensions Ethernet connections 216NC-S exclusion zones description humidity Rockwell Automation Publication MMI-UM002G-EN-P - August 2024...
- Page 365 Precision Rail Vehicle bearing replacement Safe Stopping Distance dimensions, dual array Safety dimensions, single array alert types dual array equipment dual magnet array hazardous points hazard points personnel humidity Rockwell Automation Publication MMI-UM002G-EN-P - August 2024...
- Page 366 Type Files transport system layout magnet array SYNC IT Controller motor Synchronization Option connection connection location operation System Leg, see Stand System Unpacking Upstream Rockwell Automation Publication MMI-UM002G-EN-P - August 2024...
- Page 367 Web Interface, description Wheel Materials Wiring motor power network communication power signal transport system layout XML Files Magnet Array Type File MICS File Motor Type File Node Controller Configuration File Track Layout File Rockwell Automation Publication MMI-UM002G-EN-P - August 2024...
- Page 368 This page intentionally left blank. Rockwell Automation Publication MMI-UM002G-EN-P - August 2024...
- Page 369 MagneMover LITE User Manual Rockwell Automation Publication MMI-UM002G-EN-P - August 2024...
- Page 370 Rockwell Automation maintains current product environmental compliance information on its website at rok.auto/pec. Allen-Bradley, expanding human possibility, MagneMotion, MagneMover, MML, MM LITE, QuickStick, Rockwell Automation, Stratix, and SYNC IT are trademarks of Rockwell Automation, Inc. EtherNet/IP is a trademark of ODVA, Inc.
Need help?
Do you have a question about the Allen-Bradley MagneMover LITE and is the answer not in the manual?
Questions and answers