
Related Manuals for Rockwell Automation Allen-Bradley VersaVirtual Series


Summary of Contents for Rockwell Automation Allen-Bradley VersaVirtual Series
- Page 1 VersaVirtual Appliance User Manual Catalog Number 9300-VVB-PRJ User Manual Original Instructions...
- Page 2 If this equipment is used in a manner not specified by the manufacturer, the protection provided by the equipment may be impaired. In no event will Rockwell Automation, Inc. be responsible or liable for indirect or consequential damages resulting from the use or application of this equipment.
-
Page 3: Table Of Contents
Restart vSAN Cluster ............68 Rockwell Automation Publication GMSN-UM003A-EN-P - October 2023... - Page 4 ..............135 Rockwell Automation Publication GMSN-UM003A-EN-P - October 2023...
-
Page 5: Preface
Network Time Protocol Open Virtualization Format Solid-state drive Secure Shell Single Sign On Virtualization Appliance vCPU Virtual Central Processing Unit VLAN Virtual Local Area Network Virtual Machine vSAN Virtual Storage Area Network VersaVirtual Appliance Rockwell Automation Publication GMSN-UM003A-EN-P - October 2023... -
Page 6: Features
Preface Features Overview The Rockwell Automation VVA is a hyperconverged (integrated computer, networking, and storage) appliance intended for entry-level virtualization in a managed environment. The VVA ships in a fully configured state, and includes support services to help minimize on-site customer configuration. -
Page 7: Additional Resources
Preface Additional Resources The following documents contain information for related Rockwell Automation products. You can view or download additional publications at rok.auto/literature. Resource Description Describes how to configure and use EtherNet/IP devices to communicate on the EtherNet/IP ™ EtherNet/IP Network Devices User Manual, ENET-UM006 network. - Page 8 Preface Notes: Rockwell Automation Publication GMSN-UM003A-EN-P - October 2023...
-
Page 9: Install The Versavirtual Appliance
2. Unbox the VVA and remove the shipping brackets and front bezel. 3. Install the cable management arms. 4. Mount the VVA in your rack using the hardware that came with your VVA and rack. Rockwell Automation Publication GMSN-UM003A-EN-P - October 2023... -
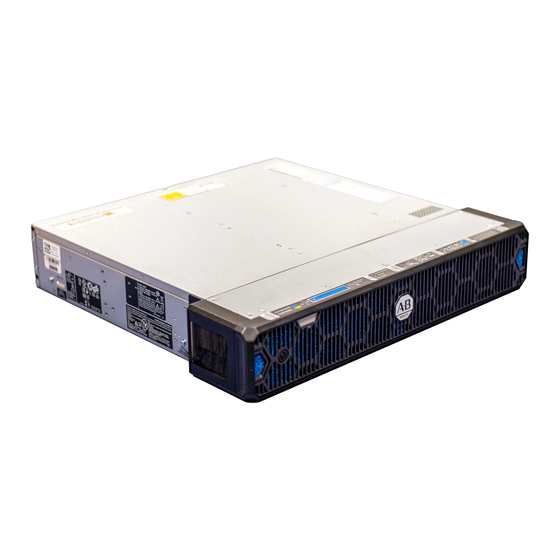
Page 10: Identify Ports And Components
Controller (iDRAC) port. These server module ports must be connected to your network switch. The NPU module has two network ports that must also be connected to your network switch. NPU module ports VVA server module ports Rockwell Automation Publication GMSN-UM003A-EN-P - October 2023... -
Page 11: Connect Network Cables
In order for the VVA to function properly, you must allocate eight GbE ports in your network switch: four access ports, and four trunk ports. Rockwell Automation recommends that you configure your VVA to use two switches that are connected to the balance of plant network, or separate power sources. This configuration can help improve redundancy and avoid disruption due to maintenance or failure. -
Page 12: Connect Power Cables
To install the front bezel, perform the following steps. 1. Align the right bracket to the right ear of the unit. 2. Tighten the two screws to secure the right bracket to the right ear. Rockwell Automation Publication GMSN-UM003A-EN-P - October 2023... - Page 13 Install the VersaVirtual Appliance 3. Repeat this process for the left bracket. 4. Align the bezel with the brackets and press until the bezel clicks into place. The front bezel is now installed. Rockwell Automation Publication GMSN-UM003A-EN-P - October 2023...
- Page 14 Chapter 1 Install the VersaVirtual Appliance Notes: Rockwell Automation Publication GMSN-UM003A-EN-P - October 2023...
-
Page 15: Integrate The Network
The core switch should also be configured with an IP address of 192.168.249.1/24 on VLAN 3249. • Rockwell Automation recommends that you add a list of default VVA IP addresses and corresponding host names to your host file. For more information, see the Add Host Names to Local Host File section on page 17. - Page 16 2 port 2 switchport mode trunk interface GigabitEthernet1/3 description Host 2 iDRAC switchport access vlan 3249 switchport mode access interface GigabitEthernet1/4 description NPU port 2 switchport access vlan 3249 switchport mode access Rockwell Automation Publication GMSN-UM003A-EN-P - October 2023...
-
Page 17: Add Host Names To Local Host File
192.168.249.15 host2.ra.internal # cluster host 2 192.168.249.13 npu.ra.internal # management host 192.168.249.16 witness.ra.internal # witness host 192.168.249.17 netsvcs.ra.internal # DNS server 192.168.249.19 support-probe.ra.internal # Support probe 192.168.249.20 support-proxy.ra.internal # Support proxy 3. Leave the note open. Rockwell Automation Publication GMSN-UM003A-EN-P - October 2023... - Page 18 4. Run Windows Notepad as administrator: a. Right-click Notepad from the Start menu, or Search bar b. Select Run as Administrator. 5. Select the File menu > Open. 6. Navigate to the following Windows directory: Local Disk (C:)\Windows\System32\Drivers\etc Rockwell Automation Publication GMSN-UM003A-EN-P - October 2023...
- Page 19 9. In the hosts file, delete any entries for the Default VVA Network scheme. See step for the default values. 10. Return to your original Windows Notepad document that contains the list of new hosts and IP addresses. Rockwell Automation Publication GMSN-UM003A-EN-P - October 2023...
- Page 20 14. Place your cursor below the last line of text. 15. Paste the new entries with CTRL+V. 16. From the File menu, select Save and then close the file. The default VVA IP addresses are now part of the local hosts file. Rockwell Automation Publication GMSN-UM003A-EN-P - October 2023...
-
Page 21: Manage The System
2. On the Server Manager dashboard, select Tools and then DNS. 3. In the Navigation pane on DNS Manager, right-click Conditional Forwarders and select New Conditional Forwarder. The New Conditional Forwarder box displays. Rockwell Automation Publication GMSN-UM003A-EN-P - October 2023... - Page 22 6. To query and validate the IP address, check the "Store this conditional forwarder in Active Directory . . ." option. The query timeout settings value can be adjusted as needed. 7. After the IP address is established and validated, select Ok. Rockwell Automation Publication GMSN-UM003A-EN-P - October 2023...
-
Page 23: Configure The Management Computer
Windows might vary. 1. From the Start menu, open the Control Panel. 2. In the Control Panel, select Network and Internet. 3. On the Network and Sharing Center, select the Ethernet link. Rockwell Automation Publication GMSN-UM003A-EN-P - October 2023... - Page 24 Chapter 3 Manage the System 4. On the General tab of Ethernet Status, select Properties. 5. On the Networking tab, select Properties. Rockwell Automation Publication GMSN-UM003A-EN-P - October 2023...
- Page 25 Chapter 3 Manage the System 6. On the General tab, select Advanced. 7. On the DNS tab, select Add. 8. Enter the IP address for your DNS server and select Add. Rockwell Automation Publication GMSN-UM003A-EN-P - October 2023...
- Page 26 11. Once verified, select Ok. 12. On the Networking tab, select Close. 13. On the General tab, Close. 14. Close Networking and Sharing Center window. The DNS server address is now reachable via the Ethernet connection. Rockwell Automation Publication GMSN-UM003A-EN-P - October 2023...
-
Page 27: Install Versavirtual Licenses
Licenses IMPORTANT The VVA ships with a 90-day evaluation license. To continue uninterrupted service, Rockwell Automation recommends that you install a license before the end of the 90-day evaluation period. To install a license after the VVA 90-day evaluation has expired, visit the Rockwell Automation Knowledgebase and search for “VersaVirtual.”... - Page 28 7. From the top, select the Hosts tab and verify host1.ra.internal is selected. 8. From the top, select vSAN Clusters and verify that Cluster is selected. 9. From the top, select vCenter Server Systems. Rockwell Automation Publication GMSN-UM003A-EN-P - October 2023...
- Page 29 10. In the left pane, select Licensing > Licenses. 11. In the right pane, under Licenses, select Add. 12. Enter the license keys that were supplied with your appliance purchase and select Next. Rockwell Automation Publication GMSN-UM003A-EN-P - October 2023...
- Page 30 The main License page is displayed. 16. In the left pane, select Licenses, then the Assets tab at the top. 17. Verify that the vCenter.ra.internal asset is selected and then select the Assign License link. Rockwell Automation Publication GMSN-UM003A-EN-P - October 2023...
- Page 31 19. Select HOSTS and verify that the following three assets are checked: host1.ra.internal host2.ra.internal npu.ra.internal 20. Select the Assign License link. 21. An Assign License dialog box is displayed to confirm license configuration on multiple objects. Select Yes. Rockwell Automation Publication GMSN-UM003A-EN-P - October 2023...
- Page 32 Verify that Cluster is selected and select the Assign License link. 24. On the Assign License page, verify the new vSAN standard license key is available and selected and select Ok. The Cluster page is displayed. Rockwell Automation Publication GMSN-UM003A-EN-P - October 2023...
- Page 33 25. In the upper-left corner, select the menu navigation icon > Inventory. 26. Confirm that each asset that the license was applied to is now visible. Repeat the prior steps to add any licenses not installed on the system. Rockwell Automation Publication GMSN-UM003A-EN-P - October 2023...
-
Page 34: Change Default Passwords
Username: root Password: <system-specific password> 3. Select Log In. 4. On the Dashboard page, select iDRAC Settings > Users. 5. On the iDRAC Settings page, select Local Users, then root user, then Edit. Rockwell Automation Publication GMSN-UM003A-EN-P - October 2023... -
Page 35: Vmware Vsphere
The VMware vSphere has one NPU, one Witness, and two cluster hosts. To change the password for each one, perform the following steps on each host. 1. Open a web browser and navigate to: https://192.168.249.13 2. Sign in with the following credentials. Username: root Password: <system-specific password> Rockwell Automation Publication GMSN-UM003A-EN-P - October 2023... - Page 36 Manage the System 3. Select Login. 4. Under the navigation pane, select Manage. 5. On the Manage page, select the Security and Users tab. 6. Under the Acceptance Level Navigation Pane, select Users. Rockwell Automation Publication GMSN-UM003A-EN-P - October 2023...
-
Page 37: Vmware Vcenter
To change the password in VMware vCenter , perform the following steps. 1. Open a web browser and navigate to: https://192.168.249.18 2. Sign in with the following credentials. Username: administrator@ra.internal Password: <system-specific password> 3. Select Login. Rockwell Automation Publication GMSN-UM003A-EN-P - October 2023... - Page 38 5. Under the Administration Navigation pane, select Single Sign On > Users and Groups. 6. From the Domain dropdown menu, verify ra.internal is selected. 7. Under the ra.internal domain users, select the Administrator radio button. Rockwell Automation Publication GMSN-UM003A-EN-P - October 2023...
- Page 39 9. In the Edit User dialog box, enter the new password in the Password and Confirm Password fields. 10. When finished, select Save. 11. Sign out of the vCenter webpage, and the new credentials. Rockwell Automation Publication GMSN-UM003A-EN-P - October 2023...
-
Page 40: Vmware Vcenter Server Appliance
This configuration uses TCP port 5480. 2. Sign in with the following credentials. Username: root Password: <system-specific password> 3. Select Login. 4. In the left column, select Administration and then select Change in the top right. Rockwell Automation Publication GMSN-UM003A-EN-P - October 2023... -
Page 41: Virtual Machines: Netsvcs
9. Press ENTER. 10. Enter the new password and confirm the new password. 11. Sign in as sysadmin and repeat steps 8 and 9. 12. To sign out, enter: logout 13. Press ENTER. Rockwell Automation Publication GMSN-UM003A-EN-P - October 2023... -
Page 42: Virtual Machines: Support-Probe
5. On the right Summary tab, select Launch Web Console. 6. In the upper right corner of the console, select Send Ctrl+Alt+Delete. 7. Once logged in, press CTRL+ALT+DELETE on the keyboard and then select Change a Password. Rockwell Automation Publication GMSN-UM003A-EN-P - October 2023... -
Page 43: Virtual Machines: Support-Proxy
5. On the Summary tab, select Launch Web Console. 6. On the Launch Console dialog box, select Ok. 7. In the Support-Proxy Web Console, sign in as root with the system-specific password. 8. Enter the following command: passwd 9. Press ENTER. Rockwell Automation Publication GMSN-UM003A-EN-P - October 2023... - Page 44 Manage the System 10. Enter the new password and confirm the new password. 11. Sign in as sysadmin and repeat Step 5 and 6. 12. To sign out, enter: logout 13. Press ENTER. Rockwell Automation Publication GMSN-UM003A-EN-P - October 2023...
-
Page 45: Configure Active Directory Authentication
4. In the upper-left corner of the vSphere Web Client, select the menu navigation icon and then select Administration. 5. In the Administration navigation view, scroll down and select Configuration. 6. Select the Identity Provider tab, then select Identity Sources > Add. Rockwell Automation Publication GMSN-UM003A-EN-P - October 2023... - Page 46 Chapter 3 Manage the System 7. In the Add Identity Source wizard, select the Active Directory over LDAP server. Rockwell Automation Publication GMSN-UM003A-EN-P - October 2023...
- Page 47 11. In the Administration navigation view, select Users and Groups (A). 12. On Users and Groups, select the Groups tab (B). 13. On Groups, select the vertical ellipse icon next to the Administrators group (C). Rockwell Automation Publication GMSN-UM003A-EN-P - October 2023...
- Page 48 17. Select the username in the top right of the window (A). 18. From the dropdown menu, select Logout (B). 19. In the vSphere web client sign in, verify you can sign in with AD credentials. Rockwell Automation Publication GMSN-UM003A-EN-P - October 2023...
-
Page 49: Update The Hardware Compatibility List
To update the HCL to the most current version, perform the following steps. 1. On the bottom of the vSAN HCL DB up-to-date alert page, select Troubleshoot. 2. In the bottom Recommendation to fix the issue section, select Alternative. Rockwell Automation Publication GMSN-UM003A-EN-P - October 2023... - Page 50 5. In the webpage, right-click and save the page as a JSON file. Functionality can vary depending on the web browser. 6. Return to the vCenter. 7. At the bottom of the page, select Update from File. Rockwell Automation Publication GMSN-UM003A-EN-P - October 2023...
- Page 51 Manage the System 8. Select the file that is downloaded in step 5 and then select Open. 9. The HCL begins the update. When the update is complete, a green Healthy logo is displayed. Rockwell Automation Publication GMSN-UM003A-EN-P - October 2023...
-
Page 52: Add A Virtual Machine
3. Select Login. 4. In the left pane, navigate to the Applications folder. Right-click on the Applications folder and then select New Virtual Machine. 5. Select Create a new VM and then select Next. Rockwell Automation Publication GMSN-UM003A-EN-P - October 2023... - Page 53 7. Select host1.ra.internal as the compute resource. In the Compatibility section, verify that the compatibility check is successful and then select Next. 8. Select vSanDatastore for the data storage location and then select Next. Rockwell Automation Publication GMSN-UM003A-EN-P - October 2023...
- Page 54 11. Configure the fields so the new VM is set up appropriately for the intended application. The default setting for adapter type is E1000E. Rockwell Automation recommends using the VMXNET 3 adapter, which can be selected from the Adapter Type dropdown menu.
- Page 55 13. The new VM is now visible under Actions Navigation pane > Applications. 14. On the Summary tab of the new VM, select the Launch Remote i icon, then select Download Remote Console. Rockwell Automation Publication GMSN-UM003A-EN-P - October 2023...
- Page 56 17. A zip file is downloaded. 18. Extract the zip file and launch the EXE (application) file. 19. The VMware Remote Console™ Install Wizard is displayed. 20. Accept the end user license agreement and install the software application. Rockwell Automation Publication GMSN-UM003A-EN-P - October 2023...
- Page 57 Chapter 3 Manage the System 21. When the installation is complete, select Finish. 22. Return to vCenter and select Launch Remote Console. 23. If any certificate warnings are displayed, select Connect Anyway. Rockwell Automation Publication GMSN-UM003A-EN-P - October 2023...
- Page 58 26. On the Boot Manager screen, in the quick access toolbar, select the Send Ctrl+Alt+Delete icon. 27. To finish the installation, follow the prompts. Prompts might vary based on the operating system you are using. The new VM is now added to your network. Rockwell Automation Publication GMSN-UM003A-EN-P - October 2023...
-
Page 59: Import An Ova Template
Username: administrator@ra.internal Password: <system-specific password> 3. Select Login. 4. On the Main Navigation pane, right-click on Clusters and select Deploy OVF Template… 5. Select the Local file radio button, and then select Upload Files. Rockwell Automation Publication GMSN-UM003A-EN-P - October 2023... - Page 60 6. In Windows File Explorer, navigate to the appropriate OVA file, select Open, and then select Next. 7. Name the VM something specific to its intended use, select the location for the VM, and then select Next. Rockwell Automation Publication GMSN-UM003A-EN-P - October 2023...
- Page 61 Manage the System 8. Select a compute resource, then select the VM. Be sure the compatibility check succeeded and then select Next. 9. Review the details of the template and then select Next. Rockwell Automation Publication GMSN-UM003A-EN-P - October 2023...
- Page 62 10. Select the storage for the OVA file. In the Compatibility section, verify that the compatibility check is successful and then select Next. 11. From the Destination Network dropdown menu, select the desired port group and then select Next. Rockwell Automation Publication GMSN-UM003A-EN-P - October 2023...
- Page 63 Chapter 3 Manage the System 12. Verify the configuration. If any changes are needed, select Back. If the configuration looks correct, select Finish. 13. Verify OVF template deployment on the Cluster Recent Tasks panel. Rockwell Automation Publication GMSN-UM003A-EN-P - October 2023...
- Page 64 Chapter 3 Manage the System Notes: Rockwell Automation Publication GMSN-UM003A-EN-P - October 2023...
-
Page 65: System Shut Down And Startup
The power button and power status indicators on each server module turn off when the cluster shuts down. 9. To restart each server module, press the power button on each. 10. Monitor the VMware vCenter webpage until it becomes available: https://vcenter.ra.internal Rockwell Automation Publication GMSN-UM003A-EN-P - October 2023... -
Page 66: Shut Down Npu
4. On the left side of the Navigator pane, select Host, and then select Shut Down on the center of the page. 5. On the Shut down warning dialog box, select Shut Down. The system shuts down. Rockwell Automation Publication GMSN-UM003A-EN-P - October 2023... -
Page 67: Restart Npu
Password: <system-specific password> 3. Select Log In. 4. From the System dropdown menu, select Overview. 5. Select Witness Server. 6. In Power Control Settings, select the Action dropdown menu > Power On. 7. Select Apply. Rockwell Automation Publication GMSN-UM003A-EN-P - October 2023... -
Page 68: Restart Vsan Cluster
2. Open a web browser and monitor the VMware vCenter webpage until it becomes available: https://vcenter.ra.internal 3. Once available, sign in into the VMware vCenter. 4. In the Navigator Pane, right-click the Cluster. 5. Navigate to vSAN and select Restart Cluster. 6. Select Ok. Rockwell Automation Publication GMSN-UM003A-EN-P - October 2023... -
Page 69: Change The Ip Address Schemes
1. To import the necessary module, open Windows PowerShell from the Start menu and enter: Install-Module vmware.powercli Press ENTER. 2. To connect to the VMware vCenter, enter: Connect-ViServer -Server 'vcenter.ra.internal' Press ENTER. 3. Enter the following credentials. Username: administrator@ra.internal Password: <system-specific password> 4. Press ENTER. Rockwell Automation Publication GMSN-UM003A-EN-P - October 2023... -
Page 70: Change The Ipv4 Settings Of The Witness Host
2. In the left side navigation of the NPU host, navigate to Virtual Machines and select Witness. 3. Select the command window thumbnail, which opens the Witness browser console 4. When the console displays, press F2. 5. Sign in with the following credentials. Username: root Password: <system-specific password> Rockwell Automation Publication GMSN-UM003A-EN-P - October 2023... - Page 71 Appendix A Change the IP Address Schemes 6. Press ENTER. 7. In the VMware ESXi DCUI, use the arrow keys to navigate to Configure Management Network and press ENTER. Rockwell Automation Publication GMSN-UM003A-EN-P - October 2023...
-
Page 72: Reset Ip Address Of Npu
To change the IP address of the NPU, perform the following steps. 1. Open a web browser and navigate to the IP address of the NPU host: https://192.168.249.13 2. Enter the following credentials. Username: root Password: <system-specific password> Rockwell Automation Publication GMSN-UM003A-EN-P - October 2023... - Page 73 3. Select Log In. 4. On the left side of the navigation pane, select Networking. 5. From the Networking submenu, select vmk0. 6. On the top right, select the VMkernel NICs tab. 7. Select Edit settings. Rockwell Automation Publication GMSN-UM003A-EN-P - October 2023...
-
Page 74: Update Access And Trunk Port With New Vlan Tag (Optional)
To reset the iDRAC IP addresses, perform the following steps. 1. Open a web browser and navigate to: https://192.168.249.11 2. Sign in with the following credentials. Username: root Password: <system-specific password> 3. Select Log In. Rockwell Automation Publication GMSN-UM003A-EN-P - October 2023... - Page 75 5. From the dropdown menu, select Network, then select IPv4 Settings. 6. Configure each text field as needed, then select Apply. 7. On the Success window, select Ok. 8. To reset the iDRAC IP of another host, repeat the prior steps 1…7. Rockwell Automation Publication GMSN-UM003A-EN-P - October 2023...
-
Page 76: Update Netsvcs Ip
4. From the Inventory Navigator on the left, select Virtual Machines. 5. Select NetSvcs, then select the command thumbnail window, which opens the NetSvcs DCUI. 6. Sign in to the NetSvcs VM with the following credentials. Username: sysadmin Password: <system-specific password> Rockwell Automation Publication GMSN-UM003A-EN-P - October 2023... - Page 77 11. Verify that the IP address changed with the following command: ip a 12. Test the connection to the newly assigned gateway with ping: ping <new gateway IP address> Rockwell Automation Publication GMSN-UM003A-EN-P - October 2023...
-
Page 78: Update Netsvcs Dns Settings
7. To save and exit the file, enter: and press ENTER. 8. Enter the following command: sudo systemctl restart unbound and press ENTER. 9. To confirm the unbound configuration status, enter: systemctl status unbound and press ENTER. Rockwell Automation Publication GMSN-UM003A-EN-P - October 2023... -
Page 79: Change Vmware Vcenter Ip Address With The Vmware Vcenter Server Appliance
1. Open a web browser and navigate to the VMware vCenter Server Appliance: https://192.169.249.18:5480 2. Sign in with the following credentials. Username: administrator@ra.internal Password: <system-specific password> 3. Select Login. 4. On the left side of the Appliance Manager, select Networking. Rockwell Automation Publication GMSN-UM003A-EN-P - October 2023... - Page 80 5. On the top left, select Edit. 6. Select NIC 0 (Management Network) and then on the bottom right, select Next. 7. Select the Hostname and DNS dropdown menu. 8. Edit the DNS server settings text field as needed. Rockwell Automation Publication GMSN-UM003A-EN-P - October 2023...
- Page 81 11. In the SSO credentials settings, enter the following credentials. Username: administrator@ra.internal Password: <system-specific password> 12. Select Next. 13. To save the updated IP address settings, select the Acknowledgment box and then select Finish. The VMware vCenter saves the updated settings. Rockwell Automation Publication GMSN-UM003A-EN-P - October 2023...
-
Page 82: Apply New Vlan Tag To Port Groups (Optional)
2. Sign in with the following credentials. Username: root Password: <system-specific password> 3. Select Login. 4. On the left side, select Networking and then select Management VM Network. 5. Select Edit settings. Rockwell Automation Publication GMSN-UM003A-EN-P - October 2023... - Page 83 8. Open a new web browser tab or window and sign in to the Witness host: https://witness.ra.internal 9. Sign in with the following credentials. Username: root Password: <system-specific password> 10. From the Navigator, select Networking. 11. Select the VMkernel NICs tab. 12. Select vmk1. 13. Select Edit settings. Rockwell Automation Publication GMSN-UM003A-EN-P - October 2023...
- Page 84 Appendix A Change the IP Address Schemes 14. Input the appropriate address and subnet mask. 15. When finished, select Save. Rockwell Automation Publication GMSN-UM003A-EN-P - October 2023...
-
Page 85: Update Ip Addresses On Vsan Hosts
1. Open a web browser and navigate to the iDRAC on the host1: https://192.168.249.14 2. Sign in with the following credentials. Username: root Password: <system-specific password> 3. Select Log In. 4. Select the Virtual Console thumbnail. Rockwell Automation Publication GMSN-UM003A-EN-P - October 2023... - Page 86 7. In the VMware ESXi Direct Console User Interface (DCUI), navigate to Configure Management Network and press ENTER. 8. Select VLAN (Optional) and press ENTER. 9. Replace VLAN ID 3249 with the desired VLAN ID and press ENTER. Rockwell Automation Publication GMSN-UM003A-EN-P - October 2023...
- Page 87 12. When finished, press ENTER. 13. Use the down arrow key to navigate to the DNS Configuration field and press ENTER. 14. Enter the new IP address of the NetSvcs (DNS). 15. When finished, press ENTER. Rockwell Automation Publication GMSN-UM003A-EN-P - October 2023...
-
Page 88: Update High Availability
1. Open a web browser and navigate to the VMware vCenter: https://192.168.249.14 2. Sign in with the following credentials. Username: administrator@ra.internal Password: <system-specific password> 3. Select Login. 4. From the left pane, select Cluster. Rockwell Automation Publication GMSN-UM003A-EN-P - October 2023... - Page 89 5. From the top, select the Configure tab. 6. From the left Services dropdown menu, select vSphere Availability. 7. From the top right, select Edit. 8. From the top right, select the Advance Options tab. Rockwell Automation Publication GMSN-UM003A-EN-P - October 2023...
- Page 90 Appendix A Change the IP Address Schemes 9. Update the das.isolationaddress0 text field with the new address. 10. When finished, select Ok. Rockwell Automation Publication GMSN-UM003A-EN-P - October 2023...
-
Page 91: Reconnect Hosts
(host1, host2, NPU, and Witness) must be disconnected and reconnected. To do so, perform the following steps. 1. Open a web browser and navigate to the VMware vCenter: https://192.168.249.14 2. Sign in with the following credentials. Username: administrator@ra.internal Password: <system-specific password> 3. Select Login. Rockwell Automation Publication GMSN-UM003A-EN-P - October 2023... - Page 92 5. To disconnect host1, select Ok. 6. Repeat steps 3 and 4 for the host2, NPU, and Witness. 7. After all four hosts are disconnected, right-click on host1 and select Connection > Connect. Rockwell Automation Publication GMSN-UM003A-EN-P - October 2023...
-
Page 93: Restart Vsan Cluster
Restart vSAN Cluster To restart the vSAN cluster, perform the following steps. 1. In the VMware vCenter, right-click the Cluster and select vSAN > Restart cluster. 2. Select Restart. The vSAN cluster restarts. Rockwell Automation Publication GMSN-UM003A-EN-P - October 2023... - Page 94 Appendix A Change the IP Address Schemes Notes: Rockwell Automation Publication GMSN-UM003A-EN-P - October 2023...
-
Page 95: Rename Versavirtual Appliance
Rockwell Automation recommends that you implement the procedures in this section during a time when an unexpected failure will not cause the loss of production or other hazards. -
Page 96: Preliminary Steps
3. Update the local hosts file or DNS server for the computer that is used to perform these steps. Doing so helps ensure that the new and default host names resolve properly. Following is an example of a host file that reflects the default and updated host names. Rockwell Automation Publication GMSN-UM003A-EN-P - October 2023... -
Page 97: Rename Procedures
1. Connect to a terminal session on the NetSvcs VM, either through the VM remote console or through SSH. Rockwell Automation recommends that you use SSH with an editor such as Microsoft® Visual Studio® Code so you can edit the DNS server configuration files offline and paste changes from the editor into the configuration file. -
Page 98: Factory Default: Ra.conf
"witness.ra.internal. IN A 192.168.249.16" local-data-ptr: "192.168.249.16 witness.ra.internal" local-data: "NetSvcs.ra.internal. IN A 192.168.249.17" local-data-ptr: "192.168.249.17 NetSvcs.ra.internal" local-data: "vCenter.ra.internal. IN A 192.168.249.18" local-data-ptr: "192.168.249.18 vCenter.ra.internal" local-data: "Support-Probe.ra.internal. IN A 192.168.249.19" local-data-ptr: "192.168.249.19 Support-Probe.ra.internal" forward-zone: name: "." forward-addr: 192.168.249.1s Rockwell Automation Publication GMSN-UM003A-EN-P - October 2023... -
Page 99: Updated Ra.conf
"192.168.249.16 vva1-witness.example.com" local-data: "vva1-NetSvcs.example.com. IN A 192.168.249.17" local-data-ptr: "192.168.249.17 vva1-NetSvcs.example.com" local-data: "vva1-vCenter.example.com. IN A 192.168.249.18" local-data-ptr: "192.168.249.18 vva1-vCenter.example.com" local-data: "vva1-Support-Probe.example.com. IN A 192.168.249.19" local-data-ptr: "192.168.249.19 vva1-Support- Probe.example.com" forward-zone: name: "." forward-addr: 192.168.249.1 Rockwell Automation Publication GMSN-UM003A-EN-P - October 2023... -
Page 100: Rename Netsvcs
No information is returned after you run this command. 2. To verify that the host name and domain name have changed, enter: hostnamectl Review the output and confirm the new host name and domain name in the static host name field. Rockwell Automation Publication GMSN-UM003A-EN-P - October 2023... -
Page 101: Rename Vmware Vcenter
3. Select Next. 4. To open the network settings wizard, select Networking from the left navigation. Then, from the upper right, select Edit. 5. The standard VMware vCenter deployment displays one network adapter. Select next. Rockwell Automation Publication GMSN-UM003A-EN-P - October 2023... - Page 102 Rename Procedures 6. Update the host name field to the desired FQDN and then select Next. 7. Enter the default SSO credentials for the unit: Username: administrator@ra.internal Password: <system-specific password> 8. Select Next. Rockwell Automation Publication GMSN-UM003A-EN-P - October 2023...
- Page 103 10. The task progress window displays again. Continue to wait. 11. When the process is complete, select Close on the network update progress window. 12. The Summary page now reflects the new name of the VMware vCenter appliance. Rockwell Automation Publication GMSN-UM003A-EN-P - October 2023...
-
Page 104: Redeploy The Vsan Witness Virtual Machine
9. A warning is displayed to indicate that the vSAN witness is about to be removed from the cluster, which could lead to a cluster misconfiguration. Select Remove. The cluster is degraded while the witness is replaced. Rockwell Automation Publication GMSN-UM003A-EN-P - October 2023... - Page 105 11. Right-click the Witness host and select Remove from Inventory. 12. Right-click on the Witness VM and select Power > Power Off. It is not necessary to shut down the guess OS since the VM is going to be removed and replaced. Rockwell Automation Publication GMSN-UM003A-EN-P - October 2023...
- Page 106 Appendix B Rename Procedures 13. Right-click on the Witness VM and select Delete from Disk. Rockwell Automation Publication GMSN-UM003A-EN-P - October 2023...
-
Page 107: Deploy The New Vsan Witness Virtual Machine
2. In the Deploy OVF Template wizard, select Local File > Choose Files. Browse to the location of VMware-VirtualSAN-Witness-201912001-15160138.ova, or a newer version of that file provided by Rockwell Automation technical support. Then select Next. Rockwell Automation Publication GMSN-UM003A-EN-P - October 2023... - Page 108 3. Enter a name for the Witness VM. The name does not have to match the host name or FQDN of the witness appliance. Rockwell Automation recommends adding “witness” to the name to help identify it in the future. 4. Select Next.
- Page 109 If you specify additional configuration information for the VM, additional steps might be added to the wizard. 7. After you confirm the template details, select Next. 8. Review and accept the end-user license agreement and then select Next. Rockwell Automation Publication GMSN-UM003A-EN-P - October 2023...
- Page 110 10. Select NPU.Datastore as the target datastore, confirm that the virtual disk format is set to Thick Provision Lazy Zeroed, and then select Next. 11. On Select Networks, set Management Network to Management Network and Secondary Network to Management Network. Then select Next. Rockwell Automation Publication GMSN-UM003A-EN-P - October 2023...
- Page 111 IP addresses referenced in the following steps and screenshots are based on factory defaults. Rockwell Automation Publication GMSN-UM003A-EN-P - October 2023...
- Page 112 If the unit has been reconfigured per this user manual, use the new addresses that are assigned to network module 1 and 2 15. Scroll down and set the Secondary Network address to 192.168.250.70, with a subnet mask of 255.255.255.192. Leave the gateway blank and select Next Rockwell Automation Publication GMSN-UM003A-EN-P - October 2023...
- Page 113 16. Review the configuration and then select Finish. 17. Wait for the Deploy OVF Template and Import OVF package tasks to complete. 18. Right-click on the new Witness VM and select Power > Power On Rockwell Automation Publication GMSN-UM003A-EN-P - October 2023...
-
Page 114: Register The New Vsan Witness
To register the new vSAN witness, perform the following steps. 1. Right-click Datacenter and select Add Host… 2. Enter the new FQDN of the Witness and select Next 3. Enter the following credentials. Username: administrator@ra.internal Password: <system-specific password> Rockwell Automation Publication GMSN-UM003A-EN-P - October 2023... - Page 115 Appendix B Rename Procedures 4. Select Next. 5. To accept the certificate thumbprint, select Yes. 6. Verify that the information on the Host summary screen is correct and click Next Rockwell Automation Publication GMSN-UM003A-EN-P - October 2023...
- Page 116 The vSAN Witness virtual appliance is provided with a pre-installed license from VMware. If the license is changed, the witness must be removed and recreated. 8. Accept the Lockdown mode default configuration and select Next. Rockwell Automation Publication GMSN-UM003A-EN-P - October 2023...
- Page 117 Appendix B Rename Procedures 9. Select a VM location and then select Next. 10. Verify the configuration information and select Finish Rockwell Automation Publication GMSN-UM003A-EN-P - October 2023...
- Page 118 From the configuration list, select Fault Domains. c. Select Configure Stretched Cluster. 12. Select Secondary (fault domain) and then click the double arrow (>>) button. This moves the secondary fault domain to the right pane. Rockwell Automation Publication GMSN-UM003A-EN-P - October 2023...
- Page 119 Stretched Cluster wizard to run a compatibility check. Verify that the check succeeds and then select Next. 15. Select the cache and capacity tier disks. Confirm that there is only one of each, then select Next to continue. Rockwell Automation Publication GMSN-UM003A-EN-P - October 2023...
- Page 120 If there is an Add witness host and Update vSAN configuration task in the task list, close the wizard by clicking the X in the upper right and then wait for the tasks to complete. Rockwell Automation Publication GMSN-UM003A-EN-P - October 2023...
- Page 121 It can take several minutes to complete this process, depending on the number of affected objects. 20. To monitor resynchronization, select vSAN > Resyncing objects. Wait for the resynchronization to complete before continuing. Rockwell Automation Publication GMSN-UM003A-EN-P - October 2023...
-
Page 122: Rename Cluster Hosts
3. Sign in with the following credentials. Username: administrator@ra.internal Password: <system-specific password> 4. Select Login. 5. Right-click Host1 and select Maintenance Mode > Enter Maintenance Mode 6. Select Ensure accessibility and then select Ok. Rockwell Automation Publication GMSN-UM003A-EN-P - October 2023... - Page 123 VMs to the other host as needed. 11. If you move multiple VMs, an alert is displayed to confirm the action. 12. To proceed, select Yes. Rockwell Automation Publication GMSN-UM003A-EN-P - October 2023...
- Page 124 13. The Migration wizard is displayed. Select Change compute resource only and then select Next. 14. Verify that host 2 is selected then select Next. 15. Verify the VM Network connection mapping and select Next. Rockwell Automation Publication GMSN-UM003A-EN-P - October 2023...
- Page 125 17. When ready to migrate the VM(s), select Finish. 18. When VM migration is complete, the host exits maintenance mode. 19. To remove Host 1 from the cluster, select it and drop it into Datacenter. Rockwell Automation Publication GMSN-UM003A-EN-P - October 2023...
- Page 126 To remove host 1 from the VMware vCenter inventory, perform the following procedures. 1. Right-click on Host 1 and select Remove from Inventory. 2. A remove host alert is displayed. To continue, select Yes. Rockwell Automation Publication GMSN-UM003A-EN-P - October 2023...
- Page 127 2. Sign in with the following credentials. Username: root Password: <system-specific password> 3. Select Login. 4. In the left navigator, select Networking, then select the TCP/IP stacks tab, and then select Default TCP/IP stack. 5. Select Edit settings. Rockwell Automation Publication GMSN-UM003A-EN-P - October 2023...
- Page 128 6. Change the host name, domain name, and search domains to the desired values, then select Save. 7. Verify that the DNS configuration for Default TCP/IP stack contains the desired new values. When finished, close the web browser. Rockwell Automation Publication GMSN-UM003A-EN-P - October 2023...
- Page 129 2. Enter the new fully qualified domain name, user name, and password, then select Next. 3. Enter the following credentials. Username: root Password: <system-specific password> 4. A certificate alert is displayed for host 1. Select Ok. Rockwell Automation Publication GMSN-UM003A-EN-P - October 2023...
-
Page 130: Rename Host 2
Wait for all running tasks to complete. It might take several minutes for the system to complete all tasks. Rename Host 2 To rename Host 2, repeat the procedures that are listed in the Rename Host 1 section. Rockwell Automation Publication GMSN-UM003A-EN-P - October 2023... -
Page 131: Rebalance Virtual Machines Across The Cluster
If you want to separate applications for primary and secondary VMs, the cluster must be rebalanced manually. Remove Obsolete After you rename the cluster hosts, Rockwell Automation recommends that you remove the original host name entries from the NetSvcs DNS configuration. To do so, perform the Information from NetSvcs following steps. -
Page 132: Final Ra.conf
IN A 192.168.249.16 local-data-ptr: 192.168.249.16 vva1-witness.example.com local-data: vva1-NetSvcs.example.com. IN A 192.168.249.17 local-data-ptr: 192.168.249.17 vva1-NetSvcs.example.com local-data: vva1-vCenter.example.com. IN A 192.168.249.18 local-data-ptr: 192.168.249.18 vva1-vCenter.example.com local-data: vva1-Support-Probe.example.com. IN A 192.168.249.19 local-data-ptr: 192.168.249.19 vva1-Support-Probe.example.com forward-zone: name: . forward-addr: 192.168.249.1 Rockwell Automation Publication GMSN-UM003A-EN-P - October 2023... -
Page 133: Final Steps
Appendix B Rename Procedures Final steps After you have updated the naming scheme, Rockwell Automation strongly recommends that you perform a controlled system shut down and restart after you follow the procedures that are outlined in chapter 5 of the... - Page 134 Appendix B Rename Procedures Notes: Rockwell Automation Publication GMSN-UM003A-EN-P - October 2023...
-
Page 135: Index
Features 6 cold start temperature 6 final ra.conf 132 command FQDN 5 modify the interface 77 verify IP address 77 Fully Qualified Domain Name 5 command thumbnail 76 fully qualified domain name 95 Rockwell Automation Publication GMSN-UM003A-EN-P - October 2023... - Page 136 77 JSON 50 ports JSON file 50 iDRAC 11 ports and components 10 power cables 12 connect 12 LDAP 46 processor (CPU) 6 local hosts file 96 Rockwell Automation Publication GMSN-UM003A-EN-P - October 2023...
- Page 137 Use the Default VLAN/Subnet Address 15 vCenter 50 remote console 57 rename 101 vCenter client 122 Versa Virtual Appliance 65 VersaVirtual Appliance rename 95 VersaVirtual Appliance components rename 95 virtual local area network 15 Rockwell Automation Publication GMSN-UM003A-EN-P - October 2023...
- Page 138 Index Notes: Rockwell Automation Publication GMSN-UM003A-EN-P - October 2023...
- Page 139 VersaVirtual Appliance User Manual User Manual Rockwell Automation Publication GMSN-UM003A-EN-P - October 2023...
- Page 140 At the end of life, this equipment should be collected separately from any unsorted municipal waste. Rockwell Automation maintains current product environmental compliance information on its website at rok.auto/pec. Allen-Bradley, expanding human possibility, and Rockwell Automation are trademarks of Rockwell Automation, Inc.
Need help?
Do you have a question about the Allen-Bradley VersaVirtual Series and is the answer not in the manual?
Questions and answers