Table of Contents
Advertisement
Quick Links
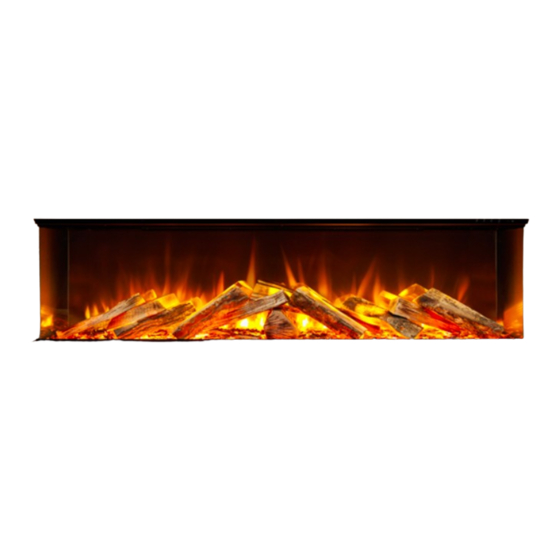
Electriflame e-DLX 3 Sided Electric Fire
Models No's
e-DLX 1250 - EDXB12RE (Real Wood Loose Log Model), e-DLX 1250 - EDXB12RE-NLD (Real Wood Loose Log Model, Netherlands),
e-DLX 1250 - EDXL12RE (Ceramic Log Model), EDXR12RE (Real Wood Model), e-DLX 1600 - EDXB16RE (Real Wood Loose Log Model) e-DLX 1600 -
EDXL16RE (Ceramic Log Model), EDXR16RE (Real Wood Model), e-DLX 1800 - EDXB18RE (Real Wood Loose Log Model) 1800 - EDXL18RE (Ceramic Log
Model), EDXR18RE (Real Wood Model), e-DLX 2000 - EDXB12RE (Real Wood Loose Log Model) 2000 - EDXL20RE (Ceramic Log Model), EDXR20RE (Real
Wood Model)
Packing Checklist
Electric Fire
Remote Control Handset* with wall mounting bracket & 3 off AAA Batteries
Bag of bark chippings
Ceramic (boxed) or Real Wood Log Set (fitted,complete)
Instruction Manual
Glass clamp
Fixing Plates x 6 off
IMPORTANT
PLEASE READ THESE INSTRUCTIONS CAREFULLY BEFOREINSTALLATION AND USE OF THIS ELECTRIC FIRE AND RETAIN FOR FUTURE REFERENCE.
Children of less than 3 years should be kept away unless continuously supervised. Children aged from 3 years and less than 8 years shall only switch on/off the fire
provided that it has been placed or installed in its intended normal operating position and they have been given supervision or instruction concerning use of the fire in
a safe way and understand the hazards involved. Children aged from 3 years and less than 8 years shall not plug in, regulate and clean the fire or perform user
maintenance. This fire is not intended for use by persons (including children) with reduced physical, sensory or learning disabilities, or lack of experience and
Advertisement
Table of Contents

Related Manuals for Celsi e-DLX Series


Summary of Contents for Celsi e-DLX Series
- Page 1 Electriflame e-DLX 3 Sided Electric Fire Models No’s e-DLX 1250 - EDXB12RE (Real Wood Loose Log Model), e-DLX 1250 - EDXB12RE-NLD (Real Wood Loose Log Model, Netherlands), e-DLX 1250 - EDXL12RE (Ceramic Log Model), EDXR12RE (Real Wood Model), e-DLX 1600 - EDXB16RE (Real Wood Loose Log Model) e-DLX 1600 - EDXL16RE (Ceramic Log Model), EDXR16RE (Real Wood Model), e-DLX 1800 - EDXB18RE (Real Wood Loose Log Model) 1800 - EDXL18RE (Ceramic Log Model), EDXR18RE (Real Wood Model), e-DLX 2000 - EDXB12RE (Real Wood Loose Log Model) 2000 - EDXL20RE (Ceramic Log Model), EDXR20RE (Real Wood Model)
- Page 2 IMPORTANT SAFETY ADVICE WHEN USING AN ELECTRIC FIRE, BASIC PRECAUTIONS SHOULD ALWAYS BE FOLLOWED TO REDUCE THE RISK OF ELECTRIC SHOCK AND INJURY TO PERSONS, INCLUDING THE FOLLOWING IMPORTANT SAFETY ADVICE. DO NOT cover the heater, to avoid overheating of the product. DO NOT leave the heater unattended while it is in use.
- Page 3 PRODUCT TECHNICAL DATA SHEET Supplier Name / Trademark Celsi Celsi Celsi Celsi Supplier Model Identifier B-1035995 B-1035996 B-1035997 B-1036316 EDXB12RE EDXB16RE EDXB18RE EDXB20RE EDXL12RE EDXL16RE EDXL18RE EDXL20RE EDXR12RE EDXR16RE EDXR18RE EDXR20RE EDXB12RE-NLD* Voltage 230v AC 50HZ 230v AC 50HZ 230v AC 50HZ...
- Page 4 Fig. 1 - EDXB12RE / EDXB12RE-NLD / EDXL12RE / EDXR12RE - Product Dimensions Page 3 of 25...
- Page 5 Fig. 2 - EDXB16RE / EDXL16RE / EDXR16RE - Product Dimensions Page 4 of 25...
- Page 6 Fig.3 - EDXB18RE / EDXL18RE / EDXR18RE - Product Dimensions Page 5 of 25...
- Page 7 Fig. 4 - EDXB20RE / EDXL20RE / EDXR20RE - Product Dimensions Page 6 of 25...
-
Page 8: Choosing A Suitable Location
Unpacking Remove and discard the plastic bag, please be responsible when handling the packing materials. Retain the original packaging for future transportation and/or storage. Check all accessories are removed from the packaging before storing it away for future use. KEEP PLASTIC BAGS AWAY FROM CHILDREN! Choosing a suitable location This electric fire is designed to be fitted into a studded wall or wall hung, mounted to a solid wall using the wall mounting bracket as fitted to the rear of the fire. -
Page 9: Unpacking The Product
Unpacking the product Fig. 5 Remove side panels. 6 screws on each. Remove clamp from top of glass panel by undoing 3 screws. Carefully tilt glass panel forward so top edge is clear of chassis and slide upwards enough to clear location at the bottom of the fire. -
Page 10: Wall Mounting
Wall Mounting Using a screwdriver remove the three screws that secure the wall mounting bracket to the top of the appliance and remove the wall mounting bracket and keep in a safe place. Position the mounting bracket where the appliance is to be installed on the wall and ensure that the bracket is level. Mark using the 32 holes as necessary on the wall mounting bracket as shown below in figure 6 &... - Page 11 1.) Hook unit onto bottom of bracket as indicated below in figure 8. 2.) Push unit into mounting bracket as indicated below in figure 8. 3.) Secure with two off screws at top as indicated below in figure 8. Fig. 8 Page 10 of 25...
- Page 12 Stud Wall Installations The wall must be of sound construction and all fixings used must be suitable for the type of wall. If there is any doubt regarding the suitability of the installation site please contact your supplier. From the front of the fire ensure that there is a minimum clearance of 50mm between any non-combustible materials. For combustible material clearances please consult with the manufacturer.
- Page 13 When the desired installation type is achieved follow the decorative ceramic logs as shown in the fuel-bed packs themselves: Product Model No. Product Description Ceramic Fuel-bed Part No. EDXB12RE / EDXB12RE-NLD / EDXL12RE / EDXR12RE Electriflame e-DLX 1250 B-1036371 EDXB16RE / EDXL16RE / EDXR16RE Electriflame e-DLX 1600 B-1036372 EDXB18RE / EDXL18RE / EDXR18RE...
-
Page 14: Operating The Fire
Manual Control using the controls on the fire. Remote Control using the included remote-control handset. Celsi App Control using smartphone or tablet voice control, Alexa or Google Assistant. Manual Control This fire can be operated manually using the control panel as shown below in figure 10. -
Page 15: Remote Control
Remote Control Remove the battery cover on the rear and insert 3 x AAA batteries ensuring the batteries are fitted correctly. Refit the cover. Please ensure old batteries are disposed of responsibly by contacting your local authority about recycling schemes. Ensure that the ON / OFF Power Switch on the fire is in the ON position. -
Page 16: Heat Setting
o use the remote handset ensure it is pointed directly towards the fire and press the appropriate button to operate the fire. Operating the Fire and Child Lock mode Use the On/Off button to switch the fire On and Off. Holding the button in for 5 seconds will enable the Child Lock mode (a padlock will appear on the handset display). -
Page 17: Adaptive Mode
Celsi App Control 1. The Celsi app can be downloaded from the IOS App Store or the Google Play Store by either searching for Celsi or by scanning the QR code using a smart phone or tablet. -
Page 18: Pairing Mode
The Celsi app can be used alongside the remote handset and provides additional feature of 7 day Timer function. ** During the initial set up of the App, the fire needs to be in pairing mode ** Pairing Mode With the fire off and in Standby mode press and hold the Standby button on the fire to hear a beep and continue holding for 5 seconds to observe a red flashing light on the rear screen. - Page 19 Connection to Alexa 1.) Once you have set up your Celsi account and successfully paired your device you can now also connect to Alexa. Fig. 13 Fig. 14 2.) To connect, open the Alexa App and select the “More” tab in the bottom right hand corner as shown in figure 13 above, then select the “skills and games”...
- Page 20 3.) Then click the “search” icon in the top right hand corner as shown below in figure 15, then search for the “smart life” skill by typing “smart life” into the search box as shown below in figure 16. 4.) Install onto your device by clicking the ”smart life” icon shown below in figure 17, then the “enable to use” icon as shown in figure 18. Fig.
- Page 21 5.) This will prompt you for your e-mail address and password that you used when registering the Celsi APP as shown below, enter the e-mail address and tick the user agreement box as indicated below in figure 19. 6.) Complete the verification puzzle as prompted, then enter your password and complete a second verification puzzle as requested.
- Page 22 Connection to Google Assistant 1.) Once you have set up your Celsi account and successfully paired your device you can now also connect to Google Assistant. Fig. 20 Fig. 21 2.) To connect, open the Google Assistant App and select the “Device” tab on the left hand side as shown above in figure 20, then click the “add devices”...
- Page 23 4.) Select the “link a smart home device” tab as indicated below in figure 22. Fig. 22 Fig. 23 Page 22 of 25...
- Page 24 5.) Click the “search” icon in the top right hand corner as shown figure 23 below, then enter “smart life” as the searched for as shown in figure 24. Select the “smart life icon as shown in figure 25 below. Fig.
- Page 25 6.) This will prompt you for your e-mail address and password that you used when registering the Celsi APP as shown below, enter the e-mail address and tick the user agreement box as indicated below in figure 25. 7.) The product should then operate from voice activation, open the google assistant app, click then click the microphone logo at the bottom centre and give instruction i.e.
-
Page 26: Maintenance Instructions
IMPORTANT This fire is fitted with an automatic thermal cut-out safety feature to reduce the risk of damage to fire due to overheating. If the fire over- heats the heater element will cut out whilst the fan will still continue to run to allow the fire to cool down sufficiently. Once the fire has cooled down the thermal cut-out will reset itself and switch the heater back on. -
Page 27: Warranty
If the product is purchased in the EU please consult the guarantee card that is supplied with your product by the approved Celsi Fires retailer for warranty terms and conditions. This warranty does not cover consumable items which have a limited lifespan.
Need help?
Do you have a question about the e-DLX Series and is the answer not in the manual?
Questions and answers