Table of Contents
Advertisement
Quick Links
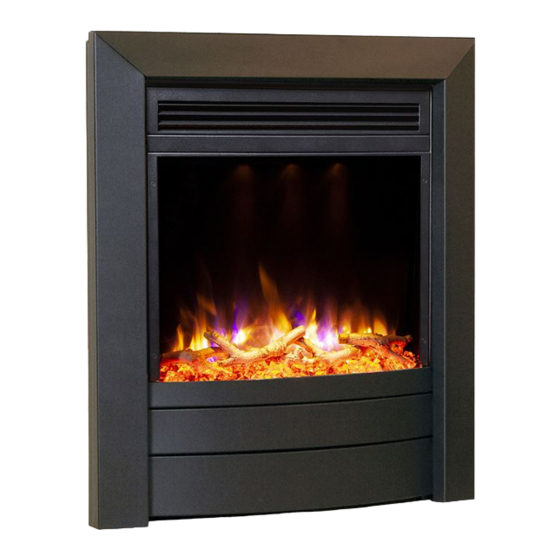
16" XD Mk2 Inset Electric Fire
Packing Checklist
Electric Fire
Remote Control Handset*
Log Set
Ember Ice Crystal Set
Instruction Manual
Fascia
*THIS PRODUCT REQUIRES 2 X AAA BATTERIES FOR USE IN THE HANDSET (NOT SUPPLIED)
PLEASE READ THESE INSTRUCTIONS CAREFULLY BEFORE
INSTALLATION AND USE OF THIS ELECTRIC FIRE AND RETAIN
This appliance is not intended for use by persons (including children) with
reduced physical, sensory or learning disabilities, or lack of experience
and knowledge, unless given supervision or instruction concerning use of
the appliance by a person responsible for their safety.
B-1005344
IMPORTANT
FOR FUTURE REFERENCE.
Page 1
Advertisement
Table of Contents

Related Manuals for Celsi ELECTRIFLAME XD Mk2 B-1005344


Summary of Contents for Celsi ELECTRIFLAME XD Mk2 B-1005344
- Page 1 16” XD Mk2 Inset Electric Fire B-1005344 Packing Checklist Electric Fire Remote Control Handset* Log Set Ember Ice Crystal Set Instruction Manual Fascia *THIS PRODUCT REQUIRES 2 X AAA BATTERIES FOR USE IN THE HANDSET (NOT SUPPLIED) IMPORTANT PLEASE READ THESE INSTRUCTIONS CAREFULLY BEFORE INSTALLATION AND USE OF THIS ELECTRIC FIRE AND RETAIN...
-
Page 2: Important Safety Advice
IMPORTANT SAFETY ADVICE WHEN USING AN ELECTRICAL APPLIANCE, BASIC PRECAUTIONS SHOULD ALWAYS BE FOLLOWED TO REDUCE THE RISK OF FIRE, ELECTRIC SHOCK AND INJURY TO PERSONS, INCLUDING THE FOLLOWING IMPORTANT SAFETY ADVICE. DO NOT cover or obstruct the airflow to the front of the heater. This is to avoid over-heating of the product. - Page 3 Product Technical Data Sheet Supplier Name / Trademark CELSI Supplier Model Identifier B-1005344 ELECTRIFLAME XD Mk2 16” Voltage 230v AC 50HZ Fuse 13 Amp Nominal Heat Output (Measured) 1.5 kW Minimum Heat Output (Indicative) 0.75 kW Maximum Continuous Heat Output 1.5 kW...
-
Page 4: Choosing A Suitable Location
Unpacking Remove and discard the plastic bag. Be responsible when handling the packing materials. Keep the original packaging for future transportation and/or storage. Check all accessories are removed from the packaging before storing it away for future use. KEEP PLASTIC BAGS AWAY FROM CHILDREN! Choosing a suitable location This electric fire is designed to be fitted within a standard 16”... -
Page 5: Installation
Installation Installation must be carried out by a qualified and competent person. The fireplace opening size required to install the fire Height: 545 – 580mm Width: 400 – 460mm Depth: 75mm minimum Connect the appliance to single-phase AC supply of the voltage specified on the rating plate. Should the fire be connected directly into the mains supply, then a fused switched spur with a 13- amp fuse must be fitted. -
Page 6: Fitting The Fascia
Lay the logs over the ember ice crystals to create desired fuel bed effect as shown below and refit the front glass using the 4 screws. Arrange the remaining ember ice crystals along the front of the fire bed as shown below Fitting the Fascia The supplied fascia fits onto the front of the fire by either hooking the fascia brackets into the 4 slots on the outer trim of the appliance or by using the supplied magnets (method dependent on... -
Page 7: Operating The Fire
Operating the Fire Manual Control This appliance can be operated manually using the controls situated on the right-hand side of the fire or by the included remote-control handset. ON / OFF Power Switch This switch is used to turn the mains supply to the appliance ON or OFF. When the switch is in the ON position an indicator light located in the centre of the screen will glow amber to indicate the appliance is switched on and in standby mode. -
Page 8: Remote Control
Remote Control Remove the battery / control panel cover by sliding completely down and insert 2 x AAA batteries ensuring the batteries are fitted correctly. Refit the cover by sliding back up to the original position. Please ensure old batteries are disposed of responsibly by contacting your local authority about recycling schemes. - Page 9 Smart Control functions The Smart Control panel reveals additional buttons to allow the following functions Set the Time of day Thermostatic temperature adjustment from 16 to 30°C Set 7-day timer with up to 3 programmable periods per day ...
- Page 10 To set Timer 2 & 3 or alter timer programme. 8. Repeatedly pressing the TIMER button will cycle through the 3 available timer programmes displaying the set parameters. To change or set an additional timer programme choose the Timer number required and press the SELECT button. 9.
-
Page 11: Maintenance Instructions
IMPORTANT This appliance is fitted with an automatic thermal cut-out safety feature to reduce the risk of damage to appliance due to overheating. If the appliance overheats the heater element will cut out whilst the fan will still continue to run to allow the fire to cool down sufficiently. Once the appliance has cooled down the thermal cut- out will reset itself and switch the heater back on. -
Page 12: Warranty
Warranty In the unlikely event of a problem occurring due to a manufacturing fault within 24 months from the date of purchase of the appliance it will be repaired or replaced free of charge. This warranty does not cover consumable items which have a limited lifespan. If a problem should occur, the nature of the problem together with the date of purchase and installer information should be immediately reported to the retailer that the appliance was purchased from.
Need help?
Do you have a question about the ELECTRIFLAME XD Mk2 B-1005344 and is the answer not in the manual?
Questions and answers