
Related Manuals for Ocean Digital WR-18


Summary of Contents for Ocean Digital WR-18
- Page 1 Internet Radio with FM WR-18 User Manual Please read this user manual carefully before using the receiver...
- Page 2 - 2 -...
-
Page 3: Table Of Contents
Contents 1. Introduction to the WR-18 Internet Radio ....4 2. Location of controls ..........6 3. Choosing modes and options ......8 4. Battery Charging ..........9 5. Dimmer ............10 6. Network Setup ..........11 7. Overview of Radio modes and functions .....14 8. My Favorite .............16 9. -
Page 4: Introduction To The Wr-18 Internet Radio
Introduction to the WR-18 Internet Radio The WR-18 Internet Radio is a compact, multi-purpose and attractive portable radio with an internal 1800 mAh Lithium Polymer rechargeable battery for many hours of audio entertainment and a gateway into the world of digital audio. - Page 5 Introduction to the WR-18 Internet Radio 8) Sleep timer • Enable the timer to turn the radio in standby after the selected time elapsed. 9) Configuration (No Wi-Fi or Internet) • Set up options to personalize the radio and information...
-
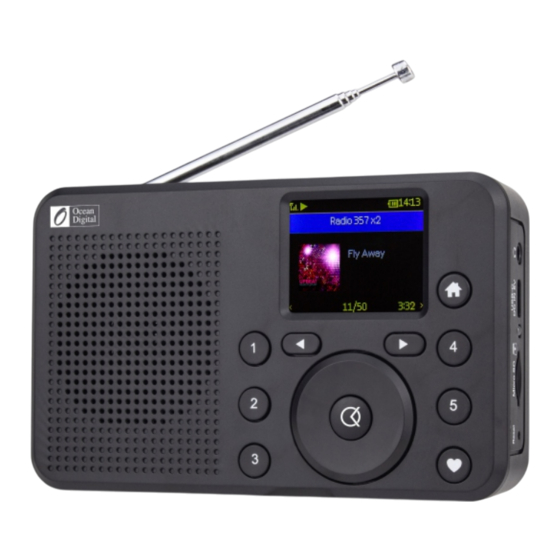
Page 6: Location Of Controls
Location of Controls - 6 -... -
Page 7: Skytune Web Application For Internet Radio
Location of Controls 1) ON/OFF ( ) - Press and Hold until display turns on or off 2) Mode – Switch between radio operating modes 3) Skytune Search – Enter keywords to find internet radio stations 4) Sleep – Setup delay timer before the radio automatically turns off... -
Page 8: Choosing Modes And Options
Choosing modes and options All user input is information that the Radio uses to provide the desired audio entertainment and pressing the OK button a confirmation (Select) and go to command. Once a desired selection is displayed or highlighted the selection is confirmed by pressing and releasing the OK button. -
Page 9: Battery Charging
Battery Charging The amount of battery charge is displayed with an indicator symbol ( ) where all bars indicate a full or nearly full charge, one bar indicates low charge and flashes continuously at minimum charge as a reminder to charge the battery. -
Page 10: Dimmer
Dimmer By pressing the "Dim" button, the screen will turn off. It helps saving the power of the battery by turning off the screen. Press the "Dim" button again to turn it back on. Entering the Dimmer settings by press and hold the "Dim" button. -
Page 11: Network Setup
Network Setup The Internet Radio must have a high bandwidth internet connection and a wireless (Wi-Fi) home network connected to it to be fully functional. To configure the Wi-Fi network connection turn on the radio by pressing and holding the power On/Off button until the display illuminates - this normally takes a few seconds. - Page 12 Network Setup 3) The display will change and display a list of options – Select Add AP (Scan) 4) The display will show a list of available networks (this may take a few seconds) – Select your network 5) The display will ask for your passphrase – this is often called passcode or password –...
- Page 13 Network Setup 1) Select Add/Remove AP (i.e. highlight and then press OK button) and repeat steps 1) through 6) above. 2) Select Add/Remove AP and then Select Add AP (WPS button) – Press WPS button on your router within 2 minutes to complete the connection.
-
Page 14: Overview Of Radio Modes And Functions
Overview of Radio modes and functions To Select any mode use the Home button ( ) to display the My Favorite screen: Navigate through the modes to find and Select any of these functions: 1) My Favorite – A maximum of 150 previously Preset (saved) favorite Internet Radio and FM radio stations are listed for Selection. - Page 15 Overview of Radio modes and functions Maximum range of the Bluetooth wireless signal is 10 meters (32 feet) but may be reduced by the presence of walls or other obstructions. 7) Timer – To count down from a specified time with alarm 8) Sleep Timer –...
-
Page 16: My Favorite
My Favorite Press and release the My Favorite button ( ) and display a list of up to 150 Internet Radio and FM radio stations that have been Preset (stored) for an easier and faster way to play favorite radio stations. To add a radio station, at the end of the list, while it is playing press and hold my favorite button ( ) until the Preset... -
Page 17: Internet Radio
Internet Radio Select Internet Radio mode (Home>My Favorite>Internet Radio>OK) and navigate the extensive list of worldwide radio stations using these options: 1) Skytune – Select a radio station using the structured lists that aid and reduce the task of finding the right station. 2) Use Search instead of browsing the extensive radio station list by searching with the initial letters of the desired station name, creating a shorter list of stations the more letters... -
Page 18: Media Center
Media Center The Radio supports the industry standard Universal Plug and Play (UPnP) and compatible with Digital Living Network Alliance (DLNA) standards. These standards enable the Radio to browse and play media files located on UPnP or DLNA server provided the server has been setup to allow sharing of files, are streaming the files and connected to the same Wi-Fi network as the radio. -
Page 19: Storage
Storage The radio can play audio Files stored in a Micro SD card provided they are stored in MP3. To play music from a Micro SD memory card, simply insert a micro SD card into its port on the side of the radio. Press the Home ( ) or Mode button and navigate to "Storage", press OK to confirm. -
Page 20: Fm Radio
FM Radio Select FM Radio and press OK if option to Scan and Preset FM Stations is displayed or if a list of Preset FM stations is displayed highlight and select station to start listening. While a station is playing it can be added to the Favorite list by pressing a Preset button ( ) or to display more radio station information use the Forward button ( ►... -
Page 21: Bt Streaming
BT streaming After selecting Bluetooth the display will show the Radio’s Bluetooth identifier code and connection status. If it is not connected “pairing” must take place with the audio source Bluetooth device. When the Radio’s identification code appears in the list of available devices on the audio source Bluetooth device pair the two devices so that they can recognize each other and will automatically connect whenever the Radio is in Bluetooth... -
Page 22: Timer
Timer Press the button and use the button OK or the arrow buttons to select "TIMER". Setting the Timer The device offers the Timer function as a kitchen timer. The time will count down from a specified time and ends with a beeping sound. -
Page 23: Sleep Timer
Sleep timer While playing an audio source press and release the Sleep button on top of the radio and the display will show a list of different delay times. Select a time delay before the Radio automatically turns off allowing the listening of audio entertainment while falling asleep. -
Page 24: Configuration
Configuration Select Configuration for a list of options to personalize the radio to be displayed, navigate the list and select the desired function. Network Wi-Fi Network Ø Network Options – Select if the Radio Wi-Fi should be permanently connected or to disconnect if the connection is not active for more than 30 seconds. - Page 25 Configuration You can also set clock style with choices between analog or digital clock display. Language Default is English or Select this option to setup the language for all displays. FM setup Options to select FM area, scan for FM stations to create station list and the display station list.
- Page 26 Configuration EQ [current setting] Options for playback sound e.g. Flat, Rock, Classical Buffer Time [current setting] Select either a 2 or 5 second minimum amount of audio streaming data in the buffer (storage) before playing when recovering from breaks in the Internet data stream Timer This is to set the alarm sound volume and duration for the Timer function.
-
Page 27: Www.skytune.net
Skytune Web Application for Internet Radio www.skytune.net Use Microsoft Internet Explorer or Google Chrome web browser to manage My Favorite list or select Internet radio station for playback. With the PC / Smart phone connected to the same Wi-Fi network as the radio go to web site www.skytune.net and click on “Browse / Search”... - Page 28 Skytune Web Application for Internet Radio www.skytune.net Select either “Add favorite” or “Listen to Station” and enter the radio’s IP address. To find the IP address of the radio go to mode>Configuration>Information>Network Information>IP: Click on “Send” and the radio will start playing the radio station and the radio’s My Favorite list will be displayed on the web page.
- Page 29 Skytune Web Application for Internet Radio www.skytune.net Adding a Radio Station To add a Radio Station its name and URL can be entered into the Add Channel section along with selecting the Country where it is located and Genre of audio entertainment it provides.
-
Page 30: Problems And Solutions
Problems and Solutions Cannot connect to the Wi-Fi Network a) Common Causes • Incorrect passphrase / passcode / password for the selected Network. • Location of the Radio has a weak Wi-Fi signal – if possible check with another Wi-Fi connected device in the same location or move to a location closer to the router. - Page 31 • The station link is out of date – it is updated daily and should be correct the next day or access via Internet Radio > Skytune. Contact Ocean Digital support for more help. • The station link is no longer active – the station is no longer available.
-
Page 32: Helpful Tips
Helpful Tips The Internet Radio is streaming the audio source data from the selected radio station by the broadband modem / router and Wi-Fi network. Problems with the broadband connection (e.g. high error rate, Internet congestion due to overcrowding) will cause the radio to stop playing until the data stream starts again. -
Page 33: Technical Specifications
Technical Specifications Model: WR-18 DC Power Input: 5 Volts 1 Amp. (USB-C) Battery: 3.7 Volt 1800 mAh Lithium Polymer Wi-Fi Wireless: IEEE 802.11b/g/n (5 GHz only version ac – not supported) Frequency: 2.4 GHz Security: WEP, WPA, WPA2 Bluetooth Version: V4.2 BR, EDR Compliant Frequency: 2.4 GHz... - Page 34 This system is financed by the industry and ensures environmentally responsible disposal and the recycling of valuable raw materials. Ocean Digital Technology Ltd. Flat B, 12/F., Yeung Yiu Chung (No.8) Ind. Bldg., 20 Wang Hoi Road, Kowloon Bay, Hong Kong Email: support@oceandigital.com.hk...
- Page 35 This equipment has been tested and found to comply with the limits for a Class B digital device, pursuant to part 15 of the FCC Rules. These limits are designed to provide reasonable protection against harmful interference in a residential installation.
Need help?
Do you have a question about the WR-18 and is the answer not in the manual?
Questions and answers