
Related Manuals for Ocean Digital WR-390


Summary of Contents for Ocean Digital WR-390
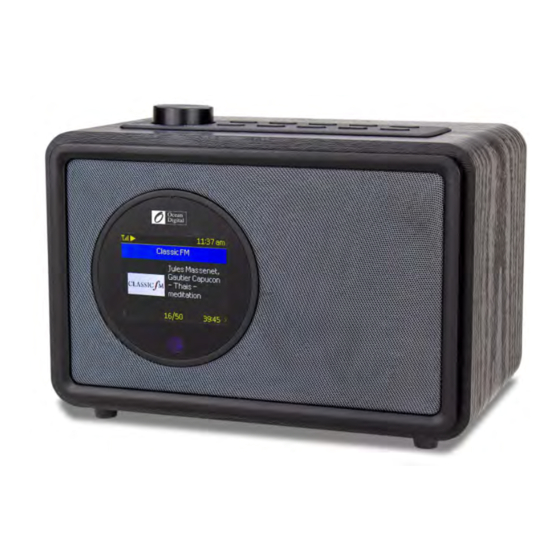
- Page 1 Internet Radio WR-390 User Manual Please read this user manual carefully before using the receiver.
-
Page 3: Table Of Contents
Contents Location of Controls ..............4 Remote control ................6 Entering security code for your wireless network ......7 1. Getting started ..............9 2. Charging battery ..............9 3. Network Setup ..............10 4. Overview of features and functions ........11 5. Internet Radio ..............12 6. Media Centre ..............14 7. -
Page 4: Location Of Controls
Location of Controls - 4 -... - Page 5 Location of Controls Press and hold to power on/off Press and release to Standby / activate the radio Press to enter the alarm setting (Alarm 1 and Alarm 2) Access Home screen/press this button to return to the playing screen. Press and hold to access EQ setting.
-
Page 6: Remote Control
Remote control : Press to toggle between Standby and Operation. To turn the radio off, press and hold the button. Note: Only the button on the radio device can power on the radio. : Mute 3. 0-9: Input index number on the list / input characters for WiFi password : Preset the current playing station to Favorite... -
Page 7: Entering Security Code For Your Wireless Network
Entering security code for your wireless network Using remote control On the alpha-numeric keypad, press the button repeatedly to cycle through the characters assigned to each button. Refer to the following list. To input a character, highlight it and press the [OK] button to confirm and input the next character. - Page 8 Before you start Please ensure the following is ready: You have a broadband internet connection. A wireless broadband router is connected to the internet successfully. The radio supports Wireless B, G and N connection (Wireless N router can also be used with the setting on B or G). You know the Wired Equivalent Privacy (WEP) or Wi-Fi Protected Access (WPA) data encryption code/password.
-
Page 9: Getting Started
1. Getting started The radio is powered by the built-in lithium battery. A USB-C cable is included in the product package. Press and hold the [ ] button to power on. To power off the radio, press and hold the same button. Press the [ ] button briefly to enter standby or activate the radio. -
Page 10: Network Setup
3. Network Setup Internet connection can be setup via Wireless network (WiFi). Your radio requires a broadband Internet connection. • If this is first time use, the Configure Network wizard will be displayed. Choose Yes to start configuring network. Scroll to "Yes" and press "Scroll/Select/Vol"... -
Page 11: Overview Of Features And Functions
4. Overview of features and functions Press [ ] to enter the main menu. Scroll by rotating the [Scroll/Select/Vol+/- ] knob or the [ ◄ / ► ] button on remote: My Favorite ― To show the list of favorite stations which have been assigned to the presets. -
Page 12: Internet Radio
5. Internet Radio On the main menu, choose Internet Radio and you will find the options below: Skytune Select Skytune to start enjoying thousands of radio stations over the world. You can filter your search by Region, Music genre and talks. The Local Radio let you access quickly the stations available in your local area through internet connection. - Page 13 5. Internet Radio Every time you press the ► button, it will toggle between the big clock and the radio channel information: My Favorite This is to show the list of your Favorite stations which have been assigned to the presets. Preset a station When a radio station is playing, press the button on the remote control...
-
Page 14: Media Centre
6. Media Centre The device supports UPnP and is DLNA-compatible. This provides the opportunity to stream music from your network. However, this requires you to have a compatible device in your network that can function as a server. This can be e.g., a network hard drive or a conventional PC with e.g., Windows 8 via which access to the shared folder or media sharing is permitted. -
Page 15: Dab+/Dab Radio
7. DAB+/DAB Radio(Digital Audio Broadcasting) If there is Digital Audio Broadcasting (DAB) in your area, the Radio can pick up the DAB stations as well (no internet connection is required). The Radio supports both DAB and DAB+. Place the Radio close to the window and extend the antenna as far as it can go to get the best reception. -
Page 16: Fm Radio
8. FM Radio To receive the ordinary FM stations (no internet connection is required), place the radio close to the window and extend the antenna as far as it can go to get the best reception. You may need to adjust the direction of the antenna to improve reception. -
Page 17: Bluetooth Playback
The device scans for Bluetooth devices in the reception range. • When the radio is found, your bluetooth device shows its name WR-390- XXXX (the XXXX is an identification code for your radio unit). -
Page 18: Alarm Setting
10. Alarm Setting Important! It is suggested to connect a power source when alarm is set so that enough power is always available when alarm goes off. • Press [ ] button on the radio or press the [ ] button on the remote control. -
Page 19: Sleep Timer Setting
11. Sleep Timer Setting You can set the timer to let the radio goes standby after the selected time elapsed in the range of 15 minutes to 180 minutes. Press [ ] button on the remote control to set the timer, or navigate to Sleep Timer option on the main menu. -
Page 20: Configuration
12. Configuration Here you will find the complete settings / options available to configure your own radio. On the main menu, navigate to Configuration setting. Press OK and you will see a list of options available. Network Network Options Always on: The WLAN function remains switched on (faster access when switching from other modes of radio). - Page 21 12. Configuration • Time zone Auto-set Time Zone: This option is set by default. Manual-set Time Zone: Choose this option if you want to set the time in another region. Choose and highlight the region/city you prefer and press OK to confirm. Coupled with NTP (use network time) and DST (Daylight time saving) will be adjusted automatically if you choose to use network time...
- Page 22 12. Configuration select your language of choice. English, French, Italian, German, Dutch and more are available. DAB set up • DAB full scan You can always carry out a new scanning of DAB channels by selecting this option. All current presets and channels will be erased. •...
- Page 23 12. Configuration Playback Setup This is to set the mode of playback under UPnP/DLNA compatible streaming: Repeat All, Repeat Once or Shuffle. Resume play power on This is to set the device whether to return to the last operating mode when it is switched on or displays the Home screen.
- Page 24 12. Configuration address ( Configuration > Information > Network Information > IP ) to your PC's browser input window. Software Update There may be software release to upgrade features of the radio from time to time. Check the update regularly to keep your radio up to date with the latest software.
-
Page 25: Remote Control Via Pc / Smart Phone
13. Remote control via PC / Smart phone ─ Tuning internet radio & manage favourite Experience an easy way to control tuning internet radio channels and manage your favourite list via PC or Smart phone's web browser. The supported browsers are Internet Explorer and Chrome. - Connect your PC or Smart phone to the same Wi-Fi network as your radio. - Page 26 13. Remote control via PC / Smart phone ─ Tuning internet radio & manage favourite - It will prompt you whether to "Add Favourite" or "Listen to Station". Enter the IP address of your radio (e.g. 192.168.1.11): The IP address can be located on the radio unit as follow: * On the remote control, press the [Info] button, choose Network and scroll to IP to view the IP address * On the radio, return to the main menu.
- Page 27 13. Remote control via PC / Smart phone ─ Tuning internet radio & manage favourite You can also add the radio channel if you know the published audio stream URL with the streaming format as follow: 1. Transport: HTTP progressive like HLS and HTTP like Shoutcast, Icecast 2.
-
Page 28: Trouble Shooting
14. Trouble Shooting Cause Problem Solutions • Confirm that a Wi-Fi or Ethernet Wired connected PC can access the internet (i.e. can browse the web) using the same network. • Check that a DHCP server is available, or that you have Network down configured a static IP address on the radio. - Page 29 14. Trouble Shooting Cause Problem Solutions • The station is not broadcasting at this time of the day (remember it may be located in a different time zone). • The station has too many people trying to attach to the radio station server and the server capacity is not large enough.
-
Page 30: Helpful Tips
Helpful Tips 1. If the Internet Radio keeps re-buffering radio station: The Internet Radio is streaming the data from the radio station via your broadband connection, if there is a high error rate on your broadband connection, or the connection is intermittent, then it will cause the Internet Radio to pause until the connection is re-established and it has received enough data to start playing again. -
Page 31: Technical Specification
Technical Specification Model WR-390 Power input 1.5A Power voltage 100-240V~50/60Hz IEEE802.11b/g/n Wireless Network Wireless network 2412 - 2484 MHZ frequency Security Protocol WEP/WPA/WPA2 V4.2 BR/EDR compliant Bluetooth version Bluetooth frequency 2.4 GHz Bluetooth range 10 meters (line of sight) 174.928MHz (5A) - 239.200MHz (13F) - Page 32 In the box • Internet Radio • USB cable • Remote control (without batteries) • User manual WEEE and Recycling The European laws do not allow any more the disposal of old or defective electric or electronic devices with the household waste. Return your product to a municipal collection point for recycling to dispose of it.
- Page 33 This equipment has been tested and found to comply with the limits for a Class B digital device, pursuant to part 15 of the FCC Rules. These limits are designed to provide reasonable protection against harmful interference in a residential installation. This equipment generates, uses and can radiate radio frequency energy and, if not installed and used in accordance with the instructions, may cause harmful interference to radio communications.
Need help?
Do you have a question about the WR-390 and is the answer not in the manual?
Questions and answers