
Subscribe to Our Youtube Channel
Related Manuals for Ocean Digital WR-100F


Summary of Contents for Ocean Digital WR-100F
- Page 1 Internet Radio WR-100F User Manual Please read this user manual carefully before using the receiver.
-
Page 2: Table Of Contents
Contents Location of Controls .........1 Switching the radio on ........3 Connecting to your WiFi Network ......4 Internet Radio ...........6 Media Center ............9 FM Radio ............11 Information Center ..........12 Aux In .............13 Bluetooth ............13 Configuration ..........14 Trouble Shooting ..........22 Technical Specification ........26 What is included in the box ......27... -
Page 3: Location Of Controls
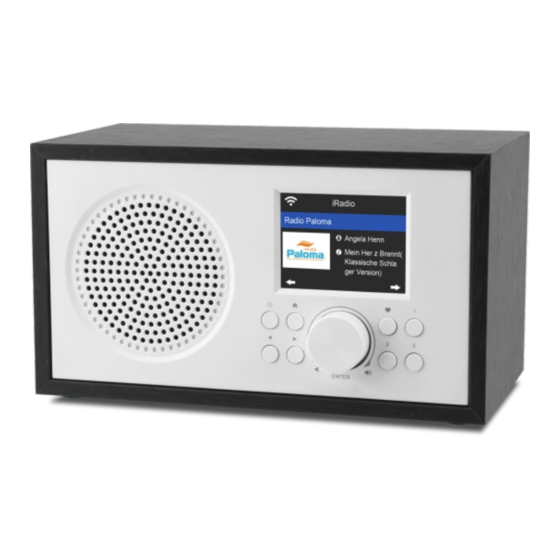
Location of Controls Dial/Select 3 2 4 AUX-IN 11 12 - 01 -... - Page 4 Location of Controls 1. Standby button 2. Home button 3. Left/Back button 4. Right button 5. Volume / Dial / Select rotary knob (Rotate to adjust the volume or browse the menu. Push down the button to confirm selection) 6. Favourite button (Press and hold to enter "Add to Favourite", press and release to recall the favourite list) 7.
-
Page 5: Switching The Radio On
Switching the radio on Connect the mains adaptor to the radio unit, one end to the DC IN on the radio and the other end to the AC mains wall socket. Caution: Use only the mains adaptor supplied with the radio. -
Page 6: Connecting To Your Wifi Network
Connecting to your WiFi Network Followed by the steps above, it will come to the network configuration setting. Choose <Yes> to start searching the available WiFi network. If your router has the WPS function, you can select <Yes(WPS)> to proceed. After the search is done, it will display a list of the available wifi... - Page 7 Connecting to your WiFi Network - Rotate the [Dial/Select] knob to browse the character - Press the [►] button to skip to the next entry - When it is done, push the [Dial/Select] rotary knob to confirm. The radio will start connecting to the network. When the wifi...
-
Page 8: Internet Radio
Internet Radio Choose <Internet Radio> from the menu, you can see several listed options. To start listening the radio stations worldwide, select <Radio Station / Music>. You can find your favourite station by Genre or Location. My Favorite This is to show the list of your Favorite stations which have been added to the list. - Page 9 Internet Radio For FM, you can store up to 99 presets You can edit your favorite list anytime with the options below: Delete - To delete the selected station Shift up - To shift the selected station by one level up on the ranking Shift down - To shift the selected station by one level down on the ranking...
- Page 10 Internet Radio History The radio will memorize the last 10 listened stations. Service Search Stations You can find your desire radio station by inputting the name of the radio or just a few characters to filter the list. Add New Radio Station If you want to add the station and you have the audio stream URL, it is suggested to add it through the MediaYou website as follow, or you can contact MediaYou...
-
Page 11: Media Center
Media Center UPnP (Universal Plug and Play) The device supports UPnP and is DLNA-compatible. This provides the opportunity to stream music from your other network devices. However, this requires you to have a compatible device in your network that can function as a server. - Page 12 Media Center 4. After a successful scan is done, select your UPnP server. 5. The radio will show the media categories available from the UPnP server, e.g. ‘Music’, ‘Playlists’ etc. 6. Choose the media files that you wish to play. You can set the mode of playback under Configuration>Playback setup.
-
Page 13: Fm Radio
FM Radio To receive the ordinary FM stations(No internet connection is required), place the radio close to the window and extend the antenna as far as it can go to get the best reception. You may need to adjust the direction of the antenna to improve reception. -
Page 14: Information Center
Information Center On the main menu, navigate to <Information Center> and select to enter. You will find the options as follow: Weather Information The radio supports weather display in standby mode. Navigate to Information Center> Weather Information, choose the region you want it to display the weather information. -
Page 15: Aux In
Bluetooth devices. 2. Turn on Bluetooth on your device and look up the device named “WR-100F” from the list.Select it to start pairing. 3. If the connection is successful, it will show “Connected” on your Bluetooth device list. -
Page 16: Configuration
Configuration Time Display You can choose the time display as analog or digital form. Manage my mediaU You can personalize your own favorite station list through MediaYou website. Set <Enable> on this option. It will prompt you to sign up on www.mediayou.net before the function can be used. - Page 17 Configuration You can then organize your own favorite stations or add any new station which is not found on the station list. Once the changes are done, your radio will synchronize the changes immediately and you will find your favorite list under <My MediaU>...
- Page 18 Configuration Time Format setting Time format setting: 12hours / 24hours Date Format setting Date format: YYYY/MM/DD, DD/MM/YYYY and MM/DD/YYYY If manual setup is selected, you will see an added item Daylight Saving Time (DST) setting appeared on the list. Alarm Dual alarm clock There are 2 alarm clocks available and settings as follow: Schedule the alarm: You can schedule the alarm repeated...
- Page 19 Configuration Remark: In case there is network issue renders the wake to radio not working, it will automatically issue melody sound after 1 minute. Timer Press [◄] or [►] button to set the timer, then press [Dial/Select] knob to confirm. When the time is due, it will release some beeping sound.
- Page 20 Configuration Power Management This function is to allow the radio to go Standby if there is no internet signal received in certain time to save power. The default setting is 15 minutes. When the radio does not receive any internet signal, the radio will go into Standby after 15 minutes.
- Page 21 Configuration FM Setup -FM Mode Option to choose hearing in Stereo or mono. Note: As the radio has one speaker, the stereo applies only on earphone listening. -FM Threshold Option to adjust the scanning threshold to pick up stronger or weaker stations. There are two types of threshold, Seek Threshold and Stereo Threshold.
- Page 22 Configuration Playback Setup This is to set the preference of UPnP playback. You can set the playback as Off, Repeat one, Repeat all(default), Shuffle. Device -Rename This is to set the name of your radio when it becomes a media render. The name by default is AirMusic. Choose “Rename”...
- Page 23 Configuration Equsliser Select your prefer equalizer to suit your listening preference. Resume When Power On The radio will resume playing the last listened station when you power it on next time if ON is selected in this option. The ON is set by default. Software update Upgrade information will pop up on the display when there is update version available.
-
Page 24: Trouble Shooting
Trouble Shooting 1. If you have trouble connecting the radio to your wireless network, these steps may help to resolve the problem: - Confirm that a Wi-Fi or Ethernet Wired connected PC can access the internet (i.e. can browse the web) using the same network. - Page 25 Trouble Shooting 2. If your radio can connect to the network successfully, but is unable to play particular stations, it may be due to one of the following reasons: - The station is not broadcasting at this time of the day (remember it may be located in a different time zone).
- Page 26 Trouble Shooting - If you have a third party firewall (Like Norton, or Zone Alarm) that will have its own control panel and you will need to consult the manual for your firewall. - If your PC is connected to a managed network, with a server sometimes the PC being searched for needs to be set to Home group.
- Page 27 Trouble Shooting 6. What is Buffering? When playing a stream, the Internet Radio/Media player, downloads a small amount of the stream before it starts playing. This is used to fill in any gaps in the stream that may occur if the internet or the wireless network is busy. The Internet Radio streams music data from the PC while you are listening.
-
Page 28: Technical Specification
Technical Specification Model WR-100F Power input Adaptor input 100-240V~50/60Hz Wireless Network IEEE802.11b/g/n Wireless Frequency 2.4 GHz Security Protocol WEP/WPA/WPA2 FM Frequency 87.5-108MHz Bluetooth Version Audio output power 3W (RMS) x 1 3.5mm earphone jack Audio socket 3.5mm Aux-in jack Unit Dimension 178 x 98 x 98 mm (L x D x H) Remark: Specification may vary without notice... -
Page 29: What Is Included In The Box
This system is financed by the industry and the ensures environmentally responsible disposal and the recycling of valuable raw materials. Ocean Digital Technology Ltd. Flat B, 12/F., Yeung Yiu Chung (No.8) Ind. Bldg., 20 Wang Hoi Road, Kowloon Bay, Hong Kong Email: support@oceandigital.com.hk...
Need help?
Do you have a question about the WR-100F and is the answer not in the manual?
Questions and answers