
Related Manuals for Enerpac ETR50


Summary of Contents for Enerpac ETR50
- Page 1 Instruction- and Maintenance Manua Trolley system Document Number: ED.03884.00.001.ENG rev02 Status: Final ETR50 Original instructions ETR100 50 tons 100 tons www.enerpac.com...
- Page 2 Revisions Revision Description Date Author Checked Approved by Rev. 00 Initial version 12 May 2021 D. Rosier M. Schreur R. Broenink Added Cube jack lifting Rev. 01 1 June 2021 M. Schreur F. Schiphorst R. Broenink requirements Added Track alignment Rev.
-
Page 3: Preface
Preface Dear customer, This is the manual for assembling, using and maintaining of the trolley systems ETR50 and ETR100. The trolley systems do have a lot in common; the differences are indicated clearly. In this manual, the trolley systems are referred to by the term “System”. -
Page 4: Table Of Contents
Contents Preface _______________________________________________________________________ 3 Contents ______________________________________________________________________ 4 Introduction ________________________________________________________________ 7 1.1. Manufacturer address ___________________________________________________________________ 7 1.2. Declaration ____________________________________________________________________________ 7 1.3. Referenced documents ___________________________________________________________________ 7 1.4. Identification ___________________________________________________________________________ 7 1.5. Liability ________________________________________________________________________________ 8 1.6. Intended use ___________________________________________________________________________ 8 1.7. Modifications __________________________________________________________________________ 8 1.8. - Page 5 4.3. Side load _____________________________________________________________________________ 39 Install the System __________________________________________________________ 40 5.1. How to hoist __________________________________________________________________________ 40 5.2. Place the supporting material ____________________________________________________________ 41 5.3. Put the tracks in place __________________________________________________________________ 42 5.4. Put the trolleys on top of the tracks _______________________________________________________ 44 5.5.
- Page 6 Page 6 Page 6 of 93 Document number: ED.03884.00.001.ENG Rev02...
-
Page 7: Introduction
Introduction 1.1. Manufacturer address Enerpac Heavy Lifting Technology B.V. Zuidelijke Havenweg 3, 7554 RR Hengelo (Ov) The Netherlands Tel. +31 74 242 20 45 Fax. +31 74 243 03 38 Email: info.hengelo@enerpac.com Website: www.enerpac.com 1.2. Declaration Declaration of Conformity according to Machine Directive 2006/42/EC. -
Page 8: Liability
Personnel as well as other people involved in the usage of the System are expected to have read and understood this manual. • In cases of doubt about the use or application of this machine, always contact with Enerpac for advice and recommendations. •... - Page 9 • Qualification of the personnel is a responsibility of the customer. • Always comply with legal minimum age stipulations. • The System should only be used, maintained and repaired by properly instructed and trained personnel. Clearly describe the qualifications of the relevant employees with regard to use, commissioning, assembly, disassembly and all maintenance and repair work.
- Page 10 5. ensuring that the area for the system is adequately prepared. The preparation includes, but is not limited to, the following: a. access for the system and associated equipment. b. sufficient room to assemble and disassemble the system. c. an operating area that is suitable for the system with respect to levelness, surface conditions, support capability, proximity to power lines, excavations, slopes, underground utilities, subsurface construction, and obstructions to operation.
- Page 11 The system Operator's responsibilities shall include the following: a) reviewing the requirements for the system with the Director before the operations. b) knowing what types of site conditions could adversely affect the operation of the system and consulting with the system Director concerning the possible presence of those conditions. c) understanding and applying the information contained in this manual.
-
Page 12: Hand Signals
1.9. Hand signals The following hand signals may be applied when using the system: TRAVEL. STOP. Arm extended Arm extended, palm forward, hand open down, move arm back and slightly and forth horizontally. raised, make pushing motion in direction of travel. END EVERYTHING. -
Page 13: General Safety Aspects
Inspect the condition of the System before every individual start-up, given the fact that the slightest defect may have severe consequences. Enerpac is not liable for improper use of accessories in combination with the System. Page 13 Page 13 of 93... -
Page 14: Symbols Applied To The System
2.3. Symbols applied to the System The System is labelled with • warning symbols • symbols with mandatory directions. The tables below shows the most common used warning symbols in industrial environments. Danger of contact with moving machine parts Danger of lethal voltage in the control panels Danger of parts of hands getting trapped/caught Danger of parts of feet getting trapped/caught Danger do not step up... -
Page 15: Working On The Electrical System
NB: Welding, cutting or grinding work on the System is not permitted without the manufacturer's prior written permission. 2.5. Working on the electrical system • In the event of an electrical fault in the electric control system, you must bring all connected device into a safe condition. - Page 16 But in cases of small quantities, standard measures suffice: • rinse thoroughly with water • wash with soap • provide fresh air • remove any contaminated clothing In common the following rules are applicable: • Contact with skin: rinse thoroughly with water remove any contaminated clothing wash the relevant body parts with soap.
-
Page 17: Assembly And Disassembly
Symbol General hazard indication Possible precautionary measures Fire hazard when heated and/or in presence of Keep away from heat, sparks, open sparks. flames and/or hot surfaces. No smoking! Take the necessary precautionary May cause fire (oxidising agent). measures to prevent mixture with flammable substances. - Page 18 • Containers may be used for transport, since they provide rigid protection against and avoid weather influences. Make sure that all parts are secured against sliding around. Page 18 Page 18 of 93 Document number: ED.03884.00.001.ENG Rev02...
-
Page 19: System Overview
Electro cabinet. The system can also be controlled locally by the controls on the electro cabinet, which is useful in case the remote-control fails, and for maintenance purposes. • The ETR50 trolleys run on single set of tracks. The ETR100 trolleys run on double set of tracks. ETR50 ETR100... -
Page 20: Configuration Kits
3.2. Configuration kits The trolleys can be provided with configuration kits. The Various kits and article numbers are listed in Appendix Z. The swivel can move in two directions (2D). Two axes swivel kit To be used when header beams are put on top of the trolleys The swivel can move in three directions (3D). - Page 21 Mounted on top of the trolley. To be used to enable mounting a cube jack cube jack mounting kit system. See ref 5 “Cube jack system”. Page 21 Page 21 of 93 Document number: ED.03884.00.001.ENG Rev02...
-
Page 22: Transport Frames
3.3. Transport frames Transport frames are available for the ETR50 and the ETR100 types. • Transport frames for the ETR50 can contain two trolleys. • Transport frames for the ETR100 can contain one trolley. The frames can be piled. ETR50 transport frame ETR50 piled •... -
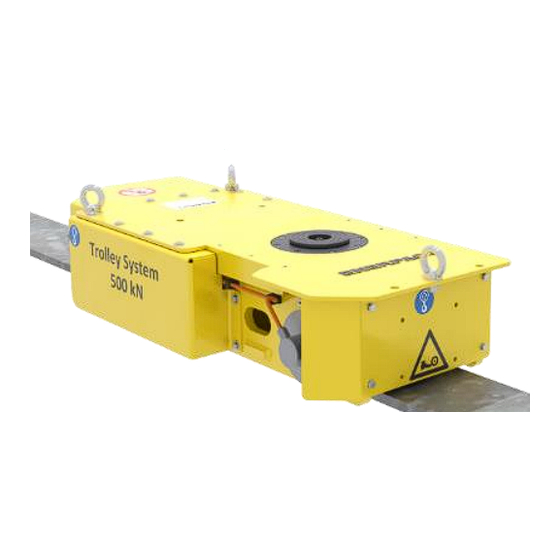
Page 23: Main Parts
3.4. Main parts 3.4.1. The trolley The pictures below indicate the main parts of the ETR50 trolley and the ETR100 trolley. Rotational encoder ETR50 Chain Hydraulic socket (if hydraulic kit applied) Electro motor and gear box Rollers Rotational encoder ETR100... - Page 24 The electro cabinet contains the electrics to control the electro motors of the trolleys. There are sockets for eight trolleys. On the front side of the cabinet switches and indicators, as well as the HMI screen. The receiver performs the wireless communication with the remote-control handheld. 3.4.3.
-
Page 25: System Specifications
Minimum - class 10 of NAS 1638 requirement - class 21/19/16 of ISO DIS 4406 0,393 l ETR50 with hydraulic kit Volume 1,430 l ETR100 with hydraulic kit Noise pressure Measured at ear height at nominal loading one metre away from any Unit’s electric 72 dB(A) motor. - Page 26 ETR50 with cube jack when driving + top block Maximum height 5 cribbing block ETR50 with cube jack when stand still + top block NB: the stability of the cube jack system is highly influenced by the trolley. It is prohibited to drive the trolley when more than 2 cribbing blocks have been entered.
- Page 27 3.5.2.2. ETR100 Moving directions of the load By moving along the tracks Horizontally By extending the cylinders ETR100 with hydraulic kit Vertically See ref 5 “Cube jack system” ETR100 with cube jack Velocities ≈100 meter/hour High speed Travelling ≈ 50 meter/hour Nominal speed speed ≈...
-
Page 28: Dimensions
3.6. Dimensions The dimensions of the trolleys are given below. ETR50 ETR50 with hydraulic kit Trolleys ETR50 Length: 1245 mm Length: 1245 mm Width: 494 mm Width: 494 mm Height: 245 mm Height: 257 mm Weight: 310 kg Weight: 320 kg... -
Page 29: System Configurations
Whatever configuration you apply, make sure the correct preparations and planning activities are made. See section 4. “Plan a moving operation”. Enerpac may advise. • The use of other components than purchased by Enerpac is possible if those components are used in accordance with their own specifications. Page 29 Page 29 of 93 Document number: ED.03884.00.001.ENG Rev02... -
Page 30: Cube Jack Configuration
3.8. Cube jack configuration In addition to the cube jack configuration, this subchapter explains how to drive safely with this configuration. As stated in chapter 3.5.2 height limitations are set for the cube jack configuration in combination with the trolley. This is set because the driving forces of the trolley can introduce additional sideloads to the cube Jack tower. -
Page 31: Plan A Moving Operation
Plan a moving operation In this chapter, the planning activities for a moving operation are described. 1. Record the preparation in the checklist given in Appendix A “Checklist for planning”. 2. Evaluate the information about the load: • Mass of the load. •... -
Page 32: Bearing Ground Pressure Calculation
4.1. Bearing ground pressure calculation The track can be put on the ground: • without foundation, if the bearing capacity of the subsoils is sufficient. • on a foundation: to compensate unevenness in the subsoil to reduce the bearing pressure on the subsoil. Use is made of the effect that pressure spreads down in an angle of 45 as shown below. - Page 33 4.1.1. No foundation applied The tracks are put directly on the ground, not on a foundation. The dimensions of the bearing surface are as follows: Bearing surface Track height 2 * Track height Track width To calculate the bearing pressure, you might use the following procedure: Parameter Abbrev Value...
- Page 34 Example: Load on one trolley 50 short tons Bearing surface of one trolley 2 * (2 * 0,02 * 0.0) = 0.016 m 50+0.385 �� = ∗ 1.7= 3149 tons / m Ground pressure 0.016 Page 34 Page 34 of 93 Document number: ED.03884.00.001.ENG Rev02...
- Page 35 4.1.2. Foundation applied The tracks are put on a foundation. Timbers of hard wood can be used as supporting material. Put the timbers close to each other without gaps. Put steel plates between the timbers and the tracks. NB: The steel plates must be adjacent. Do not leave space between them. The dimensions of the bearing surface are calculated as follows: •...
- Page 36 Value 0,02 m Height Track height Track 0.20 m Width Track width See 3.6. “Dimensions” Own mass Trolley mass Trolley 0.420 m (ETR50) Length Trolley length 0.600 m (ETR100) t.b.s. Width Timber width Timbers t.b.s. Height Timber height Safety factor...
- Page 37 Example: Load on one trolley 50 metric tonnes Timbers: Width 0.10 Height 0.10 Length of the trolley 0.42 Measure of one footprint Width: Track width + 2 * Timber height = 0.2 + 2 * 0.1 = 0.40 m Length: Trolley length + 2*(Track height+ Timber height) = 0.42 + 2 * (0.02 + 0.1) = 0,84 Surface of one footprint: L * W:...
- Page 38 T >= 15 mm Thickness • The timbers shall have a mechanical compressive strength of at least 25 N/mm² without occurrence of deflection. However, Enerpac strongly recommends adhering to 30N/mm², preferably Azobé. • The steel plates shall be properly secured. •...
-
Page 39: Check The Bearing Capacity Of The System
Inclination of the bearing ground In case of any doubt, please contact Enerpac. NB: The System integrity can only be guaranteed when exclusively Enerpac products are used. Caution: Though all limits for the capacity, skew, wind and environmental influences are either calculated or tested by the Enerpac consciously, during moving operations these parameters may interfere with each other in a negative way. -
Page 40: Install The System
This chapter describes how to install the System as well as the preparations which have to be made for the working location. Record all activities in Appendix B “Checklist for installing the system”. NB: The System integrity can only be guaranteed when exclusively Enerpac products are used. 5.1. How to hoist •... -
Page 41: Place The Supporting Material
5.2. Place the supporting material In order to ensure its stability, the tracks have to be put level on the ground. When the subsoil is not flat, it must be graded to create a good solid foundation on which the system can work safely. -
Page 42: Put The Tracks In Place
Position the tracks on the floor or on top of the supporting material. Hook the track plates together. • For the ETR50, make a track of one track plate wide. • For the ETR100, make a track of two track plates wide. - Page 43 (top view) The tracks shall have no skew more than … 0.2° (front view of one track) The tracks shall not incline 0.2° (side view of one track) The tracks shall be flat. 3 mm over 2 meter (side view of track) Page 43 Page 43 of 93 Document number: ED.03884.00.001.ENG Rev02...
-
Page 44: Put The Trolleys On Top Of The Tracks
Hoist the trolleys. Put the trolleys on the track: • the ETR50 on a single track, • ETR50 the ETR100 on a double track. Make sure the rims of the rollers enclose the track. -
Page 45: Mount The Configuration Kits
5.5. Mount the configuration kits This section gives instructions for mounting the configuration kits. The Various kits and article numbers are listed in Appendix Z. Only one configuration kit can be mounted on a trolley at a time. Observe the torque settings as given in Appendix C “Torque settings”. 5.5.1. - Page 46 Put the yellow part on top. Fasten the two bolts. 5.5.2. Mount the three-axes beam swivel kit To mount the three-axes swivel on the trolley, proceed as follows: Put the three-axes beam swivel kit in the trolley. Fasten the eight bolts. 5.5.3.
- Page 47 Put the cylinder in the trolley. Fasten the eight bolts. Mount the three parts of the socket in one 5.5.4. Mount the cube jack kit and the cube jack To mount the cube jack kit and the cube jack on the trolley, proceed as follows. For handling the cube jacks reference is made to ref 5 “Cube jack system”.
- Page 48 Put the plate on top of the trolley, according to the direction in which you want to position the cube jack. The distances between the pins differ. In the position shown on the picture, the tray of the cube jack will point to the motor.
-
Page 49: Connect The Electrics
5.6. Connect the electrics Create the electric circuit as shown below. Up to eight trolleys can be connected. Proceed as follows: Connect the trolleys electrically to the Electro cabinet on the Cabinet cart. Observe the number plates next to the sockets. -
Page 50: Put The Load On Top Of The Trolleys
5.7. Put the load on top of the trolleys To put the load on top of the trolleys Observe the following: 1. Verify that the load is plumb positioned both in longitudinal and transverse direction. (side view) (front view) 2. Make sure the Centre of gravity is in between of the trolleys to guarantee stability. (front view) Page 50 Page 50 of 93... -
Page 51: Control The System
Control the system This section describes the functions of all controls and indicators or the system. 6.1. Emergency buttons The system can be stopped immediately by pressing an emergency button. Two emergency buttons are provided: • On the electro cabinet: 1. -
Page 52: The Electro Cabinet
6.2. The electro cabinet Emergency stop button Screen RESET E-STOP Main power Reset button Main power switch Sockets for eight trolleys Main switch Switch To switch the system to on. The switch is provided with a lock. Emergency Indicator / It lit when any emergency button was pressed. -
Page 53: The Remote-Control Handheld
6.3. The remote-control handheld The remote-control handheld enables the user to control the travelling of the trolleys. Two different speeds in both directions are possible. Red LED Off, Emergency Green LED Data feedback LED Backward Forward Start Zero • OFF, To initiate an emergency stop. -
Page 54: Start The System
6.4. Start the system To start the system, proceed as follows: Make sure the emergency button is released. Try to rotate it clockwise. Set the main switch on the electro cabinet to on. After a few minutes, the initial window appears on the screen. -
Page 55: The Hmi
6.5. The HMI The system is controlled using the Human Machine Interface, implemented as windows on the screen. 6.5.1. The menu structure Remote control Main screen Local control Settings Alarms screen Service page 6.5.2. Common elements On all screens the following icons can be visible. The remote-control handheld is connected and working. - Page 56 6.5.3. Main screen The number of selected trolleys Set the system to local control. The trolleys are controlled by the buttons on the HMI. The remote-control handheld cannot be used, though the emergency button on it can stil be used. Set the system to be controlled by the remote-control handheld.
- Page 57 Keep pressed to move all selected trolleys forward and reverse. For a definition of forward and reverse, see step [8]. The positions of the trolleys with respect to each other are kept constant automatically. When a trolley is moving, the motor is shown in the icon. The zero button is used to set the measurered position Increased speed of deviations to zero.
- Page 58 Setting the moving direction enables synchronised running of trolleys while they are positioned on the tracks in opposite directions: Set to ‘Nomal direction’ Set to ‘Reverse direction’ • ‘Normal direction’ (forward): the trolley moves in the direction in which the rotational encoder is located.
- Page 59 10. To enable ‘zero’ the system using the RC-handheld. 11. To enable to change standard Enerpac settings of machine, These settings are only changed with permission of Enerpac 12. Show the Settings info screen, on which technical information is shown.
- Page 60 4. Indicates whether the trolley is selected, either in local or reverse mode. 5. Return to the screen where you came from 6. Technical information of the trolley. Use this information when communicating with Enerpac in case of technical issues.
- Page 61 Is on if one of the emergency buttons was pressed or if the RC-handheld is off. The emergency stop is active, regardless of whether it was pressed or not. Return to the previous screen To reset the indications in the “Trolley alarms” field. Indicators of all faults of all trolleys.
-
Page 62: Execute A Transportation Operation
Execute a transportation operation 7.1. Safety directions Record all activities in the checklist as given in Appendix A “Recording a moving operation”. How to execute a transportation operation is not within the scope of this manual. Nevertheless, pay attention to the risks and warnings, since correct operation of the system is essential for safety: Hazard •... - Page 63 On the electro cabinet Page 63 Page 63 of 93 Document number: ED.03884.00.001.ENG Rev02...
-
Page 64: Move The Trolleys By Local Control
7.3. Move the trolleys by local control This mode is useful: • for maintenance, • for testing, • in case remote control fails. To move trolleys by local control, proceed as follows: Switch the system to on. See section 6.4. “Start the system”. Set the system to local control. -
Page 65: Move The Trolleys By The Remote-Control Handheld
7.4. Move the trolleys by the remote-control handheld This mode is the main method of operating the system. Switch the system to on. See section 6.4. “Start the system”. Set the system to remote control. See section 6.5.3 “Main screen” Press the Setup system button. -
Page 66: Solve Problems
Other problems see section 6.5.7 “Service page”. NB: The list is meant as a first aid kit. Contact Enerpac if you need assistance. Hazard: Performing repairs on the System may cause dangerous effects when not executed by well- skilled personnel. -
Page 67: Storage
Storage Requirements for storage of the System: • During short-term storage, especially in the open air, cover the trolleys with a tarpaulin in order keep electrical and other moisture-sensitive components dry. The tarpaulin is not included in the delivery, but can be added as an option. •... -
Page 68: Maintenance
4. Any maintenance procedures not detailed in this section can only be performed by or in consultation with Enerpac. 5. Only apply spare parts provided by Enerpac. If parts of foreign make are applied, all guarantees will be void. 6. The warranty shall void if any modifications are made to the system without the consent of the manufacturer. -
Page 69: Responsibilities
17. Make certain that the system is made ready for operation after the maintenance work was completed. Inform the operator. 10.2. Responsibilities Observe the following rules for responsibilities. The maintenance tables indicate for each maintenance job whether it must be performed either by the owner or by the manufacturer. -
Page 70: Mechanical
Grease the chain. Use Kroon Oil Multi Purpose Grease 3. 2.1. Grease Test the tension of the chain. There should be no slack. If so, contact Enerpac or use 2.2. Tension the indicated bolts to tension. Page 70 of 93 Page 70 Document number: ED.03884.00.001.ENG Rev02... -
Page 71: Hydraulics
All replacement parts including the cylinder, hoses, couplings, seals, and caps shall meet or exceed the original equipment manufacturer's specifications. NB: Enerpac strongly advises to apply parts as bought from Enerpac. Hazard: Applying parts which do not apply to the specifications may cause hazards to personnel and... - Page 72 Maintenance jobs to be executed. Record all activities in Appendix B “Checklist for maintenance”. Subject Action 1. Hydraulic connections 1.1. Pipes and hoses Check on oil leakage and damages Check if the couplings are tightened well. Replace all hoses 2. Cylinders 2.1.
-
Page 73: Electrics
10.5. Electrics Maintenance jobs to be executed. Record all activities in Appendix B “Checklist for maintenance”. Subject Action 1. Electro motor 1.1. General Check on damages Wipe it clean and free from dust 2. Cables and connectors 2.1. General Check on damages 3. -
Page 74: Dismantling The System
11. Dismantling the system To dismantle the system at the end of its lifetime, proceed as follows: • Drain the hydraulic oil. • Dismount rubber and plastic components. • Dismount the metal components. Attention: Collect all material, sort it and let it be recycled by a specialized company. Page 74 Page 74 of 93 Document number: ED.03884.00.001.ENG Rev02... -
Page 75: Index
12. Index accident, 12, 15 HMI, 23, 46, 51, 52 accretion, 24 hydraulic, 14, 29, 65, 68, 71, 73 address, 6 interval, 65 aerosols, 83 legislation, 15, 83, 84, 86, 87 airways, 16, 87 manufacturer, 7, 8, 9, 10, 13, 14, 65, 66, 68 alterations, 7, 28 modifications, 7, 65 anaesthetics, 82... -
Page 76: Appendices
Appendices A.Checklist for planning 1. Project Project Date Description Weight 2. The load Mass of the load Centre of gravity of the load Length: … Width: … Dimensions of the load Height: … The position of the load’s centre of gravity with respect to the position of ... -
Page 77: Checklist For Installing The System
B.Checklist for installing the system 1. Project Project Date Description Weight 2. Mechanical Checklist A “Checklist for planning” completed and signed off Foundation installed, as determined during Planning? Tracks positioned with flatness better than 3mm over 2 m. ... -
Page 78: Recording A Moving Operation
A.Recording a moving operation 1. Project Project Date Description Weight 2. Recording of activities Activity Time The checklist in Appendix A “Checklist for planning” has been completed and signed off. The checklist in Appendix B “Checklist for installing the system” has been ... - Page 79 Part 2/3 Activity Time 3. Commitment Date: Executed by Signature Date: Approved by Signature Page 79 Page 79 of 93 Document number: ED.03884.00.001.ENG Rev02...
-
Page 80: Checklist For Maintenance
B.Checklist for maintenance Mechanical Date Remark Subject Action 1. Main construction 1.1. Main Visual check of all welding construction of Visual check painting trolleys and Visual check on corrosion and damages cabinet cart Check all bolts. Visual check of the hoisting lugs Inspect the readability of the warning signs. - Page 81 Electrics Date Remark Subject Action 1. Electro motor 1.1. General Check on damages Wipe it clean and free from dust 2. Cables and connectors 2.1. General Check on damages 3. Devices 3.1. Main switch Replace the main switch 3.2. Remote-control Replace the battery handheld Page 81...
-
Page 82: Torque Settings
C.Torque settings Inspect all bolt joints which may pose a hazard to people and machines at fixed intervals and check their torque. Apply the torque values unless indicated otherwise on the drawing. Course pitch Fine pitch [Nm] [Nm] (Copper- (Copper- Nominal Strength grease) - Page 83 Course pitch Fine pitch [Nm] [Nm] (Copper- (Copper- Nominal Strength grease) grease) size class 0.08 0.08 10.9 12.9 10.9 12.9 1060 10.9 1070 1310 12.9 1250 1530 1000 1280 10.9 1450 1820 12.9 1700 2130 1400 1700 10.9 1950 2430 12.9 2300 2840...
-
Page 84: Hydraulic Fluid Safety Information
D.Hydraulic fluid safety information SAFETY DATA SHEET According to EC No 1907/2006 as amended as at the date of this SDS Shell Tellus S4 VE 46 Version 1.2 Revision Date 02.01.2020 Print Date 03.01.2020 Identification of the substance/mixture and of the company/undertaking 1.1. - Page 85 Composition/information on ingredients 3.1. Mixtures Chemical nature Blend of polyolefins and additives Hazardous components Chemical name CAS-No. EC-No. Registration Classification Concentration [%] number (REGULATION (EC) No 1272/2008) Distillates (Fischer - 848301-69-9 Asp. Tox.1; H304 85- 95 Tropsch), heavy, C18- 482-220-0 50 –...
- Page 86 Environmental Use appropriate containment to avoid environmental contamination. Prevent from spreading or precautions entering drains, ditches or rivers by using sand, earth, or other appropriate barriers. Local authorities should be advised if significant spillages cannot be contained 6.3. Methods and materials for containment and cleaning up Methods for cleaning Slippery when spilt.
- Page 87 Hand Where hand contact with the product may occur the use of gloves approved to relevant standards (e.g. protection Europe: EN374, US: F739) made from the following materials may provide suitable chemical protection. Remarks PVC, neoprene or nitrile rubber gloves Suitability and durability of a glove is dependent on usage, e.g. frequency and duration of contact, chemical resistance of glove material, dexterity.
- Page 88 10.5. Incompatible materials Materials to avoid Strong oxidising agents 10.6. Hazardous decomposition products Hazardous decomposition products No decomposition if stored and applied as directed 11. Toxicological information 11.1. Information on toxicological effects Basis for assessment Information given is based on data on the components and the toxicology of similar products.
- Page 89 Toxicity to fish (Chronic toxicity) Remarks: Data not available Toxicity to crustacean Remarks: Data not available (Chronic toxicity) Toxicity to microorganisms Remarks: Data not available (Acute toxicity) Components: Triazole derivative M-Factor (Short-term (acute) aquatic hazard) 12.2. Persistence and degradability Product: Remarks: Not readily biodegradable., Major constituents are inherently Biodegradability biodegradable, but contains components that may persist in the environment.
- Page 90 Not regulated as a dangerous good Not regulated as a dangerous good Not regulated as a dangerous good IMDG Not regulated as a dangerous good 14.6. Special precautions for user Remarks Special Precautions: Refer to Section 7, Handling & Storage, for special precautions which a user needs to be aware of or needs to comply with in connection with transport.
- Page 91 IC50 Inhibitory Concentration fifty IL50 Inhibitory Level fifty IMDG International Maritime Dangerous Goods Chinese Chemicals Inventory IP346 Institute of Petroleum test method N° 346 for the determination of polycyclic aromatics DMSO- extractables KECI = Korea Existing Chemicals Inventory LC50 = Lethal concentration fifty LD50 Lethal Dose fifty per cent.
-
Page 92: Compatibility Of System Parts
Z. Compatibility of system parts 1. Specification of system parts a. Driving units Track width Driving unit Article number GA Drawing Max capacity [kN] [mm] ETR50 03908.01.06.00 03908.50.06.00 ETR50-H 03908.01.07.00 03908.50.07.00 1000 ETR100 03909.01.06.00 03909.50.06.00 1000 ETR100-H 03909.01.07.00 03909.50.07.00 b. Control units... - Page 93 All trolleys and control panels are compatible to each other. b. Trolleys and Track Plates All trolleys and track plates are compatible to each other. c. Trolleys and Optional Units Trolley Optional Units ETR50-BMK 03908.01.02.00 ETR100-BMK 03909.01.02.00 ETR50-MK 03908.01.03.00 ETR100-MK 03909.01.03.00...
Need help?
Do you have a question about the ETR50 and is the answer not in the manual?
Questions and answers