Advertisement
Quick Links
Advertisement

Related Manuals for Mercia Garden Products 0619PNNE2424HGDD1SW-V3


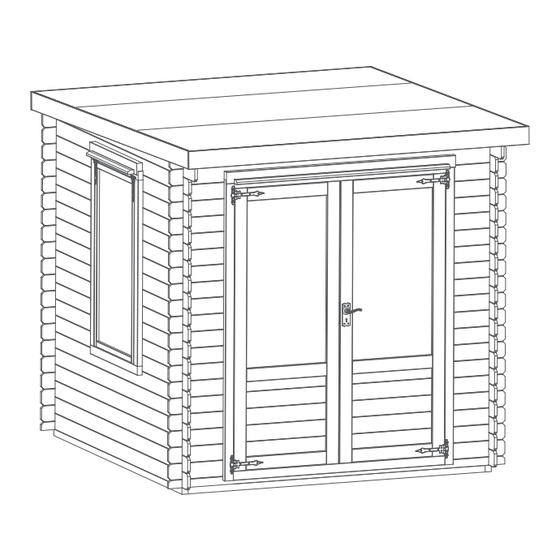
Summary of Contents for Mercia Garden Products 0619PNNE2424HGDD1SW-V3
- Page 1 2mm Drill bit...
-
Page 2: Any Questions
PLEASE SCAN HERE: ANY QUESTIONS? Scan code contact us via our customer portal. - Page 3 Before assembly Tip: Labelling your parts, using a pencil and masking tape, PLEASE SCAN HERE: ANY QUESTIONS? please make sure you have a may help you to identify them easier when you need them. suitable base ready to erect your Scan code building...
- Page 4 Door Contents: Fixing Kit Contents: Bearer - 44x44x2204mm QTY 2 F4444-2204mm-PT Bearer - 44x44x2116mm QTY 8 F4444-2116mm-PT Roof Purlin - 40x90x2400mm QTY 1 F4090-A-2400mm Master Door QTY 1 Secondary Door QTY 1 Fascia - 12x120x2695mm QTY 2 (Morticed for lock) AI-06LOGSANGHGSD750X1900-V1 S12120-2695mm AI-06LOGSANGHGMD750X1900-V1...
- Page 5 Screw Pack. Window Contents: There may be extra screws present in the pack. 60mm Bolt Set x 16 30mm Screw x 62 80mm Screw x 16 30mm Screw x 82 70mm Screw x 55 20mm Screw x 8 40mm Screw x 223 Felt Tacks x 250 Window QTY 1 AI-06LOGSANGW684X1244-V1...
- Page 6 Pre-assembly PLEASE SCAN HERE: Step 1 Parts Needed - No. 12 QTY 2 No. 13 QTY 2 *Please note: Each board interlocks at either end in a staggered pattern. Lay the bearers (No. 12 & 13) onto a rm and level base (free from areas where standing water can collect) ensuring the bearers are at and level and the ends are ush, as shown.
- Page 7 Step 3 Step 2 Parts Needed - No. 1 QTY 2 Parts Needed - No. 13 QTY 6 No. 2 QTY 2 Following the same method shown in the previous step, arrange the remaining bearers (No. 13) inside the Place the starter boards (No.1) on to the front and back of the assembled bearers and lightly position the rst assembled frame, ensuring each piece is ush and level.
- Page 8 Step 4 Step 5 Parts Needed - No. 2 QTY 16 Parts Needed - No. 30 QTY 1 No. 3 QTY 12 No. 31 QTY 1 No. 32 QTY 1 Following the method shown in the illustration, lay the rst 6 boards (No. 2, 3 & 4) o No.
- Page 9 Step 6 Step 7 Parts Needed - No. 2 QTY 12 Once you have laid 6 log boards (o of the starter board) up the door section, slide the assembled No. 3 QTY 12 door frame over the boards, ensuring to rest the frame on top of the starter board. If you have not No.
- Page 10 Step 8 Step 9 Parts Needed - No. 42 QTY 1 No. 43 QTY 1 Once you have laid 6 log boards up the window sections, slide the assembled window frame over No. 44 QTY 1 the boards, ensuring to rest the frame on top of the boards below. If you have not yet assembled No.
- Page 11 Step 10 Step 11 Parts Needed - No. 2 QTY 12 Parts Needed - No. 2 QTY 2 No. 3 QTY 12 No. 5 QTY 1 No. 4 QTY 12 No. 6 QTY 1 Following the method shown in the illustration, lay the next 6 boards (No. 2, 3 & 4) Following the method shown in the illustration, lay the next layer of boards (No.
- Page 12 Step 13 Step 12 Parts Needed - No. 2 QTY 1 Parts Needed - No. 9 QTY 2 No. 8 QTY 1 No. 22 QTY 4 No. 9 QTY 2 Lay both Gables (No. 9) onto a at and level surface and locate one Vent (No. 22) into each vent hole, as Following the method shown in the illustration, lay the next board (No.
- Page 13 Step 15 Step 14 Parts needed - No. 14 QTY 1 Parts Needed - No. 7 QTY 1 No. 10 QTY 2 Align the Purlins (No.14) into the cut out notches on the Gables, ensuring they interlock. No. 11 QTY 2 Note: Use a mallet and a scrap piece of wood to gently x the purlins into position.
- Page 14 Doors on the Side Doors on the Front Step 17 Step 16 Parts Needed - No. 19 QTY 2 Parts needed - No. 17 QTY 23 No. 23 QTY 5 Ensuring the roof boards are ush and level, locate the Eaves Frames (No. 19) to the underside of the roof Place the rst roof board (No.
- Page 15 Step 18 Step 19 Parts Needed - No. 41 QTY 1 Parts Needed - No. 48 QTY 1 No. 47 QTY 2 On the inside of the log cabin, x the casement stay (No. 48) onto the window (No. 41) and the casement stay Place the Window (No.
- Page 16 Step 20 Step 21 Parts Needed - No. 28 QTY 1 Parts Needed - No. 37 QTY 1 No. 29 QTY 1 No. 38 QTY 1 No. 36 QTY 6 No. 39 QTY 1 Once the roof is xed, place the master and secondary doors (No. 28 & 29) onto a at surface and x 3 x Fit the Mortice Lock (No.
- Page 17 Step 23 Step 22 Parts Needed - No. 18 QTY 21 Parts Needed - No. 34 QTY 1 No. 40 QTY 2 Place the rst oor board (No. 18) inside the building ush to the log board on one side. Continue adding the oor boards (internally) making sure to interlock each individual board.
- Page 18 Step 24 Step 25 Parts needed - No. 20 QTY 4 Parts needed - No. 20 QTY 4 Once the oor has been laid, arrange the closure trim (No. 20) around the outside edge of the oor Inside the building place the closure trim (No. 20) against the boarding and align with the roof as shown in the illustration.
- Page 19 Step 26 Parts Needed - No. 24 No. 25 No. 27 QTY 1 Cut the Sand Capping Felt (No.24) into one sheet measuring: 2550mm (L) x 300mm (W). Cut the Sand Felt (No.25) into three sheets measuring: 2550mm (L) x 1000mm (W). Lay the sheets onto the roof in the order shown, starting with the Capping Felt (No.24) as the rst sheet laid, then the remaining three sheets (No.25), as shown.
- Page 20 Step 27 Parts Needed - No. 26 No. 27 QTY 1 Cut the Green Felt (No.26) into three sheets measuring: 2550mm (L) x 1000mm (W). Lay the sheets onto the roof in the order shown. Ensure the sheets overhang each side by 50mm and overlap each other by 100mm.
- Page 21 Step 29 Step 28 Parts needed - No. 21 QTY 8 Parts Needed - No. 15 QTY 2 No. 16 QTY 2 Arrange the storm braces (No.21) around the building (internally), placing two storm braces per wall. Attach the Fascias (No. 15) to the sides of the log cabin (ensuring to trap the felt in between the fascia’) securing in place by screwing through the Fascia into the Purlins, log boards and eaves frames behind *Ensure the storm braces are secured at the highest point possible on each side.
- Page 22 Step 30 Step 31 Parts Needed - No. 35 QTY 1 No. 46 QTY 1 Once constructed, apply a preserving and a waterproo ng treatment to your garden building as soon as possible. This will help to protect your building and prevent decay. Attach the Rain Guard (No.
-
Page 23: After Treatment
AFTER TREATMENT: score around protective cover on glazing and carefuly peel covering back It is ESSENTIAL to seal around all window framing with sillicone sealant (not included) to minimise water ingress. Want to share your experience with us? Leave us a review on Feefo, TrustPilot or Google. Your reviews help other people nd and trust our business, as well as helping to play an important role in our growth and improvement! -
Page 24: Any Questions
PLEASE SCAN HERE: ANY QUESTIONS? Scan code contact us via our customer portal.
Need help?
Do you have a question about the 0619PNNE2424HGDD1SW-V3 and is the answer not in the manual?
Questions and answers