Table of Contents
Advertisement
Quick Links
Advertisement
Table of Contents

Subscribe to Our Youtube Channel
Related Manuals for innovair CE18C2DB2


Summary of Contents for innovair CE18C2DB2
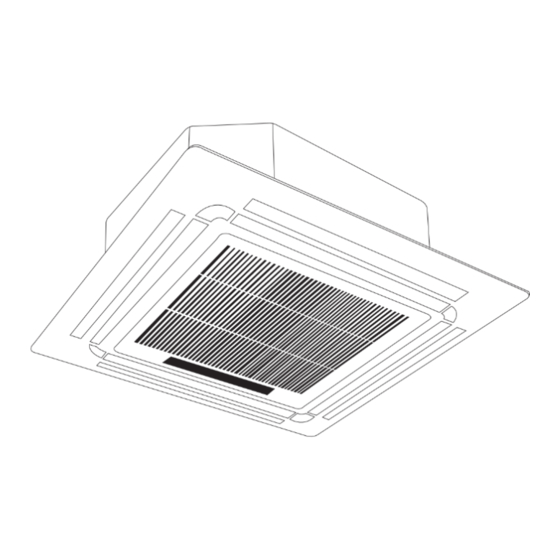
- Page 1 Installation Manual Super-Slim Four-Way Cassette CE18C2DB2 CE24C2DB2 CE36C2DB2 CE48C2DB2 CE60C2DB2 IMPORTANT NOTE: Read this manual carefully before installing or operating your new air conditioning unit. Make sure to save this manual for future reference.
- Page 2 Indoor Unit Installation Instructions ....Outdoor Unit Installation ......a. Outdoor Unit Installation Instructions ....b. Outdoor Unit Types and Specifications ....c. Notes on Drilling Hole in Wall ......Drainpipe Installation ....... ©2015 Innovair Corporation. All Rights Reserved. www.innovair.com...
-
Page 3: Table Of Contents
Indoor Unit Wiring ......c. Power Specifications ......d. Wiring Diagram ......... Air Evacuation .......... a. Evacuation Instructions ......... b. Note on Adding Refrigerant ......Panel Installation ......Test Run .......... Page 3 ©2015 Innovair Corporation. All Rights Reserved. www.innovair.com... - Page 4 Fixing screw for remote Remote controller holder ST2.9 x 10 controller & Its Frame (some Remote controller holder models) Dry battery AAA Remote controller illustration Owner’s manual Installation manual Page 4 ©2015 Innovair Corporation. All Rights Reserved. www.innovair.com...
- Page 5 4. If the system has a leak-detection system installed, it must be checked for leaks at least every 12 months. 5. When the unit is checked for leaks, proper record-keeping of all checks is strongly recommended. Page 5 ©2015 Innovair Corporation. All Rights Reserved. www.innovair.com...
- Page 6 Evacuate the refrigeration system Connect the wires Connect the refrigerant pipes (Page 23) (Page 19) (Page 16) Install the front panel Perform a test run (Page 25) (Page 27) Page 6 ©2015 Innovair Corporation. All Rights Reserved. www.innovair.com...
-
Page 7: Indoor Unit Installation Indoor Unit Installation
• DO NOT install the indoor unit in the bathroom or laundry room as excessive moisture can short the unit and corrode the wiring. Page 7 ©2015 Innovair Corporation. All Rights Reserved. www.innovair.com... -
Page 8: Indoor Unit Installation Instructions
Connecting point of refrigerant pipe (liquid side) Ceiling Connecting point of refrigerant pipe (gas side) Front panel 88cm / 34.5” (Ceiling hole) Ceiling board >2.5m / 8.2’ Ground Fig. 4.2 Page 8 ©2015 Innovair Corporation. All Rights Reserved. www.innovair.com... - Page 9 3. Using a hammer, insert the ceiling hooks into the pre-drilled holes. Secure the bolt using the included washers and nuts. 4. Install the four suspension bolts (See Fig. 4.4). Fig. 4.4 Page 9 ©2015 Innovair Corporation. All Rights Reserved. www.innovair.com...
- Page 10 M6 x 12 Bolts Fig. 4.6 Fig. 4.8 CAUTION Ensure that the unit is completely level. Improper installation can cause the drain pipe to back up into the unit or water leakage. Page 10 ©2015 Innovair Corporation. All Rights Reserved. www.innovair.com...
- Page 11 Be sure to remove any obstacles that Fix with bolts may block air circulation. • Make sure you refer to Length Specifications to ensure there is enough room for installation and maintenance. Fig. 5.3 Page 11 ©2015 Innovair Corporation. All Rights Reserved. www.innovair.com...
- Page 12 673 (26.5) 600/23.6 633/25 600/23.6 403 (15.87) 946x810x410 (37.24x31.9x16.14) 673 (26.5) 710/28 759/29.8 710/28 404 (15.9) 952x1333x410 (37.5x52.5x16.14) 634 (24.96) 710/28 843/33 710/28 404 (15.9) 952x1333x415 (37.5x52.5x16.34) 634 (24.96) Page 12 ©2015 Innovair Corporation. All Rights Reserved. www.innovair.com...
- Page 13 NOTE: Make sure the water drains to a safe location where it will not cause water damage or a slipping hazard. Base pan hole of outdoor unit Seal Seal Drain joint Fig. 5.11 Page 13 ©2015 Innovair Corporation. All Rights Reserved. www.innovair.com...
-
Page 14: Drainpipe Installation
NOTE: When connecting multiple drainpipes, install the pipes as shown in Fig 6.4. Metal clamp Drainpipe 0-53cm Insulation connecting port (20.8”) Fig. 6.1 1-1.5m ≥10cm (39-59”) (4”) Fig. 6.4 Downward slope 1/100 Fig. 6.2 Page 14 ©2015 Innovair Corporation. All Rights Reserved. www.innovair.com... - Page 15 If you discharge the water directly into a sewer, make sure that the drain has a U or S pipe to catch odors that might otherwise come back into the house. Page 15 ©2015 Innovair Corporation. All Rights Reserved. www.innovair.com...
-
Page 16: Refrigerant Piping Connection
20m The line branch pipe than or equal to (65.6’) 50cm (19.6”) Indoor unit Fig. 7.1 Page 16 ©2015 Innovair Corporation. All Rights Reserved. www.innovair.com... -
Page 17: Refrigerant Piping Connection Instructions
Make sure that the pipe is cut at a perfect 90° angle. Refer to Fig. 7.2 for examples of bad cuts Flare form 90° Rough Oblique Warped Pipe Fig. 7.2 Fig. 7.5 Page 17 ©2015 Innovair Corporation. All Rights Reserved. www.innovair.com... - Page 18 NOTE: Use both a spanner and a torque wrench when leak, ventilate the area immediately and evacuate connecting or disconnecting pipes to/from the unit. the system (refer to the Air Evacuation section of this manual). Fig. 7.8 Page 18 ©2015 Innovair Corporation. All Rights Reserved. www.innovair.com...
-
Page 19: Wiring
16 - 25 • Make sure that you do not cross your electrical 25- 32 wiring with your signal wiring, as this can cause distortion and interference. 32 - 45 Page 19 ©2015 Innovair Corporation. All Rights Reserved. www.innovair.com... -
Page 20: Indoor Unit Wiring
(5.9”) of the wires inside. b. Strip the insulation from the ends of the wires. c. Using wire crimper, crimp the u-lugs to the ends of the wires. Page 20 ©2015 Innovair Corporation. All Rights Reserved. www.innovair.com... -
Page 21: Power Specifications
1 Phase 1 Phase 1 Phase 1 Phase 1 Phase POWER FREQUENCY 208- (outdoor) 208-240V 208-240V 208-240V 208-240V AND VOLT 240V CIRCUIT BREAKER/ 20/16 40/25 50/30 60/45 60/50 FUSE(A) Page 21 ©2015 Innovair Corporation. All Rights Reserved. www.innovair.com... -
Page 22: Wiring Diagram
CIRCUIT BREAKER/FUSE(A) 15/10 15/10 15/10 15/10 PHASE 3 Phase 3 Phase 3 Phase 3 Phase POWER FREQUENCY (outdoor) 380-420V 380-420V 208-240V 208-240V AND VOLT CIRCUIT BREAKER/FUSE(A) 30/20 30/25 50/40 50/40 Page 22 ©2015 Innovair Corporation. All Rights Reserved. www.innovair.com... -
Page 23: Air Evacuation
12. Tighten valve caps by hand, then tighten it using the to the vacuum pump. proper tool. 3. Open the Low Pressure side of the manifold gauge. Keep the High Pressure side closed. Page 23 ©2015 Innovair Corporation. All Rights Reserved. www.innovair.com... -
Page 24: Note On Adding Refrigerant
(Total pipe length - (Total pipe length - Inverter R410A: standard pipe length) standard pipe length) x15g(0.16oZ)/m(ft) x30g(0.32oZ)/m(ft) Page 24 ©2015 Innovair Corporation. All Rights Reserved. www.innovair.com... -
Page 25: Panel Installation
Fig. 10.3 Connect the two louver motor connectors to the corresponding wires in the control box. Control box Fig. 10.2 Connect the louver motor Connect the louver motor Fig. 10.4 Page 25 ©2015 Innovair Corporation. All Rights Reserved. www.innovair.com... - Page 26 The unit’ s height can be adjusted by loosening the Gap not allowed upper nut, and adjusting the lower nut. Adjust lower nut Fig. 10.8 Page 26 ©2015 Innovair Corporation. All Rights Reserved. www.innovair.com...
-
Page 27: Test Run
Ensure the indicators on the remote control and the display panel on the indoor unit work properly. e. Ensure the manual buttons on the indoor unit works properly. Page 27 ©2015 Innovair Corporation. All Rights Reserved. www.innovair.com... - Page 28 The design and speci cations are subject to change without prior notice for product improvement. Consult with the sales agency or manufacturer for details. Page 28 ©2015 Innovair Corporation. All Rights Reserved. www.innovair.com...
- Page 29 Page 29 ©2015 Innovair Corporation. All Rights Reserved. www.innovair.com...
- Page 30 Page 30 ©2015 Innovair Corporation. All Rights Reserved. www.innovair.com...
Need help?
Do you have a question about the CE18C2DB2 and is the answer not in the manual?
Questions and answers