Table of Contents
Advertisement
Quick Links
Warning notices: Before using this product, please read this manual carefully and keep it for future reference.
The design and specifications are subject to change without prior notice for product improvement.
Consult with your dealer or manufacturer for details.
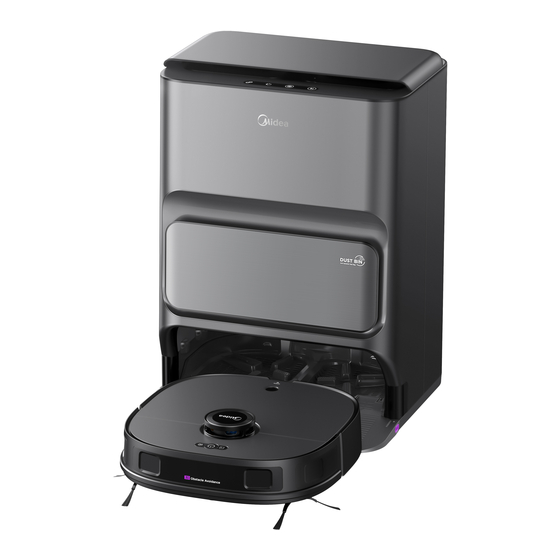
The diagram above is just for reference. Please take the appearance of the actual product as the standard.
Download the app
& activate product
Robot Vacuum Cleaner
USER MANUAL
MV12UltraSGBK
Advertisement
Table of Contents

Related Manuals for Midea MV12UltraSGBK


Summary of Contents for Midea MV12UltraSGBK
- Page 1 Robot Vacuum Cleaner USER MANUAL MV12UltraSGBK Download the app & activate product Warning notices: Before using this product, please read this manual carefully and keep it for future reference. The design and specifications are subject to change without prior notice for product improvement.
-
Page 2: Table Of Contents
THANK YOU LETTER Thank you for choosing Midea! Before using your new Midea product, please read this manual thoroughly to ensure that you know how to operate the features and functions that your new appliance o ers in a safe way. - Page 3 CONTENTS GETTING STARTED Start / Pause / Resume Spot Cleaning Recharge Washing the Mopping Cloth Drying Status Indicators of Robot Vacuum Self-Cleaning Base Buttons Status Indicators of Self-Cleaning Base MAINTENANCE Maintenance of Dust Bin (Clean as needed) Dust Bag Replacement Maintenance of Main Brush (Weekly cleaning is recommended) Cleaning of Side Brush (Weekly cleaning is recommended) Cleaning of Driving Wheel (Weekly cleaning is recommended)
-
Page 4: Safety Instructions
SAFETY INSTRUCTIONS Warning for the machine This appliance can be used by children aged from 8 years and above and persons with reduced physical, sensory or mental capabilities or lack of experience and knowledge if they have been given supervision or instruction concerning use of the appliance in a safe way and understand the hazards involved. - Page 5 SAFETY INSTRUCTIONS Correct Disposal of this product. This marking indicates that this product should not be disposed of with other household wastes throughout the EU. To prevent possible harm to the environment or human health from uncontrolled waste disposal, recycle it responsibly to promote the sustainable reuse of material resources.
- Page 6 If the supply cord is damaged, it must be replaced by the manufacturer, its service agent or similarly qualified persons in order to avoid a hazard. Docking base is only applicable to the product MV12UltraSGBK. (Battery pack type: Li-ion, DC 14.4 V, 5200 mAh) The Docking base will automatically start charging after Robot Vacuum Cleaner returned to the base.
- Page 7 SAFETY INSTRUCTIONS Warning for battery The product must be powered o before removing the battery. Please note that do not disassemble the battery by yourself. If you need to replace it, please contact the after-sales service center. Please dispose of used battery according to local laws and regulations Do not dismantle, open or shred the battery.
- Page 8 SAFETY INSTRUCTIONS [symbol IEC 60417-5957 for indoor use only ( 2004-12 )] [symbol ISO 7000-0790 read operator's manual ( 2004-01 )] [symbol IEC 60417-5031 direct current ( 2002-10 )] time-lag miniature fuse-link where X is the symbol for the time/current characteristic as given in IEC 60127 [symbol IEC 60417-5032 alternating current ( 2002-10 )]...
-
Page 9: Technical Data
Battery Model: BP14452G Battery Rated Voltage: 14.4V Battery Capacity: 5200mAh 74.88Wh Charging Limit Voltage: 16.8V Midea Robozone Technology Co., Ltd No.39 Caohu Avenue, Xiangcheng Economic Development Zone,Suzhou, Jiangsu, China 151 Lorong Chuan New Tech Park (Lobby E, #04-05, 556741) Note: You can also view the instructions on the app. -
Page 10: In The Box
IN THE BOX Components in Package Robot Vacuum Self-Cleaning Base 108mm 567mm Side Brush x2 Mopping Holder x2 Mopping Cloth x2 Cleaning Brush Instruction Manual Dust Bag... -
Page 11: Introduction To Parts Of Robot Vacuum
IN THE BOX Introduction to Parts of Robot Vacuum Main View (with lid closed) Bumper Start/Pause Button Spot Cleaning Button Docking Button LiDAR Sensor Edge Sensor Charging Contacts Main View (with lid open) Wireless Network Dust Bin Pairing Button Bottom View Omni-directional Wheel Side Brush Cover Plate of Main Brush... -
Page 12: Introduction To Self-Cleaning Base
IN THE BOX Introduction to Self-Cleaning Base Main View Base Station Lid Indicator & Button Area Dust Collector Mop Cleaning Tray Cleaning Tray Release Button (with a removable tray) Top View Waste Water Tank (Grey, on the left) Clean Water Tank (Transparent, on the right) Indicator Area Start/Pause Button... -
Page 13: Preparations Before Use
PREPARATIONS BEFORE USE Placement of the Self-Cleaning Base Place the self-cleaning base on a hard surface against a wall, with clear space of at least 0.5 meters on the left and right sides and 1.3 meters in front. Plug the power cord into an electrical outlet. Then wind the excess cable around the power cord storage slot on the back to avoid a ecting the proper function of the robot vacuum. -
Page 14: Installation Of The Mopping Cloth
PREPARATIONS BEFORE USE Installation of the Mopping Cloth As shown in the figure, align the mopping Press the mopping module into the robot to complete the installation. cloth centrally with the mopping holder and apply it evenly. Power on & Charging Press and hold "... -
Page 15: Environmental Requirements
PREPARATIONS BEFORE USE PREPARATIONS BEFORE USE Environmental Requirements Before using the robot vacuum, please make sure the area to be cleaned is free from items that may be tangled/stuck with the robot vacuum (such as wires, hard objects, iron nails, glasses and other sharp fragments), and items that may be dragged or knocked down by the robot vacuum (such as valuable objects, fragile objects and dangerous objects likely to fall). -
Page 16: Setting Up App
Press and hold the wireless network pairing button for 3 seconds until you hear a beep. The network indicator light should start flashing. Follow instructions in app for next steps. Add Device Click “+” or "Add Device" in the App to add the device. Choose MV12UltraSGBK. -
Page 17: Using Smarthome App
PREPARATIONS BEFORE USE Using SmartHome App Notes The content of the App is subject to the upgraded version of the App. The interface is only for reference, and will be updated continuously. Friendly reminder: As software and products undergo continuous upgrades, the interfaces of other versions may di er from the current one. -
Page 18: Getting Started
GETTING STARTED Notes 1. Make sure that the mopping cloths are installed properly before use, otherwise the robot will not start normally. 2. This product is intended for indoor use only. Do not use it outdoors. 3. Do not submerge the robot vacuum in water. Doing so may damage the equipment, causing a short circuit or current leakage. -
Page 19: Washing The Mopping Cloth
GETTING STARTED Emptying After cleaning, the robot will return to the self-cleaning base and automatically begin self-emptying. More self-emptying settings can be enabled in the app, such as manual emptying. Avoid manual emptying frequently. Washing the Mopping Cloth The robot vacuum returns to the self-cleaning base to wash the mopping cloth after mopping an area of 10 square meters. -
Page 20: Self-Cleaning Base Buttons
GETTING STARTED Self-Cleaning Base Buttons Button Operation Recall the robot vacuum to the Start/resume/pause Briefly Press base/Enable the robot vacuum to exit the base Press and Stop a cleaning task hold Status Indicators of Self-Cleaning Base Indicator Light Pattern Status Flashing white Robot is charging Steady-on white... -
Page 21: Maintenance
MAINTENANCE Maintenance of Dust Bin (Clean as needed) Open the upper lid of the robot vacuum. Press the Opening button on the side of Then, lift the handle of the dust bin and pull the dust bin to open it. Then, dispose of the bin out. -
Page 22: Maintenance Of Main Brush (Weekly Cleaning Is Recommended)
MAINTENANCE How to use the cleaning brush: ① Cut the hair entangled on the main brush body with the blade. ② Brush o the cut hair with the brush. Blade Brush Maintenance of Main Brush (Weekly cleaning is recommended) Press and hold the left and right release Lift the red side of the main brush to take buttons on the cover plate of the main it out. -
Page 23: Cleaning Of Side Brush (Weekly Cleaning Is Recommended)
MAINTENANCE Cleaning of Side Brush (Weekly cleaning is recommended) Pull out the side brush. Remove dust on the side brush. Cleaning of Driving Wheel (Weekly cleaning is recommended) Rotate the driving wheel back and forth to remove debris and clean it with the cleaning brush in the accessories box or a soft cloth. -
Page 24: Cleaning Of The Base Station
MAINTENANCE Cleaning of the Base Station Press and hold the left and right release buttons on the bottom of the self-cleaning base and take out the mop cleaning tray. Take out the small tray and rinse both parts with clean water. Make sure the cleaning tray is completely dry before placing it back. -
Page 25: Troubleshooting
TROUBLESHOOTING Actions Faults Possible Causes The robot vacuum The robot vacuum is not in Place the robot vacuum in front of contact with the charging the self-cleaning base and press cannot be recharged contacts. the docking button. The robot vacuum Place the self-cleaning base on a The self-cleaning base is cannot return for... - Page 26 TROUBLESHOOTING Actions Faults Possible Causes · The sound is set to mute or low The robot vacuum has · Turn up the volume. volume. no sound · Turn o "Do Not Disturb Mode" · The robot vacuum is in "Do Not Disturb Mode".
-
Page 27: Trademarks, Copyrights And Legal Statement
Midea Group and/or its a liates (“Midea”), to which Midea owns trademarks, copyrights and other intellectual property rights, and all goodwill derived from using any part of an Midea trademark. Use of Midea trademark for commercial purposes without the prior written consent of Midea may constitute trademark infringement or unfair competition in violation of relevant laws. -
Page 28: Data Protection Notice
Further information are provided on request. You can contact our Data Protection O cer via MideaDPO@midea.com. To exercise your rights such as right to object your personal date being processed for direct marketing purposes, please contact us via MideaDPO@midea.com. To find...
Need help?
Do you have a question about the MV12UltraSGBK and is the answer not in the manual?
Questions and answers