Table of Contents
Advertisement
MIDEA SERVICE MANUAL
VACUUM CLEANER
MODEL: HANDHELD TYPE
November, 2019
This document is published to be used for after sales service only. The content are subject
to change without prior otice.
In interest of user safety the appliance sould be restored to its original condition and only
parts identical to those should be applied.
Midea Kitchen Appliance
Advertisement
Table of Contents

Related Manuals for Midea KH19P


Summary of Contents for Midea KH19P
- Page 1 MIDEA SERVICE MANUAL VACUUM CLEANER MODEL: HANDHELD TYPE November, 2019 This document is published to be used for after sales service only. The content are subject to change without prior otice. In interest of user safety the appliance sould be restored to its original condition and only parts identical to those should be applied.
-
Page 2: Table Of Contents
CONTENTS WARNING ..................................3 PRODUCT ..................................3 1. Model ..................................3 SERVICE ................................... 4 1. System Diagram..............................4 1.1 Components ............................. 4 2. Maintenance ................................ 5 2.1 Tool & Measure Instrument........................5 2.2 Assembly & Disassembly ........................5 2.2.1 Assembly of Switch Bracket ..................... 5 2.2.2 Assembly of Motor ........................ -
Page 3: Warning
WARNING This service information is designed for experienced repair technicians only and is not designed for use by the general public.It does not contain warning or cautions to advise non-technical individuals of potential dangers in attempting to service a product.Products powered by electricity should be serviced or repaired only by experienced professional technicians.Any attempt to service or repair the product or products dealt with in this service information by anyone else could result in serious injury or death. -
Page 4: Service
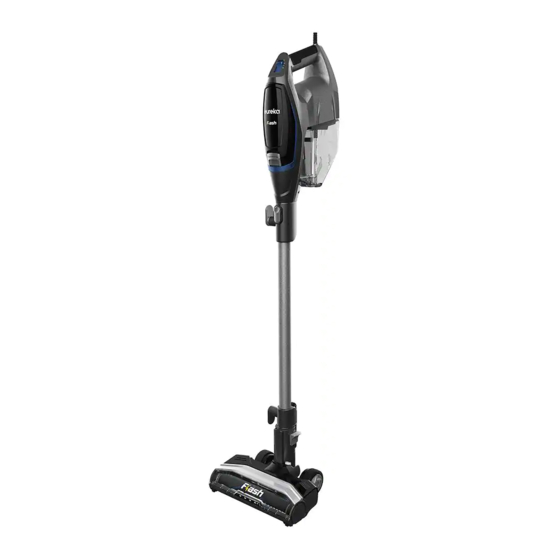
SERVICE 1. System Diagram 1.1 Components [1] Handle [11] Connecting Tube Release Button [2] On/Off Switch Button [12] Connecting Tube [3] Filter Cover [13] Front Wheel [4] Filter Cover Release Button [14] Brush Roller [5] Front Power Cord Hook [15] Nozzle Release Pedal [6] Dust Cup [16] Dust Cup Release Button [7] Power Cord... -
Page 5: Maintenance
2. Maintenance 2.1 Tool & Measure Instrument 1. +/- Screw Drivers 2. Multi-meter 2.2 Assembly & Disassembly 2.2.1 Assembly of Switch PCB (1) Fix the Switch PCB Supporter in the Body by Screw. (2) Install the switch PCB on the Supporter (3) Connect all wire according to the color mark on PCB. -
Page 6: Assembly Of Motor
2.2.1 Assembly of Motor (1) Install the .sealing ring on the motor. (2) Install the seat and the silencer cotton on the motor. (3) Assembly the left and right motor housing (4) Connect the wire Put the motor assembly into the Body. Install the motor bottom cover by the screw... -
Page 7: Assembly Of Air Outlet Grill
2.2.2 Assembly of Air Outlet Grill (1) Install the foam inside the air outlet grill. (2) Cover the air outlet grill on the motor bottom cover. 2.2.4 Assembly of Dust Cup (1) Install the dust cup on the machine. -
Page 8: Assembly Of Brush
2.2.5 Assembly of Brush Install the brush into the Nozzle Base Install the nozzle base cover Fix the nozzle base cover by the knob... -
Page 9: Error Code & Trouble Shooting
2.3 Error Code & Trouble Shooting 2.3.1 EC01: Vacuum Cleaner Cannot Work The power source is abnormal. Change power source. The circuit connection is loosen Tight the connection or change or short circuit. the wire. The On/Off button cannot work. Replace a new On/Off button. -
Page 10: Ec02: Start Directly After Plugging In
2.3.2 EC02: Start Directly after Plugging in The On/Off button can stop the Stop the vacuum cleaner and vacuum cleaner. restart again. The circuit connection is loosen Tight the connection or change or short circuit. the wire. The PCB cannot work. Replace a new PCB. -
Page 11: Ec03: Low Suction Pressure
2.3.3 EC03: Low Suction Pressure The seal ring is installed not Reinstall the seal ring or replace tightly or broken. a new one. There is block in the hose. Clean the hose. There is block in the suction Clean the suction mouth. mouth. -
Page 12: Ec04: Smoky Motor
2.3.4 EC04: Smoky Motor The power source is not stable. Change a new power source. The circuit connection is loosen Tight the connection or change or short circuit. the wire. The vacuum cleaner is used to It’s not allowed as instructed in clean liquid or metal materials. -
Page 13: Ec05: Dust Leakage
* Note: All maintenance should be done by professional engineers. ATTACHED FILES LIST 1. Exploded View 2. Spare Parts List 3. Wiring Diagram * Note: The manual may update without prior notice. Please download the latest version on website: https://tsp.midea.com.
Need help?
Do you have a question about the KH19P and is the answer not in the manual?
Questions and answers