Table of Contents
Advertisement
Quick Links
Advertisement
Table of Contents

Subscribe to Our Youtube Channel
Related Manuals for Joie mint latch


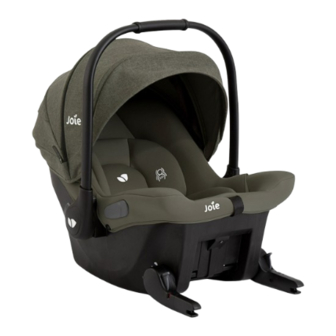
Summary of Contents for Joie mint latch
- Page 1 ™ Built-in LATCH infant seat Instruction Manual Child height less than 30 inches (76 cm) Child weight 4 to 30 lb (1.8 to 13.6 kg) installation videos Read all the instructions in this manual before using the child restraint.
-
Page 2: Table Of Contents
To Remove LATCH child restraint. Install Using Lap/Shoulder Belt Install Using Lap Belt ONLY Joie Baby USA Consumer Service Contact Info Install in an Aircraft Address: 70 Thousand Oaks Blvd Morgantown, PA 19543 Accessories Email: info.us@joiebaby.com... -
Page 3: Child Requirements
To ensure the safety of your preterm or low birth weight infant child restraint: (born before 37 weeks or weighing less than 5 lb (2.3 kg), Joie recommends following the AAP’s guidelines and consulting your Model Name: doctor or hospital staff before the child’s first car or airplane trip. -
Page 4: Warnings
WARNING! WARNING! DEATH OR SERIOUS INJURY can occur if you DEATH OR SERIOUS INJURY can occur if you fail to follow the warnings, instructions and fail to follow the warnings, instructions and labels on the child restraint. labels on the child restraint. Read ALL INSTRUCTIONS before use of the •... - Page 5 WARNING! WARNING! DEATH OR SERIOUS INJURY can occur if you DEATH OR SERIOUS INJURY can occur if you fail to follow the warnings, instructions and fail to follow the warnings, instructions and labels on the child restraint. labels on the child restraint. NEVER secure this car restraint using an •...
- Page 6 • DO NOT attach additional padding, toys, or soft surfaces. FALL HAZARD Child’s activity can move child other devices unless made by Joie and • restraint. NEVER place carrier on counter tops, described in these instructions. Use only approved accessories. Unapproved items can tables, or any other elevated surface.
- Page 7 1) The vehicle was able to be driven away from • Only use with Joie strollers or appropriate Joie the crash site. adapters designed for use with other strollers. 2) The vehicle door nearest the car restraint was NOT damaged.
-
Page 8: Best Practices
Vehicle Compatibility: Best Practices: Expiration: You MUST read and understand ALL child restraint related instructions and warnings in This child restraint expires 7 years from the date of manufacture. your vehicle owner’s manual to correctly and Stop using it after that date and dispose of it. Check the label on safely use this child restraint in your vehicle. -
Page 9: Vehicle Belts
Vehicle Belts: These vehicle belts CANNOT BE USED with your child restraint. Install with lower anchors instead. 1-Motorized Belts (Automatic) These should not be used unless the shoulder belt can be removed, the lap belt is locked and use is allowed by the vehicle manufacturer. -
Page 10: Choose Your Installation
Vehicle Belt Install: Choose your Installation: Vehicle Seat Belt: This child restraint can be installed in your vehicle using either the vehicle seat belt OR the lower anchor attachment (LATCH). Both Refer to your vehicle owner’s manual to determine if the belts in are equally safe to use. - Page 11 Choose Your Installation: Installation Method Suitable For LATCH Lap/Shoulder Belt Page Intentionally Child height less than Left Blank 30 inches (76 cm) Child weight 4-30 lb (1.8 - 13.6 kg) Lap Belt ONLY...
-
Page 12: Parts List
Parts List: Parts List: Please make sure there are no missing parts. Please contact Joie Customer Service if anything is missing. Head Support Seat Pad Shoulder Pads Chest Clip Buckle Crotch Pad Infant Insert Harness Adjustment Button Harness Adjustment Strap... - Page 13 An unlocked handle could move 1 - Carry Position unexpectedly, causing injury to the child. Joie recommends to have the handle in the carry position when in the vehicle. This allows space between front/rear seats and easier install/removal of the carrier.
- Page 14 The head support can be used as necessary, to provide a snug fit for small babies. Removing the Head Support: The head support can be removed when your child has outgrown it. Locate the hook and loop fasteners behind the seat fabric. Carefully pull apart the fastener to detach the head support.
- Page 15 The infant insert can be used as necessary, to provide a snug fit for small babies. The low birth weight pillow located inside the infant insert can be used for even smaller babies. Removing the Infant Insert: Unbuckle the harness by pressing the release button on the buckle.
-
Page 16: Adjusting Harness Height
Check Harness Height Fit: For safety and comfort, ensure the harness straps fit snugly on your child’s shoulders and are positioned at or just below their shoulders. Have your child sit in the child restraint with the harness buckled. The shoulder straps should be at or just below the child’s shoulders. - Page 17 Adjusting Harness Height: (cont.) Re-thread the shoulder straps through the correct slots on the front of the child restraint. Ensure the harness straps pass under the cross bars. WARNING: Make sure shoulder straps are not twisted before attaching to the splitter plate. Once you’ve adjusted the shoulder straps to the desired height, re-attach BOTH shoulder strap loops into the metal splitter plate.
-
Page 18: Securing Child In Seat
Securing Child in Seat: 1 inch (2.5 cm) The top of child’s head must be at least 1 inch (2.5 cm) below top of child restraint. Loosen the harness straps by pressing the harness adjustment button (1) and pulling on the straps (2). Press the button to release the halves of the chest clip and separate chest clip. - Page 19 Securing Child in Seat: (cont.) Pull on the adjustment strap to tighten the harness. Slide any excess strap length from the child’s waist up through the buckle towards the shoulders, and repeat this step until the harness is snug on child. TIP: The harness should be snug around your child’s waist and shoulders.
-
Page 20: Install Using Latch
Install Using LATCH: INSTALL USING ONLY ONE METHOD. NEVER install using BOTH seat belt and LATCH. Insert LATCH guides to help with installation. Press the LATCH rotate button (1) on either side first to turn the LATCH connectors down (2). Line up the LATCH connectors with the LATCH guides, and then click both LATCH connectors onto the LATCH anchor bars. -
Page 21: To Remove Latch
Install Using LATCH: (cont.) Make sure the LEVEL LINE on the restraint label is LEVEL WITH THE GROUND. Rotate the LATCH by pressing the LATCH rotate button (1) to adjust the recline of the seat (2). Check Install! Blue level line must be level with ground. LATCH connectors are properly attached and show green on the indicators. -
Page 22: Install Using Lap/Shoulder Belt
Install Using Lap/Shoulder Belt: INSTALL USING ONLY ONE METHOD. NEVER install using BOTH seat belt and LATCH. Only install in a forward facing vehicle seat. Place the child restraint in the vehicle facing the back of the car. Thread your vehicles lap belt under BOTH lap belt guides. Make sure the LEVEL LINE on the restraint label is LEVEL WITH THE GROUND. -
Page 23: Install Using Lap Belt Only
Install Using Lap Belt ONLY: INSTALL USING ONLY ONE METHOD. NEVER install using BOTH seat belt and LATCH. Only install in a forward facing vehicle seat. Place the child restraint in the vehicle facing the back of the car. Thread your vehicles lap belt under BOTH lap belt guides. Make sure the LEVEL LINE on the restraint label is LEVEL WITH THE GROUND. -
Page 24: Install In An Aircraft
Press firmly into the middle of the child restraint while pulling the aircraft’s lap belt to tighten. Accessories: 1b - The infant carrier can attach to Joie strollers using adapters or with the stroller’s armbar. Adapters are included with Joie strollers. Visit www.joiebaby.com for more information. -
Page 25: Removing Canopy/Fabric
Removing Canopy/Fabric: WARNING! NEVER use this child restraint without the softgoods in place. Unfasten the snaps under the canopy fabric on the sides of the child restraint. Press the round plastic tab on the canopy support, then pull it upwards to disconnect it from the hinge. Carefully pull apart the hook and loop closure at the back top of the seat. - Page 26 Removing Canopy/Fabric: (cont.) Remove the crotch pad, then thread the buckle and crotch belt through the bottom slot of both the infant insert and seat pad. Remove the infant insert. Disconnect the harness by referring to “Adjusting Harness Height” on PG. 30. 10 - Starting from the bottom, lift the seat pad to remove it from the child restraint shell.
-
Page 27: Care And Maintenance
Regularly check if everything functions properly. If any parts are Buckle Care: torn, broken, or missing stop using immediately and contact Joie for replacement parts. Rinse the buckle using warm water only. Do not use soaps, solvents, or lubricants. - Page 28 share the joy at joiebaby.com IM-001413F...
Need help?
Do you have a question about the mint latch and is the answer not in the manual?
Questions and answers