Table of Contents
Advertisement
Quick Links
Advertisement
Table of Contents

Related Manuals for AEG CGB6133CCM


Summary of Contents for AEG CGB6133CCM
- Page 1 EN User Manual | Cooker CGB6133CCM aeg.com\register...
-
Page 2: Table Of Contents
Welcome to AEG! Thank you for choosing our appliance. Get usage advice, brochures, trouble shooter, service and repair information: www.aeg.com/support Subject to change without notice. CONTENTS 1. SAFETY INFORMATION................2 2. SAFETY INSTRUCTIONS................5 3. INSTALLATION....................8 4. PRODUCT DESCRIPTION................11 5. - Page 3 be kept away from the appliance unless continuously supervised. • Children should be supervised to ensure that they do not play with the appliance. • Keep all packaging away from children and dispose of it appropriately. • WARNING: The appliance and its accessible parts become hot during use.
- Page 4 • CAUTION: The cooking process has to be supervised. A short term cooking process has to be supervised continuously. • WARNING: Danger of fire: Do not store items on the cooking surfaces. • Do not use a steam cleaner to clean the appliance. •...
-
Page 5: Safety Instructions
2. SAFETY INSTRUCTIONS electrical ratings of the mains power This appliance is suitable for the following supply. markets: GB IE • Always use a correctly installed shockproof socket. 2.1 Installation • Do not use multi-plug adapters and extension cables. • Do not let mains cables touch or come WARNING! near the appliance door or the niche below Only a qualified person must install this... - Page 6 installation regulations. Follow the WARNING! requirements for adequate ventilation. Risk of fire and explosion. 2.4 Use • Fats and oil when heated can release flammable vapours. Keep flames or WARNING! heated objects away from fats and oils Risk of injury and burns. when you cook with them.
- Page 7 • Cookware made of cast iron, aluminium or • Do not clean the burners in the with a damaged bottom can cause dishwasher. scratches. Always lift these objects up 2.6 Lid when you have to move them on the cooking surface. •...
-
Page 8: Installation
• Contact your municipal authority for • Cut off the mains electrical cable close to information on how to dispose of the the appliance and dispose of it. appliance. • Flat the external gas pipes. • Disconnect the appliance from the mains supply. - Page 9 3.5 Other technical data WARNING! These instructions are only valid in the countries whose symbols appear on this booklet's cover. 180 mm Gas category: 30 mm Gas supply: G20 (2H) 20 mbar Voltage: 220-240 V Frequency: 50 Hz 3.6 Gas burners BURNER NORMAL POWER Natural Gas...
- Page 10 2. Put on the burner crowns and caps. Make sure that they are correctly seated. 3. Put on the pan supports. Use flexible tubing, which comply with 4. Light one of the hob burners. the BS.669 current edition. To light the hob burner refer to the "Ignition of the hob burners".
-
Page 11: Product Description
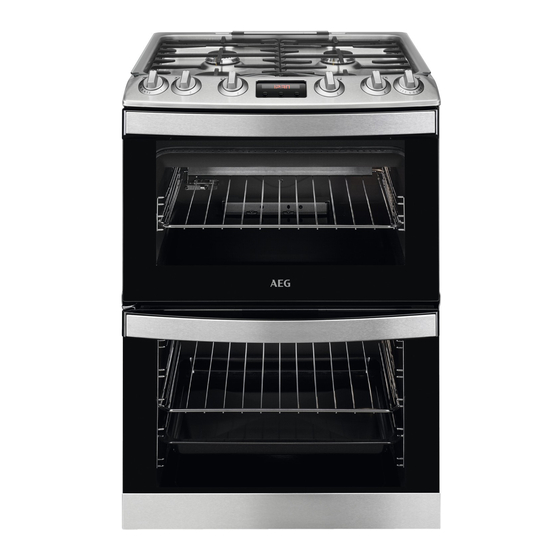
4. PRODUCT DESCRIPTION 4.1 General overview Control panel and hob Air vents for the cooling fan Grill Lamp Shelf support, removable Shelf positions 4.2 Hob overview Auxiliary burner Rapid burner Semi-rapid burner 4.3 Cooker control panel Knob for the top oven Knobs for the hob Steam outlet - number and position depend on the model... -
Page 12: Before First Use
4.4 Accessories For roasting and grilling. • Wire shelf For cookware, cake tins, roasts. Use the trivet only with the Grill- / • Grill- / Roasting pan roasting pan. To bake and roast or as pan to collect fat. • Trivet 5. - Page 13 knob, the spark generator activates automatically. 2. Keep the knob for the hob pushed for It is not possible to use the hob without equal or less than 10 seconds to let the electricity. thermocouple warm up. If not, the gas supply is interrupted.
-
Page 14: Hob - Hints And Tips
WARNING! WARNING! Always turn the flame down or switch it Always use the knob for the hob to switch off before you remove the pans from the off a burner. Do not use the lid as a cut- burner. off device. 6.5 Lid Safety Device Lid has safety device, which cuts off the gas supply for the hob. -
Page 15: Hob - Care And Cleaning
8. HOB - CARE AND CLEANING 2. After you clean the pan supports, make WARNING! sure that they are in correct positions. 3. For the burner to operate correctly, make Refer to Safety chapters. sure that the arms of the pan supports are aligned with the center of the burner. - Page 16 9.2 Main Oven Functions Oven function Application Off position The oven is off. Minimum temperature To set the minimum temperature. Heat settings Heat settings for Conventional Cooking. 1 - 8 Ignition To activate the main oven. min - 135 °C, 1 - 155°C, 2 - 170°C, 3 -185°C, 4 - 210°C, 5 - 235°C, 6 - 250°C, 7 - 260°C, 8 - 265 °C 9.3 Igniting the oven burners WARNING! Do not push the knob for more than 15...
- Page 17 2. Adjust the deep pan runner position to fit Wire shelf: in different portions of food. Push the shelf between the guide bars of the Refer to Grilling in "Hints and Tips" chapter. shelf support. 9.6 Cooling fan When the appliance operates, the cooling fan turns on automatically to keep the surfaces of the appliance cool.
-
Page 18: Oven - Clock Functions
Make sure the supports of the wire shelf point up. Make sure the supports of the wire shelf point down. 10. OVEN - CLOCK FUNCTIONS 10.1 Display A. Minute minder indicator B. Time display C. Time of day indicator The display works only with the main oven. -
Page 19: Oven - Hints And Tips
10.4 Cancelling the clock functions 2. Press and hold The clock function goes out after some 1. Press the again and again until the seconds. necessary function indicator starts to flash. 11. OVEN - HINTS AND TIPS quantities of food. It is especially good for WARNING! baking fruitcakes, cookies, savoury flans or quiche. - Page 20 Baking results Possible cause Remedy The cake bakes unevenly. The oven temperature is too high Next time set a longer baking time and and the baking time is too short. lower oven temperature. The cake batter is not evenly dis‐ Next time spread the cake batter evenly on tributed.
- Page 21 Other dishes Food Preheating Heat setting Time (min) Shelf position Accessories time (min) Pasta /Lasagne 35 - 45 Tray on wire etc. shelf Fish Pie 30 - 40 Tray on wire shelf Shepherd’s Pie 40 - 50 Tray on wire shelf Mince Pies 15 - 25...
- Page 22 11.7 Roasting Food Preheating Heat setting Time (min) Shelf position Accessories time (min) Beef / Beef bon‐ 60 - 70 Trivet in Grill-/ Roasting pan Mutton / Lamb 65 - 75 Trivet in Grill-/ Roasting pan Fish trout 40 - 40 Trivet in Grill-/ Roasting pan Pork / Veal /...
- Page 23 Food Preheating Grilling time Shelf po‐ Accessories time (min) (min) sition Lamb chops 20 - 25 Trivet in Grill-/Roasting Pork chops 25 - 35 Trivet in Grill-/Roasting Whole trout / Mackerel 20 - 30 Trivet in Grill-/Roasting Plaice / Cod fillet 20 - 30 Trivet in Grill-/Roasting Kebabs...
-
Page 24: Oven - Care And Cleaning
Food Preheating time Time (min) Shelf position Accessories (min) Toast 2 - 3 Trivet with Grill-/ Roasting pan 12. OVEN - CARE AND CLEANING WARNING! Refer to Safety chapters. 12.1 Notes on cleaning Clean the front of the appliance only with a microfibre cloth with warm water and a mild de‐ tergent. - Page 25 Before activating the catalytic cleaning remove all the accessories from the oven. The walls with catalytic coating are self- cleaning. They absorb fat which collects on the walls while the appliance operates. To support the self-cleaning procedure, heat the empty oven on a regular basis. Install the shelf supports in the opposite The oven cavities must be cleaned sequence.
-
Page 26: Troubleshooting
12.7 Removing and cleaning the 12.8 Replacing the lamp door glasses - main oven WARNING! Risk of electric shock. The lamp can be hot. The door glass in your product can be different in type and shape from the 1. Turn off the oven. Wait until the oven is example you see in the image. - Page 27 13.1 What to do if... Problem Possible cause Remedy You cannot activate the appliance. The appliance is not connected to Check if the appliance is correctly an electrical supply or it is connec‐ connected to the electrical supply. ted incorrectly. You cannot activate the appliance.
-
Page 28: Energy Efficiency
14. ENERGY EFFICIENCY 14.1 Product Information according to EU and UK Ecodesign Regulation for Hob Model identification CGB6133CCM Type of hob Hob inside Freestanding Cooker Number of gas burners Energy efficiency per gas burner (EE Left Front - Rapid 55.0 %... -
Page 29: Environmental Concerns
Heat source Top oven: 36 l Volume Main oven: 83 l Type of oven Oven inside Freestanding Cooker Mass 63.4 kg EN 15181 Measuring method of the energy consumption of gas fired ovens. 14.4 Oven - Energy saving Residual heat When the cooking duration is longer than 30 Following tips below will help you save min, reduce the appliance temperature to... - Page 32 867363359-B-022024...
Need help?
Do you have a question about the CGB6133CCM and is the answer not in the manual?
Questions and answers