Table of Contents
Advertisement
Quick Links
Advertisement
Table of Contents

Related Manuals for AEG CGB6130ACM


Summary of Contents for AEG CGB6130ACM
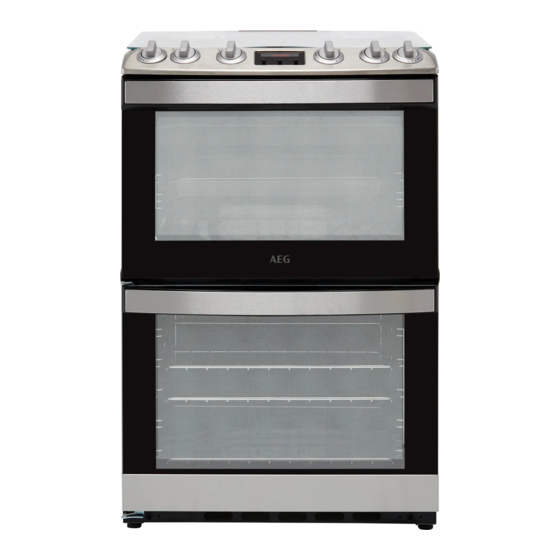
- Page 1 EN User Manual | Cooker CGB6130ACM...
-
Page 2: Table Of Contents
FOR PERFECT RESULTS Thank you for choosing this AEG product. We have created it to give you impeccable performance for many years, with innovative technologies that help make life simpler – features you might not find on ordinary appliances. Please spend a few minutes reading to get the very best from it. -
Page 3: Safety Information
SAFETY INFORMATION Before the installation and use of the appliance, carefully read the supplied instructions. The manufacturer is not responsible for any injuries or damage that are the result of incorrect installation or usage. Always keep the instructions in a safe and accessible location for future reference. - Page 4 • Only a qualified person must install this appliance and replace the cable. • This appliance is intended for use up to an altitude of 2000 m above sea level. • This appliance is not intended to be used on ships, boats or vessels.
-
Page 5: Safety Instructions
• WARNING: Ensure that the appliance is switched off before replacing the lamp to avoid the possibility of electric shock. • If the mains power supply cable is damaged, it must be replaced by the manufacturer, its Authorised Service Centre or similarly qualified persons to avoid an electrical hazard. - Page 6 the appliance, especially when it operates CAUTION! or the door is hot. • The shock protection of live and insulated The use of a gas cooking appliance parts must be fastened in such a way that results in the production of heat, moisture it cannot be removed without tools.
- Page 7 2.5 Care and Cleaning • Open the appliance door carefully. The use of ingredients with alcohol can cause a mixture of alcohol and air. WARNING! WARNING! Risk of injury, fire, or damage to the appliance. Risk of damage to the appliance. •...
-
Page 8: Installation
• Use only lamps with the same specifications. 2.8 Service • To repair the appliance contact the Authorised Service Centre. • Use original spare parts only. 2.7 Internal lighting 2.9 Disposal WARNING! WARNING! Risk of electric shock. Risk of injury or suffocation. •... - Page 9 2. Mark the position of the wall and this gives anchor point for the stability chain. Dimension less than 400 3.3 Levelling of the appliance 180 mm 30 mm 3.5 Other technical data WARNING! Use small feet on the bottom of appliance to set the appliance top surface level with other These instructions are only valid in the surfaces.
- Page 10 WARNING! WARNING! Only a qualified and competent person The gas bayonet connector must be in can do the gas installation. the marked area. Before you connect te gas, disconnect the appliance from the electricity supply Dimension or switch off the fuse in the fuse box. Close the primary valve of the gas supply.
-
Page 11: Product Description
2. Light one of the hob burners. To light the hob burner refer to the "Ignition of the hob burners". The spark generator is active all the time 3. Close the lid. There should be no gas if the phases are not connected correctly. supply to the hob burners. -
Page 12: Before First Use
4.2 Hob overview Steam outlet - number and position depend on the model Semi-rapid burner Auxiliary burner Power rapid burner Semi-rapid burner 4.3 Cooker control panel Knob for the top oven Knobs for the hob Display Knob for the main oven 4.4 Accessories For roasting and grilling. -
Page 13: Hob - Daily Use
1. Set the maximum temperature. To change the time, press again and 2. Let the appliance operate for 1 hour. again until starts to flash. 3. Set the function 4. Let the appliance operate for 15 minutes. Accessories can become hotter than usual. You cannot change the time of day if any The appliance can emit an odour and smoke. - Page 14 6.2 Burner overview A. Burner cap B. Burner crown C. Ignition candle D. Thermocouple A. Burner cap B. Burner crown C. Ignition candle D. Thermocouple 6.3 Replacing burner parts can move the cap from side to side and front to back. 1.
-
Page 15: Hob - Hints And Tips
6.5 Lid Safety Device WARNING! Lid has safety device, which cuts off the gas Always use the knob for the hob to switch supply for the hob. Closing the lid activates off a burner. Do not use the lid as a cut- the safety device. -
Page 16: Oven - Daily Use
• Use a special cleaner suitable for the 8.3 Cleaning the hob surface of the hob. • Wash stainless steel parts with water, and • Remove immediately: melted plastic, then dry them with a soft cloth. plastic foil, salt, sugar and food with sugar, otherwise, the dirt can cause damage to 8.2 Pan supports the hob. - Page 17 9.2 Main Oven Functions Oven function Application Off position The oven is off. Minimum temperature To set the minimum temperature. Heat settings Heat settings for Conventional Cooking. 1 - 8 Ignition To activate the main oven. min - 135 °C, 1 - 155°C, 2 - 170°C, 3 -185°C, 4 - 210°C, 5 - 235°C, 6 - 250°C, 7 - 260°C, 8 - 265 °C 9.3 Igniting the oven burners WARNING! Do not push the knob for more than 15...
- Page 18 2. Adjust the deep pan runner position to fit in different portions of food. Refer to Grilling in "Hints and Tips" chapter. 9.6 Cooling fan When the appliance operates, the cooling fan turns on automatically to keep the surfaces of the appliance cool.
-
Page 19: Oven - Clock Functions
2. Put the deep pan into the oven on the necessary shelf position. 10. OVEN - CLOCK FUNCTIONS 10.1 Display A. Minute minder indicator B. Time display C. Time of day indicator The display works only with the main oven. 10.2 Buttons Button Function... -
Page 20: Oven - Hints And Tips
11. OVEN - HINTS AND TIPS quantities of food. It is especially good for WARNING! baking fruitcakes, cookies, savoury flans or quiche. Refer to Safety chapters. 11.2 Main oven The main oven is particularly suitable for The temperature and baking times in the cooking larger quantities of food. - Page 21 11.5 Conventional Cooking - Main oven Baking in tray Food Preheating time Heat setting Time (min) Shelf position (min) Éclairs 20 - 30 Choux Pastry 30 -35 Scones 15 - 25 Bread rolls 20 - 30 Bread 30 - 40 Roast Potatoes 60 - 90 Baking in tins...
- Page 22 Food Preheating Heat setting Time (min) Shelf position Accessories time (min) Mince Pies 15 - 25 Tins on wire shelf Meat Pies 30 - 40 Tray on wire shelf Milk pudding 90 - 120 Tray on wire shelf Soufflés 20 - 30 Ceramic rame‐...
- Page 23 Food Preheating Heat setting Time (min) Shelf position Accessories time (min) Pork / Veal / 80 -90 Grill-/Roasting Chicken 80 - 90 Trivet in Grill-/ Roasting pan Turkey / Goose 150 - 180 Trivet in Grill-/ Roasting pan Duck 120 - 130 Trivet in Grill-/ Roasting pan Pheasant...
-
Page 24: Oven - Care And Cleaning
Food Preheating Grilling time Shelf po‐ Accessories time (min) (min) sition Kebabs 20 - 30 Trivet in Grill-/Roasting Kidneys - Lamb / Pig 10 - 20 Trivet in Grill-/Roasting Liver - Lamb / Pig 15 - 25 Trivet in Grill-/Roasting Sausages 20 - 30 Trivet in Grill-/Roasting... - Page 25 12.1 Notes on cleaning Clean the front of the appliance only with a microfibre cloth with warm water and a mild de‐ tergent. Use a cleaning solution to clean metal surfaces. Clean stains with a mild detergent. Do not apply it on the catalytic surfaces. Cleaning Agents Clean the cavity after each use.
- Page 26 2. Pull the rear end of the shelf support away from the side wall and remove it. 3. Pull the door trim to the front to remove it. 4. Remove the glass panels. To install the panels, do the same steps in reverse.
-
Page 27: Troubleshooting
3. Put a cloth on the bottom of the cavity. The back lamp To replace the glass panels, do the same steps in reverse. Before you lower the trim, attach the A trim part to the door. Refer to the image. The lamp glass cover is at the back of the cavity. -
Page 28: Energy Efficiency
......... 14. ENERGY EFFICIENCY 14.1 Product Information according to EU and UK Ecodesign Regulations for hob Model identification CGB6130ACM Type of hob Hob inside Freestanding Cooker Number of gas burners Energy efficiency per gas burner (EE Left Front - Multi crown 54.2 %... - Page 29 Refer to its user manual. 14.3 Product Information and Product Information Sheet according to EU and UK Ecodesign and Energy Labelling Regulations for ovens Supplier's name Model identification CGB6130ACM 948905160 Top oven: 95.1 Energy Efficiency Index Main oven: 90.0 Top oven: A...
-
Page 30: Environmental Concerns
15. ENVIRONMENTAL CONCERNS the household waste. Return the product to Recycle materials with the symbol . Put the your local recycling facility or contact your packaging in relevant containers to recycle it. municipal office. Help protect the environment and human health by recycling waste of electrical and Electrolux Appliances AB - Contact Address: electronic appliances. - Page 32 867363635-D-122023...
Need help?
Do you have a question about the CGB6130ACM and is the answer not in the manual?
Questions and answers