Arjo Maxi Move Instructions For Use Manual
Floor lift
Hide thumbs
Also See for Maxi Move:
- Maintenance and repair manual (70 pages) ,
- Operating and product care instructions (50 pages) ,
- Manual (12 pages)
Table of Contents
Advertisement
Advertisement
Table of Contents

Related Manuals for Arjo Maxi Move


Summary of Contents for Arjo Maxi Move
- Page 1 INSTRUCTIONS FOR USE Maxi Move 001.25060.EN rev 19 • 09/2022...
- Page 2 Mandatory to read the Instructions for Use Design Policy and Copyright ® and ™ are trademarks belonging to the Arjo group of companies. © Arjo 2022. As our policy is one of continuous improvement, we reserve the right to modify designs without prior notice.The content of this publication may not be copied either whole or in part without the consent...
-
Page 3: Table Of Contents
Using your MAXI MOVE ......................16 Before Approaching the Patient...................... 16 Powered Opening “V” Chassis ....................... 16 MAXI MOVE ‘Lock and Load’ System .................... 16 Testing the Attachment........................17 Using the DPS Spreader Bar......................18 To Lift from a Chair ........................18 To Lift from the Bed ........................ - Page 4 Removing the Battery Pack ......................36 Charging the Battery ........................36 Battery and Battery Charger Safety Practices ................37 Care of your MAXI MOVE ......................38 Sling Cleaning and Care ......................... 38 Lift Cleaning, Disinfection and Care....................38 Removing visible residues:....................38 Cleaning: ..........................
-
Page 5: General Information
Maxi Move is part of a series of quality products where they may be lying; on the bed or on the intended to assist caregivers in hospitals, long- floor. -
Page 6: Conditions
Required for Patient Transfer • The unit is cared for and serviced in accordance with recommended, published Arjo’s passive and active series of lifts are “Instruction for Use” and the “Preventive designed for safe usage with one caregiver. Maintenance Schedule”. -
Page 7: Safety Instructions
Safety Instructions Safety Instructions Symbols Used Symbols Key to symbols This symbol is accompanied by a date (to indicate the date of manufacture) and by the address of the manufacturer. This symbol indicates that the products comply with the European Medical Device Regulation. -
Page 8: Homecare Environment Considerations
Left the MAXI MOVE, and to carry out any action position, standing at concerning inspection procedures. Right the rear of the... -
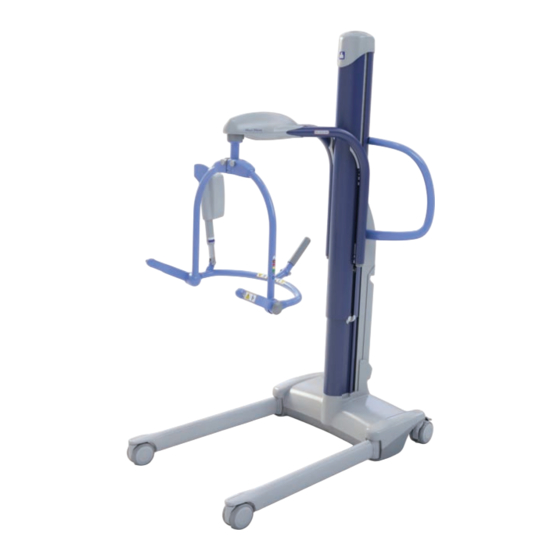
Page 9: Product Description/Functions
Product Description/Functions Product Description/Functions Parts Referred to in this Manual Fig. 3 1) Mast 12) Emergency Stop button 2) Mast top cover 13) Power button 3) Maneuvering handle 14) Battery release button 4) Lift battery pack 15) Battery charger 5) Braked casters 16) Two-point loop spreader bar (if included)* 6) Adjustable chassis legs 17) Loop medium Combi (if included)*... -
Page 10: Spreader Bars
Product Description/Functions Spreader Bars Fig. 4... -
Page 11: Slings
Arjo T-Bar attachment system. Large powered DPS spreader bar (700.19316) The foldable stretcher frame for Maxi Move is intended to be used for Stretcher frame supine transfer in combination with a soft stretcher, a strap stretcher or a scoop stretcher Fig. - Page 12 Product Description/Functions Arjo standard sling profiles that can be used with the MAXI MOVE Four-point padded sling Four-point toileting sling Four-point amputee sling Soft stretcher Strap stretcher (Refer to Arjo Strap Stretcher IFU) NOTE: Other sling models are available. Scoop stretcher...
-
Page 13: Controls And Features
Control Panel (See Fig. 8) An additional feature available on the Emergency Stop MAXI MOVE, is a mast-mounted control panel, button which operates in parallel with the control handset, enabling powered operations to be controlled from the lift mast as well as remotely by... -
Page 14: System Failure Wind Down Facility
“up” button to raise the jib until the lift is clear. Then remove the obstruction. Battery Indicator The battery indicator for the MAXI MOVE is a feature found on the control handset. Please refer to the “Battery Charging” section for operating Fig. -
Page 15: Usage Counter
Jib and Spreader Bars/Stretcher Frame When the maintenance symbol appears, the unit (See Fig. 3) Your MAXI MOVE is equipped with a will still be safe to use, but the annual quick connection device that allows you to use... -
Page 16: Using Your Maxi Move
WARNING: During displacement, always make sure there is enough clearance above the MAXI MOVE to ensure the safety of the patient and the people around, and to avoid injuries. Be very careful when... -
Page 17: Testing The Attachment
(see Fig. 17). If the attachment Fig. 17 becomes dislodged from the T-bar, DO NOT use the MAXI MOVE. Contact your local Arjo agent. WARNING: Always check that the attachment is locked in place by: 1) verifying the markings on... -
Page 18: Using The Dps Spreader Bar
Fig. 21 Fig. 19 For most residents, the straight attachment of the Ensure that the MAXI MOVE is close enough to leg clips is recommended use (see Fig. 22). be able to attach the sling’s shoulder clips to the spreader bar. To accomplish this you may have to Apply the leg clips of the sling put the patient’s feet on, or over, the chassis. -
Page 19: To Lift From The Bed
Fig. 23 Maxi Move. Only detach the sling leg connection If necessary, lower the spreader bar using the clips followed by the shoulder connection clips handset control, being careful not to lower it onto when the patient’s body weight is fully supported... - Page 20 CAUTION: Always check that all the sling Now position the MAXI MOVE so that the attachment clips are fully in position before and spreader bar is just above and centred over the during the lifting cycle, and in tension as the patient.
-
Page 21: To Lift From The Floor
Fig. 34. This will have the effect of raising the patient’s head Pull the MAXI MOVE away before removing the and shoulders slightly. sling from under the patient. If transferring the patient to a chair, refer to the section entitled “To... -
Page 22: Powered Dps Spreader Bar
Fig. 36. Read and thoroughly understand these with extensor spasms may be lifted by the operating instructions in order to avoid mistakes MAXI MOVE, but care should be taken to support that could result in injury. the patient’s legs during the beginning of the lift. -
Page 23: Care Of Your Powered Dps Spreader Bar
For general care, refer to the section entitled large). For details on a more specialised range of “Care of your MAXI MOVE”. Refer in particular to slings, please contact Arjo or its authorised the paragraphs on cleaning plastic parts, labels, distributors. -
Page 24: To Lift From A Chair
Using your MAXI MOVE To Lift from a Chair METHOD 2 First, ease the patient forward if necessary. Slide the sling down the patient’s back until seam “C” reaches base spine (see Fig. 40). Fig. 42 Method 2 - As in Method 1, but pass each leg section of the sling under both thighs and then out the other side before attaching points “B”... -
Page 25: To Lift From The Bed
Use the following procedure to lift a patient using the stretcher frame and soft stretcher. CAUTION: Before the soft stretcher can be used with the MAXI MOVE, ensure the Arjo stretcher frame has been correctly installed on the carrier (see Fig. 15). Once correctly installed, the stretcher frame should be able to rotate approximately 90°... - Page 26 Note: The “head end” straps have a black tab stitched to them that can be used with other Arjo stretcher frames. Fig. 47 Do not use any other type of soft stretcher sling with the MAXI MOVE.
-
Page 27: Using The Strap Stretcher
CAUTION: Before the stretcher can be used with section at the side of the patient with the clamps the MAXI MOVE, ensure that the Arjo stretcher towards the top (see Fig. 50). Push each end tube spreader bar has been correctly installed on the through the corresponding holes in the side carrier (see Fig. - Page 28 Using your MAXI MOVE Strap guide End of cross strap to be pushed under patient Loose end of strap Fig. 53 Fig. 51 Slide the straps under the patient where this can easily be done. Lift the patient’s head and legs to facilitate this.
- Page 29 For instructions on how to lift and transfer patients leave the stretcher at 90º to the chassis legs. In with the Arjo Strap Stretcher (700-14945), refer to this position the lift and patient can be moved the Strap Stretcher’s Instructions for Use.
-
Page 30: Scale
Avoid any Scale other uses to avoid injuries. marking If your MAXI MOVE has been equipped with an Arjo scale, your lift will have the added advantage of being able to weigh patients once they have Fig. 59 been lifted. -
Page 31: Overload Warning Symbol
“TILT” symbol alternating with the scale symbol, relocate the MAXI MOVE to a level position so that the scale can be operated correctly (see Fig. 60). NOTE: It is normal that the display occasionally shows a “Tilt” pictogram when the lift is being moved or manipulated. -
Page 32: Method B - Weighing With The Patient Already Suspended In The Sling
(see Fig. 64). Save button Fig. 67 3) Reinstall the sling back on the MAXI MOVE. Ignore the minus sign preceding the digits on the screen. Allow the weight reading to Fig. 64 stabilise. The weight shown is the patient’s 5) Press the save button if the net weight needs actual weight (see Fig. -
Page 33: Units Of Measurement
Scale Units of Measurement The unit of measure is set in kilograms for Europe Enter Exit and can’t be changed. For non-European button button instruments, the unit of measure can be set in either “kg” or “lb”. 1) At start-up, press both operating buttons for the scale at the same time (see Fig. -
Page 34: Scale - Handset Instructions Mini-Guide
Scale - Handset Instructions Mini-Guide Scale - Handset Instructions Mini-Guide METHOD A METHOD B AT START-UP AT START-UP DURING A TRANSFER With sling already With sling not yet With patient already on the spreader bar on the spreader bar on the lift STEP 1 STEP 1 STEP 1... - Page 35 Enter battery symbol. button Recharge batteries as soon as possible. (continued next column) OTHER WARNINGS The display will show crossed wrenches on the top right corner. Contact an Arjo technician for service.
-
Page 36: Battery Charging
Care should be taken so that the batteries are not drained unnecessarily. The battery indicator on the control handset will show if the batteries for the MAXI MOVE are Fig. 75 close to being completely empty and it will emit two beep every minute (see Fig. -
Page 37: Battery And Battery Charger Safety Practices
Battery Charging Only use batteries designed and labelled for use with the device. When not sure, do not use the battery. Make sure the battery belongs to the device by comparing the battery label with the technical specifications in the Instructions for Use. -
Page 38: Care Of Your Maxi Move
Unless otherwise stated, follow the cleaning, straps (if applicable). disinfection, care and inspection procedures described in this section before each use. 2) Remove visible residues from the MAXI MOVE using a cloth soaked in water. Start from top Sling Cleaning and Care and move downwards. -
Page 39: Disinfection
Care of your MAXI MOVE Disinfection: To disinfect the device, clean the equipment first, then wipe it using a solution containing one of the compatible disinfectants listed below: Control Box Maxi Locking Spreader Bar Handset Disinfectant Agents Membrane Move Clip... -
Page 40: Mandatory Daily Checks
CAUTION: If in doubt about the correct functioning or lack of performance of the MAXI MOVE, do not use it and contact the Arjo Service Department. -
Page 41: Troubleshooting
Call for service (charger may be faulty). lights are visible. Yellow indicator light does not go off • Battery pack needs replacing. Call Arjo for replacement. after several hours of charging time. Battery pack indicates it is fully charged •... -
Page 42: Labels
Labels Labels Key to Labels: Arjo wet environment product identification Safe working load label Sling Color-to-Size reference Lift name label Arjo label Product information label Serial number label Metrological display label Emergency lowering label 10. Scale marking 11. Stretcher attachment point... -
Page 43: Technical Specifications
WARNING: Portable RF communications equipment (including peripherals such as antenna cables and external antennas) should be used no closer than 30 cm to any part of the Maxi Move, including cables specified by the manufacturer. Otherwise, performance degradation of this equipment could result. -
Page 44: Lift Dimensions
Technical Specifications Separate and recycled. Components that are primarily be made up of different kinds of metal The Lift (containing more than 90% metal by weight) for example sling bars, rails, upright supports, etc., should be recycled as metals. Lift systems having electrical and electronic components or an electrical cord should be disassembled and recycled per Waste of Electrical and Electronic Electrical and Electronic Equipment (WEEE) or in accordance with local or national regulation. - Page 45 Technical Specifications Lift Dimensions DIMENSIONS TAKEN WITH HOIST UNLOADED 2) DIMENSIONS TOLERANCES: ± 10 MM (3/8”) CLOSED OPEN LEGS LEGS [ 4 3/4" ] [3 1/8''] STANDARD BASE [ 4 1/2" ] HEIGHT BASE [4''] 1118 [ 44" ] WITH DPS SPREADER BAR STANDARD BASE & LOW HEIGHT BASE (EXTENDED JIB) WITH 4-POINT LOOP SPREADER BAR WITH 2-POINT LOOP SPREADER BAR WITH STRETCHER SPREADER BAR...
-
Page 46: Appendix - Scale Gravity Code Configurations
Appendix - Scale Gravity Code Configurations Appendix - Scale Gravity Code Configurations Whenever the MAXI MOVE floor lifts with scale are sold in Europe, the conformity of the scale NOTE: When the preset code is 99, it means that with the requirements of the Council Directive 90/... -
Page 47: Electromagnetic Compatibility
Electromagnetic Emissions - For all Equipment and Systems The MAXI MOVE is intended for use in the electromagnetic environment specified below. The customer or the user of the MAXI MOVE should assure that it is used in such an environment. Emissions test... -
Page 48: Electromagnetic Immunity
Electromagnetic Immunity - For all Equipment and Systems The MAXI MOVE is intended for use in electromagnetic environment specified below. The customer or the user of the MAXI MOVE should assure that it is used in such an environment. Electromagnetic... - Page 49 Electromagnetic Compatibility Electromagnetic Immunity test IEC 60601 test level Compliance level environment - guidance 800 - 960 MHz 800 - 960 MHz 28 V/m; PM 50%; 18 Hz 28 V/m; PM 50%; 18 Hz (continued) Proximity fields 1700 - 1990 MHz 1700 - 1990 MHz from RF wireless 28 V/m;...
-
Page 50: Ukca Symbol
UKCA Symbol UKCA Symbol UK SYMBOL EXPLANATION This section is only applicable to United Kingdom (UK) market when UK marking is applied to the Arjo medical device labelling. UK marking indicating conformity with UK Medical Devices Regulations 2002 (SI 2002 No 618, as amended) Figures indicate UK Approved Body supervision. - Page 51 AUSTRALIA FRANCE Arjo Australia Arjo SAS Arjo Polska Sp. z o.o. Building B, Level 3 2 Avenue Alcide de Gasperi 11 Talavera Road CS 70133 Macquarie Park, NSW, 2113, FR-59436 RONCQ CEDEX Tel: +48 61 662 15 50 Australia Tél: +33 (0) 3 20 28 13 13...
- Page 52 At Arjo, we are committed to improving the everyday lives of people affected by reduced mobility and age-related health challenges. With products and solutions that ensure ergonomic patient handling, personal hygiene, disinfection, diagnostics, and the effective prevention of pressure ulcers and venous thromboembolism, we help professionals across care environments to continually raise...
Need help?
Do you have a question about the Maxi Move and is the answer not in the manual?
Questions and answers