Table of Contents
Advertisement
Quick Links
Advertisement
Table of Contents

Related Manuals for Gentec SMARTEC PLUS Series


Summary of Contents for Gentec SMARTEC PLUS Series
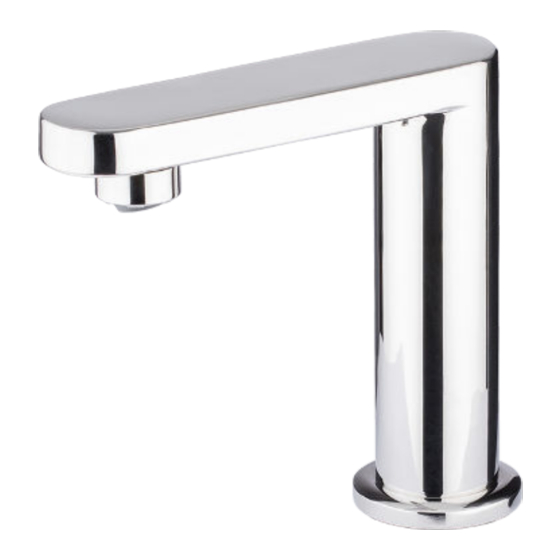
- Page 1 INSTALLATION MANUAL SMARTEC PLUS Electronic 90˚ Basin Tap PLUS1000 (M/B/BM) - Polished PLUS1000S (M/B/BM) - Satin Electronic 45˚Basin Tap PLUS1500 (M/B/BM) - Polished PLUS1500S (M/B/BM) - Satin Electronic Wall Mounted Tap PLUS2500 (M/B/BM) - Polished PLUS2500S (M/B/BM) - Satin...
-
Page 2: Table Of Contents
Contents Product Features Product Range Technical Drawings Unit components General Connections Sensitivity Adjustment Electronic Basin Tap Installation Electronic Wall Mounted Tap Installation Product Warranty... -
Page 3: Product Features
Smartec Plus by Gentec The new stainless steel Smartec Plus offers flexible power solutions and laser technology. New laser sensors avoid nuissance triggering related to skin colour or reflective surfaces. Sensitivity is adjustable on site post installation without the use of tools. Smartec Plus enables the end user to conserve water and power usage, saving up to 65% over regular taps. -
Page 4: Product Range
Product Range PLUS1000 M / B / BM PLUS1500 M / B / BM ELECTRONIC 90˚ BASIN TAP ELECTRONIC 45˚ BASIN TAP PLUS2500 M / B / BM ELECTRONIC WALL MOUNTED TAP *Use 350Kpa pressure reduction valve for extended life and be er operation... -
Page 5: Technical Drawings
Technical Drawings PLUS1000 M / B / BM PLUS1500 M / B / BM ELECTRONIC 90˚BASIN TAP ELECTRONIC 45˚ BASIN TAP 160.7 105° 15° Ø55 M34*1.5 M34*1.5 Ø55.0 PLUS2500 M / B / BM POWER CONTROL BOX unless specified. s specified. ELECTRONIC WALL MOUNTED TAP SOLENOID Plug... -
Page 6: Unit Components
Spare Parts Breakdown DIAGRAM 1: PLUS1000BM, PLUS1500BM DIAGRAM 2: PLUS2500BM *Use 350Kpa pressure reduction valve for extended life and be er operation... - Page 7 Screws Threaded Piece Flexible Hose Sensors Sensor Grub Screw Temperature Probe Flange * Not all spare components are available for individual sale. Contact GENTEC for more information. OPERATION REQUIREMENTS Configuration - Minimum 50kpa - Battery Water Pressure - Optimum 350kpa...
-
Page 8: General Connections
General Connections FOR ALL UNITS PLUS1000BM, PLUS1500BM, PLUS2500BM BM: Ba ery and Mains Operated Screw the solenoid box to the wall using the screws provided. B: Ba ery Operated Ensure to have enough space between M: Mains Operated the wall and the fixing point. When using the unit for first time Make sure to turn the... - Page 9 Connect the tap flexible hose to the • 2m extension cables are available if required. The extension can be use power control box outlet. Make sure the either for the sensor or for the power. connections are firm and in the right place. Not for extending both.
-
Page 10: Sensitivity Adjustment
Sensitivity Adjustment FOR ALL UNITS PLUS1000BM, PLUS1500BM, PLUS2500BM The sensor's maximum distance is 170mm. Place your hand desired position to adjust sensitivity and hold it in position until the light turns off. To reprogram sensitivity disconnect the sensor power cable from the solenoid box and leave it for at least 20 seconds. -
Page 11: Electronic Basin Tap Installation
Mounting Instructions ELECTRONIC BASIN TAPS PLUS1000BM & PLUS1500BM Flush the new pipe prior to installation Drill a 35mm hole on the counter top Washer Mounting Place the Flange, and insert the sensor cable followed by the flexi hose through the tap hole in the counter top. From underneath the sink or basin, fix Important Information rubber seal, fixing plate and fixing nut with... -
Page 12: Electronic Wall Mounted Tap Installation
Mounting Instructions HOB FIT OUT ELECTRONIC WALL MOUNTED TAP PLUS2500BM PRIOR TO INSTALLATION should finish 5mm behind To ensure a flush fit to the wall / hob, the fitting the finish wall (or perfectly flush). Any protrusion may affect installation. Drill 45mm hole in the hob Fasten the tap to the hob using the 4 fixing screws. - Page 13 See Figure 1 below 2m extension cables are available if *Contact Gentec for installation advise. required. The extension can be used for Thread the threaded piece into the the sensor or for the power wire. Not for female plumbing fitting in the wall.
-
Page 14: Product Warranty
Warranty GENTEC PRODUCT QUALITY WARRANTY You have purchased a quality product from GENTEC 2.2.7 include pictures of the alleged defect; and Australia Pty Ltd ABN 581 552 50285 ). This product a reasonable time. is covered by a 24 month warranty over spare 2.2.8 completed credit card authorisation in the... - Page 15 4.3.1 an act, default, omission or representation made by some other person, excluding Gentec You are also entitled to have the Goods repaired or its manufacturer (for example, damage...
- Page 16 4.5 However, nothing in this clause will prevent 5.3 The address for any notice to be You from exercising any rights which You may delivered to the Principal is as follows: have under the Competition and Consumer Act 2010 or any other law which cannot by law be excluded or modified by agreement.
Need help?
Do you have a question about the SMARTEC PLUS Series and is the answer not in the manual?
Questions and answers