Table of Contents
Advertisement
DEHUMIDIFIER
USER MANUAL
MODEL NUMBER
MDDQ1-12DEN7-QA3
Warning notices: Before using this product, please read this manual carefully and keep it for future reference.
The design and specifications are subject to change without prior notice for product improvement.
Consult with your dealer or manufacturer for details.
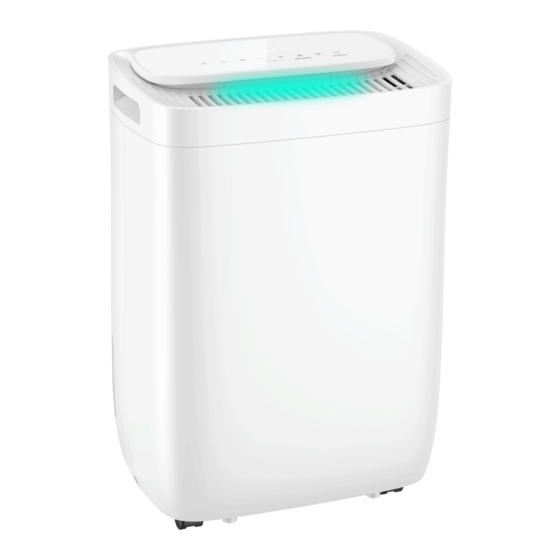
The diagram above is just for reference. Please take the appearance of the actual product as the standard.
Advertisement
Table of Contents

Related Manuals for Midea MDDQ1-12DEN7-QA3


Summary of Contents for Midea MDDQ1-12DEN7-QA3
- Page 1 DEHUMIDIFIER USER MANUAL MODEL NUMBER MDDQ1-12DEN7-QA3 Warning notices: Before using this product, please read this manual carefully and keep it for future reference. The design and specifications are subject to change without prior notice for product improvement. Consult with your dealer or manufacturer for details.
-
Page 3: Table Of Contents
THANK YOU LETTER Thank you for choosing Midea! Before using your new Midea product, please read this manual thoroughly to ensure that you know how to operate the features and functions that your new appliance ofers in a safe way. -
Page 4: Safety Precautions
SAFETY PRECAUTIONS It’s really important you read Safety Precautions Before Operation and Installation Incorrect installation due to ignoring instructions can cause serious damage or injury. The seriousness of potential damage or injuries is classified as either a WARNING or CAUTION. Explanation of Symbols WARNING The signal word indicates a hazard with a medium level of risk... - Page 5 WARNING • Do not climb up on or sit on the unit. • Always insert the filters securely. Clean filter once every two weeks. • If water enters the unit, turn the unit off and disconnect the power , contact a qualified service technician.
- Page 6 CAUTION • Your unit must be used in a properly grounded wall receptacle. If the wall receptacle you intend to use is not adequately grounded or protected by a time delay fuse or circuit breaker(please refer to the nameplate for the electrical data), have a qualified electrician install the proper receptacle.
- Page 7 WARNING for Using R32/R290 Refrigerant • Do not use means to accelerate the defrosting process or to clean, other than those recommended by the manufacturer. • The appliance shall be stored in a room without continuously operating ignition sources (for example: open flames, an operating gas appliance or an operating electric heater).
- Page 8 1. Transport of equipment containing flammable refrigerants See transport regulations 2.Marking of equipment using signs See local regulations 3.Disposal of equipment using flammable refrigerants See national regulations. 4.Storage of equipment/appliances The storage of equipment should be in accordance with the manufacturer's instructions.
- Page 9 8)Checks to the refrigeration equipment Where electrical components are being changed, they shall be fit for the purpose and to the correct specification. At all times the manufacturer's maintenance and service guidelines shall be followed. If in doubt consult the manufacturer's technical department for assistance.
- Page 10 9.Cabling Check that cabling will not be subject to wear, corrosion, excessive pressure, vibration, sharp edges or any other adverse environmental effects. The check shall also take into account the effects of aging or continual vibration from sources such as compressors or fans. 10.Detection of flammable refrigerants Under no circumstances shall potential sources of ignition be used in the searching for or detection of refrigerant leaks.
- Page 11 14.Decommissioning Before carrying out this procedure, it is essential that the technician is completely familiar with the equipment and all its detail. It is recommended good practice that all refrigerants are recovered safely. Prior to the task being carried out, an oil and refrigerant sample shall be taken in case analysis is required prior to re-use of reclaimed refrigerant.
-
Page 12: Specifications
SPECIFICATIONS Product Model MDDQ1-12DEN7-QA3 220-240V~ 50Hz, 1Ph Power source 12 L/DAY Capacity (DB=30 RH=80%) 2.1A Rated current 380W Rated power input Resistance class IPX0... -
Page 13: Product Overview 1
PRODUCT OVERVIEW NOTE ON ILLUSTRATIONS: All the illustrations in the manual are for explanation purpose only. Your machine may be slightly different. The actual shape shall prevail. The unit can be controlled by the unit control panel alone or with the remote controller. This manual does not include Remote Controller Operations, see the <<Remote Controller Instruction>>... -
Page 14: Confirm It Before You Get Start
CONFIRM IT BEFORE YOU GET START 40cm or more 40cm or more 20cm 20cm or more or more 40cm or more Front view Top view Casters(At four points on the bottom of unit) Casters can move freely. Do not force casters to move over carpet, nor move the unit with water in the bucket. (The unit may tip over and spill water.) A dehumidifier operating in a basement will have little or no effect in drying an adjacent enclosed storage area, such as a closet, unless there is adequate circulation of air in and out of the area. -
Page 15: Removing The Collected Water
REMOVING THE COLLECTED WATER There are two ways to remove collected water. Type 1: Type 2: Bucket drainage water hose drainage (continuous) Type 1: Use the bucket • When the bucket is full, the unit will automati-cally stop running, and the Full indicator light will flash. •... - Page 16 Type 2: water hose drainage (continuous) Water can be automatically emptied into a floor drainby attaching the unit with a water hose(Φ16.5*13.5 mm)(not included). • Remove the plastic konck-out panel from the upper side of the bucket. Remove the konck-out panel Remove all burrs from the cut section of the panel.
-
Page 17: Operation Instructions
OPERATION INSTRUCTIONS Control Panel NOTE: The following control panels are for explanation purpose only. The control panel of the unit you purchased may be slightly different according to the models. Your machine may not contain some indicators or buttons. The actual shape shall prevail. Indicator Function Indicator... - Page 18 Description • Press to initiate the Auto start or Auto stop feature, in conjuction with the + and - buttons. When the unit is on, press the Timer button to activate the Auto buttons. stop feature. When the unit is off, press this button to activate the Auto start feature.
- Page 19 Description • Shows the set % humidity level from 35% to 85% or auto start/stop time (0~24) while setting, then shows the actual(±5% accuracy) room % humidity level in a range of 30% RH(Relative Humidity) to 90%RH (Relative Humidity). Error Codes: EH60-Humidity sensor error--Unplug the unit and plug it back in.
- Page 20 Other features Dryer mode(On some models) HEPA filter The unit can make the MAX dehumidification fun- • Install the HEPA(High Efficiency Particulate Air) ction when it is under Dryer mode. The fan speed to reduce the dust and allergen content in the can’t be adjusted.
-
Page 21: Cleaning And Maintenance
CLEANING AND MAINTENANCE wall outlet before cleaning. Clean the Grille and Case Use water and a mild detergent. Do not use bleach or abrasives. Do not splash water directly onto the main unit. Doing so may cause an electrical shock, cause the insulation to deteriorate, or cause the unit to rust. -
Page 22: Troubleshooting 2
TROUBLESHOOTING Before calling for service, review the chart below first yourself. Problem What to check Make sure the dehumidifiers plug is pushed completely into the outlet. Check the house fuse/circuit breaker box. Unit does not start Dehumidifier has reached its preset level or bucket is full. Water bucket is not in the proper position. -
Page 23: Trademarks, Copyrights And Legal Statement
Midea may constitute trademark infringement or unfair competition in violation of relevant laws. This manual is created by Midea and Midea reserves all copyrights thereof. No entity or individual may use, duplicate, modify, distribute in whole or in part this manual, or bundle or sell with other products without the prior written consent of Midea. -
Page 24: Data Protection Notice
Further information are provided on request. You can contact our Data Protection MideaDPO@midea.com. To exercise your rights such as right to object your personal date being processed for direct marketing purposes, please contact us via MideaDPO@midea.com. To find further information, please follow the QR Code. - Page 25 The design and specifications are subject to change without prior notice for product improvement. Consult with the sales agency or manufacturer for details. Any updates to the manual will be uploaded to the service website, please check for the latest version.
- Page 27 WARRANTY CARD MIDEA DEHUMIDIFIER Thank you for purchasing this midea dehumidifier unit. Should your product prove to be defec�ve in material or workmanship under normal use within the 1 Year of ownership we will replace the defec�ve part(s) we deem to be faulty, or at our discre�on replace the en�re product.
- Page 28 2023 CD001-DQ1 20230427...
Need help?
Do you have a question about the MDDQ1-12DEN7-QA3 and is the answer not in the manual?
Questions and answers