Table of Contents
Advertisement
Quick Links
Advertisement
Table of Contents

Related Manuals for RBR duo3 C.T uv


Summary of Contents for RBR duo3 C.T uv
- Page 1 RBR CT | uv and CTD | uv INSTRUMENTS INSTRUMENT GUIDE rbr-global.com...
-
Page 2: Table Of Contents
Derived parameters ........................12 Salinity...........................13 Specific conductivity......................13 Speed of sound ........................14 Density anomaly ........................14 Sea pressure ..........................15 Depth .............................15 Hardware ...........................16 Opening and closing the instrument ...................16 Instrument interface ......................17 Twist activation........................19 Wi-Fi module .........................20 Maintenance..........................22 Safety precautions ........................22 Support kit..........................23 RBR#0015699revB... - Page 3 Replacing the O-ring ......................24 Replacing the batteries......................25 Replacing the desiccant capsules ..................26 Cables and connectors ......................28 Cleaning the instrument .......................29 Calibrating the instrument ....................30 Repair.............................30 Revision history.........................30 RBR#0015699revB...
-
Page 4: Rbrduo³ C.t | Uv And Rbrconcerto³ C.t.d | Uv
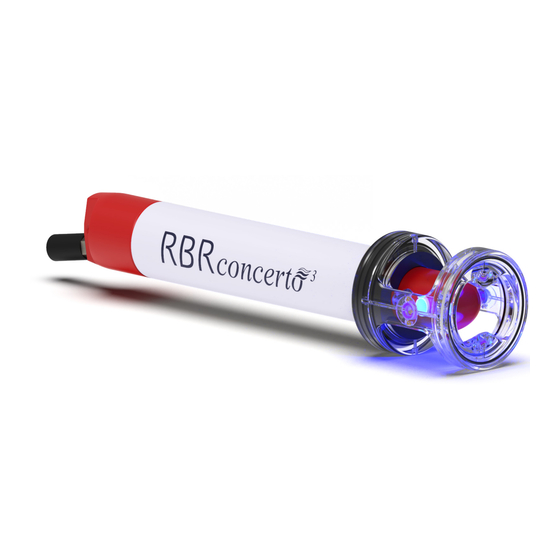
This guide focuses on CT and CTD instruments with active antifouling. For information on other sensors and instruments, refer to the RBR Instrument Guide: Standard Instruments³. RBR offers two standard instruments with active antifouling: • RBRduo C.T | uv - conductivity and temperature •... - Page 5 C.T.D | uv are perfect for moored applications, such as on surface buoys, seafloor observatories, and cabled realtime monitoring systems, and are recommended for operation depths less than 200m. Four UV LEDs illuminating the CT cell All RBR standard instruments support the following features : • High accuracy •...
-
Page 6: Antifouling
. Ds located on the spine Upper UV LEDs The UV LEDs will activate immediately after you enable the deployment. See Safety precautions. RBR#0015699revB... -
Page 7: Physical Specifications
* Internal batteries are used only as a backup during power interruptions. See Ruskin User Guide: Standard Instruments³ for suitable battery chemistries. RBR recommends using an external power supply with the RBRduo C.T | uv and RBRconcerto C.T.D | uv. Instruments with active antifouling tend to consume more power than a regular RBRduo or RBRconcerto and... - Page 8 Ruskin autonomy engine will calculate the End date and indicate when your deployment is likely to • stop Note that RBR instruments with the antifouling system typically rely on the external power supply during deployments, so the only gating condition will be the memory. RBR#0015699revB...
-
Page 9: Sensor Specifications
C.T | uv instruments use conductivity and temperature sensors. The RBRconcerto C.T.D | uv instruments use conductivity, temperature, and pressure sensors. 4.1 Conductivity (C) RBR CT | uv and CTD | uv instruments use integrated inductive conductivity sensors which measure the ability of seawater to conduct electric current. Parameter Value... -
Page 10: Temperature (T)
4.2 Temperature (T) RBR CT and CTD instruments use the thermistor-type temperature sensors. While RBR thermistors are rated for depths up to 10km, the C.T | uv C.T.D | uv instruments operate at depths up to 200m. Parameter Value Range* -5°C to 35°C Initial accuracy ... -
Page 11: Pressure (D)
4.3 Pressure (D) RBR CTD | uv instruments use piezoresistive pressure (depth) sensors. The sensor is protected by a clear plastic guard. During moored deployments with sediment in the environment, avoid orientations with the pressure sensor facing directly upwards. Parameter Value Range 20 / 50 / 100 / 200dbar ... -
Page 12: Derived Parameters
5 Derived parameters Calculate derive parameters using Ruskin software or on the RBR instrument itself, depending on how it is configured. Both routes use the same equations and produce identical results. Calculation on Ruskin All derived parameters will be calculated on Ruskin: when the data storage format is set to Desktop and Realtime is set to None ... -
Page 13: Salinity
L.S. Clesceri et al, which yields specific conductivity normalised to 25°C. where conductivity in mS/cm and temperature in °C are values measured by your RBR instrument, and 0.0191 is the default specific conductivity coefficient. The specific conductivity coefficient is defined as the change in conductivity (in %) per 1°C. Its default value corresponds to an increase in conductivity of 1.91%. -
Page 14: Speed Of Sound
See UNESCO (1981), Tenth report of the joint panel on oceanographic tables and standards for details. The UNESCO equation of state is applicable within these ranges: 2 < practical salinity < 42, −2°C< temperature < 35°C. If salinity values are lower than 2PSU (freshwater), density anomaly values will not be accurate. RBR#0015699revB... -
Page 15: Sea Pressure
C.T.D | uv atmospheric pressure. The units of measurement are dbar (decibars). .where pressure (in dbar) is the value measured directly by your RBR instrument. Enter atmospheric pressure (in dbar) manually in the table under the Parameters tab in Ruskin. See Ruskin User Guide: Standard Instruments . If not entered, a default value of 10.1325dbar will be used. ... -
Page 16: Hardware
C.T.D | uv, open Closing the instrument Plug the mini-display port connector into the instrument as shown. Twist the end-cap counterclockwise two full rotations to unwind the umbilical cable. Twist the end-cap clockwise back on the instrument until aligned with PAUSE. RBR#0015699revB... -
Page 17: Instrument Interface
6.2 Instrument interface The RBR standard instruments provide an internal USB-C port and, depending on the end-cap type, an external MCBH-6-MP connector. Refer to Opening and closing the instrument for details on accessing connection ports. Refer to Physical specifications for the external MCBH-6-MP connector pinout diagram. ... - Page 18 End-cap types RBR standard instruments are compatible with three different end-caps. These end-caps are interchangeable between instruments. Connectorised end-cap Standard end-cap Right-angle connectorised end-cap MCBH connectors Only connectorised battery end-caps have the external MCBH-6-MP connector. Depending on your needs, they may be wired to support the USB, RS-232, or RS-485 communication (selected at the time of order).
-
Page 19: Twist Activation
6.3 Twist activation All RBR Generation standard instruments are equipped with twist activation as a standard feature. See Ruskin User Guide: Standard Instruments . Sampling Twist activation allows you to start or pause the instrument without the need to connect to a computer. -
Page 20: Wi-Fi Module
Your device will switch to this network and connect to the instrument. If set to Auto-download, Ruskin will start downloading the data. There are two ways to activate the Wi-Fi on RBR instruments: twist activation and pressure switch. Twist activation Activate the Wi-Fi by twisting the end-cap in either direction. - Page 21 30m, but it may be shorter in real life due to challenging physical environments. If the Wi-Fi connection is lost in the middle of the download, Ruskin will continue from where it left off next time it detects the instrument again, appending the original RSK file. RBR#0015699revB...
-
Page 22: Maintenance
Ultraviolet radiation is invisible so it may not be obvious when the instrument is active. Exercise caution to avoid any associated health risks for the eyes. The instruments ship with the UV schedule disabled, so it is safe to unpack them. However, going forwards, RBR recommends following protective measures at all times. ... -
Page 23: Support Kit
7.2 Support kit RBR provides one support kit per every three instruments ordered. If you need more units, contact RBR. The RBR support kit contains an assortment of basic accessories and spare parts, as presented below. RBR#0015699revB... -
Page 24: Replacing The O-Ring
Care for the O-ring is the single most important item of maintenance on any submersible RBR instrument. A water leak can damage the circuit board beyond repair and cause complete data loss. Every instrument's seal depends upon its O- ring, not the end-cap tightness. -
Page 25: Replacing The Batteries
Close the instrument. 7.4 Replacing the batteries RBR ships new instruments with fresh, highest capacity batteries included. Replace the batteries before each deployment to maximise the operational time and prevent data loss. Ruskin software estimates the remaining battery life during deployment by tracking power consumption in mAh. When setting up your deployment on Ruskin, check "Fresh"... -
Page 26: Replacing The Desiccant Capsules
Fresh desiccant will keep the instrument compartment dry and prevent malfunction. Water damage may occur if condensation forms inside the instrument. As a preventative measure, RBR recommends servicing the instrument in a cool, dry place (when possible). Replacing desiccant capsules Remove the battery end-cap. - Page 27 All instruments ship with fresh reusable desiccant capsules. They use a cobalt-free colour changing indicator dye. Orange indicates fresh desiccant, while green indicates it is saturated (about 15% water by weight). Once exhausted, the capsules can be replaced with new ones (available from RBR), or refreshed. Fresh (orange) and saturated (green) desiccant capsules Refreshing the desiccant Follow the steps below to refresh the desiccant.
-
Page 28: Cables And Connectors
7.6 Cables and connectors Cable bend radius The smallest bend radius for RBR supplied cables is 15cm. Lubricating the connectors Lubrication improves watertight sealing, prevents corrosion, and reduces the force required to de-mate the connector. Use the silicone compound provided with your instrument. -
Page 29: Cleaning The Instrument
Unscrew the sensor guard using a coin or a large flathead screwdriver. Do not apply excessive force, especially when using the screwdriver. Rinse the area under running water. If this fails to remove the deposits, try soaking in vinegar. If unsuccessful, contact RBR. Cleaning the CT cell ... -
Page 30: Calibrating The Instrument
RBR recommends calibrating your instrument before any critical deployment, periodically once a year, or if you suspect the readings to be out of specifications. Discuss your calibration requirements with RBR. In some cases, the instrument will need to be returned to RBR to have it checked and recalibrated.
Need help?
Do you have a question about the duo3 C.T uv and is the answer not in the manual?
Questions and answers