Table of Contents
Advertisement
Quick Links
Advertisement
Table of Contents

Related Manuals for RBR quartz3 BPR zero


Summary of Contents for RBR quartz3 BPR zero
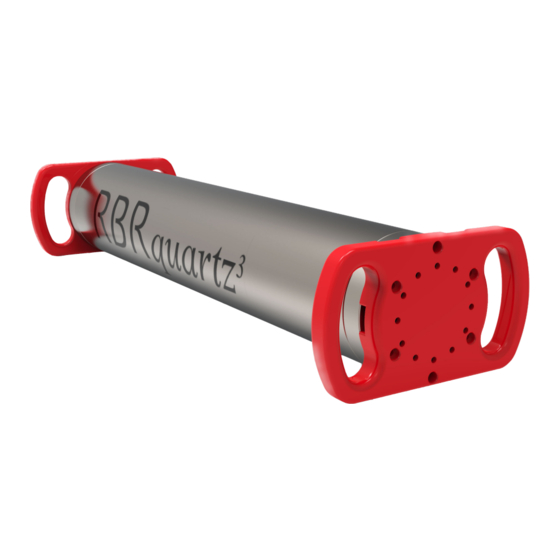
- Page 1 BPR | zero INSTRUMENT GUIDE rbr-global.com...
-
Page 2: Table Of Contents
Underwater battery canisters ..................11 General maintenance ....................12 Support kit.........................12 Replacing the O-rings....................13 Replacing batteries ....................15 Replacing desiccant capsules...................16 Cables and connectors .....................17 Cleaning the instrument ...................18 Calibrating the instrument ..................18 Oil purge container maintenance ................19 Repairs ...........................21 Revision history......................22 RBR#0008819revB... -
Page 3: Rbrquartz³ Bpr | Zero
(power and memory) canisters. Alternatively, use an extension cable to connect the instrument to an observatory for external power and realtime data access. The RBRquartz BPR | zero may include an optional built-in tilt sensor (accelerometer). For a detailed description of bottom pressure recording using the RBRquartz BPR | zero, see Ruskin User Guide: Standard Loggers RBRquartz BPR | zero RBR#0008819revB... -
Page 4: Specifications
±0.002°C Resolution 0.00005°C Typical stability ±0.002°C/year Time constant ~3min *A wider temperature range is available upon request. Contact RBR for more information. Pressure sensor Specification Description Range 1000 / 2000 / 4000 / 7000dbar Initial accuracy ±0.01% full scale ... - Page 5 Deployment times are estimated for lithium thionyl chloride batteries based on both memory and internal battery capacity. Internal LTC batteries only RBRfermata with LTC batteries (no valve operation) (with the valve activated every 20 days) Speed Time (days) Number of samples Time (days) Number of samples 5.6M 2.8M RBR#0008819revB...
- Page 6 Data output from the instrument (Tx+) Data input into the instrument (Rx+) Data output from RD(B)+ Data output from the the instrument instrument (Tx-) (Tx) Ground Data input into TD(B)+ instrument (Rx) Data input into the instrument (Rx-) TD(A)- Ground RBR#0008819revB ...
-
Page 7: Hardware
Alternatively, you can lay it on the side. Unscrew and remove the two cap screws using a 5mm hex key. Rest the battery end-cap on the side of the instrument, as shown. Open instrument, with the end-cap resting on the side Locations of cap screws RBR#0008819revB... -
Page 8: Rbrquartz³ Bpr | Zero Interface
3.2 RBRquartz³ BPR | zero interface The RBRquartz³ BPR | zero instrument provides an internal USB-C port and several external communication options. Select from RS-232, RS-485, and Ethernet at the time of order, and RBR will wire the battery end-cap to support your preferred external connection. ... - Page 9 The RBRquartz³ BPR | zero battery end-caps may support a MINK-10-FCR connector, two MINK-10-FCR connectors, or two MCBH-6-MP connectors, depending on the type. Dual MINK battery end-cap MINK battery end-cap Dual MCBH battery end-cap Refer to Specifications for the external connector pinout diagrams. RBR#0008819revB...
-
Page 10: Orientation And Datum Location
3.3 Orientation and datum location The datum of the RBRquartz BPR | zero is located at the centre of the sensor end-cap. RBR performs an offset adjustment with the pressure sensor facing downwards, as shown in the first image below. It is recommended to deploy the instrument vertically with the battery end-cap up and the sensor end-cap down. -
Page 11: Underwater Battery Canisters
The RBRfermata is a standard battery canister operating with lithium thionyl chloride and alkaline batteries. It prolongs deployment by providing 1kWh of power to any underwater instruments. For standard RBR instruments, this is approximately a 40x improvement to our extended battery carriage capacity. ... -
Page 12: General Maintenance
4 General maintenance 4.1 Support kit RBR provides one support kit per every three instruments ordered. If you need more units, contact RBRquartz BPR | zero support kit The RBR support kit contains an assortment of basic accessories and spare parts, as presented below. -
Page 13: Replacing The O-Rings
4.2 Replacing the O-rings Care for the O-rings is the single most important item of maintenance on any submersible RBR instrument. A water leak can damage the circuit board beyond repair and cause complete data loss. Every instrument's seal depends upon its O- rings, not the end-cap tightness. - Page 14 Install the backup O-ring, ensuring that the concave side is facing toward the main O-ring. Once in place, inspect the O-rings once more for scratches and debris, and wipe away any silicone compound deposited on the end-cap. Once the inspection is complete, close the instrument. RBR#0008819revB...
-
Page 15: Replacing Batteries
4.3 Replacing batteries RBR ships new instruments with lithium thionyl chloride batteries included. Replace batteries before each deployment to maximise the operational time and prevent data loss. Ruskin software allows users to estimate the remaining battery life during deployment (assuming fresh batteries) by tracking power consumption in mAh. -
Page 16: Replacing Desiccant Capsules
Fresh desiccant will keep the instrument compartment dry and prevent malfunction. Water damage may occur if condensation forms inside the instrument. As a preventative measure, RBR recommends servicing the instrument in a cool, dry place (when possible). Replacing the desiccant capsules Remove the battery end-cap. See Opening the... -
Page 17: Cables And Connectors
4.5 Cables and connectors Cable bend radius The smallest bend radius for RBR supplied cables is 15cm. Lubricating the connectors Lubrication improves watertight sealing, prevents corrosion, and reduces the force required to de-mate the connector. Use the silicone compound provided with your instrument. -
Page 18: Cleaning The Instrument
RBR recommends calibrating your instrument before any critical deployment, periodically once a year, or if you suspect the readings to be out of specifications. Discuss your calibration requirements with RBR. In some cases, the instrument will need to be returned to RBR to have it checked and re-calibrated. -
Page 19: Oil Purge Container Maintenance
Cleaning the oil purger container Step Description Image Unscrew the battery end-cap and remove the umbilical cord (see Opening and closing the instrument) Remove the container Turn the red handle counterclockwise at least one full rotation Pull the handle out, with the container RBR#0008819revB... - Page 20 Reinstall the container Hold the pad so that it does not unravel Insert the container back into the instrument Turn the red handle clockwise one full rotation Return the battery end-cap back onto the instrument (see Opening and closing the instrument) RBR#0008819revB...
-
Page 21: Repairs
Please have the model and the serial number of the unit ready. Our support team will work to resolve the issue remotely. In some cases, you may have to return your instrument to RBR for further servicing. ... -
Page 22: Revision History
Updated Specifications, Hardware, General maintenance, Pressure sensor maintenance, and Repair sections. Added information on the external pressure adaptor kit, removing the oil bladder, and servicing the valve. Removed the Warranty section (available on the RBR website) and Appendices. Minor updates throughout the document. RBR#0008819revB...
Need help?
Do you have a question about the quartz3 BPR zero and is the answer not in the manual?
Questions and answers