
Related Manuals for Dover HEIL DURAPACK 5000


Summary of Contents for Dover HEIL DURAPACK 5000
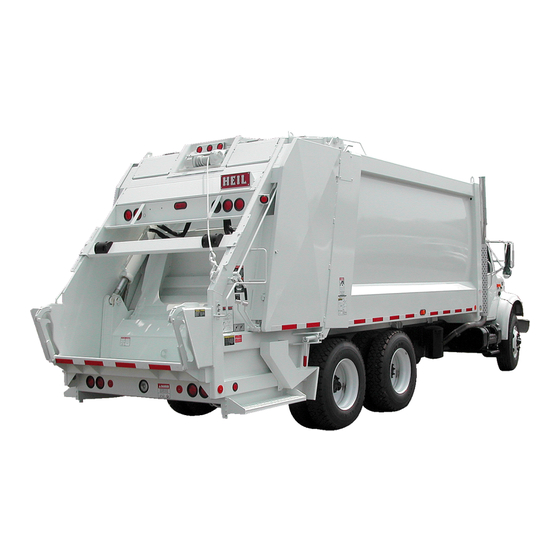
- Page 1 ® DURAPACK 5000 HIGH-COMPACTION REAR LOADER SERVICE MANUAL ISSUED JULY 2020 TP1DP5-SM-0720 © 2020 Heil Environmental...
- Page 2 WARNING IF INCORRECTLY USED, THIS EQUIPMENT CAN CAUSE SEVERE INJURY. THOSE WHO USE AND MAINTAIN THE EQUIPMENT SHOULD BE TRAINED IN ITS PROPER USE, WARNED OF ITS DANGERS, AND SHOULD READ AND FULLY UNDERSTAND THIS ENTIRE MANUAL BEFORE ATTEMPTING TO SET UP, OPERATE, ADJUST OR SERVICE THE EQUIPMENT. KEEP THIS MANUAL FOR FUTURE REFERENCE IMPORTANT SAFETY NOTICE Proper service and repair are important to the safe, reliable operation of Heil Co.’s products.
-
Page 3: Table Of Contents
® DURAPACK 5000 TABLE OF CONTENTS General Information Introduction ......................................4 Service/Parts Assistance ......................................5 Recommended Spare Parts ......................................6 Electronic Parts Catalog (EPC) ......................................7 Hazard Symbols and Definitions ......................................10 Lock-Out/Tag-Out Procedures ......................................14 Storing Refuse in Container ......................................15 Maintenance/Lubrication Information ......................................15 Winch Gear Oil ......................................15 Grease Lubrication Recommendation ......................................15... - Page 4 ® DURAPACK 5000 TABLE OF CONTENTS Change Hydraulic Oil Filter ......................................59 Drain and Clean the Hydraulic Oil Tank ......................................60 Purge the Hydraulic System ......................................61 Ejector Shoe Adjustment ......................................62 Tailgate Control Valve Pressure Settings ......................................62 Pressure Adjustment Settings ......................................63 Adjust Lower and Upper Hydraulic Detent Panels ......................................67 Ejector Unload Valve ......................................70...
- Page 5 ® DURAPACK 5000 ® DURAPACK 5000 HIGH-COMPACTION REAR LOADER SERVICE MANUAL ISSUED JULY 2020 TP1DP5-SM-0720 Copyright 2020, Heil Environmental Issued July 2020 Printed in the U.S.A.
- Page 6 ® DURAPACK 5000 NOTES Issued July 2020 Copyright 2020, Heil Environmental General Information Printed in the U.S.A.
-
Page 7: General Information
® DURAPACK 5000 General Information SECTION 1 GENERAL INFORMATION Copyright 2020, Heil Environmental Issued July 2020 Printed in the U.S.A. General Information... -
Page 8: Introduction
® DURAPACK 5000 General Information INTRODUCTION The following sections are a guide for maintenance and service of the Heil unit. The sections cover preventive maintenance, adjustment, and troubleshooting hints. Before performing maintenance, check the work area carefully to find all the hazards present and make sure all necessary safeguards or safety devices are used to protect all persons and equipment involved. -
Page 9: Service/Parts Assistance
® DURAPACK 5000 General Information SERVICE/PARTS ASSISTANCE Assistance in troubleshooting repair and service is available by contacting the authorized Heil Dealer in your area. Parts are available at your Heil Dealer or through Heil. Heil personnel are trained to give prompt, professional assistance. ALWAYS give the unit serial number in all correspondence relating to the equipment. -
Page 10: Recommended Spare Parts
® DURAPACK 5000 General Information RECOMMENDED SPARE PARTS PART NO. DESCRIPTION BODY AND TAILGATE 022-3509 SEAL, TAILGATE, 240" 019-1242 SPRING, 1" OD X 6", MOUNTING HYDRAULICS 001-7007 CYLINDER, INSIDE 001-7006 CYLINDER, OUTSIDE 001-7120 CYLINDER, EJECTOR, 18 YD. BODY 001-7117 CYLINDER, EJECTOR, 20 YD. BODY 001-7121 CYLINDER, EJECTOR, 25 YD. -
Page 11: Electronic Parts Catalog (Epc)
® DURAPACK 5000 General Information ELECTRONIC PARTS CATALOG (EPC) The Parts Central EPC includes electronic versions of the Heil Parts Manuals, specific to a Customer’s truck configuration and options. After registering and logging in, the user can search by Keyword(s) or Part Number and/or Heil Body Serial Number to quickly identify a spare part or browse a custom parts catalog. - Page 12 ® DURAPACK 5000 General Information Search by Part Keyword(s) or Part Number in Body Serial Number After login, you will land on the User Dashboard. At the top right of the Dashboard, there will be two search fields, as shown in the image below.
- Page 13 ® DURAPACK 5000 General Information Search by Body Serial Number If you want to view an entire parts catalog for a particular Heil unit, you can search by only the Heil Body Serial Number, leaving the Keyword(s) / Part Number field blank. The search result will then be the Body Serial Number-specific parts catalog with familiar catalog sections that you can browse.
-
Page 14: Hazard Symbols And Definitions
® DURAPACK 5000 General Information PRECAUTIONARY STATEMENTS Listed below are the definitions for the various levels of hazards. It is important that the operators of this equipment and people who service units read and understand all warnings as they relate to this equipment operation. DANGER –... - Page 15 ® DURAPACK 5000 General Information DANGER The packer and crusher panels are dangerous. They can cause death or serious injury if a person is inside the hopper. Make sure no one is inside the hopper before you begin a packer or crusher function. Put the unit in the Lock-Out/Tag-Out mode if it is necessary to enter the hopper area.
- Page 16 ® DURAPACK 5000 General Information WARNING Clear all people of the area before you lift a refuse container. Make sure the refuse is secure in the refuse container before you lift the container. Loose refuse can fall and cause death or serious injury. WARNING The hydraulic fluid can be under pressure and can spray while you open the connection.
- Page 17 ® DURAPACK 5000 General Information NOTICE Grabbing a refuse container with too much pressure can damage the container. The container can become unusable. Use enough pressure with the grabber to raise the container with the lift arm and not damage the container. NOTICE Always use your employer’s Lock-Out/Tag-Out procedures.
-
Page 18: Lock-Out/Tag-Out Procedures
® DURAPACK 5000 General Information LOCK-OUT/TAG-OUT PROCEDURES NOTICE Always use your employer’s Lock-Out/Tag-Out procedures. If your employer does not have Lock-Out/Tag-Out procedures, use the procedures that follow. Contact your supervisor or Heil Technical Service if you have any questions about Lock- Out/Tag-Out procedures. -
Page 19: Storing Refuse In Container
® DURAPACK 5000 General Information STORING REFUSE IN THE BODY Heil does not recommend storing refuse in the body overnight. The different types of debris and corrosive elements usually collected can cause severe corrosion inside the body decreasing the life of your body. This corrosion can affect unloading and decrease the structural life of the body. -
Page 20: Standard Torque Data For Nuts And Bolts
® DURAPACK 5000 General Information STANDARD TORQUE DATA FOR NUTS AND BOLTS The following recommended torque data is for use as a general guideline. Recommended torque, in foot pounds, for all Standard Application nuts and bolts provided in the following table. NOTICE Torque specifications on a drawing override torque values in the Standard Torque Data for Nuts and Bolts Table. - Page 21 ® DURAPACK 5000 General Information STANDARD TORQUE DATA FOR NUTS AND BOLTS TABLE Heil Zinc Plated Heil Heil Thread Heil Plain Dry Fastener Lubricated Deformed Turns per Condition Torque Fastener Lock Nut Bolt Size Nut Type Inch Torque Value Value Torque Value Torque Value (STD/Lock)
- Page 22 ® DURAPACK 5000 General Information STANDARD TORQUE DATA FOR NUTS AND BOLTS TABLE Heil Zinc Plated Heil Heil Thread Heil Plain Dry Fastener Lubricated Deformed Turns per Condition Torque Fastener Lock Nut Bolt Size Nut Type Inch Torque Value Value Torque Value Torque Value (STD/Lock)
- Page 23 ® DURAPACK 5000 General Information STANDARD TORQUE DATA FOR NUTS AND BOLTS TABLE Heil Zinc Plated Heil Heil Thread Heil Plain Dry Fastener Lubricated Deformed Turns per Condition Torque Fastener Lock Nut Bolt Size Nut Type Inch Torque Value Value Torque Value Torque Value (STD/Lock)
-
Page 24: Bolt Type Identification Chart
® DURAPACK 5000 General Information BOLT TYPE IDENTIFICATION CHART S.A.E. Bolt Head Description Type Grade Marking** No radial lines. 1 or 2 Low or medium carbon steel not heat treated. NOT USED, replace with same grade bolt. Three radial lines. Quenched and tempered medium carbon steel. -
Page 25: Torque For Hydraulic Tubes And Fittings
® DURAPACK 5000 General Information TORQUE FOR HYDRAULIC TUBES AND FITTINGS FLAT FACE ORFS FITTINGS SET WRENCH TO NOMINAL TUBE OD TORQUE WRENCH SETTING ALTERNATE TORQUE UNITS 1/4" 21 ft-lbs. 250 in-lbs. 3/8" 33.5 ft-lbs. 400 in-lbs. 1/2" 50 ft-lbs. 600 in-lbs. - Page 26 ® DURAPACK 5000 General Information TORQUE FOR HYDRAULIC TUBES AND FITTINGS (CONTINUED) 37 DEGREE FLARE (JIC) FITTINGS SET WRENCH TO NOMINAL TUBE OD TORQUE WRENCH SETTING ALTERNATE TORQUE UNITS 1/8" 6.5 ft-lbs. 80 in-lbs. 3/16" 9 ft-lbs. 110 in-lbs. 1/4" 12.5 ft-lbs.
- Page 27 ® DURAPACK 5000 General Information TORQUE FOR HYDRAULIC TUBES AND FITTINGS (CONTINUED) FROM SAE J2593 TABLE 7 (STEEL) SET WRENCH TO BOSS (ORB) NOMINAL TUBE OD TORQUE WRENCH SETTING ALTERNATE TORQUE UNITS 3/16" 9 ft-lbs. 110 in-lbs. 1/4" 16.5 ft-lbs. 200 in-lbs.
- Page 28 ® DURAPACK 5000 General Information TORQUE FOR HYDRAULIC TUBES AND FITTINGS (CONTINUED) Figure 4. Torque for Hydraulic Tubes and Fittings SPLIT- FLANGE (HALF CLAMP) CONNECTORS (CODE 61) SET WRENCH TO NOMINAL TUBE BOLT SIZE BOLT TORQUE [FT- BOLT TORQUE [IN-LBS] ALUMINUM FT- LBS] LBS [IN-LBS]...
- Page 29 ® DURAPACK 5000 General Information TORQUE FOR HYDRAULIC TUBES AND FITTINGS (CONTINUED) SPLIT- FLANGE (HALF CLAMP) CONNECTORS (CODE 62) SET WRENCH TO NOMINAL BOLT SIZE BOLT TORQUE [FT- BOLT TORQUE [IN-LBS] ALUMINUM FT-LBS [IN- TUBE OD LBS] LBS] 1/2" 5/16-18 x 1.25 17 ft-lbs.
-
Page 30: Cold Weather Warmup Procedure
® DURAPACK 5000 General Information COLD WEATHER WARMUP PROCEDURE When ambient air temperature is cold (below 0 degrees F), it is necessary to warm up the unit’s hydraulic oil before you start your daily route operation, check the oil level, or adjust hydraulic pressure settings. The hydraulic oil is sufficiently warmed when the temperature is between 120°... -
Page 31: Proximity Switch Troubleshooting
® DURAPACK 5000 General Information PROXIMITY SWITCH TROUBLESHOOTING When one or more of a unit’s functions do not operate properly and there are proximity switches in the circuits of the unit for these functions, refer to the following table as a guide to find the problem(s). NOTICE Heil proximity switches have a Light Emitting Diode (LED) on the switch to indicate that the switch is sensing metal. - Page 32 ® DURAPACK 5000 General Information PROXIMITY SWITCH TROUBLESHOOTING (CONTINUED) Issued July 2020 Copyright 2020, Heil Environmental General Information Printed in the U.S.A.
- Page 33 ® DURAPACK 5000 General Information PROXIMITY SWITCH TROUBLESHOOTING (CONTINUED) Copyright 2020, Heil Environmental Issued July 2020 Printed in the U.S.A. General Information...
- Page 34 ® DURAPACK 5000 General Information PROXIMITY SWITCH TROUBLESHOOTING (CONTINUED) Issued July 2020 Copyright 2020, Heil Environmental General Information Printed in the U.S.A.
-
Page 35: Decals On The Unit
® DURAPACK 5000 General Information DECALS ON THE UNIT Make sure you can read all hazard and instruction decals. Clean decals if you cannot read the words. See for directions on cleaning decals. Replace any decal that is damaged, missing, or is not readable. When you replace a part that has a decal, make sure a new decal is installed on the new part. - Page 36 ® DURAPACK 5000 General Information DECAL CARE (CONTINUED) Figure 5. Recommended Technique Figure 6. Incorrect Technique Issued July 2020 Copyright 2020, Heil Environmental General Information Printed in the U.S.A.
-
Page 37: Hydraulic Symbols
® DURAPACK 5000 General Information HYDRAULIC SYMBOLS Copyright 2020, Heil Environmental Issued July 2020 Printed in the U.S.A. General Information... - Page 38 ® DURAPACK 5000 General Information HYDRAULIC SYMBOLS (CONTINUED) Issued July 2020 Copyright 2020, Heil Environmental General Information Printed in the U.S.A.
-
Page 39: Electrical Symbols
® DURAPACK 5000 General Information ELECTRICAL SYMBOLS Copyright 2020, Heil Environmental Issued July 2020 Printed in the U.S.A. General Information... - Page 40 ® DURAPACK 5000 NOTES Issued July 2020 Copyright 2020, Heil Environmental Pumps Printed in the U.S.A.
- Page 41 ® DURAPACK 5000 Pumps SECTION 2 PUMPS Copyright 2020, Heil Environmental Issued July 2020 Printed in the U.S.A. Pumps...
-
Page 42: Hydraulic Pump Control
® DURAPACK 5000 Pumps HYDRAULIC DRIVE CONTROL There are multiple hydraulic drive configurations available on the 2020 Rear End Loader. Each achieves the same goal utilizing different mechanisms and modes of operation. 1. Clutch Shift PTO Listed in the display as Cab Controller Output, OUT02 p16 – PTO Sol. a. - Page 43 ® DURAPACK 5000 Pumps HYDRAULIC DRIVE CONTROL (CONTINUED) b. Constant Drive PTO or Crankshaft Driven Option Config Clutch Shift PTO, [OFF] Operation - ON with System Enable, governed by the following EOS parameters. Maximum Engine Speed for PTO Engagement: 1000 RPM 3.
-
Page 44: Tandem O.i.g.a.i. Pump
® DURAPACK 5000 Pumps TANDEM O.I.G.A.I. PUMP Front Loaders, Rear Loaders, Recycle 2000, and Liberty Figure 7. Tandem O.I.G.A.I. Pump This is the Hydraulic Controls Operate-In-Gear-At-Idle (OIGAI) System. The pump section (pump 1) closest to the input shaft operates the lift and shuts off first. The pump section (pump 2) farthest from the input shaft operates the packer and stays on at higher RPMs. -
Page 45: Tandem Vane Pump O.i.g.a.i. Hydraulic System Troubleshooting
® DURAPACK 5000 Pumps TANDEM VANE PUMP O.I.G.A.I. HYDRAULIC SYSTEM TROUBLESHOOTING The Operate-in-Gear-at-Idle (OIGAI) system is designed to perform the loading operations at standard idle speed. It is comprised of two major components, the monoblock tandem vane pump and attached unloader valve assembly. On the OIGAI Rear End Loader (REL) systems the P1 closest to the pump input shaft while the P2 farthest from the input shaft supplies flow to the complete hydraulic systems. - Page 46 ® DURAPACK 5000 Pumps TANDEM VANE PUMP O.I.G.A.I. HYDRAULIC SYSTEM TROUBLESHOOTING (CONTINUED) NOTICE If flow is present check the main relief valves for proper adjustment and operation. Figure 9. Issued July 2020 Copyright 2020, Heil Environmental Pumps Printed in the U.S.A.
-
Page 47: Body And Tailgate
® DURAPACK 5000 Body and Tailgate SECTION 3 BODY AND TAILGATE Copyright 2020, Heil Environmental Issued July 2020 Printed in the U.S.A. Body and Tailgate... -
Page 48: Nomenclature
® DURAPACK 5000 Body and Tailgate NOMENCLATURE Figure 10. Body and Tailgate Nomenclature Issued July 2020 Copyright 2020, Heil Environmental Body and Tailgate Printed in the U.S.A. -
Page 49: Specifications
® DURAPACK 5000 Body and Tailgate SPECIFICATIONS Hydraulic Cylinders: Blade (Lower Panel) ....................5-1/2” Bore x 24” Stroke Upper Panel ........................5” Bore x 36” Stroke Tailgate Raise ......................4” Bore x 24-1/2” Stroke Container Arm ......................3” Bore x 18-7/16” Stroke Roll Bar ........................ -
Page 50: Side Access Door
® DURAPACK 5000 Body and Tailgate SIDE DOOR ACCESS A hinged side access door is installed on both sides of the body and provides access to the body area for clean out purposes. Be sure doors are closed and latched properly at all times. See Figure Side Access Door below. Figure 11. -
Page 51: Tailgate Support Props
® DURAPACK 5000 Body and Tailgate TAILGATE SUPPORT PROPS Figure 12. Copyright 2020, Heil Environmental Issued July 2020 Printed in the U.S.A. Body and Tailgate... -
Page 52: Underbody And Ejector Unload Valve Locations
® DURAPACK 5000 Body and Tailgate UNDERBODY AND EJECTOR UNLOAD VALVE LOCATIONS The underbody and ejector unload valves are located on the street-side (left side) front corner of the body. These valves control the ejector panel and tailgate raise/lower functions. Figure 13. -
Page 53: Hydraulic Oil Tank With In Tank Oil Filter Location
® DURAPACK 5000 Body and Tailgate HYDRAULIC OIL TANK WITH IN TANK OIL FILTER LOCATION In most cases, the hydraulic oil tank is located on the street-side (left side) of the unit and mounted to the chassis. Optionally, the tank is mounted above the front head of the body. See figure below. Figure 14. -
Page 54: Blade Back Off Relief Valve
® DURAPACK 5000 Body and Tailgate BLADE BACK-OFF RELIEF VALVE A relief is provided in the tailgate valve to allow the lower panel to back off slightly (2 to 5 inches of cylinder stroke) during the final stages of packing the load. If the cylinders back-off excessively (5 to 7 inches of cylinder stroke) the back-off relief needs to be replaced. -
Page 55: Maintenance And Adjustment
® DURAPACK 5000 Maintenance and Adjustment SECTION 4 MAINTENANCE AND ADJUSTMENT Copyright 2020, Heil Environmental Issued July 2020 Printed in the U.S.A. Maintenance and Adjustment... -
Page 56: Body Daily Checklist
® DURAPACK 5000 Maintenance and Adjustment BODY DAILY CHECKLIST Make sure you perform a daily check of the unit. Refer to the Operator’s Manual for the Daily Checklist. Many checks in the Daily Checklist are maintenance related, such as checking tire pressures and hoses for wear and damage. DAILY CHECKLIST MAINTENANCE ITEMS Item Required Action... -
Page 57: Body Preventive Maintenance Chart
® DURAPACK 5000 Maintenance and Adjustment BODY PREVENTIVE MAINTENANCE CHART Preventive maintenance must be performed to ensure the safe and reliable operation of your unit. Use the chart below as a guideline for when essential items should checked and serviced. Severe use or adverse conditions may require more frequent maintenance. - Page 58 ® DURAPACK 5000 Maintenance and Adjustment BODY PREVENTIVE MAINTENANCE CHART *HOURS OF OPERATION COMPONENT/SYSTEM 1000 2000 CHECK/SERVICE spline PTOs such as the Chelsea 890/897 series. Lubricate as shown on Body Lube Grease Fittings Chart. Inspect body undercoating and repair Body Undercoating as necessary.
-
Page 59: Packer/Ejector Cylinders Preventive Maintenance
® DURAPACK 5000 Maintenance and Adjustment PACKER/EJECTOR CYLINDERS PREVENTIVE MAINTENANCE It is critical to follow the guidelines of the Body Preventive Maintenance Chart and Body Lubrication Guide found in this section of this Service Manual and the Body Lubrication Guide decal on the unit. Failure to follow stated routine preventive maintenance can lead to premature cylinder failure that is not covered by your warranty. -
Page 60: Lubrication Guide
® DURAPACK 5000 Maintenance and Adjustment LUBRICATION GUIDE Clean fittings before applying grease and always pump enough grease into joint to remove the old grease. Wipe off excess grease. Lubricate moveable mechanical parts without fittings every 60 days with non-detergent engine oil. See the figure below. - Page 61 ® DURAPACK 5000 Maintenance and Adjustment LUBRICATION GUIDE Clean fittings before applying grease and always pump enough grease into joint to remove the old grease. Wipe off excess grease. Lubricate moveable mechanical parts without fittings every 60 days with non-detergent engine oil. See the chart below.
-
Page 62: Preparing The Unit To Check The Oil Level
® DURAPACK 5000 Maintenance and Adjustment PREPARING THE UNIT TO CHECK THE OIL LEVEL Before checking the oil level or adding oil, make sure the unit is in the following position with all cylinders collapsed: Truck – on level ground Tailgate and Body –... -
Page 63: Check Oil Level
® DURAPACK 5000 Maintenance and Adjustment CHECK OIL LEVEL Check the hydraulic oil level (after warning up the oil) daily or every eight (8) hours, whichever comes first. Fill as necessary. Important: Contamination is a hydraulic system’s worst enemy. Do not let dirt enter the system. Use a clean rag and remove dirt or other contamination around any system component before you disconnect or remove it. -
Page 64: Drain And Clean The Hydraulic Oil Tank
® DURAPACK 5000 Maintenance and Adjustment DRAIN AND CLEAN THE HYDRAULIC OIL TANK Change the hydraulic oil when the oil sample shows to change it. Remember that almost all hydraulic system malfunctions can be traced to dirt in the fluid. When working with the hydraulic system, the hands, tools, working area and parts must be as clean as possible. -
Page 65: Purge The Hydraulic System
® DURAPACK 5000 Maintenance and Adjustment DRAIN AND CLEAN THE HYDRAULIC OIL TANK (CONTINUED) NOTICE Before filling the tank be sure the funnel is clean and 200 mesh (or finer) screen is used to strain the hydraulic oil. 13.Fill tank with recommended oil, checking the sight gauge as you fill. Refer to Hydraulic Oil Specifications 14.Check the entire system to make sure all connections are tight and no leaks are found. -
Page 66: Ejector Shoe Adjustment
® DURAPACK 5000 Maintenance and Adjustment EJECTOR SHOE ADJUSTMENT If the ejector panel has excessive side-to-side movement and is binding or stalling in the body, it may be caused by the ejector shoes not being properly adjusted. Washers are installed behind the wear shoes. The clearance between the shoe and track should never exceed 1/4”. The tighter the clearance, the less chance the ejector panel will turn and bind in the body. -
Page 67: Pressure Adjustment Settings
® DURAPACK 5000 Maintenance and Adjustment PRESSURE ADJUSTMENT PROCEDURES DANGER Stand clear when packing mechanism is in motion. Standing close to the unit when it is in motion or operation may result in injury or death. DANGER Do not stand in the hopper or on the hopper sill while adjustments are being made on the packing mechanism with the unit running. - Page 68 ® DURAPACK 5000 Maintenance and Adjustment PRESSURE ADJUSTMENT PROCEDURES (CONTINUED) 7. DECREASE the main relief pressure on the underbody valve by: a. Remove dome nut. b. Loosen lock nut. c. Turn adjusting screw out (counter-clockwise) of body valve four times to decrease the pressure setting. 8.
- Page 69 ® DURAPACK 5000 Maintenance and Adjustment PRESSURE ADJUSTMENT PROCEDURES (CONTINUED) Figure 19Adjust Valve Relief Figure 20 Ejector Control E. Adjust Relief Valve B 1. Lock the tailgate and read the main system pressure gauge. Adjust the main system pressure down until the gauge reads 2100 PSI.
- Page 70 ® DURAPACK 5000 Maintenance and Adjustment PRESSURE ADJUSTMENT PROCEDURES (CONTINUED) F. Adjust Relief Valve C 1. Lock the tailgate and read the main system pressure gauge. Adjust the main system pressure until the gauge reads 2300 PSI. 2. Using a screwdriver or wrench, turn slotted adjusting screw of relief C in (clockwise) 2-1/2 turns. 3.
-
Page 71: Adjust Lower And Upper Hydraulic Detent Panels
® DURAPACK 5000 Maintenance and Adjustment ADJUST LOWER HYDRAULIC DETENT PANEL The packing mechanism is controlled by two levers at both corners of the tailgate. These levers control the lower panel (blade) and upper panel. Refer to the operator’s manual for correct operation of the controls. The blade and upper panel functions can be operated independently by engaging one lever at a time. - Page 72 ® DURAPACK 5000 Maintenance and Adjustment ADJUST LOWER HYDRAULIC DETENT PANEL (CONTINUED) 12.If the setting is wrong, remove the rubber plug from the end of the panel spool to expose the detent release adjusting screw. See figure below. IMPORTANT: Be sure the area around the packing mechanism is clear of all people! Figure 21.
- Page 73 ® DURAPACK 5000 Maintenance and Adjustment ADJUST UPPER HYDRAULIC DETENT PANEL (CONTINUED) 6. Remove any dirt and grease around the underbody valve main relief. 7. To lower the main relief pressure: (a) Remove the dome nut. (b) Loosen the lock nut. (c) Turn the adjusting screw out counterclockwise four times to decrease the pressure setting.
-
Page 74: Ejector Unload Valve
® DURAPACK 5000 Maintenance and Adjustment EJECTOR UNLOAD VALVE The ejector unload valve is located beside the underbody valve. There are two different relief adjustments to make on this valve. See the figure below. NOTE: All adjustments must be made with the throttle advance engaged! Figure 22. - Page 75 ® DURAPACK 5000 Maintenance and Adjustment EJECTOR UNLOAD VALVE (CONTINUED) 6. Start the engine and engage the PTO or front mount pump. 7. Push the upper panel control lever to move the upper panel to a full “up” position. Manually shift the lever back to neutral.
- Page 76 ® DURAPACK 5000 Maintenance and Adjustment EJECTOR UNLOAD VALVE (CONTINUED) Adjust Relief Valve C NOTE: Make all adjustments with throttle advance engaged. 1. Lock the tailgate and read the main system pressure gauge. Adjust the main system pressure down until the gauge reads 2300 PSI.
-
Page 77: Underbody Valve - Main Relief And Pump Pressure
® DURAPACK 5000 Maintenance and Adjustment UNDERBODY VALVE - MAIN RELIEF AND PUMP PRESSURE Be sure to remove all dirt and grease around the main relief. NOTE: All adjustments must be made with throttle advance engaged. NOTE: Hydraulic oil must be at or near operating temperature. If not, warm the oil using the directions in Check the System Pressure Check the system pressure before making adjustments to the main relief and pump pressure. -
Page 78: Kick Out Adjustments
® DURAPACK 5000 Maintenance and Adjustment KICK-OUT ADJUSTMENTS A. Upper Kick-Out Adjustment 1. Retract outside cylinders to the full up position. 2. Check the distance from the cylinder packing nut to the center of the cylinder mounting pin. The distance should be 4 ¾... - Page 79 ® DURAPACK 5000 Maintenance and Adjustment KICK-OUT ADJUSTMENTS (CONTINUED) B. Lower Kick-Out Adjustment 1. Extend outside cylinders to the full out position. 2. Check the distance from the cylinder packing nut to the center of the cylinder mounting pin. The distance should be 39 ¼”.
-
Page 80: Optional Container Mechanism Adjustment Procedure
® DURAPACK 5000 Maintenance and Adjustment OPTIONAL CONTAINER MECHANISM ADJUSTMENT PROCEDURE Before adjusting the container mechanism, install accurate 0-3000 PSI glycerin filled pressure gauges in two locations. Place one gauge on the underbody valve to check the main system pressure and one on the ejector line for unload pressure. -
Page 81: Tailgate Control Lever Alignment
® DURAPACK 5000 Maintenance and Adjustment TAILGATE CONTROL LEVER ALIGNMENT The tailgate control handles should be in line when in the neutral position. Adjustments can only be made to blade control rod. See Figure Tailgate Control Levers below. If Handle is Out of Align: 1. -
Page 82: Underbody Valve Disassembly/Assembly
® DURAPACK 5000 Maintenance and Adjustment UNDERBODY VALVE DISASSEMBLY AND ASSEMBLY CAUTION Do not use lockwashers with stud nuts. If stud nuts are not tightened to the proper torque, valve spools may bind or stick or cause section seals to extrude. Do the following to disassemble or assembly the underbody valve 1. -
Page 83: Replacing Spool Seals
® DURAPACK 5000 Maintenance and Adjustment REPLACING SPOOL SEALS Do the following to replace the spool seals: 1. Remove the bonnet assembly parts from the back of the valve section. Keep the parts in order of the disassembly. See the figure below. 2. -
Page 84: Cracked Weld Joints
® DURAPACK 5000 Maintenance and Adjustment REPAIRING CRACKED WELD JOINTS Repair all cracked weld joints immediately after finding cracked weld joints. If you are unsure of the proper repair procedure, call Heil Technical Services at 866-310-4345. TAILGATE LUBRICATION See Grease Lubrication Recommendation and Body Lubrication Guidein this section. INSPECT PROXIMITY SWITCHES See Proximity Switch Troubleshooting for recommended procedures for inspecting proximity switches. -
Page 85: Body Controller Hardware
® DURAPACK 5000 Body Controller Hardware SECTION 5 BODY CONTROLLER HARDWARE Copyright 2020, Heil Environmental Issued July 2020 Printed in the U.S.A. Body Controller Hardware... -
Page 86: In-Cab Display
® DURAPACK 5000 Body Controller Hardware IN-CAB DISPLAY Issued July 2020 Copyright 2020, Heil Environmental Body Controller Hardware Printed in the U.S.A. -
Page 87: In-Cab Display
® DURAPACK 5000 Body Controller Hardware IN-CAB DISPLAY ® Refer to the Heil DuraPack the unit. The display also allows a qualified and authorized Service Technician to see detailed system information and make configuration changes based on option configuration. Status LED The Status LED on the bottom-right corner of the display indicates status of the display as described below. - Page 88 ® DURAPACK 5000 Body Controller Hardware CAB CONTROLLER INPUTS SCREEN This Cab Controller Inputs screen displays the status of Cab Controller inputs and parameters. INPUT PIN # DESCRIPTION FUNCTION IN00 PTO Pressure Sw. ON with PTO engaged IN01 Low Torque PSW. ON with O.A.I.
- Page 89 ® DURAPACK 5000 Body Controller Hardware BODY CONTROLLER INPUTS SCREEN This Body Controller Inputs screen displays the status of Body Controller inputs and parameters. INPUT PIN# DESCRIPTION FUNCTION IN00 Hyd. Press #1 Main body valve inlet pressure IN01 Hyd. Press #2 CV valve pressure IN02 Hyd.
- Page 90 ® DURAPACK 5000 Body Controller Hardware TAILGATE CONTROLLER INPUTS SCREEN This Tailgate Controller Inputs screen displays the status of Tailgate Controller inputs and parameters. INPUT PIN# DESCRIPTION FUNCTION IN00 Tipper Curb Side ON with cart tipper activated, curb side IN01 Tipper Street Side ON with cart tipper activated, street side IN02...
- Page 91 ® DURAPACK 5000 Body Controller Hardware CHASSIS VARIABLES (J1939) SCREEN This screen displays chassis variables which are received from the chassis J1939. Some variables are not available on all chassis, in which case the variable status will not update. On chassis where J1939 is not available, Engine RPM is derived from the alternator R Stator or tach.
- Page 92 ® DURAPACK 5000 Body Controller Hardware CAB CONTROLLER OUTPUTS SCREEN This Cab Controller Outputs screen displays the status of Cab Controller outputs. OUTPUT PIN# DESCRIPTION FUNCTION OUT00 Spare Out OUT01 Spare Out OUT02 PTO Sol. Power to Clutch shift PTO solenoid OUT03 Pump 1 Sol.
- Page 93 ® DURAPACK 5000 Body Controller Hardware BODY CONTROLLER OUTPUTS SCREEN This Body Controller Outputs screen displays the status of Body Controller outputs. OUTPUT PIN# DESCRIPTION FUNCTION OUT00 Right Turn Light NOT USED, Power to mid body RH Turn lamp OUT01 Left Turn Light NOT USED, Power to mid body LH Turn lamp OUT02...
- Page 94 ® DURAPACK 5000 Body Controller Hardware TAILGATE CONTROLLER OUTPUTS SCREEN This Tailgate Controller Outputs screen displays the status of Tailgate Controller outputs. OUTPUT PIN# DESCRIPTION FUNCTION OUT00 Right Turn Light RH Multi-Function Strobe OUT01 Left Turn Light LH Multi-Function Strobe OUT02 Stop Light NOT USED, Power to Stop lamps...
- Page 95 ® DURAPACK 5000 Body Controller Hardware FAULT SCREENS Access fault screens from the Home screen by using the UP directional arrow. CRITICAL FAULTS SCREEN Critical faults result in disabled functions, allowing limited to no operation. These faults are displayed in the Home Screen Message Banner, which allows one message at a time based upon order of importance.
- Page 96 ® DURAPACK 5000 Body Controller Hardware SYSTEM FAULTS SCREEN Access this screen from the Critical Fault screen by using the LEFT directional arrow. System faults occur with the loss of a signal or, when a signal is out of the normal operating range. These faults are retained through a power cycle and once active will remain active until reset.
- Page 97 ® DURAPACK 5000 Body Controller Hardware CONTROLLER FAULTS SCREEN Access this screen from the Critical Fault screen by using the RIGHT directional arrow. Controller faults occur with the following: Supply voltage to a controller is lost or low. A controller output has an error, short or open circuit etc. Loss of communications with or between two controllers.
- Page 98 ® DURAPACK 5000 Body Controller Hardware FAULT CAUSE Body, Output Error Error diagnostic on one or more outputs 00 thru 07 Body, Lost Comms w/ Controller lost comms with in-cab display. Display Body, Lost Comms w/ Controller lost comms with Body controller. Body Body, Lost Comms w/ Controller lost comms with Tailgate controller.
- Page 99 ® DURAPACK 5000 Body Controller Hardware PASSWORD PROTECTED SCREENS To access password protected screens press and hold the OK button for 3 seconds. This will switch the view to the password screen. Enter the password and press OK. PASSWORD PROTECTED SCREEN PASSWORD Maintenance 4321...
- Page 100 ® DURAPACK 5000 Body Controller Hardware OPTION CONFIG SCREEN The Option Config screen is used to configure the system. Press the OK button to turn the functions ON/OFF. Press ESC to exit screen. Clutch Shift PTO ON, enables the PTO Solenoid output and should be used when a Clutch shift PTO in installed. Additionally, the hydraulic pump may or may not be configured with a solenoid controlled manifold block.
- Page 101 ® DURAPACK 5000 Body Controller Hardware OPTION CONFIG SCREEN (CONTINUED) Multi-Function Strobe ON, enables a secondary use of the tailgate turn lamps. When not in use as turn signals, the lamps can be used as alternating strobe lights. Option Switches ON, enables two multiplexed body controller outputs to be used for optional functions.
- Page 102 ® DURAPACK 5000 Body Controller Hardware MAINTENANCE SCREEN Filter Change Reset, press OK button to reset Oil Change Reset, press OK button to reset Service Mode, press OK button to activate. Service mode is strictly intended to allow pump operation while servicing or troubleshooting the unit.
-
Page 103: Cortex Controller
® DURAPACK 5000 Body Controller Hardware CORTEX CONTROLLER Copyright 2020, Heil Environmental Issued July 2020 Printed in the U.S.A. Body Controller Hardware... -
Page 104: Programmable Controllers
® DURAPACK 5000 Body Controller Hardware PROGRAMMABLE CONTROLLERS Cortex Controllers For units equipped with Cortex Controllers, there are three identical 32 I/O Cortex Controllers in this system: Cab, Body and Tailgate. Each has a unique program with I/O is shared between the three and the In-Cab display. Each controller is equipped with an LED Status indicator. - Page 105 ® DURAPACK 5000 Body Controller Hardware PROGRAMMABLE CONTROLLERS (CONTINUED) Cab Controller Typically mounted inside the cab, on a conventional cab this controller will be behind or under the seat. On a cab over engine it will be under the dog house cover. This controller manages most of the unit functionality, this includes: Chassis interface, including J1939 comms Hydraulic Pump Controls Option Configuration...
- Page 106 ® DURAPACK 5000 Body Controller Hardware PROGRAMMABLE CONTROLLERS (CONTINUED) Tailgate Controller Mounted in the upper portion of the tailgate this controller manages circuits local to the tailgate, including: Strobe Lights Work Lights Tailgate controls DPF 5000 Tailgate PT Commercial Tailgate Issued July 2020 Copyright 2020, Heil Environmental Body Controller Hardware...
-
Page 107: Control Fusing
® DURAPACK 5000 Body Controller Hardware CONTROL FUSING Control Fuses The 2020 REL control system utilizes two fuses. Fuse #1 (F1) is powered by chassis ignition. Fuse #2 (F2) is battery powered by the cold side of the battery disconnect. Fusing for RP170 Compliant Chassis The below fuse holder is typically located within 8”... - Page 108 ® DURAPACK 5000 Body Controller Hardware CONTROL FUSING (CONTINUED) Fusing for NON RP170 Compliant Chassis Non RP170 chassis uses a Power Relay Module, pictured below, with two build-in 20-amp fuses. This module is typically located near the chassis battery disconnect switch. SOURCE FUSE CIRCUIT...
-
Page 109: Control Area Network
® DURAPACK 5000 Body Controller Hardware CONTROL AREA NETWORK The control system for the 2020 Rear End Loader has multiple components that communicate over Control Area Networks or CAN. a. In-Cab Display b. Cab Controller (32 I/O Cortex Control Module) c. - Page 110 ® DURAPACK 5000 Body Controller Hardware CONTROL AREA NETWORK (CONTINUED) Network Schematic Issued July 2020 Copyright 2020, Heil Environmental Body Controller Hardware Printed in the U.S.A.
- Page 111 ® DURAPACK 5000 Body Controller Hardware CONTROL AREA NETWORK (CONTINUED) System Architecture Copyright 2020, Heil Environmental Issued July 2020 Printed in the U.S.A. Body Controller Hardware...
- Page 112 ® DURAPACK 5000 NOTES Issued July 2020 Copyright 2020, Heil Environmental Body Controller Software Printed in the U.S.A.
- Page 113 ® DURAPACK 5000 Body Controller Software SECTION 6 BODY CONTROLLER SOFTWARE Copyright 2020, Heil Environmental Issued July 2020 Printed in the U.S.A. Body Controller Software...
-
Page 114: Body Controller Software
® DURAPACK 5000 Body Controller Software CORTEX CONTROLLER PROGRAM DOCUMENTATION FOR OAI UNITS - PROGRAM 109-0327 Document Scope: This document details the operation and application of program 109-0327. This program is written for controller P/N: 254- 4912 and is utilized in PDC equipped REL units, as a retrofittable replacement for the mini PLC P/N: 108-7860. The primary function of this application is to manage the OIGAI tandem pump control. - Page 115 ® DURAPACK 5000 Body Controller Software Section 2: Program 109-0327 I/O Functions 2.01: I/O Chart PROGRAM: 109-0237 REVISION: 20180814 CONTROLL SIGNAL ADDRESSING ER PINOUT REL– (DP5000 / PT COMM / PT COM PLUS / PT1000) INPUT FUNCTIONS SPARE INPUT IN00 BINARY CALIBRATION SIGNAL #1 ACTIVE...
- Page 116 ® DURAPACK 5000 Body Controller Software BINARY CHASSIS REVERSE ACTIVE SIGNAL IN13 HIGH BINARY CALIBRATION SIGNAL #2 ACTIVE IN14 HIGH BINARY J1939 500K BAUD RATE ACTIVE IN15 HIGH OUTPUT FUNCTIONS BINARY TRANS TEMP INDICATOR ACTIVE OUT00 HIGH SPARE OUTPUT OUT01 SPARE OUTPUT OUT02 BINARY...
- Page 117 ® DURAPACK 5000 Body Controller Software CHASSIS-J1939 Network (NOT USED) CAN1-L CHASSIS-J1939 Network (NOT USED) CAN1-H POWER SUPPLY VOLTAGE PDC, BOX CONTROLLER VBBS 2, CB-6 SUPPLY VOLTAGE PDC, BOX OUTPUT 00-07 VBB1 2, CB-6 SUPPLY VOLTAGE PDC, BOX OUTPUT 08-15 VBB2 2, CB-2 Copyright 2020, Heil Environmental...
- Page 118 ® DURAPACK 5000 Body Controller Software 2.02: Input Functions A01 - Not Assigned (IN00) Spare input. Function Logic: Input Device Status I/O Address Status Spare IN00 A02 - Calibration Signal #1 (IN01) This input is activated by the Configuration Jumper and is used during engine speed calibration. Function Logic: Input Device Status...
- Page 119 ® DURAPACK 5000 Body Controller Software A06 - Right Turn Signal (IN05) This input is connected to the left-hand turn signal. The input is ON when the turn lamp is ON. Function Logic: Input Device Status I/O Address Status Chassis L.H. Turn Activated IN05 A07 - Low Torque Pressure Switch (IN06)
- Page 120 ® DURAPACK 5000 Body Controller Software A11 - Slide Active (IN10) This input is connected to the pump enable circuit downstream of the side door interlock relay. The input should be ON with the Pump switch ON and Side Door closed, if equipped. Function Logic: Input Device Status...
- Page 121 ® DURAPACK 5000 Body Controller Software 2.03: Output Functions B01 – Transmission Temp. Indication (OUT00) Activation of this output indicates that the Transmission Sump/Retarder Temperature is high. With this output ON the hydraulic pumps will disable and remain disabled until the transmission temperature warning is OFF three minutes, or ignition power is cycled. Conditions Necessary to activate the circuit: Condition Logic Function or Component...
- Page 122 ® DURAPACK 5000 Body Controller Software B05 - Pump Solenoid (P1) (OUT04) This output controls the Pump Solenoid (P1). Pump 1 Operating Speed Parameters Setting Max. Engage Speed 1000 RPM Max. Operate Speed 1000 RPM Conditions Necessary to activate the circuit: Condition Logic Function or Component...
- Page 123 ® DURAPACK 5000 Body Controller Software B09 – Not Assigned (OUT08) Spare Output. Conditions Necessary to activate the circuit: Condition Logic Function or Component Status Status none none none none B10 – Not Assigned (OUT09) Spare Output. Conditions Necessary to activate the circuit: Condition Logic Function or Component...
-
Page 124: Rear Loader Pack On The Fly - Program 109-0201
® DURAPACK 5000 Body Controller Software REAR LOADER PACK ON THE FLY - PROGRAM 109-0201 PURPOSE The purpose of this document is to detail the operation of the Pack on the Fly Programable Logic Controller for rear loaders. Revision History REVISIO DATE DESCRIPTION... - Page 125 ® DURAPACK 5000 Body Controller Software REAR LOADER PACK ON THE FLY - PROGRAM 109-0201 (CONTINUED) INPUT CHART Chart below shows PLC input and functions. INPUTS EOS FUNCTION POWERED 0.00 Alternator Input 0.01 Tach Calibration Input #1 0.02 Tach Calibration Input #2 0.03 Not used 0.04...
- Page 126 ® DURAPACK 5000 Body Controller Software REAR LOADER PACK ON THE FLY - PROGRAM 109-0201 (CONTINUED) 3.0 OUTPUTS 10.01 Pump P1 - This output operates Pump P1. This pump will only operate at rpms less than 1000. A high transmission temp signal or a low torque pressure switch signal will disconnect this pump.
-
Page 127: Schematics
® DURAPACK 5000 Schematics SECTION 7 SCHEMATICS Copyright 2020, Heil Environmental Issued July 2020 Printed in the U.S.A. Schematics... -
Page 128: Harness, Body Controller, 2020 Rel - 263-1869-001
TANK ANTI PSI#2 PSI#1 FMVSS FMVSS CAN1 CAN1 TWISTED PAIR TWISTED PAIR CAN1 CAN1 CAN1 NO LOOM ON MAIN TRUNK BUNDLE WIRES WITH CABLE TIES ANTI BODY TANK LOWER SOL BODY CONTROL SWITCH RAISE SOL FMVSS FMVSS LOWER SOL EJECTOR RET. -
Page 129: Harness, Body, 2020 Rel - 263-1869-002
REF PINOUT 108-8721-005 GROUND CLEAR WHITE SIDE STOP / TURN / STROBE DOOR REF PINOUT 108-8721-004 GROUND WORK BLACK WORK OVAL LIGHT STROBE WHITE TAIL / CLEAR / MARKER STOP / TURN / STROBE STROBE WORK LIGHT STROBE RH MID TURN OVAL STROBE... -
Page 130: Harness, Mid Tailgate Light Cluster 2020 Rel - 263-1869-011
12 8 REF PINOUT 108-8721-005 WHITE REF PINOUT 108-8721-004 BLACK SIDE SIDE WHITE SPARE MECH CAN2 TWISTED PAIR FMVSS UPPER TWISTED PAIR TWISTED PAIR REV -... -
Page 131: Harness, Upper Tailgate, 2020 Rel - 263-1869-010
REV -... -
Page 132: Harness, Cab Controller Convent Cab Non Rp70, 2020 Rel - 263-1882-001
SPARE INPUTS AND OUTPUTS PUMP D-1A CTRL SA125 CAN-1 CAN1 DISP PUMP TWISTED PAIR CAN1 D1-A D1-A TWISTED PAIR TWISTED PAIR CAN1 REV -... -
Page 133: Harness, Cab Controller Cab Over Rp170, 2020 Rel - 263-1882-002
SPARE INPUTS AND OUTPUTS BODY CAN-1 D-1A FUSE 3 CTRL FUSE 4 SA125 PUMP DISP CAN1 PUMP TWISTED PAIR CAN1 BODY TWISTED PAIR TWISTED PAIR CAN1 CHASSIS CHASSIS INTERFACE INTERFACE CONNECTOR CONNECTOR D-1A REV -... -
Page 135: Ejector Retract/Ejector Extend - 701-8426-1
EJECTOR RETRACT EJECTOR EXTEND EJECTOR EJECTOR CYLINDERS CYLINDERS TO EJECTOR TO EJECTOR UNLOAD VALVE UNLOAD VALVE TANK TANK FROM FROM PUMP PUMP UNDERBODY VALVE UNDERBODY VALVE LEGEND USED ON 27 AND 32 YD. UNITS ONLY = PUMP PRESSURE = RETURN PRESSURE 701-8426-1... -
Page 136: Tailgate Lower/Raise - 701-8426-2
TAILGATE LOWER TAILGATE RAISE TAILGATE TAILGATE CYLINDERS CYLINDERS TANK FROM ADJACENT VALVE TANK SECTION FROM ADJACENT VALVE SECTION UNDERBODY VALVE UNDERBODY VALVE LEGEND = PUMP PRESSURE = RETURN PRESSURE = INTERMEDIATE PRESSURE 701-8426-2... -
Page 137: Blade (Lower Panel) Down/Up - 701-8426-3
BLADE (LOWER PANEL) DOWN BLADE (LOWER PANEL) UP LOWER PANEL UPPER PANEL LOWER PANEL UPPER PANEL CYLINDERS CYLINDERS CYLINDERS CYLINDERS REGEN. REGEN. VALVE VALVE FROM FROM TANK TANK ADJACENT ADJACENT VALVE VALVE SECTION SECTION TAILGATE VALVE TAILGATE VALVE LEGEND = PUMP PRESSURE = RETURN PRESSURE 701-8426-3... -
Page 138: Upper Panel In/Out - 701-8426-4
UPPER PANEL - IN UPPER PANEL - OUT UPPER PANEL UPPER PANEL CYLINDERS CYLINDERS REGEN. REGEN. VALVE VALVE PILOT SENSE TO "C" UNLOAD CARTRIDGE FROM FROM TANK TANK ADJACENT ADJACENT VALVE VALVE SECTION SECTION TAILGATE VALVE TAILGATE VALVE LEGEND = PUMP PRESSURE = RETURN PRESSURE = INTERMEDIATE PRESSURE 701-8426-4... -
Page 139: Upper Panel-In-Ejector Unloading & Blade Backing Off - 701-8426-5
UPPER PANEL-IN - EJECTOR UNLOADING & BLADE (LOWER PANEL) BACKING OFF EJECTOR TAILGATE CYLINDER CYLINDERS EJECTOR UNLOAD VALVE REEVING LOWER PANEL UPPER PANEL CYLINDERS CYLINDERS CYLINDERS REGEN. VALVE TAILGATE VALVE UNDERBODY VALVE USED ON 27 AND 32 YD UNITS ONLY LEGEND = PUMP PRESSURE = RETURN PRESSURE... -
Page 140: Reeving Cylinder Raising/Lowering Container - 701-8426-6
REEVING CYLINDER RAISING CONTAINER REEVING CYLINDER LOWERING CONTAINER REEVING REEVING CYLINDERS CYLINDERS TANK TANK FROM FROM UNDERBODY UNDERBODY VALVE VALVE TAILGATE VALVE TAILGATE VALVE LEGEND = PUMP PRESSURE = RETURN PRESSURE 701-8426-6... -
Page 141: Reeving Cylinder Raising/Lowering Container During Blade Down - 701-8426-7
REEVING CYLINDER RAISING CONTAINER REEVING CYLINDER LOWERING CONTAINER DURING BLADE DOWN DURING BLADE UP REEVING LOWER PANEL UPPER PANEL REEVING LOWER PANEL UPPER PANEL CYLINDER CYLINDERS CYLINDERS CYLINDER CYLINDERS CYLINDERS REGEN. REGEN. VALVE VALVE FROM FROM UNDERBODY UNDERBODY VALVE TANK VALVE TANK TAILGATE VALVE... - Page 142 ® DURAPACK 5000 Schematics Issued July 2020 Copyright 2020, Heil Environmental Schematics Printed in the U.S.A.
-
Page 143: Index
® DURAPACK 5000 INDEX introduction battery disconnect switch body daily checklist kick-out adjustments body preventive maintenance chart bolt type identification chart lock-out/tag-out procedures lock-out tags caution lubrication guide change hydraulic oil filter element check oil level clean and inspect the tailgate seal maintenance/lubrication information cold weather warm-up procedure control area network... - Page 144 ® DURAPACK 5000 INDEX tandem vane pump O.I.G.A.I. hydraulic system troubleshooting torque for hydraulic tubes and fittings warming up the hydraulic oil warning welding and electronic devices welding procedures when to change oil filter element winch gear oil Issued July 2020 Printed in the U.S.A.
- Page 145 HEIL ENVIRONMENTAL WARRANTY STATEMENT The Heil Co. d/b/a Heil Environmental ("Heil") warrants its solid waste collection equipment to be free from defects in material and workmanship under normal use for a period of one (1) year or 2000 hours of operation (whichever comes first) from the date of equipment In-Service or during the period of coverage offered by an extended warranty program, when proper service and maintenance as described in Heil Service Bulletins and Parts &...
- Page 146 www.heil.com Customer Care: 866-ASK-HEIL (866-275-4345) Heil Environmental 4301 Gault Avenue North Fort Payne, AL 35967-9984 Parts Central: 800-528-5308 Technical Service: 866-310-4345 TechSupport@DoverESG.com...
Need help?
Do you have a question about the HEIL DURAPACK 5000 and is the answer not in the manual?
Questions and answers