Advertisement
INSTALLATION GUIDE
ROMAN SHADES
LIFT SYSTEMS: CORDED LIFT | CORDLESS LIFT
The difficulty level of this installation is ranked at Level 1. A piece of cake!
If you have questions or get stuck, call our Customer Care Team at 888-257-1840, or email customercare@selectblinds.com
HARDWARE AND PARTS INCLUDED
BRACKET WITH WINGNUT
CORDLESS HANDLE
*Recommended if mounting into hollow drywall.
MOUNTING THE BRACKETS
1.
NOTE:
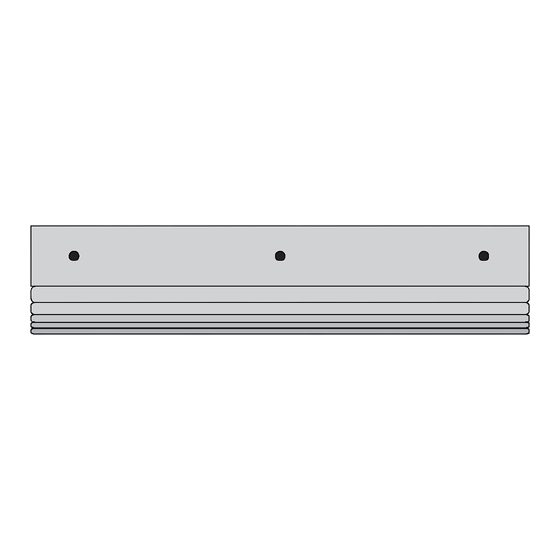
Corded and cordless shades have pre-drilled holes in the top of the headrail.
You will use these holes as a guide for your bracket placement. If using your own
screws instead of those provided, be sure to pre-drill a small hole with a 5/64" drill
bit before the final screws go in to attach brackets.
INSIDE MOUNT
1. Grasp the shade by the headrail and hold it up inside the top of the window. Set it back until
the front of the shade is flush with the wall. Hold the shade in place, and with a pencil, make a
mark through each hole in the headrail. Set the shade aside.
2. Take a bracket and center the drop-bolt over each mark. Use the holes in the top of the
bracket to mark where your two screws will go.
3. Align the brackets with the holes, and use a Phillips drill bit to securely fasten the screws.
OUTSIDE MOUNT
NOTE:
If using your own screws instead of those provided, be sure to pre-drill a
small hole with a 5/64" drill bit before the final screws go in to attach brackets.
1. Center and hold the headrail at least two inches above the window. While
keeping the shade level, make a small line with your pencil just above each of
the pre-drilled holes in the headrail. Set the shade aside.
2. Align the top edge of a bracket along each mark, and use the holes in the
back of the bracket to mark where your two screws will go.
3. Align the brackets with the holes, and use a Phillips drill bit to fasten the
screws in place.
*If you are using wall anchors, pre-drill with a 1/4" bit instead, and tap the wall
anchors into the holes with a hammer before drilling in the screws.
®
Simple. Smart. Custom.
SCREWS
WALL ANCHORS*
INSTALLATION GUIDE | ROMAN SHADES
TOOLS REQUIRED
PENCIL
TAPE MEASURE
5/64" DRILL BIT
PHILLIPS SCREWDRIVER
PHILLIPS DRILL BIT
PRE-DRILLED HOLES
BACK
Simple. Smart. Custom.
POWER DRILL
LEVEL
STEP LADDER
FRONT
DROP-BOLT
UPDATED DEC 2021
®
5
Advertisement
Table of Contents

Related Manuals for SelectBlinds LEVOLOR Series

Summary of Contents for SelectBlinds LEVOLOR Series
- Page 1 LIFT SYSTEMS: CORDED LIFT | CORDLESS LIFT The difficulty level of this installation is ranked at Level 1. A piece of cake! If you have questions or get stuck, call our Customer Care Team at 888-257-1840, or email customercare@selectblinds.com HARDWARE AND PARTS INCLUDED...
- Page 2 ATTACHING THE SHADE INSIDE AND OUTSIDE MOUNT IMPORTANT: The cords running along the underside of the headrail must be able to move freely. To avoid tangling or damage to the cords, make sure the “wings” of the wingnut are facing the sides of the window. 1.
-
Page 3: Cleaning Instructions
To learn more about our product warranties, please visit: https://www.selectblinds.com/warranty.html For replacement parts, and/or to file a warranty claim for a product that is damaged, defective, or missing parts, please call our Customer Care Team at 888-257-1840, or email customercare@selectblinds.com. CHILD SAFETY WARNING WARNING Corded window blinds and shades can be a strangulation risk or cause serious injury to young children and pets. -
Page 4: Roman Shades
LIFT SYSTEMS: CONTINUOUS CORD LOOP | MOTORIZATION The difficulty level of this installation is ranked at Level 1. A piece of cake! If you have questions or get stuck, call our Customer Care Team at 888-257-1840, or email customercare@selectblinds.com HARDWARE AND PARTS INCLUDED... - Page 5 OUTSIDE MOUNT 1. Measure 2”- 4” in from each side of the window frame. From here, measure upward another 2” - 4”, and make a pencil mark. 2” - 4” NOTE: Leave marks for any additional brackets you need, evenly spaced between your first two marks and at the same height.
-
Page 6: Installation Instructions
Installation Instructions Align Center Hole with Mark Bead Chain Loop Universal Cord Tensioner Inside Mount or Outside Mount Installations Rev: 3 April, 2024... -
Page 7: Getting Started
Getting Started Required Tools Before doing anything, you must first slide the • Pencil Universal Cord Tensioner (UCT) to the bottom of the • Small-tip Phillips screwdriver bead chain loop. • Power drill with two drill bit sizes: 1. Insert a small screwdriver, punch, or —... - Page 8 Wall Anchors Choose a Mounting Option Wall Anchor If only drywall is available for mounting, The Universal Cord Tensioner (UCT) can be mounted a wall anchor is required to ensure a secure in one of three ways: attachment of the UCT. If the screw or screws can •...
-
Page 9: Outside Mount
Outside Mount 4. Hold the OB bracket with its center hole aligned with the mark and mark both screw hole locations. 1. Break off the Outside Mount (OB) bracket. Mark Both Screw Holes Bracket Align Nub Align Center Hole with with Mark Mark Bracket... - Page 10 7. Attach the UCT to the bracket 8. Ensure the bead chain can move freely through the UCT without engaging the lock. The center of a. Press the UCT release buttons on the sides the screw hole should be aligned with the notch in of the UCT while pulling down on the spring- the UCT (±...
- Page 11 Inside Mount with a Bracket 5. Drill the screw holes. — Determine whether or not wall anchors are 1. Break off the Inside Mount (IB) required (see "Wall Anchors" on page 4) bracket and drill either a " pilot hole (no wall anchor) or a "...
- Page 12 Inside Mount without a Bracket b. Insert the nub on the inside mount bracket into the back of the screw hole in the UCT. NOTE: If mounting to a textured or uneven surface, use the provided mounting bracket. 1. With the Universal Cord Tensioner (UCT) at the bottom of the bead chain loop, position it at the c.
- Page 13 b. Insert one of the longer provided screws into d. Attach the UCT directly to the wall. the screw hole in the UCT. Screw Hole CAUTION: Do not overtighten the mounting screw. c. Press in on the UCT release buttons and pull This can prevent the UCT from functioning properly down on the screw hole to align the hole with and increase bead chain wear.
- Page 14 WARNING Products with a Damaged, Loose, or Missing Tension Device Pose a Strangulation Risk to Children. This Window Blind is equipped with a Tension Device • Remove from use and repair or replace if tension device is damaged, loose, or missing •...
-
Page 15: How To Use The Remote
PROGRAMMING AND USING YOUR REMOTE MOTORIZED ROMAN SHADES REMOTE LABEL WARNING: DO NOT attempt to raise or lower your motorized shade with your hands. This may cause permanent damage to the motor, and other components in the headrail, which may not be covered under your warranty. REMOTE LITHIUM Your shade’s motor and remote(s) are pre-programmed at the factory,... - Page 16 PAIRING THE REMOTE WITH A MOTOR NOTE: The factory pairs each of your shades to the remote. The following steps are only necessary if you want to change how the channels are configured, or if you are adding a new shade to a remote already in use. 1.
- Page 17 Installation Guide No-Drill Blinds Headrail Remove the No-Drill Blinds Headrail The No-Drill Blinds Headrail will already be installed onto the existing product headrail. Remove the product from the headrail (See Fig A), which will vary from product and depend on lift type. (Fig A) Preparing the No Drill Blinds Headrail Push here...
- Page 18 Uninstalling the No Drill Blinds Headrail To uninstall the product, follow step 1 by removing the product from the headrail and use a screwdriver to unlatch the lever. Make sure to hold the No Drill Blinds Headrail in place while unlatching the lever. This will prevent damage to the window or headrail.
Need help?
Do you have a question about the LEVOLOR Series and is the answer not in the manual?
Questions and answers