Table of Contents
Advertisement
Quick Links
Advertisement
Table of Contents

Related Manuals for Dahua ASA3223A-W


Summary of Contents for Dahua ASA3223A-W
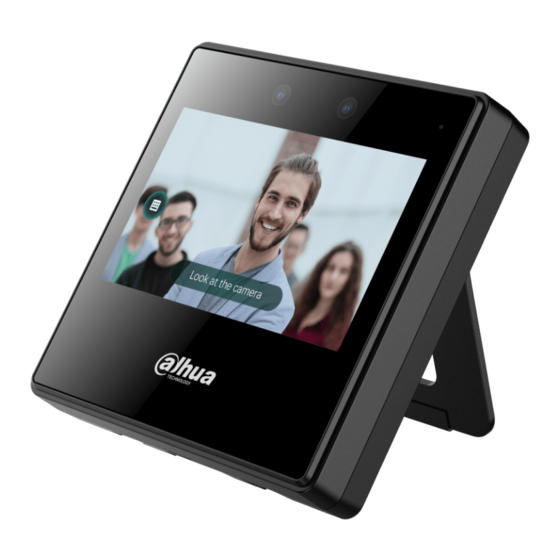
- Page 1 Face Recognition Time & Attendance User's Manual V1.0.1...
-
Page 2: Foreword
Foreword General This manual introduces the functions and operations of the Face Recognition Time & Attendance (hereinafter referred to as the "Device"). Read carefully before using the device, and keep the manual safe for future reference. Safety Instructions The following signal words might appear in the manual. Signal Words Meaning Indicates a high potential hazard which, if not avoided, will result in... - Page 3 visit our official website. The manual is for reference only. Slight differences might be found between the electronic version and the paper version. All designs and software are subject to change without prior written notice. Product updates ● might result in some differences appearing between the actual product and the manual. Please contact customer service for the latest program and supplementary documentation.
-
Page 4: Important Safeguards And Warnings
Important Safeguards and Warnings This section introduces content covering the proper handling of the Device, hazard prevention, and prevention of property damage. Read carefully before using the Device, and comply with the guidelines when using it. Transportation Requirement Transport, use and store the Device under allowed humidity and temperature conditions. Storage Requirement Store the Device under allowed humidity and temperature conditions. - Page 5 Use an adapter or cabinet power supply provided by the manufacturer. ● Use the power cords that are recommended for the region and conform to the rated power ● specifications. The Device is a class I electrical appliance. Make sure that the power supply of the Device is ●...
-
Page 6: Table Of Contents
Table of Contents Foreword................................I Important Safeguards and Warnings......................III 1 Overview................................1 2 Local Operations.............................. 2 2.1 Common Icons............................2 2.2 Standby Screen............................2 2.3 Initialization............................3 2.4 Logging In...............................3 2.5 Person Management..........................4 2.5.1 Adding Users..........................4 2.5.2 Viewing User Information......................6 2.6 Attendance Management........................6 2.6.1 Configuring Verification Mode....................7 2.6.2 Configuring Departments......................7 2.6.3 Configuring Shifts........................7... - Page 7 2.12 System Information...........................24 2.12.1 Viewing Data Capacity......................24 2.12.2 Viewing Device Version......................24 3 Web Operations............................. 25 3.1 Initialization............................25 3.2 Logging In.............................25 3.3 Resetting the Password........................26 3.4 Home Page............................26 3.5 Person Management........................... 27 3.6 Face Detection............................. 29 3.6.1 Configuring Face Detection......................30 3.6.2 Privacy Settings.........................
- Page 8 3.12.6 Maintenance..........................67 3.12.7 Updating the System......................67 3.12.8 Advanced Maintenance......................68 3.13 Security Settings(Optional) ......................69 3.13.1 Security Status.........................69 3.13.2 Configuring HTTPS........................70 3.13.3 Attack Defense........................70 3.13.4 Installing Device Certificate....................73 3.13.5 Installing the Trusted CA Certificate..................76 3.13.6 Data Encryption........................77 3.13.7 Security Warning........................78 3.13.8 Security Authentication......................78 4 Smart PSS Lite Configuration........................
-
Page 9: Overview
1 Overview The Device can be used to track attendance of people. People can clock in/out through face and password. It is widely used in parks, communities, business centers and factories, and ideal for places such as office buildings, government buildings, schools and stadiums. Configurations might differ depending on the models of the product, please refer to the actual product. -
Page 10: Local Operations
2 Local Operations Configurations might differ depending on the actual product. ● You might see some UI texts are not displayed because of the limited space. Long press the text ● for 3 seconds and it will show. 2.1 Common Icons Table 2-1 Description of icons Icon Description... -
Page 11: Initialization
Figure 2-1 Standby screen Name Description Status display Displays status of Wi-Fi, network and USB, and more. Date and time Displays the current date and time. Verification methods Displays available verification methods. Password Enter user ID and password to clock in or clock out. 2.3 Initialization For the first-time use or after restoring factory defaults, you need to select a language on Device, and then set the password and email address for the admin account. -
Page 12: Person Management
Administrator account: Can log in to the main menu of the Device and has door access ● permissions. Procedure Step 1 Press and hold the standby screen for 3 seconds. Step 2 Select a verification method to enter the main menu. Face: Enter the main menu by face recognition. - Page 13 Table 2-2 Parameters description Parameter Description The No. is like employee ID, which can be numbers, letters, and their combinations, and the maximum length of the No. is 30 characters. The name can have up to 32 characters (including Name numbers, symbols, and letters).
-
Page 14: Viewing User Information
Parameter Description Department Schedule: Apply department schedules to ● the user. Personal Schedule: Apply personal schedules to the ● user. For how to configure personal or department schedules, see "2.6.5 Configuring Work Schedules". Schedule Mode If you set the schedule mode to department schedule here, the personal schedule you have configured for the user in Attendance >... -
Page 15: Configuring Verification Mode
2.6.1 Configuring Verification Mode Procedure Select Attendance > Verification Mode. Step 1 Step 2 Select the attendance verification mode. To cancel your selection, tap the selected method again. Tap /Or to configure combinations. Step 3 Verify one of the selected verification methods to take attendance. Step 4 to save changes. - Page 16 to view more shifts. You can configure up to 24 shifts. Step 3 Configure the parameters of the shift. Figure 2-5 Create shifts Table 2-3 Shift parameters description Parameter Description Shift Name Enter the name of the shift. Period 1 Specify a time range when people can clock in and clock out for the workday.
-
Page 17: Configuring Holiday Plans
Figure 2-6 Time interval (Even number) For example: If the interval is 120 minutes, then the clock-out time for period 1 is from 12:00 to 12:59, and the clock-in time for period 2 is from 13:00 to 14:00. If a person clocks out multiple times during period 1, the latest time will be valid, and if they clock in multiple times during period 2, the earliest time will be valid. -
Page 18: Configuring Work Schedules
Step 2 Click to add holiday plans. Step 3 Configure the parameters. Figure 2-8 Create holiday plans Table 2-4 Parameters description Parameter Description Attendance Holiday No. The number of the holiday. Attendance Holiday The name of the holiday. Start Time The start and end time of the holiday. - Page 19 Figure 2-9 Configuring work schedules Procedure Step 1 Select Attendance > Schedule Config. Step 2 Set work schedules for individuals. 1. Tap Personal Schedule. 2. Enter the user ID, and then tap 3. On the calendar, select a day, and then select a shift. The shift is scheduled for the day.
- Page 20 Figure 2-10 Schedule shifts to individuals 4. Tap Step 3 Set works schedules for departments. 1. Tap Department Schedule. 2. Tap a department, and then select shifts for a week. Shifts are scheduled for the week. 0 indicates rest. ● 1 to 24 indicates the number of the per-defined shifts.
-
Page 21: Configuring The Verification Time Interval
2.6.6 Configuring the Verification Time Interval When an employee clocks in and out multiple times within a set period, the earliest time will be valid. Procedure Step 1 Select Attendance > Verification Interval (sec). Step 2 Enter the time interval, and then tap 2.6.7 Configuring Attendance Modes When you clock in or clock out, you can set the attendance modes to define the attendance status. -
Page 22: Communication Settings
Figure 2-13 Auto Mode/manual mode Table 2-6 Attendance mode parameters Parameters Description Check In Clock in when your normal workday starts. Break Out Clock out when your break starts. Break In Clock in when your break ends. Check Out Clock out when your normal workday starts. Overtime Check In Clock in when your overtime period starts. -
Page 23: Configuring Wi-Fi
Figure 2-14 Auto registration Step 2 Turn on the automatic registration function and set the parameters. Table 2-7 Auto registration Parameter Description Server Address The IP address of the management platform. Port The port No. of the management platform. Enter the device ID (user defined). Registration ID When you add the Device to the management platform, the registration ID you enter on the management platform must conform... -
Page 24: Configuring Wi-Fi Ap
Figure 2-15 Connect to Wi-Fi 2.7.3 Configuring Wi-Fi AP Procedure On the Main Menu, select Communication Settings > Network > Wi-Fi AP. Step 1 Step 2 Turn on Wi-Fi AP. Wi-Fi AP and Wi-Fi function cannot be enabled at the same time. Figure 2-16 Connect to Wi-Fi AP Results Use your computer to connect to Wi-Fi AP of the Device to access its webpage. -
Page 25: System Settings
2.8 System Settings 2.8.1 Configuring Time Configure system time, such as date, time, and NTP. Procedure On the Main Menu, select System Settings > Time. Step 1 Step 2 Configure system time. Figure 2-17 Time Table 2-8 Description of time parameters Parameter Description 24-hour System... -
Page 26: Configuring Face Parameters
Parameter Description A network time protocol (NTP) server is a machine dedicated as the time sync server for all client computers. If your computer is set to sync with a time server on the network, your clock will show the same time as the server. When the administrator changes the time (for daylight savings), all client machines on the network will also be updated. - Page 27 Table 2-9 Description of face parameters Name Description Adjust the accuracy level of face recognition. Higher threshold means higher accuracy and lower false recognition rate. Face Recognition Threshold When the threshold is too low such as 0, the false recognition rate will be extremely high.
-
Page 28: Setting The Volume
Name Description Do Not Detect : Mask is not detected during face recognition. ● Mask Reminder : Mask is detected during face recognition. If ● the person is not wearing a mask, the system will remind them to wear a mask, but they will still be allowed access. Mask mode No Authorization without Wearing Face Mask : Mask is ●... -
Page 29: Restoring Factory Defaults
2.8.6 Restoring Factory Defaults Procedure On the Main Menu, select System Settings > Factory Defaults. Step 1 Step 2 Restore factory defaults if necessary. Restore the factory default settings if necessary. Factory Defaults : Resets all configurations and data except for IP settings. ●... - Page 30 Table 2-10 Function description Parameter Description Password Reset: The password can be reset when you turn on ● this function. Enable HTTPS: Hypertext Transfer Protocol Secure (HTTPS) is a ● protocol for secure communication over a computer network. When HTTPS is enabled, HTTPS will be used to access CGI commands;...
-
Page 31: Usb Management
2.10 USB Management You can use a USB to update the Device, and export or import user information or attendance records through USB. Make sure that a USB is inserted to the Device before you export data or update the system. To ●... -
Page 32: Attendance Records
2.11 Attendance Records On the main menu, select Record Management > Search for Attendance Records. The attendance records are displayed. You can search for record by user ID. 2.12 System Information You can view data capacity and device version. 2.12.1 Viewing Data Capacity On the Main Menu, select System Info >... -
Page 33: Web Operations
3 Web Operations On the webpage, you can also configure and update the Device. Web configurations differ depending on models of the Device. 3.1 Initialization Initialize the Device when you log in to the webpage for the first time or after the Device is restored to the factory defaults. -
Page 34: Resetting The Password
3.3 Resetting the Password Reset the password through the linked e-mail when you forget the admin password. Procedure On the login page, click Forgot password. Step 1 Step 2 Read the on-screen prompt, and then click OK. Step 3 Scan the QR code, and you will receive a security code. Figure 3-1 Reset password Up to two security codes will be generated when the same QR code is scanned. -
Page 35: Person Management
Figure 3-2 Home page Table 3-1 Home page description Description Main menu. : Enter the home page. ● : Display in full screen. ● : Enter the Security page. ● : Log out or restart the device. ● : Select a language on the device. ●... - Page 36 Figure 3-3 Add users Table 3-2 Parameters description Parameter Description The User ID. is like employee ID, which can be numbers, User ID letters, and their combinations, and the maximum length of the number. is 30 characters. The name can have up to 32 characters (including Name numbers, symbols, and letters).
-
Page 37: Face Detection
Parameter Description Department Add users to a department. If a department schedule is assigned to the person, they will follow the established department schedule. For how to create department, see "2.6.2 Configuring Departments". Department Schedule: Assign department schedule to ● the user. -
Page 38: Configuring Face Detection
3.6.1 Configuring Face Detection Configure face detection parameters. Face parameters might differ depending on models of the product. Procedure Step 1 Log in to the webpage, select Face Detection > Face Detection. Figure 3-4 Face detection parameters Step 2 Configure the parameters. Table 3-3 Description of face parameters Name Description... - Page 39 Name Description When the same face remains in front of the lens after the first Invalid Face Interval (sec) failed recognition, the Device will perform recognition again for the face after a defined interval. A certain number of pixels are required between the eyes for recognition to be successful.
-
Page 40: Privacy Settings
Figure 3-5 Exposure parameters Table 3-4 Exposure parameters description Parameter Description Channel 1 is the white light mode. ● Channel No. Channel 2 is the infrared light mode. ● Face Exposure After the face exposure function is enabled, the face will be exposed at the defined brightness to detect the face image Face Target Brightness clearly. -
Page 41: Attendance Configuration
Step 2 Enable snapshot function. Face images will be captured automatically when people clock in or clock out. Figure 3-6 Enable snapshot Click Apply. Step 3 3.7 Attendance Configuration This function is only available on select models. 3.7.1 Configuring Departments Procedure Select Attendance Config >... -
Page 42: Configuring Shifts
3.7.2 Configuring Shifts Configure shifts to define time attendance rules. Employees need to work at the time scheduled for their shift to start, and leave at the end time, except when they choose to work overtime. Procedure Step 1 Select Attendance Config > Shift Config. Step 2 Click to configure the shift. - Page 43 Parameter Description Period 1 Specify a time range when people can clock in and clock out for the workday. If you only set one attendance period, employees need to clock in and out by the designated times to avoid an anomaly appearing on their attendance record.
-
Page 44: Configuring Holiday
Figure 3-10 Time interval (even number) For example: If the interval is 125 minutes, then the clock-out time for period 1 is from 11:55 to 12:57, and the clock-in time for period 2 is from 12:58 to 14:00. Period 1 has 62 minutes, and period 2 has 63 minutes. -
Page 45: Configuring Work Schedules
Figure 3-11 Create holiday plans Table 3-6 Parameters description Parameter Description Attendance Holiday No. The number of the holiday. Attendance Holiday The name of the holiday. Start Time The start and end time of the holiday. End Time Step 4 Click OK. - Page 46 Figure 3-12 Configuring work schedules Procedure Step 1 Select Attendance Config > Schedule Config. Step 2 Set work schedules for individuals. 1. Click Personal Schedule. 2. Select a person in the person list. 3. On the calendar, select a day, and then select a shift. You can also click Batch Configure to schedule shifts to multiple days.
- Page 47 Figure 3-13 Personal schedule You can only set work schedules for the current month and the next month. 0 indicates break. ● 1 to 24 indicates the number of the per-defined shifts. For how to configure shifts, see ● "2.6.3 Configuring Shifts". 25 indicates business trip.
-
Page 48: Configuring Attendance Modes
Figure 3-14 Schedule shifts to a department The defined work schedule is in a week cycle and will be applied to all employees in the department. 3.7.5 Configuring Attendance Modes Procedure Step 1 Select Attendance Config > Attendance Config. Step 2 Enter the verification interval. - Page 49 Figure 3-15 Attendance modes Table 3-7 Attendance mode Parameter Description The screen displays the attendance status automatically after you clock in or out, but you can also manually change your attendance status. Check In: Clock in when your normal workday starts. ●...
-
Page 50: Configuring Audio And Video
Step 5 Click Apply. Related Operations Refresh: If you do not want to the save the current changes, click Refresh to cancel changes and ● restore it to previous settings. Default: Restore the attendance settings to factory defaults. ● 3.8 Configuring Audio and Video 3.8.1 Configuring Video On the home page, select Audio and Video Config >... - Page 51 Table 3-8 Bit rate description Parameter Description When the Device functions as the a VTO and connects the VTH, the acquired stream limit Resolution of VTH is 720p.When resolution is changed to 1080p, the call and monitor function might be affected. The number of frames (or images) per Main Format Frame Rate (FPS)
- Page 52 Table 3-9 Parameters description of status Parameter Description The image hue is different in different scene mode. Close : Scene mode function is turned off. ● Auto : The system automatically adjusts the scene mode based ● Scene Mode on the photographic sensitivity. Sunny : In this mode, image hue will be reduced.
- Page 53 Figure 3-18 Exposure Table 3-10 Exposure parameter description Parameter Description Set anti-flicker to reduce flicker and decrease or reduce uneven colors or exposure. 50Hz : When the mains electricity is 50 Hz, the exposure is ● automatically adjusted based on brightness of the surroundings to prevent the appearance of horizontal lines.
- Page 54 Parameter Description You can set the exposure to adjust image brightness. Auto : The Device automatically adjusts the brightness of images ● based the surroundings. Shutter Priority : The Device adjust the image brightness according ● to the set range of the shutter. If the image is not bright enough but the shutter value has reached its upper or lower limit, the Device will automatically adjust the gain value for ideal brightness level.
- Page 55 Parameter Description Contrast is the difference in the luminance or color that makes an Contrast object distinguishable. The larger the contrast value is, the greater the color contrast will be. Refers to the strength or saturation of a color. It describes the color intensity, or how pure it is.
- Page 56 Table 3-12 Status description Parameter Description Disable : Compensation is turned off. ● BLC : Backlight compensation automatically brings more light to ● darker areas of an image when bright light shining from behind obscures it. WDR : The system dims bright areas and compensates for dark ●...
- Page 57 Parameter Description You can set the exposure to adjust image brightness. Auto : The Device automatically adjusts the brightness of images ● based the surroundings. Shutter Priority : The Device adjust the image brightness according ● to the set range of the shutter. If the image is not bright enough but the shutter value has reached its upper or lower limit, the Device will automatically adjust the gain value for ideal brightness level.
-
Page 58: Configuring Audio Prompts
3.8.2 Configuring Audio Prompts Set audio prompts during identity verification. Procedure Select Audio and Video Config > Audio. Step 1 Step 2 Configure the audio parameters. Figure 3-23 Configure audio parameters Table 3-15 Parameters description Parameters Description Speaker Set the volume of the speaker. Audio File Click Upload audio files to the platform. -
Page 59: Communication Settings
Figure 3-24 Motion detection area Step 4 Configure the parameters. Sensitivity: The sensible to the surroundings. Higher sensitivity means easier to trigger ● alarms. Threshold: The percentage of the moving object area in the motion detection area. ● Higher threshold means easier to trigger alarms. Step 5 Click Apply. -
Page 60: Configuring Port
3.9.2 Configuring Port You can limit access to the Device at the same time through webpage, desktop client and mobile client. Procedure Step 1 Select Communication Settings > Network Setting > Port. Step 2 Configure the ports. Figure 3-25 Configure ports Except for Max Connection and RTSP Port, you need to restart the Device to make the configurations effective after you change other parameters. -
Page 61: Configuring Basic Service
3.9.3 Configuring Basic Service When you want to connect the Device to a third-party platform, turn on the CGI and ONVIF functions. Procedure Step 1 Select Network Settings > Basic Services. Step 2 Configure the basic service. Figure 3-26 Basic service Table 3-17 Basic service parameter description Parameter Description... -
Page 62: Configuring Cloud Service
Parameter Description Emergency Maintenance It is turned on by default. Set the authentication mode, including safe mode and compatibility mode. It is recommended to choose Security Mode. Security Mode (recommended): Does not support accessing ● Private Protocol Authentication the device through Digest, DES, and plaintext authentication Mode methods, improving device security. -
Page 63: Configuring Auto Registration
Figure 3-27 Cloud service Click Apply. Step 3 Step 4 Scan the QR code with DMSS to add the device. 3.9.5 Configuring Auto Registration The auto registration enables the devices to be added to the management platform without manual input of device information such as IP address and port. Background Information The auto registration only supports SDK. -
Page 64: Configuring Cgi Actively Registers
Figure 3-28 Auto Registration Table 3-18 Automatic registration description Parameter Description Server Address The IP address or the domain name of the server. Port The port of the server that is used for automatic registration. The registration ID (user defined) of the device. Adding the device to Registration ID the management by entering the registration ID on the platform. - Page 65 Figure 3-29 CGI active registration Table 3-19 Automatic registration description Parameter Description Supports up to 32 bytes, including Chinese, numbers, letters, and Device ID special characters. Address Type Supports 2 methods to register. Host IP Host IP: Enter the IP address of the third-party platform. ●...
-
Page 66: Configuring Auto Upload
3.9.7 Configuring Auto Upload Send user information and attendance records through to the management platform Procedure On the home page, select Communication Settings > Network Settings > Auto Step 1 Upload. Step 2 Enable HTTP upload mode. Step 3 Click Add, and then configure parameters. Figure 3-30 Automatic upload Table 3-20 Parameters description Parameter... -
Page 67: User Management
3.10.1 User Management You can add or delete users, change users' passwords, and enter an email address for resetting the password when you forget your password. 3.10.1.1 Adding Administrators You can add new administrator accounts, and then they can log in to the webpage of the Device. Procedure Step 1 On the home page, select System >... - Page 68 3.10.1.2 Adding ONVIF Users Background Information Open Network Video Interface Forum (ONVIF), a global and open industry forum that is established for the development of a global open standard for the interface of physical IP-based security products, which allows the compatibility from different manufactures. ONVIF users have their identities verified through ONVIF protocol.
-
Page 69: Configuring Time
Parameter Description There three permission groups which represents different permission levels. admin: You can view and manage other user accounts on ● the ONVIF Device Manager. Group Operator: You cannot view or manage other user accounts ● on the ONVIF Device Manager. User: You cannot view or manage other user accounts and ●... - Page 70 Figure 3-34 Date settings...
-
Page 71: Configuring The Shortcuts
Table 3-22 Time settings description Parameter Description Manual Set: Manually enter the time or you can click Sync Time to ● sync time with computer. NTP: The Device will automatically sync the time with the NTP ● server. Time Server : Enter the domain of the NTP server. Port : Enter the port of the NTP server. -
Page 72: Management Center
Table 3-23 Parameters description Parameter Description Password The icon of the password is displayed on the standby screen. After the doorbell function is turned on, doorbell icon is displayed on the standby screen. Local Device Ringer: Tap the ring bell icon on the standby screen, ●... -
Page 73: Data Capacity
3.12.2.1 Viewing Version Information On the webpage, select System > Version, and you can view version information of the Device. 3.12.2.2 Viewing Legal Information On the home page, select System > Legal Info, and you can view the software license agreement, privacy policy and open source software notice. -
Page 74: Configuration Management
Select Log > Admin Log. Step 2 Enter the admin ID, and then click Search. Step 3 Click Export to export admin logs. 3.12.4.4 USB Management Export user information from/to USB. Procedure Step 1 Log in to the webpage. Step 2 Select Maintenance Center >... -
Page 75: Maintenance
Import the configuration file. ● 1. Click Browse to select the configuration file. 2. Click Import configuration. Configuration files can only be imported to devices that have the same model. 3.12.5.2 Restoring the Factory Default Settings Procedure Select Maintenance Center > Manager > Config.. Step 1 Restoring the Device to its default configurations will result in data loss. -
Page 76: Advanced Maintenance
Click Update. Step 3 The Device will restart after the update finishes. 3.12.7.2 Online Update Procedure On the home page, select Maintenance Center > Update. Step 1 Step 2 In the Online Update area, select an update method. Select Auto Check for Updates, and the Device will automatically check for the latest ●... -
Page 77: Security Settings(Optional)
3.13 Security Settings(Optional) 3.13.1 Security Status Scan the users, service, and security modules to check the security status of the Device. Background Information User and service detection: Check whether the current configuration conforms to ● recommendation. Security modules scanning: Scan the running status of security modules, such as audio and ●... -
Page 78: Configuring Https
3.13.2 Configuring HTTPS Create a certificate or upload an authenticated certificate, and then you can log in to the webpage through HTTPS on your computer. HTTPS secures communication over a computer network. Procedure > System Service > HTTPS. Step 1 Select Step 2 Turn on the HTTPS service. - Page 79 Figure 3-41 Firewall Step 3 Select the mode: Allowlist and Blocklist. Allowlist : Only IP/MAC addresses on the allowlist can access the Device. ● Blocklist : The IP/MAC addresses on the blocklist cannot access the Device. ● Click Add to enter the IP information. Step 4 Figure 3-42 Add IP information Click OK.
- Page 80 3.13.3.2 Configuring Account Lockout If the incorrect password is entered for a defined number of times, the account will be locked. Procedure Step 1 Select > Attack Defense > Account Lockout. Step 2 Enter the number of login attempts and the time the administrator account and ONVIF user will be locked for.
-
Page 81: Installing Device Certificate
Figure 3-44 Anti-DoS attack Click Apply. Step 3 3.13.4 Installing Device Certificate Create a certificate or upload an authenticated certificate, and then you can log in through HTTPS on your computer. 3.13.4.1 Creating Certificate Create a certificate for the Device. Procedure Step 1 Select... - Page 82 Figure 3-45 Certificate information The name of region cannot exceed 2 characters. We recommend entering the abbreviation of the name of the region. Click Create and install certificate. Step 5 The newly installed certificate is displayed on the Device Certificate page after the certificate is successfully installed.
- Page 83 Region: The name of region must not exceed 3 characters. We recommend you enter ● the abbreviation of region name. Figure 3-46 Certificate information (2) Click Create and Download. Step 5 Save the request file to your computer. Step 6 Apply to a third-party CA authority for the certificate by using the request file.
-
Page 84: Installing The Trusted Ca Certificate
Click Install Device Certificate. Step 2 Select Install Existing Certificate , and click Next. Step 3 Step 4 Click Browse to select the certificate and private key file, and enter the private key password. Figure 3-47 Certificate and private key Click Import and Install. -
Page 85: Data Encryption
Figure 3-48 Install the trusted certificate Step 4 Click OK. The newly installed certificate is displayed on the Trusted CA Certificates page after the certificate is successfully installed. Related Operations Click Enter Edit Mode on the Device Certificate page to edit the name of the certificate. ●... -
Page 86: Security Warning
Table 3-24 Data encryption description Parameter Description Streams are encrypted during transmission Enable through private protocol. Private Protocol Encryption Type Keep it as default. Update Period of Secret Ranges from 0 h -720 h. 0 means never update the secret key. RTSP stream is encrypted during transmission Enable through TLS tunnel. - Page 87 Figure 3-51 Security Authentication...
-
Page 88: Smart Pss Lite Configuration
4 Smart PSS Lite Configuration This section introduces how to manage and configure the device through Smart PSS Lite. For details, see the user's manual of Smart PSS Lite. 4.1 Installing and Logging In Install and log in to Smart PSS Lite. For details, see the user manual of Smart PSS Lite. Procedure Step 1 Get the software package of the Smart PSS Lite from the technical support, and then... -
Page 89: Adding Devices In Batches
Figure 4-1 Add devices Table 4-1 Parameters of IP adding Parameter Description We recommend you name devices with the monitoring area for easy Device Name identification. Select IP/Domain. Method to add IP/Domain: Enter the IP address or domain name of the device. ●... - Page 90 Procedure On the Device Manager page, click Auto Search. Step 1 Step 2 Select a search method. Auto Search: Enter the username and the password of the device. The system will ● automatically search for devices that are on the same network to your computer. Device Segment Search: Enter the username and the password of the device, and then ●...
-
Page 91: User Management
4.3 User Management 4.3.1 Adding Users Procedure Select Personnel > Personnel Manager > Add. Step 1 Step 2 Enter basic information of staff. 1. Select Basic Info. 2. Add basic information of staff. Figure 4-4 Add basic information Step 3 Click Extended information to add extended information of the personnel, and then click Finish to save. - Page 92 Figure 4-5 Add extended information Step 4 Configure permissions. 1. Click 2. Enter the group name, remarks (optional), and select a time template. 3. Select verification methods and doors. Step 5 Configure permissions. For details, see "4.3.2 Assigning Attendance Permissions". 1.
- Page 93 Figure 4-6 Configure permission groups Click Finish. Step 6 After completing adding, you can click to modify information or add details in the list of staff.
-
Page 94: Assigning Attendance Permissions
4.3.2 Assigning Attendance Permissions Create a permission group that is a collection of time attendance permissions, and then associate employees with the group so that they can punch in/out through defined verification methods. Procedure Step 1 Log in to the Smart PSS Lite. Click Access Solution >... - Page 95 Figure 4-7 Create a permission group The Time & Attendance only supports punch-in/out through password and face attendance. Step 7 Click of the permission group you added. Step 8 Select users to associate them with the permission group.
- Page 96 Figure 4-8 Add users to a permission group Step 9 Click OK.
-
Page 97: Appendix 1 Important Points Of Face Registration
Appendix 1 Important Points of Face Registration Before Registration Glasses, hats, and beards might influence face recognition performance. ● Do not cover your eyebrows when wearing hats. ● Do not change your beard style greatly if you use the Device; otherwise face recognition might ●... - Page 98 Appendix Figure 1-1 Appropriate face position Requirements of Faces Make sure that the face is clean and forehead is not covered by hair. ● Do not wear glasses, hats, heavy beards, or other face ornaments that influence face image ● recording.
- Page 99 Appendix Figure 1-3 Face distance When importing face images through the management platform, make sure that image ● resolution is within the range 150 × 300 pixels–600 × 1200 pixels; image pixels are more than 500 × 500 pixels; image size is less than 100 KB, and image name and person ID are the same. Make sure that the face takes up more than 1/3 but no more than 2/3 of the whole image area, ●...
-
Page 100: Appendix 2 Security Recommendation
Appendix 2 Security Recommendation Account Management 1. Use complex passwords Please refer to the following suggestions to set passwords: The length should not be less than 8 characters; ● Include at least two types of characters: upper and lower case letters, numbers and symbols; ●... - Page 101 Network Configuration 1. Enable Allow list It is recommended that you turn on the allow list function, and only allow IP in the allow list to access the device. Therefore, please be sure to add your computer IP address and supporting device IP address to the allow list.
- Page 102 and key management in place to prevent unauthorized personnel from damaging hardware and other peripheral equipment (e.g. USB flash disk, serial port).
Need help?
Do you have a question about the ASA3223A-W and is the answer not in the manual?
Questions and answers