Advertisement
Quick Links
Advertisement

Summary of Contents for Exaco Riga
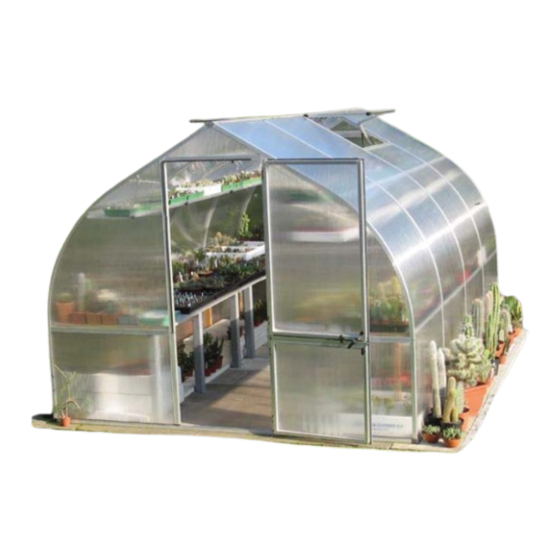
- Page 1 A L U M I N I U M GREENHOUSE Riga S/Riga...
- Page 2 Assembling the Eaves/Sidewalls……………………………………………………25-27 Installing roof windows/doors …………………………………………………………..27 Polycarbonate Size/Count Sheet………………………………………………………………..28 Optional Accessories (may not be included with your kit) Riga Top Shelf…………………………………………………………………………29-3 Riga Bottom Table Shelf………………………………………………………………3 -3 Exhaust Fan Installation…………………………………………………………………..3 Intake Vent Installation……………………………………………………………… ……3 Assembly Help Contact Information………………………………………..front and back covers...
- Page 3 pc. Phillips screwdriver size 2 pc. level pc. stepladder 1 pc. rubber 1 pc. tape measure...
- Page 4 of wedge seals...
- Page 6 Riga S : Profiles and accesso es for foundation frame Riga Profiles and accesso es for foundation frame V26/V27/S12/S1 as above)
- Page 7 ote: bolts M6 x 12 (S12) (S12) (S1).
- Page 8 greenhouse with the included mounting brackets (V15) see note on left *Exterior foundation dims based on an 8" wide concrete strip.
- Page 9 Riga S/Riga Profiles for both gables: 1.5.4 1.5.6 Profiles for eaves:...
- Page 10 Accessories bag basic kit Riga S/Riga...
- Page 11 view from inside screw pan head 4,2 x 13 (S9) 1.9) view from inside...
- Page 12 view from view from outside The cross bars (pos.1.9) are x 45 (S13). The rear gable is assembled in Only rear gable!
- Page 13 Profiles for roof windows (per roof window) profi Content accessories bag roof window (per roof window) fl (total: 15 meters Note:...
- Page 14 Red = silicone the edges of the profiles and connector pieces before assembling. Green= Silicone where the polycarbonate meets the aluminum framing on the exterior of the skylight after assembling. screws M6 x 12 (S12) for the window opener!
- Page 15 Attention: Cut the T-Seal to have a mitered edge.
- Page 16 If you do not disengage the piston, the pressure will cause the piston to burst. You will need to purchase a replacement piston from EXACO. or the red strap...
- Page 17 Riga Greenhouse Window Auto Opener Correct Installation In the correct position, the opener is sitting parallel to the window, which means that it will not demand a lot of pressure from the cylinder when the opening starts. Before fitting a new cylinder to the openers, you must check that the window can open freely right from the start.
- Page 18 If you get strong wind gusts, we recommend protecting your roof vents and openers with restraint cables. Roof vent restraints can be purchased from Exaco Trading (US distributor of Riga’s) or can be made, they are not a standard part from the Riga manufacturer.
- Page 19 Profiles for divided revolving door - bottom - Content accessories bag divided revolving door - bottom - Note:...
- Page 20 Note:...
- Page 21 Profiles for divided revolving door - top - Content accessories bag - divided revolving door - top Note:...
- Page 22 Note:...
- Page 24 Profiles for rear window fi Content accessories bag - rear window - Note:...
- Page 25 M6 x 16 (S5) nuts M6 (S1). Note:...
- Page 27 to step 13:...
- Page 28 When using a foundation frame (see page 5, 6) corner (V1). screw pan head 4,2 x 13 (S9). to step 15: Instructions, see page 12-21.
- Page 30 Riga helf Riga Riga Riga Riga escription pos. overview III/IIIS IV/IVS V/VS longitudinal profile strut (Ø20 x 1,5) angle-end tail (narrow) cross-brace V161 connector with grub screw S12/ S15/...
- Page 31 Riga 1x 2104 mm Riga III 1x 3162 mm 1x 4220 mm Riga IV Riga V 1x 5278 mm Pos. 5 Pos. 3 Pos. 1 Step 1 Step 2...
- Page 32 Step 3 Step 4 Step 5 Step 6 Step 7...
- Page 33 Riga Rig able helf Riga Riga Riga Riga escription pos. overview III/IIIS IV/IVS V/VS longitudinal profile cross-profile strut (Ø20 x 1,5) angle-end tail (narrow) cross-brace angle connector with grub screw V161 S12/ S15/...
- Page 34 Riga 1x 2104 mm Riga III 1x 3162 mm 1x 4220 mm Riga IV Riga V 1x 5278 mm Pos. 5 Pos. 3 Pos. 1...
- Page 35 Step 1 Step 2 Step 3 Step 4 Step 5...
- Page 36 Step 6 Step 7 Step 8 Step 9...
- Page 37 For a Riga 4 & 5, we recommend placing the exhaust fan next to rear wall window by placing the unit on top of the cross bar to support the weight, as seen below.
- Page 38 Intake Shutter Vent Installation for RIGA XL, RIGA 4 & RIGA 5 You will want your intake shutter vent to be opposite from your exhaust fan (i.e. opposite wall and lower part of the greenhouse) to get the best cross-breeze. They should both be plugged into the thermostat with a plug splitter to engage them simultaneously.
- Page 39 Riga Metal Hook Assembly...


Need help?
Do you have a question about the Riga and is the answer not in the manual?
Questions and answers