Exaco Royal Victorian VI23 Assembly Instructions Manual
Hide thumbs
Also See for Royal Victorian VI23:
- Mounting instructions (66 pages) ,
- Assembly instructions manual (104 pages)
Advertisement
Quick Links
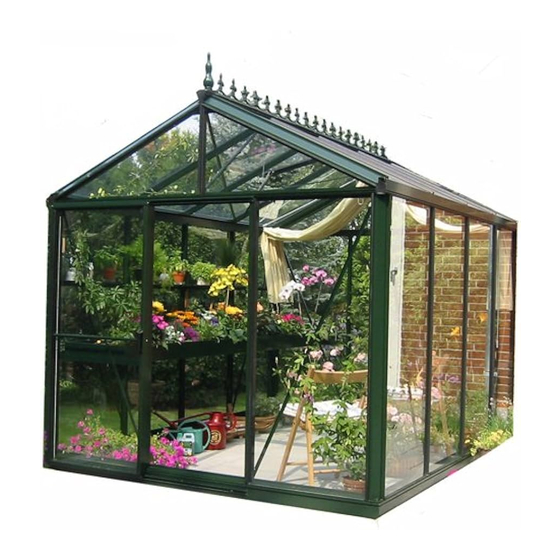
Royal Victorian Greenhouse
Janssens Version 2021_2
Exaco Edits 04.15.22
Note: This is an all-inclusive manual. It shows optional accessories and customizations that may not apply
to your greenhouse. Direct any questions to Exaco.
Or find the link to our YouTube page at
www.exaco.com. Go to the Victorian
Greenhouse Playlist for all videos.
VI23,34,36,46
Assembly Videos can
be found by scanning
the code to the left
with your
smartphone.
A
SSEMBLY
www.exaco.com
877-760-8500
1
I
NSTRUCTIONS
Advertisement

Related Manuals for Exaco Royal Victorian VI23


Summary of Contents for Exaco Royal Victorian VI23
- Page 1 NSTRUCTIONS Exaco Edits 04.15.22 Note: This is an all-inclusive manual. It shows optional accessories and customizations that may not apply to your greenhouse. Direct any questions to Exaco. Assembly Videos can be found by scanning the code to the left with your www.exaco.com...
- Page 2 Table of Contents Introduction & General Information……………………………………………………...………………4 Foundation Measurements and Planning…………………………………………...………………….5 Option: Placing Greenhouse on a Stem Wall VI34, 36, 46 on a Stem Wall……………………………………………………………………..6 VI 23 on a Stem Wall…………………………………………………………..………..………..7 Single Sliding Door on a Stem Wall……………………………………….…………..………..8 Double Sliding Door on a Stem Wall…………………………………………..……….……….9 Packing List………………………………………………………………………………………..…10-11 Glass Specs………………………………………………………………………………………….12-13 Diagram of Greenhouse Extrusions/Profiles………………………………………………….………14...
- Page 3 Customer Service or Assembly Questions? Give us a call: 1-877-760-8500 customerservice@exaco.com www.EXACO.com Please watch our assembly videos on our Exaco YouTube Channel, find the link at www.exaco.com, then go to the Victorian Greenhouse Playlist - or scan the QR code to the...
-
Page 4: Product Information
- Screwdriver - Drill + drill bit 4.2 mm - Scissors (to cut the rubber). We reserve the right to change the construction without prior notice! Questions? Need Assembly Support? Please call Exaco at 877-760-8500, ext. 701 or email customerservice@exaco.com. - Page 5 Royal Victorian Foundation Drawing VI23 3098mm/122" VI23 2360mm/93" VI34 4574mm/180" VI34 3098mm/122" VI36 6050mm/ 238.2" VI36 3098mm/122" VI46 6050mm/ 238.2" VI46 3836mm/151" Note: Do not set anchors in concrete until the entire greenhouse frame is complete, level and square. You will need some play to attach the uprights.
- Page 6 This page only applies when you have a OPTION:VI 34,36,46 on Stem Wall door extension kit and are placing your greenhouse on a wall. = 3.098 | 3.836 2.25" B = 2.360 | 3.098 | 3.836 4.574 | 5.312 | 6.050 C = 829 | 1.567 | 2.305 D = 703 Single Door...
- Page 7 OPTION:VI 23 Stem Wall One door on Gable (narrow panes) = 2.360 2.25" B = 2.360 | 3.098 | 3.836 4.574 | 5.312 | 6.050 C = 829 D = 703 E = 829 !!! A = C + D + E !!! measurements above are in millimeters A|B|C|E...
- Page 12 Royal Victorian Glass Sizes - 4mm thick (3/16") (VI23 7'9"x10'2") 4 7/16" Roof Vent & 2 15/16" Gable below louver Roof Side wall 43 1/4" 28 3/4" below vent 28 3/4" 28 3/4" 28 3/4" (VI34 10'2" x 15') 4 7/16" 2 15/16"...
- Page 13 VI46 Glass 3/16" (4mm) tempered safety glass 13/16 " " " " 3/16 "...
- Page 37 You are now ready to install your glazing. If you have polycarbonate glazing, please refer to next page for specific prep regarding the polycarbonate panels - you will not use the crescent shaped gasket (E400330) with your polycarbonate panels. Tips for installing your glazing (more detailed steps/diagrams follow - this is an overview): Use the provided glass suction cup - it helps a lot! Wait until the end to install your roof vents - it will be easier to pop through...
- Page 38 HELIOS polycarbonate 10mm This page is for polycarbonate units only. The crescent seal (E400330) is NOT used with polycarbonate. It may be shipped with your unit, but it is only for GLASS panels. Remove the protective film, but leave the silver sealed tape and ventialtion tape on the ends.
- Page 43 ACCESSORIES This section contains many of the optional accessories. You will have some, but likely not all, items seen in this section. IMPORTANT: Find Janssens Accessory installation video on our site here: https://www.exaco.com/greenhouse-victorian.php It will be immensely helpful! Page: H_33...
- Page 44 Sliding door (standard for most models) Some models will have double sliding doors. Important: Door rollers may be M 4,8 x 32 adjusted front to back to hold door closer to greenhouse frame. M 4,8 x 19 Place rollers As needed, use washer underneath 4"...
- Page 45 OPTION: Double Sliding Door If you have a double sliding door, you will have an extra bundle with the following 2 pieces. The top piece adds support. The piece below OPTION closes the gap between the two doors. Note: Apply upward pressure when installing the door support(in red).
- Page 46 VERSION 1 NOTE: You may have one of two styles of door hanger hardware packed in your door bundle. Please use the page that applies to the style you have. Version 1 on double door option OPTION PAGE: H_35-36...
- Page 47 VERSION 2 NOTE: You may have one of two styles of door hanger hardware packed in your door bundle. Please use the page that applies to the style you have. Version 2 on double door OPTION PAGE: H_35-36...
- Page 48 Slide door rollers into top door hanger (PRO7546 or PRO7876) and slide a stopper on either side. Determine how far you want your door to slide, then tighten the screw STOP on the bottom of the stopper to secure. Finish with door hanger caps. STOP M16x15 Attach bottom door guide (PRO39796) to your foundation frame (PRO6120).
-
Page 49: Optional Upgrade
OPTIONAL UPGRADE: Low Threshold for Sliding Door/s OPTION Double sliding door Single sliding door opening should be Cut foundation opening should be 1441mm frame 17mm from 703mm bolt hole Cut foundation frame 17mm from bolt hole SDL1... - Page 50 OPTIONAL UPGRADE: Low Threshold for Sliding Door/s p. 2 OPTION Attach bottom door guide to low threshold and foundation frame. SDL2...
- Page 51 OPTION Install lock at Ø 10 bottom of a: - single sliding door -first door of (View from outside at bottom of door) double sliding doors -both of your double sliding doors 4,2 x 19 4,2 x 19...
- Page 52 OPTION (View from inside at top of door) If you have a double sliding door, you may install one lock Ø 10 on the inside of your greenhouse as shown 4,2 x 19 4,2 x 19...
- Page 57 Louvre Window - All Standard Royal models include one louvred window Note: All louvered window are black (even with green models). ____ Insert a washer between black louvre frame and the greenhouse profile at all four bolt locations. It is likely that your kit include an automatic opener (SESAM LIBERTY) for the louvre vent.
- Page 58 Louvred window may be installed on sidewall (under gutter profile (PRO20227)) or on gable end (under horizontal gable profile (PRO20229)). Both are shown to the left and below.
- Page 59 Insert a washer (not included) between black louvre frame and the greenhouse profile at all four bolt locations. Pinch louvre clamps together to hold glass. We recommend using a few dabs of silicone where the glass meets the clamps to hold the glass more securely.
- Page 60 Louver Window Cover During cold weather, the louvered window may get drafty. Your kit includes as lexan cover to seal the louvers during this time. To install the Lexan panel: • Unscrew the piston from your auto opener • Go outside the greenhouse and pull back the heavy duty rubber gaskets that hold in the panes of glass to the left, right, and bottom of the louvered window (see picture to the right)
- Page 61 OPTION: Push out window - no standard Royals include this option unless added 4,8 x 70...
- Page 62 4,8 x 19 4,8 x 19...
- Page 63 RUBBER E400330 RUBBER PRO1748...
- Page 64 OPTION: Hinged Door IMPORTANT: Find Janssens Accessory installation video on our site here: https://www.exaco.com/greenhouse-victorian.php HD 1...
- Page 65 item L 40X40 4 pc 36 mm PRO6280 2 pc 703 mm PRO6280 2 pc 1.441 mm PRO6280 2 pc 1.930 mm 4,2 x 13 8 pc HD 2...
- Page 66 Double Hinged door will need opening of 1441mm, 17mm from bolt holes on foundation frame. (Single door shown, double door jamb installation will be identical) (view from top) HD 3...
- Page 67 OPTION: Hinged door on a stem wall (door extension kit will be needed)
- Page 68 Single hinged door (view from top) HD 4...
- Page 69 OPTION: Double Hinged Door HD 5...
- Page 70 Step 3: Tighten set screw in handle - note that square rod must be equidistant from each handle. Step 4: Slide face plates onto door handles and snap in place. IMPORTANT: Find Janssens Accessory installation video on our site here: https:// www.exaco.com/greenhouse-victorian.php HD 6...
- Page 71 Insert lock cartridge and secure with screw. Attach latch catch plate to second door. HD 7...
- Page 72 HD 8...
- Page 73 HD 9...
- Page 74 This page only applies to double hinged doors. HD10...
-
Page 75: Hinge Adjustment
HINGE ADJUSTMENT (Left to Right) - Page 76 HINGE HINGE ADJUSTMENT ADJUSTMENT (Up) (Front/Back) ±0,5 ±0,5...
- Page 82 OPTIONAL ACCESSORY: SHADECLOTH Inserting the curlicue hooks into the curtain: The curlicue hooks that insert into the curtain will go in every 6 loop in the white ribbon– look at the picture diagram to ensure you are inserting them in the correct direction so the curtain hangs well. Your curtains will have one looped ribbon running across the center (for the ridge) and 3 white looped ribbons on either side.
- Page 84 INSTALLING AN EXHAUST FAN IN A VICTORIAN GREENHOUSE The exhaust fan in a Victorian Greenhouse should be installed up high in one of the gable ends of the greenhouse. If you happen to have polycarbonate walls on your Victorian, you may cut an opening in the polycarbonate to accommodate the fan.
-
Page 85: Optional Accessory
OPTIONAL ACCESSORY: Louvre Window Fly Screen (view from outside) - Page 87 OPTIONAL ACCESSORY: Sliding Screen Door (view from inside) 4,5 X 50 4,5 X 50 4,5 X 50 4,5 X 50 4,5 X 50 4,5 X 50...
- Page 88 Toll free: 1-877-760-8500 customerservice@exaco.com Exaco Trading www.EXACO.com Please watch our animated assembly video on our Exaco Trading Co YouTube Channel. Find the link at www.exaco.com Mechelsesteenweg 388, B-2500 Lier Belgium Janssens NV (T) +32 15 30 67 80 (W) www.janssens-alusystems.be (E) info@janssens-...
Need help?
Do you have a question about the Royal Victorian VI23 and is the answer not in the manual?
Questions and answers