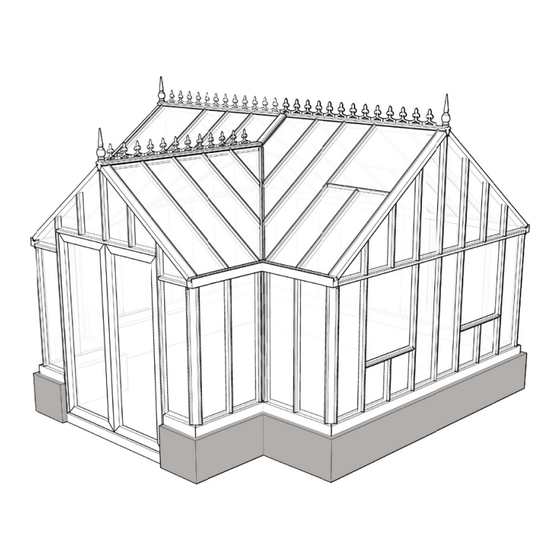
Summary of Contents for Exaco EOS ROYAL MUR
- Page 5 PRO40091 PRO41942 PRO1456 PRO6918 PRO20229 PRO20779 PRO6578 PRO1456 PRO6120 PRO40633 Key to Profile (Extrusion) Placement...
- Page 6 PRO210 8 pc 400 mm Metric PRO6120 1+1 pc 2.010 mm PRO6120 1+1 pc 459 mm Tip: Exaco recommends that you use a tape measure to distinguish PRO6120 2 pc 3.098 mm between similar looking pieces of different lengths. PRO6120...
- Page 7 ALTERNATIVE ITEM OPTION OPTION item ROYAL TM 2...
- Page 8 item PRO6578 6 pc 1.230 mm M6x12 18 pc M6x25 8 pc PRO40633 2 pc 1.230 mm PRO1456 1+1 pc 2.026 mm PAGE ROYAL TM 17 M6x25 M6x25 ROYAL-TM 3...
- Page 9 item PRO20229 2 pc 2.982 mm 1 pc 1.511 mm PRO20229 PRO20229 1+1 pc 401 mm M6x12 14 pc ROYAL-TM 4...
- Page 10 item 20x55x20 1 pc 600 mm 15x20 1 pc 600 mm 4 pc Silicon all edges where item this piece meets the frame. This will prevent future PRO20779 1+1 pc 2.010 mm water leakage. PRO20779 2+2 pc 829 mm M6x12 10 pc 2 pc 2 pc...
- Page 11 item PAGE ROYAL TM 14 PRO1456 25 pc 1.230 mm M6x12 M6x12 50+8+2 pc M6x25 6 pc Louvre Window - Install in locations along the back Seed Tray - Install in either of the locations wall outlined in green. outlined in red. Do not May install in locations outlined in red only if a install a Louvre window in...
- Page 12 item PRO1456 2 pc 203 mm PRO1456 2 pc 703 mm M6x12 12 pc ROYAL-TM 7...
- Page 13 Optional: Use a piece of NOTE: Use a power drill to wood to provide extra pre-drill holes before adding support. the screws. Buy 10ft 2x4 and cut to fit. item K 30 x 30 1 pc 1.500 mm U 30 x 30 1 pc 1.500 mm 1+1 pc...
- Page 14 PAGE ROYAL TM 8 PAGE ROYAL TM 10 + 12 PAGE ROYAL TM 18 item PRO6918 1.830 PAGE ROYAL TM 10 M6x12 8+4+16 ROYAL-TM 9...
- Page 15 NOTE: The wind braces (BLUE) can be tricky to install. If you are having trouble, try temporarily un-attaching Piece A from the hub (depicted above). It can be reattached later, and its PAGE ROYAL TM 19 removal should allow for some wiggle room.
- Page 16 item PRO1456 1.830 M6x12 18+12 M6x25 M6x12 M6x12 M6x12 M6x12 M6x25 M6x12 PAGE ROYAL TM 17 M6x25 M6x12 PAGE ROYAL TM 17 M6x25 PAGE ROYAL TM 12 PAGE ROYAL TM 17 M6x12 PAGE ROYAL TM 12 M6x12 M6x25 M6x12 PAGE ROYAL TM 17 ROYAL-TM 11 M6x12...
- Page 17 item PRO1456 1.005 PRO1456 M6x12 ROYAL-TM 12...
- Page 18 M6x12 PAGE ROYAL TM 10 M6x12 PAGE ROYAL TM 10 Insert bolts to connnect short uprights to the PRO6918. You will need as many bolts as you have short uprights. item PRO40091* PRO6918 1.430 M6x12 ROYAL-TM 13...
- Page 19 PAGE ROYAL TM 19 Turn to this page for additional tips NOTE: The wind braces (BLUE) can be tricky to install. If you are having trouble, try temporarily un-attaching Piece A from the hub (depicted above). It can be reattached later, and its removal should allow for some wiggle room.
- Page 20 M6x12 M6x12 M6x12 M6x25 PAGE ROYAL TM 17 item PRO1456 1.430 M6x25 PAGE ROYAL TM 17 M6x12 M6x12 M6x25 ROYAL-TM 15...
- Page 21 = PAGE ROYAL = PAGE ROYAL TM 11 TM 15 Installing Triangular Glass: Start from the top and add item framing as you work towards the lower most piece. PRO41942 1.942 Leave hardware loose until all triangular glass is in. PRO1456 1.408 PRO1456...
- Page 22 item M6x40 33 PC. 10 SETS 1 PC. PUSH 10MM 2 FIX ROYAL-TM 17...
- Page 23 You must manually bend the ends of this bar (circled) to accommodate the angle of placement. Tighten the end of an adjustable wrench on the flat area and bend it into position. item Ø 19mm 1.030 ROYAL-TM 18...
- Page 24 X = EXTRA FIXING / EXTRA BEFESTIGUNG / ATTACH EXTRA item 1.437 1.611 2.356 1.975 ROYAL-TM 19...
- Page 25 ROYAL-TM 20...
- Page 26 4 mm GLASS Pro 20780 Be sure to place two clips to reinforce each of the interior corners and prevent glass from sliding These illustrations outline the steps for installing certain roof glass pieces (marked by red X's in the diagram to the right).
- Page 27 Glazing shim installation: Install the glass panels, then fix the shims to either side of the glass with a dab of silicon. Then install the rubber trim. Shims are only installed in end panes as shown below. Space the shims 100mm/4" from the top and bottom.
- Page 28 E 400330 15 M PRO2290 SILICONEN SILICONEN Crescent seal is only SILICONEN installed in the eaves and roof (not along side walls). E 400330 ROYAL-TM 23...


Need help?
Do you have a question about the EOS ROYAL MUR and is the answer not in the manual?
Questions and answers