
Related Manuals for Fuji Electric NSN31047-S Series


Summary of Contents for Fuji Electric NSN31047-S Series
- Page 1 Instruction Manual Neutron survey meter NSN31047 - YYYYY-S NSN31047 - YY1YY-S NSN31047 - Y1YYY-S NSN31047 - Y11YY-S April. 2019 Fuji Electric Co., Ltd. TN5A3974c 1/77...
- Page 2 TN5A3974c 2/77...
- Page 3 Please enclose any pictures or diagrams in order to facilitate our understanding of the problem. The unauthorized user, repairing or modifying may result in electrical shock hazards, incorrect operation and may avoid warranty. FUJI ELECTRIC will not be responsible for any deaths and injuries sustained due to the unauthorized repair. TN5A3974c...
- Page 4 Product Package Contents This package contains the items listed in the table below. Please confirm before use. Item Quantity Remarks NSN3 One USB connector Neutron survey meter Includes a button-type battery Instruction manual This document Test report AA alkaline batteries Shoulder belt Optional Accessories The following optional accessories are available.
- Page 5 For Your Safety Read the following safety precautions in order to use the product safely and prevent personal injury and product damage. Read the complete Instruction Manual for further information before using the product. Please note that the contents of this Manual may change due to the product modification without notice.
- Page 6 Safety Precautions When the "low battery" indicator appears, replace old batteries with the new ones immediately. If you are using Ni-MH rechargeable batteries, remove and recharge the batteries with the designated charger. Replace the batteries when they are fully charged. Replace primary batteries with standard AA alkaline batteries.
- Page 7 Material Safety The NSN3 detector of contains flammable gas. Follow the attentions below. Attention Flammable gas is used in the detector. Do not use the product near fire. Do not throw the product into an open fire. Do not expose the product to shock or impact. Do not drop the survey meter.
-
Page 8: Table Of Contents
Contents 1. General ................................9 2. Product type code .............................. 9 3. Specifications ..............................10 4. Parts and features............................12 Configuration ............................. 12 Display unit ............................15 Description of the displays ........................ 16 5. Operation ................................. 18 Dose rate measurement and time constant setting ................23 Accumulated dose measurement ..................... -
Page 9: General
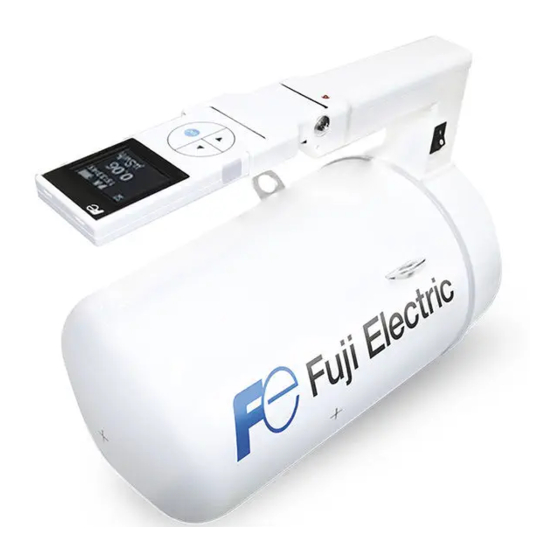
1. General This equipment is the portable neutron survey meter, to measure the neutron dose rate and the accumulated dose at neutron fields in nuclear facilities or accelerator facilities. Lightweight and high sensitivity have been achieved by adopting the organic mixed gas counter. The measurement values are displayed on the screen. -
Page 10: Specifications
Specifications Item Specification Radiation detected Neutron (Excluding pulsed neutron) Energy range 0.025eV to 15MeV Detector Organic mixed gas counter Moderator NSN31047-YYYYY-S : Not used NSN31047-Y1YYY-S : Not used NSN31047-YY1YY-S : Polyethylene NSN31047-Y11YY-S : Polyethylene 1cm dose equivalent rate 5 decades Effective measurement range 1 μSv h to 99.99 mSv h... - Page 11 Item Specification Power source (1) Primary battery (6 ordinary AA alkaline batteries) (2) Secondary battery (6 ordinary AA Ni-MH batteries) (3) Commercial AC source (with AC adaptor) Monitor beep ON / OFF Check functions (1) Battery level AC adaptor Battery level 4 : Ample charge. Battery level 3 : Medium charge.
-
Page 12: Parts And Features
Parts and features This Section describes parts and features of the NSN3. 4.1 Configuration ( b ) ( c ) ( f ) ( n ) ( j ) ( k ) ( h ) ( e ) Measuring object ( d ) ( m ) ( g ) - Page 13 Operating pad Use the operating pad to switch between various functions. Refer to the section 4.3 for details on display unit. (d) Power switch Press down the “ | ” to turn ON. Press down the “O ” to turn OFF. (e) Battery compartment Pressing down on point A, slide the battery cover upward (in the direction indicated by the arrow) to remove the cover.
- Page 14 Flashes in response to detection count. The light is continuously on when a high dose rate is detected. Power jack Use only FUJI ELECTRIC approved AC adapter (optional) designated for the NSN3. Failure to do this may result in a malfunction or excessive heat generation. Use only the designated charger for recharging AA Ni-MH batteries. When...
-
Page 15: Display Unit
Display unit (a) ENT key - Use the "ENT" key to display setup values/setup screen while the dose rate is displayed. - The "ENT" key is also used to cancel or confirm various parameters. - Use the " " key to move the cursor up to the next selection. The " "... -
Page 16: Description Of The Displays
Description of the displays 4.3.1 Display (Dose rate) (d) (e) (f) 「 (a) Dose rate value - Displays Dose Rate Value in digital format. (b) Unit - Displays selected unit: "µSv/h" or "mSv/h". (c) Battery Indicator - Indicates the battery level. Replace the standard AA alkaline batteries immediately when the "... - Page 17 4.3.2 Display (Accumulated dose) (a) Accumulated dose - Displays accumulated dose value in digital format. (b) Unit - Displays selected unit: "µSv" or “mSv". (c) Accumulation indicator - Indicates that the NSN3 is accumulating the dose values. When the dose values are not being accumulated, "||"...
-
Page 18: Operation
Operation The operational flow of the NSN3 is as follows: NSN3 Survey meter NOTE: When the NSN3 operates in the measurement mode, the following values can be measured. Dose rate and accumulated dose, while the data is being transferred to the PC using the USB connector or while trend data is being copied to the display unit Memory, the above data cannot be measured. - Page 19 The NSN3 operates in the following four modes: Measurement mode Configuration mode Communication mode Accumulation mode (1) Measurement mode In the measurement mode, the NSN3 continuously measures the dose rate. In addition, the NSN3 displays the followings: Dose rate Accumulated dose Display sample of measurement mode (2) Configuration mode...
- Page 20 (3) Communication mode This function automatically begins when connecting the survey meter to the PC. The setting values displayed on the PC screen can be changed and the transferred trend data (*) can be saved in the PC. Note (*): The updated trend data is transmitted from the main body to the PC. When the main body is turned OFF or the display unit is removed from the main body, the data recorded in the display unit memory is transferred to the PC.
- Page 21 - Start, stop or reset the accumulation process by pressing the "ENT" key to select "START", "STOP" or "RESET?". Selecting the "STOP" Selecting the "START" Press the "ENT" key. Press the "ENT" key. While accumulation While accumulation process been process has been performed, performed or stopped, either of either of the "STOP"...
- Page 22 To set the selection, press the keys in the order of " ", " " and "ENT". STEP 1 STEP 3 PRESS PRESS STEP 2 PRESS Setting the Selection When restarting the Accumulation Process, perform the aforementioned procedures. TN5A3974c 22/77...
-
Page 23: Dose Rate Measurement And Time Constant Setting
Dose rate measurement and time constant setting The dose rate measurement is a basic function of the NSN3. By turning on the instrument, the dose rate measurement begins in the measurement mode. It takes approximately two seconds for the survey meter to power up. Once the survey meter is ready,the display lights up. - Page 24 • Press the "ENT" key to select "S", "M" ,”L” or "A". This will automatically confirm the selection. Refer to the section 7 for details on the "Time constant". Mode S Mode M PRESS PRESS Mode A Mode L PRESS PRESS Go back to the beginning.
-
Page 25: Accumulated Dose Measurement
Accumulated dose measurement Once the switch of the NSN3 is turned ON, the dose rate screen will be shown. Then press either the " " key or the " " key. It would appear the accumulated dose screen. The accumulation process will start automatically. PRESS Displaying the accumulated dose screen To stop the accumulation process:... - Page 26 To restart the accumulation process: • Press the "ENT" key and then confirm that "START" appears in the lower left corner of the screen. • Press the keys in the order of " ", " ", and "ENT". Selecting the "START" To reset the accumulation process: •...
- Page 27 To start the accumulation process of dose values: • Press the "ENT" key and then confirm that "START" appears in the lower left corner of the screen. • Press the keys in the order of " ", " ", and "ENT". Selecting the "START"...
-
Page 28: Time Setting (Accumulation)
Time setting (Accumulation) To display the "Menu", press the "ENT" key while in the dose rate screen shown. PRESS Displaying the "Menu" screen Press the " " key or the " " key to select the "Settings" under the "Menu" and then press the "ENT"... - Page 29 After changing the time, press the "ENT" key to move the cursor to the last digit and then press the "ENT" key again. Confirm that the "SET" appears and press the "ENT" key PRESS PRESS PRESS Setting the "Accum. time" To switch back to the "Menu", press the "...
-
Page 30: Backlight Setting (Power-Saving Mode)
Backlight setting (Power-Saving mode) To save battery life, the Display Backlight automatically turns OFF when there has been no key activity for a certain amount of time depending on the setting (1 min./5min.). To display the "Menu", press the "ENT" key while in the dose rate screen shown. PRESS Displaying the "Menu"... - Page 31 Press the " " key or the " " key to select the "Backlight". PRESS Selecting the "Backlight" By pressing the "ENT" key, each selection is displayed in the following order: 1 min. è 5 min. è " " indicates that the display backlight will always be on. •...
- Page 32 To switch back to the "Menu", press the " " key or the " " key to select "END" at the bottom of the screen and press the "ENT" key. PRESS PRESS Switching back to the "Menu" screen To display to the dose rate screen, press the " "...
-
Page 33: Buzzer (Monitoring Sound)
Buzzer (monitoring sound) The "Buzzer" (Monitoring sound) can be turned ON/OFF depending on the environmental factors. To display the "Menu", press the "ENT" key while in the dose rate screen shown. PRESS Displaying the "Menu" screen Press the " " key or the " "... - Page 34 Press the "ENT" key to select "ON" or "OFF". This will automatically confirm the selection. PRESS PRESS Selecting the "Buzzer" When the buzzer is turned "ON", the " " indicator is displayed on the measurement screen and monitoring sound activates. To display the dose rate screen, press the "...
-
Page 35: Trend Data Storage Cycle
Trend data storage cycle Select from the 8 time selections depending on the environmental factors. The default setting is 300 seconds. To display the "Menu", press the "ENT" key while in the dose rate screen shown. PRESS Displaying the "Menu" screen Press the "... - Page 36 By pressing the " " key or the " " key, each selection is displayed in the following order: 0 Û 10 Û 20 Û 30 Û 60 Û 120 Û 300 Û 600 (sec.) (Default setting : 300 seconds) When "...
- Page 37 Press the " " key or the " " key to select " 0 ", " 10", " 20", " 30", " 60", "120", "300" or "600" (seconds) and then press the "ENT" key . Confirm that "SET" appears and then press the "ENT" key again.
-
Page 38: Date & Time Setting
Date & time setting To display the "Menu", press the "ENT" key while in the dose rate screen shown. PRESS Displaying the "Menu" screen Press the " " key or the " " key to select the "Date & Time" and then press the "ENT" key. PRESS PRESS Selecting the "Date &... - Page 39 Press the " " key or the " " key to change the last 2 digits to the preferred figure. For example: The Year 2009 should be entered as "09 Y." • Move the cursor by pressing the "ENT" key. The cursor moves in the following order: "Y"(Year), "M"...
- Page 40 After changing the Date and Time, press the "ENT" key to move the cursor to "m" (Minutes : Final digit) and then press the "ENT" key again. Confirm that "SET" is highlighted at the bottom of the screen. Press the "ENT" key to confirm. PRESS PRESS Setting the "Date &...
-
Page 41: Copy Of Trend Data
Copy of trend data When turning ON the survey meter, the main body of the NSN3 automatically collects and stores the trend data according to the trend data storage cycle (refer to the section 5.7). The default setting of the data storage cycle is 60 seconds at the time of shipment. Up to 1200 data records can be stored in the main body. - Page 42 Confirm that the message: "Now operating. Don’t turn off" appears. The total number of trend data records and of copied data records are displayed. Displaying the message Once it reaches at 240/240, then the copying is completed. Completion of the copying TN5A3974c 42/77...
- Page 43 When copying has been completed, press the " " key or the " " key. Confirm that the "CXL" is highlighted at the bottom of the screen. Press the "ENT" key and the "Menu" is displayed. PRESS PRESS Displaying the "Menu" screen Note: The optional maintenance software is required to transfer the trend data to the PC.
-
Page 44: Maintenance
Maintenance This operation displays the each ID number and each version number of the main body NSN3 and the display unit NHV1. To display the "Menu", press the "ENT" key while in the dose rate screen shown. PRESS Displaying the "Menu" screen Press the "... - Page 45 To switch back to the "Menu", press the "ENT" key and press the " " key or the " " key to select "END" at the bottom of the screen and press the "ENT" key again. PRESS PRESS Switching back to the "Menu" screen To display to the dose rate screen, press the "...
-
Page 46: Maintenance
Maintenance Maintenance and inspection procedures The Maintenance procedures are described in Table 6-1. The maintenance and inspection procedures are described in Table 6-2. 6-1 Maintenance procedures Table Item Description Storage Turn OFF the NSN3 and remove the all batteries. method Store the NSN3 into a plastic bag. - Page 47 6-2 Maintenance Table Item Description When the battery power is low, replace the used batteries Battery replacement with the new ones. (Standard AA Refer to the section 6.3 for details on the "Battery alkaline batteries) replacement". When battery power is low, recharge the AA Ni-MH rechargeable batteries.
-
Page 48: Replacement Parts
Replacement parts Contact our sales representative or agency when replacing the following parts Table 6-3 Replacement parts Fuji Electric Item Cycle Type Remarks number MAXELL CR2032 R79219N16 Battery backup of RTC 10 year button-type battery When change Packing seal TQ400977P1 No.1... -
Page 49: Battery Replacement
Battery replacement For the battery removal or the replacement, follow the procedures below: (1) Turn OFF the power switch of the main body. Battery cover (2) Pressing down on point A (shown in Figure 6-1), Battery slide the battery cover upward (in the direction compartment indicated by the arrow) and remove it. -
Page 50: Handle Replacement
Handle replacement For the handle replacement, follow the procedures below: Display (1) Turn OFF the power switch of the main body. (2) Pressing down on point A (shown in Figure 6-3), slide the battery cover upward (in the direction indicated by the arrow) and remove it. In case of NSN31047-Y11YY-S and NSN31047- Y1YYY-S, loosen the screw on point A before open the battery cap. - Page 51 (6) Remove the 4 screws. (7) Remove the handle unit upward while pressing the connector rock. (8) Attach the new handle to NSN3 body. TN5A3974c 51/77...
- Page 52 Fit the connector as below. (NOT able to connect) (Connected) (9) Fasten 4 screws to fix the handle and NSN3 body. TN5A3974c 52/77...
- Page 53 (10) Attach the cap and fasten the screw. (11) Attach the display unit Display holder (12) Attach the battery cap. Check the looseness of handle and NSN3 body. When installation of a handle is loose, there is a possibility of damage the NSN3 body by falling and a possibility of your injury.
-
Page 54: Time Constant Table
Time constant table 7-1 Time constant Table Time constant (sec) Measurement accuracy (2σ) Measured dose rate [μSv/h] Under 0.03 0.03 or over Under 0.1 100% 88.2% 50.9% 0.1 or over Under 0.2 83.7% 48.3% 27.9% 0.2 or over Under 0.5 59.2% 34.2% 19.7%... -
Page 55: Troubleshooting
Troubleshooting If the problem continues, please contact our sales representative or agency. When returning the product, place it in a suitable box with appropriate packing material and label the box "Precision equipment, handle with care". Please enclose the detailed status and defect report in the box. - Page 56 SYMPTOM POSSIBLE CAUSE SUGGESTED SOLUTION Dose errors: (1) Display malfunction (1) (2) & (3) Contact our sales representative - Dose rate/ (garbled characters, etc.) or agency. Accumulated dose (2) IC malfunction. (4) The product needs calibration. Contact our readings are high. (3) Faulty counting tube.
-
Page 57: Appendix A Characteristic For Neutrons And Gamma-Rays
Appendix A Characteristic for neutrons and gamma-rays Relative error of indication 9.1.1 Dose equivalent rate Note) using electrical pulse Figure 9-1-1 Relative intrinsic error of dose equivalent rate 9.1.2 Accumulate dose equivalent Note) using electrical pulse Figure 9-1-2 Relative intrinsic error of accumulate dose equivalent TN5A3974c 57/77... -
Page 58: Energy Characteristics
Energy characteristics 9.2.1 Energy characteristics for continuous energy neutrons Evaluated by: Japan Atomic Energy Agency (JAEA). Neutron sources: Cf (2.13 MeV), Am-Be (4.16 MeV), thermal neutrons generated from graphite pile loading an Cf source (0.025 eV), D O- moderated neutrons of Cf source (550 keV), and graphite-moderated neutrons of Am-Be source (840keV). - Page 59 9.2.2 Energy characteristics for monoenergetic neutrons Evaluated by: - Japan Atomic Energy Agency (JAEA) : 8keV,144keV, 250keV, 565keV,14.8MeV - National Institute of Advanced Industrial Science and Technology (AIST), (Japan), : 24keV, 1.1MeV, 14.8MeV - Fast Neutron Lab. (FNL) of Tohoku University in Japan : 5MeV Simulation calculation: - Particle and Heavy Ion Transport Code System (PHITS [A]) Figure 9-2-2 Energy characteristics for monoenergetic neutrons...
-
Page 60: Response For Photon Radiation
Response for photon radiation Table 9-3 Response for photon radiation Gamma-ray ( Indication Response Reference dose equivalent late [mSv/h] [mSv/h] < 0.0001 < 0.01 % < 0.01 < 0.1 % Angular dependence 9.4.1 Horizontal direction 9.4.2 Vertical direction TN5A3974c 60/77... -
Page 61: Appendix B Error Code
10. Appendix B Error code When communication error occurs, the following error code will be displayed on the screen. Refer to Table 10-1 for further details. First digit Second digit Table 10-1 Error code First digit indicates the location where Second digit indicates details of error (*) the error occurred. -
Page 62: Appendix C Confirmation Of Dose Rate Response
11. Appendix C Confirmation of dose rate response This section describes the calibration procedures for the NSN3. Expose the NSN3 to the neutron sources such as Cf and Am-Be. A dose rate should be measured by placing the source at the distance from reference point of the NSN3 and it should also be traceable to the Japanese National Standard. - Page 63 (3) Calculation of the calibration factor Compare the reference dose rate (R ) and the dose rate reading (R ). If there is an unacceptable difference between R and R , change the calibration factor. In general, the calibration factor (C ) is calculated by the following formula: ´...
- Page 64 The maintenance software activates and then the following "Main Menu" is displayed. Figure 11-3 Main menu screen Click on the "Operation setting" under the "Main Menu". Confirm that the "Operation setting" screen is displayed as shown below. Figure 11-4 Operation setting screen TN5A3974c 64/77...
- Page 65 Click on "Read" to display the calibration factor. Figure 11-5 Operation setting screen Enter the calibration factor value and then click on "Update" as shown below. For example, when changing the calibration factor to 1.28, then enter "128". Calibration Click on "Read" again and confirm that the calibration factor is updated. Figure 11-7 Operation setting screen TN5A3974c 65/77...
-
Page 66: Appendix D Transportation
12. Appendix D Transportation This section describes the packing and transportation method for this product. Shipping should be performed by shipper’s responsibility. Because the following dangerous materials are included, shipper shall pack and transport according to this chapter. United Nations Number : UN1954 Proper Shipping Name (PSN) : Compressed gas, flammable, n.o.s. -
Page 67: Packing Method
12.1 Packing method This section describes the packing method for this product. The packing must be performed according to U.S. DOT special permit (DOT-SP 16217). It is recommended that dedicated optional packaging material (transportation case or fiberboard box) is used for the packaging of this product since they were tested and confirmed the compliance with U.S. - Page 68 12.1.1 Packing methods using the cardboard box for transportation 1) Material Main Material : Fiberboard box Dimension : 590mm(L) x 390mm(W) x 310mm(H) Inner Material : Styrofoam Buffer materials : Eco plus etc. Packing Tape : 45mm or more width with sufficient adhesive power 2) Packing method Seal off the bottom surface of the Fiberboard box by taping all lids together in H-shaped form.
- Page 69 iv) Put in the inner material for accessories on the inner material for neuron survey meter. v) Place the accessories and buffer materials like following figure. Shoulder belt Manuals Batteries AC adaptor al Buffer materials USB cable and CD-ROM (optional) vi) Seal off the top surface of the cardboard case by taping all lids together in H-shaped form.
-
Page 70: Transportation Method
12.2 Transportation method Ground transportation Transport this product according to the regulations of the applicable country. This neutron survey meter can be transported with usual ground transportation service in Japan since any Japanese regulations does not prohibit or limit a ground transportation of this product. For the ground transportation in the U.S., transport this product according to special permit (DOT- SP 16217) Air transportation... -
Page 71: Special Permit
12.3 Special permit See following special permit. Please get the latest special permit and confirm it before shipping. TN5A3974c 71/77... - Page 72 TN5A3974c 72/77...
- Page 73 TN5A3974c 73/77...
- Page 74 TN5A3974c 74/77...
- Page 75 TN5A3974c 75/77...
- Page 76 -Your Comment- Dear customers, If you have any comments/ requests/ suggestions regarding our instruction manual, please feel free to contact us just by filling out this form and give to our sales representative. Manual # TN5A3974c Date(D,M,Y;) Company/Agency Instruction Manual Name of Department/Section Neutron Survey Meter...
- Page 77 TN5A3974c 77/77...
- Page 78 TN5A3974c 78/77...
Need help?
Do you have a question about the NSN31047-S Series and is the answer not in the manual?
Questions and answers