Advertisement
Quick Links
INSTALLATION INSTRUCTIONS
WARNING: NEVER EXCEED YOUR VEHICLE MANUFACTURER'S RECOMMENDED TOWING CAPACITY
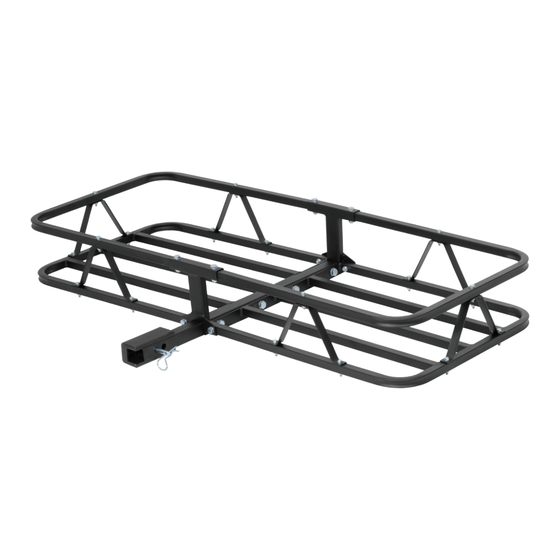
FIXED, HITCH-MOUNTED CARGO CARRIER
PARTS LIST
Item#
Qty
Description
1
18
Locknut, M6
2
18
Flat washer, M6
3
6
Support bracket, V-shape
4
2
Platform, bottom half
5
4
Locknut, M10
6
4
Spring washer, M10
7
4
Flat washer, M10*1.5
8
8
Hex head bolt, M8*35
9
1
Shank, 1 1/4"
10
4
Hex head bolt, M10*60
11
18
Hex head bolt, M6*35
12
2
Platform, top tubing
13
8
Locknut, M8
14
8
Flat washer, M8
15
2
Connection tube
16
1
Clip
17
1
Hex head bolt, 1/2" - 13
18
1
Flat washer, 1/2"
19
1
Star washer, 1/2"
20
1
U-type adapter
SUGGESTED TOOLS
Adjustable wrench, 0 to 30mm
12
1
2
3
4
17
18
19
20
Figure 1
WARNINGS
Do not exceed maximum weight capacity of 500 lbs.
when using 2" receiver tube and 300 lbs. when using
an 1 1/4" receiver tube. Distribute the weight evenly on
platform when hauling a load. NOTE: This carrier is not
intended for transporting people.
Do not carry loads wider or deeper than carrier. Do not
carry flammable items on carrier. Do not allow exhaust
fumes to blow directly on items. This is a fire hazard.
CURT Manufacturing, LLC is not responsible
for any damage if warnings are not heeded.
PAGE 1 • 18145-INS-RA • 1.800.798.0813 • NEED ASSISTANCE?
5
6
7
14
13
8
15
9
10
16
11
• CURTMFG.COM
12
Advertisement

Subscribe to Our Youtube Channel
Related Manuals for curt 18145


Summary of Contents for curt 18145
- Page 1 Do not allow exhaust fumes to blow directly on items. This is a fire hazard. CURT Manufacturing, LLC is not responsible for any damage if warnings are not heeded. • CURTMFG.COM PAGE 1 • 18145-INS-RA • 1.800.798.0813 • NEED ASSISTANCE?
- Page 2 NOTE: The connection tube bracket with reflective tape should be located on the side facing away from the vehicle. Figure 1 The one without tape should be located on the shank side. CURTMFG.COM • NEED ASSISTANCE? • 1.800.798.0813 • 18145-INS-RA • PAGE 2...
Need help?
Do you have a question about the 18145 and is the answer not in the manual?
Questions and answers