Table of Contents
Advertisement
Quick Links
INSTALLATION MANUAL
Level of Difficulty
Easy
Parts List
Qty
Description
1
Bottom bracket
4
U-clamp
9
Lock nut, M10
4
Eye bolt, M10 x 45mm
1
Carrier frame
1
Fixed plate
1
Button socket cap screw,
M10 x 25mm
2
Eye bolt, M10 x 20mm
1
Flat washer, M10
1
Shank assembly
1
Hex head bolt, M16
1
Lock nut, M16
1
Pin
2
Clip
1
Anti-rattle hitch pin, M16
1
Spring washer, M16
1
Flat washer, M16
2
Button socket cap screw,
M10 x 20mm
1
Upper ramp
1
Lower ramp
Tools Required
Open wrench, 17mm
Adjustable wrench
Open wrench, 24mm Socket, 17mm
Torque wrench
Hex key, 6mm
Weight Capacities
Weight capacity
500 lbs.
CURTMFG.COM
•
NEED ASSISTANCE?
WARNING
Do not carry flammable items on the carrier. Do not allow exhaust fumes
to blow directly on items in the carrier. This is a fire hazard.
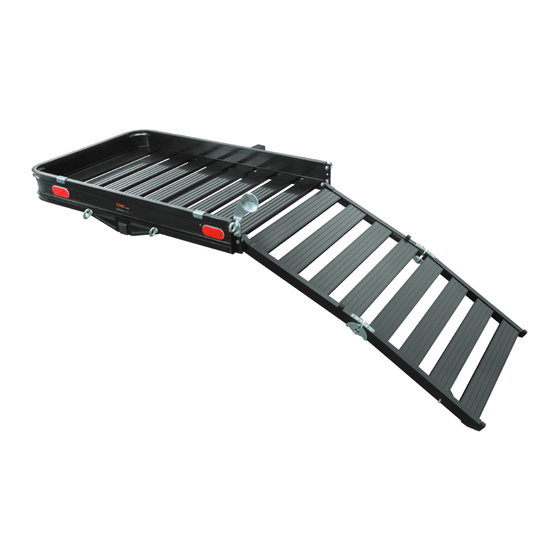
Product Photo
#
1
2
3
4
5
6
7
8
9
10
11
12
13
14
15
16
17
18
Notes and Maintenance
19
Before you begin installation, read all instructions thoroughly.
20
Distribute the weight evenly on the platform when hauling
a load. This carrier is not intended for transporting people.
Do not carry loads wider or deeper than the carrier.
Proper tools will improve the quality of installation and reduce the time required.
Mild automotive detergent may be used to clean the product. Do not use dish detergent, abrasive
cleaners, abrasive pads, wire brushes or other similar products that may damage the finish.
Product Registration
CURT Group stands behind our products with industry leading warranties.
227 kg
You can help us continue to improve our product line and help us understand
your needs by registering your purchase by visiting:
warranty.curtgroup.com/surveys
At CURT Group, customer is king. We value your feedback and we use that information to make
improvements on our products. Please, take a minute and let us know how we are doing.
•
877.287.8634
•
18112-INS-RB
•
PAGE 1
18112
Advertisement
Table of Contents

Related Manuals for curt 18112


Summary of Contents for curt 18112
- Page 1 At CURT Group, customer is king. We value your feedback and we use that information to make improvements on our products. Please, take a minute and let us know how we are doing.
- Page 2 Button socket cap screw, Flat washer, M16 M10 x 25mm Button socket cap screw, Eye bolt, M10 x 20mm M10 x 20mm Flat washer, M10 Upper ramp Shank assembly Lower ramp CURTMFG.COM • NEED ASSISTANCE? • 877.287.8634 • 18112-INS-RB • PAGE 2...
- Page 3 Align the holes in the upper ramp (#19) and lower ramp (#20) hinge brackets. Insert an M10 button socket cap screw (#18) into each hinge. Secure with an M10 lock nut (#3), ensuring the hinge operates freely. CURTMFG.COM • NEED ASSISTANCE? • 877.287.8634 • 18112-INS-RB • PAGE 3...
- Page 4 Note: The head of the eye bolt will be on the outside of the carrier frame. Secure with M10 lock nuts (#3). Snug the hardware, but do not fully tighten. CURTMFG.COM • NEED ASSISTANCE? • 877.287.8634 • 18112-INS-RB • PAGE 4...
- Page 5 Slide M10 flat washer (#9) onto eye bolt. Secure with an M10 lock nut. At this time, torque all M10 hardware in steps 2 and 3 to 12 ft-lbs. CURTMFG.COM • NEED ASSISTANCE? • 877.287.8634 • 18112-INS-RB • PAGE 5...
- Page 6 (#15). Insert the M16 hitch pin through the receiver tube and the shank assembly hole. Tighten until there is no longer any rattle. Insert a clip through the M16 hitch pin. CURTMFG.COM • NEED ASSISTANCE? • 877.287.8634 • 18112-INS-RB • PAGE 6...
- Page 7 Both sections of the ramp need to be moved together to allow the proper angle for the locking pin to align with the hole on the fixed plate. Folding the cargo basket CURTMFG.COM • NEED ASSISTANCE? • 877.287.8634 • 18112-INS-RB • PAGE 7...
Need help?
Do you have a question about the 18112 and is the answer not in the manual?
Questions and answers