Advertisement
Quick Links
Guangzhou Grandview Creative Technology Co., Ltd
Add: No.1 Building of No.43 South International Trade Avenue,
Hualong Town, Panyu District, Guangzhou China.
Tel: +8620-8489-9499 Fax: +8620-8480-5299
Http://www.grandviewscreen.com
When you select the ultra-short throw ambient light rejection screen, the standard configuration for the
projector is table-top projection, which is determined prior to production. For customized requirements,
it can be altered to ceiling mount projection.
ISO9001:2015
International Certification
Thank you for choosing Gandview products. Please read the manual carefully before installation and use.
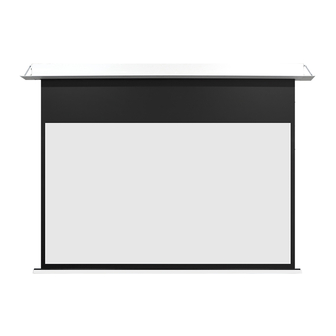
Hidetech Series Recessed ALR Tab-Tension Screen
Caution
Installation Manual
Model:H T - M I x x
H T - M F x x
Advertisement

Related Manuals for Grandview Hidetech Series


Summary of Contents for Grandview Hidetech Series
- Page 1 Hidetech Series Recessed ALR Tab-Tension Screen Installation Manual Model:H T - M I x x H T - M F x x Caution When you select the ultra-short throw ambient light rejection screen, the standard configuration for the projector is table-top projection, which is determined prior to production. For customized requirements, it can be altered to ceiling mount projection.
- Page 2 Maintenance Screen Structure Diagram Ultra-short throw ambient light rejection fabric: DO NOT USE RAG OR PAPER TOWEL TO WIPE ● Use brush provided to brush lightly horizontally along the texture of the screen to remove dust or other fine Left Suspension Plate Screen Casing Right Suspension Plate particles.
- Page 3 Setting the top/bottom limit: Concrete Ceiling If have to adjust height limit for installation environment reasons,you can adjust the limit setting by using a M8x500mm provided adjustment bar insert into the adjustment hole which onthe left down area of motor. As below figure: Threaded Rod The threaded rod must be installed perpendicular to the mounting surface...
- Page 4 The hook position on the decorative cover can be adjusted as follows. Pairing/Unpairing (Remote have been paired at factory) Disconnect the power supply for 10 seconds and then reconnect, press the Up and Stop button simultaneously within Counterclockwise Clockwise 10 seconds of reconnection. The motor will rotate forward and then backward once signaling a successful pairing. ③Once positioned correctly, reinsert the ①...
Need help?
Do you have a question about the Hidetech Series and is the answer not in the manual?
Questions and answers