Advertisement
Quick Links
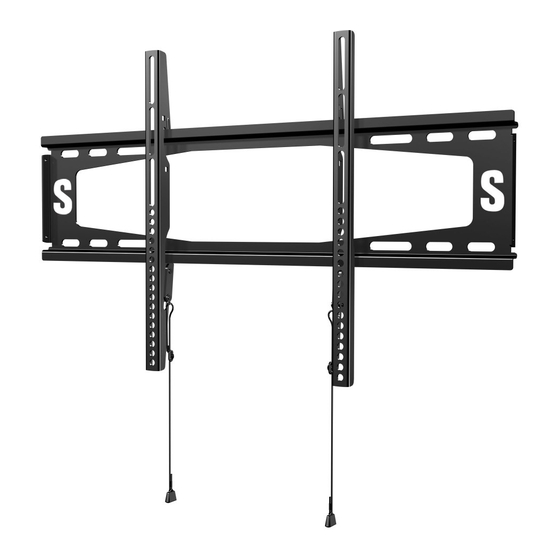
QLL23-B2
INSTRUCTION MANUAL
If you have any questions along the way, just give us a call. We're ready to help!
US: +1 (800) 359-5520 • EMEA: +31 (0) 495 580 852 • UK: +44 (0) 800 056 2853
Texto en español, página 14
Texte français page 17
We'll Make It Stress-Free
Deutscher Text Seiten 20
Nederlandse tekst op pagina 23
Svensk text sida 26
日本語は 29 ページ
中文文字说明请参见第 32 页
Русский текст: стр. 35
Advertisement

Related Manuals for Secura QLL23-B2


Summary of Contents for Secura QLL23-B2
- Page 1 QLL23-B2 INSTRUCTION MANUAL We’ll Make It Stress-Free If you have any questions along the way, just give us a call. We’re ready to help! US: +1 (800) 359-5520 • EMEA: +31 (0) 495 580 852 • UK: +44 (0) 800 056 2853 Texto en español, página 14...
- Page 2 No — Perfect! 120 lbs. Yes — This mount is NOT compatible. Visit secura-av.com or call to find a compatible mount. (54.4 kg) US: +1 (800) 359-5520 • EMEA: +31 (0) 495 580 852 • UK: +44 (0) 800 056 2853...
- Page 3 Dimensions TV INTERFACE 3.94 100.0 3.94 15.75 100.0 400.0 0.33 27.56 700.0 WALL PLATE CLICK-LOCK SECUREMENT SIDE VIEW - DEPTH 1.13 28.6 4.73 120.0 23.23 590.0 5.00 127.0 SECUREMENT LATCH 16.00 0.41 406.4 10.4 24.00 609.6 FULLY ASSEMBLED MOUNT LATERAL SHIFT 16.73 425.0 19.01...
-
Page 4: Parts And Hardware
Parts and Hardware WARNING: This product contains small items that could be a choking hazard if swallowed. Before starting assembly, verify all parts are included and undamaged. If any parts are missing or damaged, do not return the damaged item to your dealer; contact Customer Service. Never use damaged parts! NOTE: Not all hardware included will be used. - Page 5 Parts and Hardware for STEP 2 Lag Bolts (qty. 4) 5/16 x 2¾ in. Lag Bolt Washers Wall Plate Template (qty. 4) 5/16 in. (qty. 1) For concrete installations ONLY CAUTION : Do not use in drywall or wood Concrete Anchors (qty.
-
Page 6: Step 1 Attach Brackets To Tv
STEP 1 Attach Brackets to TV NOTE: your TV included 1.1 Select TV Screw Diameter 1.2 Select TV Screw Length inset spacers or adapters, use If your TV has a flat back, AND you want your TV closer to the wall, them UNDER the Hand thread screws into the threaded inserts on... - Page 7 1.3 Attach TV Brackets CAUTION: Avoid potential personal injuries and property damage! DO NOT use power tools for this step. Tighten the screws only enough to secure the TV bracket to the TV. DO NOT overtighten the screws. IMPORTANT: Ensure TV bracket is securely fastened before moving on to the next step. Flat Back IMPORTANT: After attaching the brackets,...
- Page 8 Attach Wall Plate STEP 2A Wood Stud Option CAUTION: Avoid potential personal injury or property damage! ● Drywall covering the wall must not exceed 5/8 in. (16 mm) ● Minimum wood stud size: nominal 2 x 4 in. (51 x 102 mm) actual 1 x 3 in. (38 x 89 mm) ●...
- Page 9 Tighten the lag screws only until the washers are pulled snug against the wall plate IMPORTANT: Be sure to drill into the center of the studs. CAUTION: Improper use could reduce the holding power of the lag screw. IMPORTANT: Pilot holes must be drilled to a depth of 2 ¾ in. (70 mm). DO NOT over-tighten the lag screws 2¾...
- Page 10 Attach Wall Plate Solid Concrete or Concrete Block Option STEP 2B CAUTION: Avoid potential personal injury or property damage! ● Mount the wall plate directly onto the concrete surface ● Minimum solid concrete thickness: 8 in. (203 mm) ● Minimum concrete block size: 8 x 8 x 16 in. (203 x 203 x 406 mm) ●...
- Page 11 Tighten the lag screws only until the washers are pulled snug against the wall plate CAUTION: Be sure the anchors are seated flush with the CAUTION: Improper use could reduce the holding power of the lag screw. concrete surface. DO NOT over-tighten the lag screws...
-
Page 12: Step 3 Attach Tv To Wall Plate
STEP 3 Attach TV to Wall Plate HEAVY! You may need assistance with this step. IMPORTANT: You will hear an audible click when the TV brackets are securely fastened to the wall plate. Locked... - Page 13 Adjustments LATERAL SHIFT REMOVING THE TV HEAVY! You may need assistance with this step.
- Page 14 No: ¡Perfecto! 54,4 kg Sí: Esta montura NO es compatible. Visite secura-av.com o llame al número: (120 lb) US: +1 (800) 359-5520 EMEA: +31 (0) 495 580 852 Reino Unido: +44 (0) 800 056 2853 para encontrar una montura compatible.
- Page 15 ESPAÑOL Dimensiones Consulte la página 3 Piezas y accesorios suministrados Consulte la página 4 ADVERTENCIA: Este producto contiene piezas pequeñas que, en caso de ser tragadas, podrían causar asfixia. Antes de comenzar a montar la unidad, verifique que dispone de todas las piezas y que se encuentran en buen estado. Si no dispone de todas las piezas o alguna está dañada, no devuelva el elemento defectuoso al distribuidor.
- Page 16 ESPAÑOL IMPORTANTE: Asegúrese de taladrar en el centro del montante. IMPORTANTE: 2 ¾ Los orificios guía deben taladrarse hasta una profundidad de 70 mm ( pulg.). PRECAUCIÓN: Evite posibles lesiones personales o daños materiales. El uso incorrecto podría reducir la capacidad de sujeción del perno tirafondo .
- Page 17 Non — Parfait ! 54,4 kg OUI — Ce support n’ e st PAS compatible. Rendez-vous sur secura-av.com ou appelez le US: +1 (800) 359-5520 EMEA: +31 (0) 495 580 852 RU : +44 (0) 800 056 2853 (120lb) pour trouver un support compatible.
- Page 18 FRANÇAIS Dimensions Voir à la page 3 Pièces et quincaillerie fournies Voir à la page 4 AVERTISSEMENT : Ce produit contient de petites pièces qui peuvent représenter un risque d’ é touffement si elles sont avalées. Avant de commencer l’assemblage, assurez-vous qu’il ne manque aucune pièce et qu’ e lles ne sont pas endommagées. Si une pièce est manquante ou endommagée, contactez le service à...
- Page 19 FRANÇAIS IMPORTANT : Assurez-vous de percer au centre du montant. IMPORTANT : 2 ¾ Percez les avant-trous à une profondeur de 70 mm ( po). ATTENTION : Évitez les risques de blessures corporelles ou de dommages matériels ! Une utilisation inadéquate peut réduire la force de rétention du boulon tire-fond Serrez les boulons tire-fond jusqu’à...
- Page 20 Nein – Perfekt! 54,4 kg Ja – Diese Halterung ist NICHT kompatibel. Besuchen Sie secura-av.com oder rufen Sie US: +1 (800) 359-5520 EMEA: +31 (0) 495 580 852 (120lbs) Vereinigtes Königreich: +44 (0) 800 056 2853 an, um eine kompatible Halterung zu finden.
- Page 21 DEUTSCH Abmessungen Siehe Seite 3 Mitgelieferte Teile und Befestigungsmaterialien Siehe Seite 4 WARNUNG: Dieses Produkt enthält kleine Teile, die beim Verschlucken zum Erstickungstod führen können. Prüfen Sie vor Montagebeginn, ob alle Teile vorhanden und unbeschädigt sind. Falls Teile fehlen oder beschädigt sind, bringen Sie das Produkt nicht zum Händler zurück, sondern wenden Sie sich an den Kundendienst.
- Page 22 DEUTSCH WICHTIG: Stellen Sie sicher, dass Sie in die Mitte des Balkens bohren. WICHTIG: 2 ¾ Die Tiefe der Vorbohrungen muss 70 mm ( ") betragen. VORSICHT: Vermeiden Sie Verletzungen und Sachschäden! Eine unsachgemäße Verwendung kann die Haltekraft der Ankerschraube verringern.
- Page 23 Weegt uw tv meer dan 54,4 kg (120lbs.), inclusief accessoires? Nee: prima! 54,4 kg Ja: deze wandbevestiging is NIET geschikt. Ga naar secura-av.com of bel (120lbs.) US: +1 (800) 359-5520 EMEA: +31 (0) 495 580 852 VK: +44 (0) 800 056 2853 om een geschikte wandbevestiging te vinden.
- Page 24 NEDERLANDS Afmetingen zie pagina 3 Bijgeleverde onderdelen en materialen zie pagina 4 WAARSCHUWING: Dit product bevat kleine onderdelen die verstikkingsgevaar kunnen opleveren als ze worden ingeslikt. Controleer vóór de montage of alle onderdelen onbeschadigd aanwezig zijn. Mochten er onderdelen ontbreken of beschadigd zijn, breng het beschadigde item dan niet terug naar de dealer, maar neem contact op met de klantenservice.
- Page 25 NEDERLANDS BELANGRIJK: Boor precies in het midden van de drager. BELANGRIJK: 2 ¾ De montagegaten moeten 70 mm ( in.) diep geboord worden. LET OP: Voorkom mogelijk lichamelijk letsel of materiële schade! Een onjuist gebruik kan de grip van de bout verminderen .
- Page 26 Nej – Perfekt! 54,4 kg Ja – Det här monteringsfästet är INTE kompatibelt. Besök secura-av.com eller ring oss på (120lbs.) US: +1 (800) 359-5520 EMEA: +31 (0) 495 580 852 Storbritannien: +44 (0) 800 056 2853 för att hitta ett kompatibelt fäste.
- Page 27 SVENSKA Mått Se sidan 3 Medföljande delar och monteringstillbehör Se sidan 4 VARNING: Den här produkten innehåller små delar som kan utgöra kvävningsrisk om de sväljs. Innan du påbörjar hopmonteringen ska du kontrollera att alla delar finns med och är intakta. Om någon del saknas eller är skadad ska du inte returnera den skadade produkten till din återförsäljare, utan vända dig direkt till kundtjänst.
- Page 28 SVENSKA VIKTIGT! Se till att du borrar in i regelns mitt. VIKTIGT! 2 ¾ Pilothålen måste borras till ett djup på 70 mm ( tum). FÖRSIKTIGT: Undvik eventuella personskador och materiella skador! Olämplig användning kan minska träskruvens hålleffekt . Dra endast åt träskruvarna tills brickorna sitter ordentligt fast jäms med väggplattan...
- Page 29 日本語 安全のための重要な説明 – この説明書を保管しておいてください – 本製品を使用する前に、説明書全体をよくお読みください 始める前に、このマウントがあなたの用途に最適であるかを確認します! お使いのテレビおよびアクセサリを合わせた重量が 54.4 kg(120ポンド)以上ありますか? いいえ — 最適です! 54.4 kg はい — このマウントは、適合しません。secura-av.com をご覧になるか、+1 (800) 359-5520 EMEA: +31 (0) 495 580 852 (120ポンド) 英国: +44 (0) 800 056 2853 にお電話いただき、適合するマウントをご確認ください。 壁はなんで 木製スタッド 打放しコンクリート 注意: ?...
- Page 30 日本語 寸法 3 ページを参照 付属している部品およびハードウェア 4 ページを参照 警告: 本製品には小さい部品が付属しており、誤って飲み込むと窒息の危険性があります。 組み立てを始める前に、部品がすべてそろっており、破損していないことを確認してください。足りない部品または破損している部品がある場合は、販売店に 破損している製品を返品されるのではなく、カスタマーサービスまでご連絡ください。破損した部品は絶対にご使用にならないでください! 注記:付属の金具をすべて使用するわけではありません。 手順 1 ブラケットをテレビに取り付ける 6 ページを参照 テレビに付属しているスペーサーを使用します。 1.1 テレビのネジの直径を選択する 注記: 1.2 テレビのネジの長さを選択する 注意: ネジ、ワッシャー、スペーサーの組み合わせとすべてのブラケットの間で、ネジ山が十分にかみ合っていることを確認します。 - 短すぎると、テレビを支えることができません。 - 長すぎると、テレビを損傷します。 1.3 テレビブラケットを取り付ける 注意: ケガをしたり、壁面を破損しないように注意してください!この手順には、電動工具を使用しないでください。ネジは、テレビブラケットをテレビ に固定するために必要なだけ締めてください。ネジを締めすぎないでください。 重要: 次の手順に進む前に、テレビブラケットが確実に取り付けられていることを確認します。 重要: ブラケットを取り付けた後に、ストラップを調整してテレビの下側と同じ高さにします。 手順 2A ウォールプレートを取り付ける - 木製スタッドオプション 8 ページを参照...
- Page 31 日本語 重要: 必ずスタッドの中心に穴を開けます。 重要: 2 ¾ パイロットホールは、70 mm( インチ)の深さまで開けます。 注意: ケガをしたり、壁面を破損しないように注意してください!適切に使用しないと、ラグボルトでしっかりと支えることができません 。ラグボル ト が、壁面取付金具 上のワッシャー に引き込まれる程度の強さで締め付けて下さい。ラグボルト を締めすぎないようにします。 手順 2B ウォールプレートを壁面に取り付ける - 打放しコンクリートまたはコンクリートブロックオプション 10 ページを参照 注意: ケガをしたり、壁面を破損しないように注意してください! ● ウォールプレートアッセンブリ を、直接コンクリート面に取り付けます ● 打放しコンクリートの最小厚:203 mm(8 インチ) ● コンクリートブロックの最小サイズ:203 x 203 x 406 mm(8 x 8 x 16 インチ) ●...
- Page 32 重要安全说明 – 保存这些说明 – 使用本产品之前,请阅读完本说明书 在开始安装之前,我们首先来确认此支架是否适合您! 您的电视机连同附件的重量超过 54.4 kg (120 lbs) 吗? 否 — 适合! 54.4 kg 是 — 此支架不兼容。访问 secura-av.com 或致电 +1 (800) 359-5520 EMEA: +31 (0) 495 580 852 (120 lbs) 英国 +44 (0) 800 056 2853 查找兼容的支架。 墙是什么材料 有木墙柱的...
- Page 33 中文 尺寸 参见第 3 页 配套零件和配件 参见第 4 页 警告: 此产品包含若吞咽可能引致窒息危险的小部件。 在开始装配以前,先确定所有零件均已提供且完好无损。如果有零件缺失或受损,请勿将受损零件返回至经销商;请联系客户服务部门。切勿使用受损零件! 注意: 并非包含的所有配件均要使用。 步骤 1 向电视机安装托架 参见第 6 页 1.1 选择电视机螺钉直径 注意: 使用电视机配套的隔圈。 1.2 选择电视机螺钉长度 注意: 确保螺纹已充分与螺钉/垫圈/隔板的组合以及电视机托架啮合。 - 配合过短将无法支承电视机。 - 配合过长将会损坏电视机。 1.3 安装电视机托架 注意: 避免潜在人身伤害和财产损毁!请勿在此步骤中使用电动工具。只需将螺钉拧紧,使电视机托架足以固定到电视机上即可。请勿过度紧固螺钉。 重要事项: 在执行下一步之前,请确保电视机托架牢牢紧固。 重要事项: 安装托架之后,调节束带,使其与电视机底部平齐。 步骤...
- Page 34 中文 重要事项: 务必在墙柱中心钻孔。 重要事项: 2 ¾ 打钻的导孔深度必须达 70 mm ( 英寸)。 注意: 避免潜在人身伤害或财产损毁!不当使用可能减少方头螺栓的保持力 。紧固方头螺栓 直到将垫圈 牢牢固定在壁板 上。请勿过度紧固方 头螺栓 。 步骤 2B 将壁板安装到墙上 - 实心混凝土或混凝土砌块 参见第 10 页 注意: 避免潜在人身伤害或财产损毁! ● 直接安装壁板组件 到混凝土表面上 ● 最小实心混凝土厚度:203 mm (8 英寸) ● 最小混凝土砌块尺寸:203 x 203 x 406 mm (8 x 8 x 16 英寸) ●...
- Page 35 Ваш телевизор весит более 54,4 кг (120 фунтов) вместе с принадлежностями? Нет — Прекрасно! 54,4 кг Да — Это крепление НЕ подходит. Посетите веб-сайт secura-av.com или позвоните по телефону +1 (800) 359-5520 EMEA: +31 (0) 495 580 852, (120 фунтов) Великобритания: +44 (0) 800 056 2853 чтобы найти подходящее крепление.
- Page 36 РУССКИЙ Размеры См. стр. 3 Поставляемые комплектующие и крепежные элементы См. стр. 4 ПРЕДУПРЕЖДЕНИЕ! В составе изделия есть мелкие детали, которые могут вызвать удушье при проглатывании. Перед сборкой убедитесь, что все детали имеются в наличии и не повреждены. Если какая-либо деталь отсутствует или повреждена, не возвращайте изделие дилеру;...
- Page 37 РУССКИЙ ВАЖНО! Отверстия необходимо просверлить по центру стойки. ВАЖНО! 2 ¾ Направляющие отверстия сверлятся на глубину 70 мм ( дюйма). ВНИМАНИЕ! Соблюдайте осторожность для предотвращения возможных травм или повреждения имущества! Неправильное использование может уменьшить прочность соединения болта . Затягивайте болты только...
- Page 38 English Français Legrand AV Inc and its a iliated corporations and subsidiaries (collectively, “Legrand”), intend to make Legrand AV Inc et ses sociétés a iliées et ses filiales (collectivement dénommées « Legrand »), se this manual accurate and complete. However, Legrand makes no claim that the information contained sont e orcées de rendre ce manuel précis et complet.
- Page 39 Nederlands Русский Legrand AV Inc и связанные с ней корпорации и дочерние предприятия (упоминаемые здесь под общим названием Legrand AV Inc en haar aangesloten bedrijven en dochterondernemingen (verder samen te noemen: “Legrand”) “Legrand”) стремятся сделать это руководство точным и полным. Однако Legrand не гарантирует, что содержащаяся hebben de intentie deze montagehandleiding zo accuraat en volledig mogelijk te maken.
- Page 40 Legrand makes no representation of warranty, expressed or implied, regarding the information contained herein. Legrand assumes no responsibility for accuracy, completeness or su iciency of the information contained in this document. ©2022 Legrand AV Inc. All rights reserved. Secura is a brand of Legrand. All other brand names or marks are used for identification purposes and are trademarks of their respective owners.
Need help?
Do you have a question about the QLL23-B2 and is the answer not in the manual?
Questions and answers