Table of Contents
Advertisement
Quick Links
Advertisement
Table of Contents

Subscribe to Our Youtube Channel
Related Manuals for Smoke hollow PG2415SS


Summary of Contents for Smoke hollow PG2415SS
- Page 1 This Owner's Manual is provided and hosted by Appliance Factory Parts. Smoke Hollow PG2415SS Owner's Manual Shop genuine replacement parts for Smoke Hollow PG2415SS Find Your Smoke Hollow Grill Parts - Select From 115 Models -------- Manual continues below --------...
-
Page 2: For Outdoor Use Only
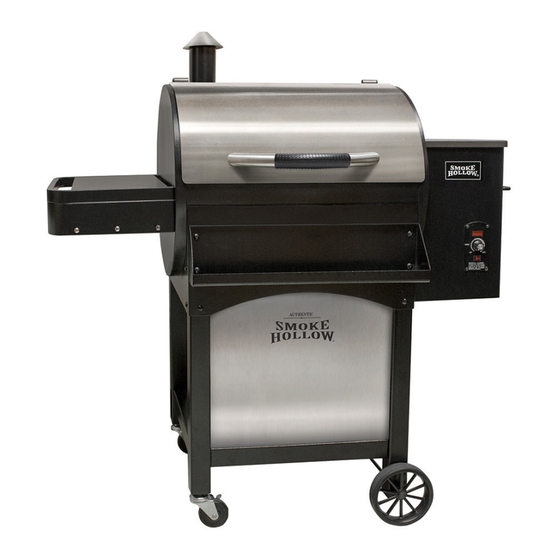
Owner’s Manual Pellet Smoker Grill Model# PG2415SS 4010637 FOR OUTDOOR USE ONLY WARNING! DO NOT STORE OR USE COMBUSTIBLE MATERIALS NEAR THIS APPLIANCE! USE ONLY PREMIUM 100% HARDWOOD BBQ PELLETS WITH THIS SMOKER GRILL. Please read this entire manual before installation and use of the pellet fuel-burning appliance. Failure to follow these instructions could result in property damage, bodily injury or even death. - Page 3 Introduction Congratulations on your purchase of your new Smoke Hollow Pellet Smoker Grill. With proper set-up, operation and maintenance, this appliance will provide you with years of delicious food and cooking enjoyment. IMPORTANT When you un-pack your grill, remove all parts and packaging material from the box and inside the grill.
- Page 4 WARNING! Use ONLY PREMIUM 100% HARDWOOD BBQ WOOD PELLETS, which are specifically made to work in our Grills. Smoke Hollow wood pellets are rated for 8500 BTU per LBS with an ash content of 2%. MINIMUM DISTANCE...
-
Page 5: Parts And Tool List
Parts and Tool List... - Page 6 Parts and Tool List Note: For assistance, including missing or damaged parts, call toll free 1- 866-475-5180 from 8:30 am - 4:30 pm Central Time, Monday - Friday Part# Part Name Part# Part Name Stainless Steel Smoke Stack Cap Wheel Locking Caster Smoke Stack Axle...
-
Page 7: Grill Assembly
Grill Assembly Step 1: Leg Assembly Locate: DON’T PUT SCREWS IN THESE HOLES AT • Left front leg THIS TIME. • Left rear leg • Right front leg • Right rear leg • (14) 1/4-20 x .59” Bolts Note: Each leg will have an identification label. -
Page 8: Step 4: Front Panel Assembly
Step 3: Wheel and Caster Assembly Locate: • (2) Locking casters • (2) Wheels • (1) axle • (1) washer • (1) Lock nut Procedure: Screw a locking caster into the left front leg and the left rear leg, then using the included wrench, tighten the castors securely. - Page 9 Step 5: Side Table / Front Basket / Lid Handle Assembly Locate: • (1) Side Table • (1) Front Basket • (1) Front Handle • (1) Heat Shield • (10) 1/4-20 x .59 Bolts Procedure: Screw (2) 1/4-20 x .59” bolts into the lower holes on the left side of the barrel (leave the screws out approx.
- Page 10 Step 7: Baffle / Heat Plate / Grid / Bucket Assembly Locate: • (1) Heat Baffle • (1) Grease Pan Fig. 1 Fig. 2 • (1) Cooking Grid • (1) Grease Bucket Long Procedure: Flange Side Position the Heat baffle directly over Short Flange the firebox on the locating brackets...
-
Page 11: Initial Firing Instructions
Initial Firing Instructions FOLLOW THESE INSTRUCTIONS THE FIRST TIME YOU FIRE THE GRILL AND WHENEVER IT RUNS OUT OF PELLETS. FIRE THE GRILL Open the lid and remove the porcelain grid, grease drain pan and heat baffle from inside the grill. Make sure the power switch is in the OFF position. - Page 12 Regular Firing Instructions FOLLOW THESE INSTRUCTIONS FOR REGULAR FIRINGS. ALWAYS START THE GRILL ON SMOKE SETTING WITH THE LID OPEN. ONCE THE PELLETS ARE IGNITED, CLOSE THE LID AND SET THE TEMPERATURE DIAL TO THE COOKING TEMPERATURE DESIRED. With the lid open, turn the Switch/Dial ON (--) and Temperature Dial to SMOKE. In approximately 2 minutes you will notice whitish-gray smoke coming out of the Grill as the pellets ignite.
- Page 13 Manual Firing Instructions If the Hot Rod only is not operating, the Grill can still be used to cook and smoke using the MANUAL LIGHTING PROCEDURE below: 1) DANGER! Turn the Switch OFF (o) and disconnect the Power Cord. Allow the Grill to thoroughly cool if it is still hot.
-
Page 14: Safety Instructions
Operating Instructions The temperature dial can be changed at any time to increase or decrease the cooking temperature of the grill. See the table below for recommended temperatures. HIGH/HIGHER for grilling MED/MID RANGE for slow cooking SMOKE for smoking and adding smoke flavor to food for holding foods at about 180°F The outside temperature effects cooking times. - Page 15 When operating in “SMOKE” mode, the Auger will cycle on for 15 seconds and off for 65 seconds. There is no temperature control with the “Smoke” setting. This timed cycle setting for “Smoke” is a factory pre- set recommended by Smoke Hollow Grills to develop a “Smoking” temperature of 150 to 180 degrees fahrenheit.
-
Page 16: Carbon Monoxide
a) DANGER! Turn the Switch OFF and disconnect the Power Cord. Allow the Grill to thoroughly cool if it is still hot. Open the lid and remove all food, the Porcelain Grid, Grease Drain Pan and the Heat Baffle. b) WARNING! Remove all unburned pellets and ash from inside and around the Firepot. (See instructions for proper handling and disposal of ash in the Cleaning and Maintenance section). -
Page 17: Cleaning And Maintenance
During the rainy season, take care that water does not get into the pellet hopper. When wet, wood pellets expand and will jam your auger. Consider getting a Smoke Hollow grill cover to protect your grill when it is stored. -
Page 18: Troubleshooting
Troubleshooting THE GRILL FAILS TO IGNITE IF THE GRILL DOES NOT IGNITE OR THE FIRE GOES OUT IN THE FIREPOT WHILE COOKING, FIRST TRY RE-FIRING THE GRILL: Turn the power switch to OFF and disconnect the Power Cord. Remove the porcelain grid, grease drain pan and heat baffle. Also remove any food. Remove all unburned pellets and ash from the firepot. - Page 19 Plug the power cord into an appropriate, grounded electrical outlet and turn the power switch to ON. If the auger drive motor is working, the problem is the digital control, which may need to be replaced. If the auger drive motor is not working, but the draft inducer fan is working, the problem is the auger system, which may need to be checked: •...
-
Page 20: Wiring Diagram
Wiring Diagram Wiring Diagram WIRING DIAGRAM SMOKE ADJUSTMENT SETTING HOLE CONTROL SENSOR WHITE BLACK FIBERGLASS POWER WIRING CORD FUSE FOR HOT ROD Smoke ORANGE HIGH ON BACK OF CONTROL WHITE WHITE PURPLE WHITE HOT ROD MOLEX CONNECTOR TYPICAL DRAFT INDUCER AUGER DRIVE FIREPOT FIREBOX... -
Page 21: Limited Warranty
5400 Doniphan Drive Neosho, MO 64850 www.olp-inc.com ©2014 Outdoor Leisure Products, Inc. Smoke Hollow ® and the Smoke Hollow ® logo are trademarks of Outdoor Leisure Products, Inc. and are not to be used without express permission by Outdoor Leisure Products, Inc.
Need help?
Do you have a question about the PG2415SS and is the answer not in the manual?
Questions and answers