Table of Contents
Advertisement
Quick Links
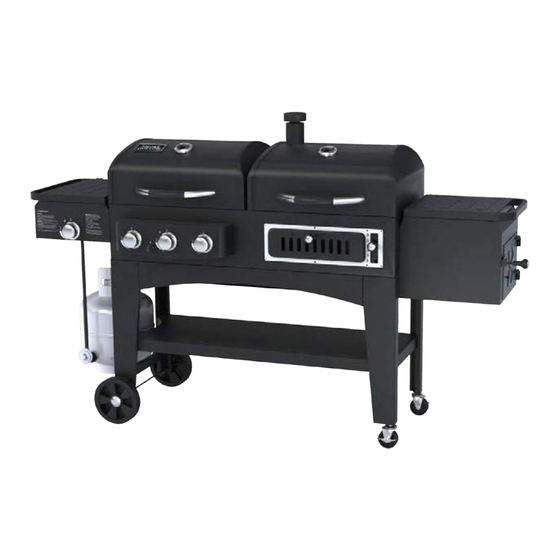
Owner's Manual
Grill & Smoker
Model No.
SH9916
"Conforms to ANSI STD Z21.58-2015
OUTDOOR COOKING GAS APPLIANCES"
THIS IS YOUR ASSEMBLY, CARE & USE MANUAL
WITH IMPORTANT WARNING & SAFETY INFORMATION.
PLEASE SAVE THESE INSTRUCTIONS.
CUSTOMER SERVICE: 1-866-475-5180 (Monday–Friday, 8:30 am–4:30 pm, CST)
www.olp-inc.com
FOR OUTDOOR USE ONLY
Advertisement
Table of Contents

Related Manuals for Smoke hollow SH9916


Summary of Contents for Smoke hollow SH9916
- Page 1 Owner’s Manual Grill & Smoker Model No. SH9916 “Conforms to ANSI STD Z21.58-2015 OUTDOOR COOKING GAS APPLIANCES” THIS IS YOUR ASSEMBLY, CARE & USE MANUAL WITH IMPORTANT WARNING & SAFETY INFORMATION. PLEASE SAVE THESE INSTRUCTIONS. CUSTOMER SERVICE: 1-866-475-5180 (Monday–Friday, 8:30 am–4:30 pm, CST) www.olp-inc.com...
-
Page 2: If You Smell Gas
DANGER IF YOU SMELL GAS: 1. SHUT OFF GAS TO THE APPLIANCE 2. EXTINGUISH ANY OPEN FLAME 3. OPEN LID 4. IF ODOR CONTINUES, KEEP AWAY FROM THE APPLIANCE AND IMMEDIATELY CALL YOUR GAS SUPPLIER OR YOUR FIRE DEPARTMENT. WARNING 1. -
Page 3: Charcoal Grill General Warnings
CHARCOAL GRILL GENERAL WARNINGS • Only use this grill on a hard, level, non-combustible, stable surface (concrete, ground, etc.) capable of supporting the weight of the grill. Never use on wooden or other surfaces that could burn. • DO NOT use grill without charcoal ash tray in place. DO NOT attempt to remove charcoal ash tray while tray contains hot coals. - Page 4 TOLL FREE 1-866-475-5180 (Monday–Friday, 8:30 am–4:30 pm, CST). NOTE : DO NOT RETURN UNIT TO THE STORE BEFORE CALLING THE TOLL FREE NUMBER. Do not dispose of your cartons until you are completely satisfied with your new Smoke Hollow grill.
- Page 5 SH9916 Parts List Parts and Tool List Note: For assistance, including missing or damaged parts, call toll free - 866-475-5180 from 8:30 am - 4:30 pm Central Time, Monday - Friday Hardware Pack Item Quantity Description M6x15 Combo Head Bolts...
- Page 6 Parts and Tool List SH9916 Parts List y t i ) t t Gas Cooking Grids (Glossy) 47183T-12 Heat Indicators with l l i r t f i Hose, Valves and Regulator (HVR & Manifold only) SH9916-26 Wheel Assembly HC4518L-46...
- Page 7 Note: Carefully cut the straps holding the carton together. Cut th 866-475-5180. Discard all packing materia bly Manual for future reference. lay flat on the ground to provide a clean surface for assembling yo Grill Assembly Note: “ Do not tighten any bolts until instruc materials and all the parts from inside the Cabinet.
- Page 8 #2, then tighten with a wrench. Locate: (2) Locking Casters Step Grill Assembly Procedure: Leg #2 Loca Refer to Fig. 3 and screw (2) Casters onto Leg #1 embly the Right Rear Leg #1 and Right Front Leg Proce #2, then tighten with a wrench. Refe Fig.
- Page 9 Grill Assembly ssembly Assembly Step 6: Assemble Cart Front Bracket Leg #4 Leg #4 Fig. 6 eg #2 Step 6: Locate: Cart Front Bracket, (4) M6x15 Leg #2 bolts Attach Cart Front Bracket to the Left Front Leg #4 and Right Front Leg #2 Legs using (4) M6x15 Procedure: Attach Cart Front Bracket to bolts as shown as Fig.
- Page 10 Grill Assembly WARNING: This step requires tw ple to lift the Gas and Charcoal C with Lids Assembly. Failure to do s result in personal injury or damage Fig. 9A Step 9: grill. WARNING: This step requires two people to lift the Gas and Charcoal Procedure: Place the Gas and C Cabinet with Lids Assembly.
- Page 11 Grill Assembly Step 10: Assemble Lid Handl Fig. 10 Fig. 11 r i l the Gas Grill Lid Locate: Gas Grill Lid Handle Hea embly Assembly (1) Lid Handle, (2) M6x15 bolts r i l l Procedure: Refer to Fig. 10, open Step 12: Attach the Smoke Stack Grill Lid and fit the Heat Shield in p inside the Lid, place (2) M6x15 bo...
- Page 12 Assembly Step 14: Assemble Grill Assembly Lifting System Step 14: Assemble th Lifting System Locate: Charcoal Tray L Assembly (2) Hinge Pins and (2) “R Locate: Charcoal Tray Lift S (2) Hinge Pins and (2) “R” C Fig. 14A Step 14: Step 14: Assemble the Charcoal Tray Procedure: Refer to Figs Procedure: Refer to Figs.
- Page 13 Step15: Install the Contr has (4) igniter wires sembly Grill Assembly attach to each burn Locate: Fig. 15A shows the i Burner and (4) M6x Control Panel Assembly ( CP valves mounted on a manifo Fig. 15A to the Hose, Sear Burner Va Ignitor Wire 3 Ignitor Wire 2 Ignitor Wire 1...
- Page 14 Assembly Rivnut as shown Grill Assembly Step 16: Assemble th Rivnut Assembly Assembly Locate: HVR Cover and ( Step 16: Assemble the HVR Cover Rivnut Step 16: Assemble the HVR Co Rivnut Fig. 16 Step 16: Procedure: Refer to Fig. 1 Locate: HVR Cover and (2) M6x15 bolts Procedure: Refer to Fig.
- Page 15 box Assembly with the rectangular open the right side of the Grill Cabinet, so tha Grill Assembly Assembly resting on the ledge of the Firebox Sup Bracket. Insert (3) M6x15 bolts through Step 18: Assemble Firebox Firebox and the Cabinet Wall. Attach (3 KEPS nuts to each of the bolts.
- Page 16 Assembly (Continued) Sear Burner Hou Grill Assembly Step 20 Refer to Fig. 20B Refer to Fig. 20C (Contin bolts from INSID the Gas Valve in Sear Burner Hou Fig. 20B (2) M4x5 bolts. Refer to Step 20: (Continued) Refer to Fig. 20C Refer to Fig.
- Page 17 Grill Assembly wire Step 21: Assembly Fig. 21 Refer to Fig. 21 – unscrew the black cap from the Electronic Igniter. Insert the AA hole battery with the + end facing out. Screw Step 24: Install Warming Racks the black cap back onto the Igniter. When Step 24: Install Warming Racks Locate: (2) Warming Racks, and (4) M6x30 you press the soft black button on the...
- Page 18 Procedure: Refer to Fig coal Drip Tray Knob to Grill Assembly using (1) M5x10 bolt. Refer to Fig. 23B, slide Charcoal Drip Tray to t Step 23: Attach Gas Drip Tray and Char- Step 24: Fig. 24A coal Drip Tray Refer to Fig.
- Page 19 Grill Assembly ASSEMBLY OF YOUR GRILL IS NOW COMPLETE. FOR YOUR SAFETY, FOLLOW ALL SAFE GUARDS AND INSTRUCTIONS. To order a cover for your grill, please visit our website at www.olp-inc.com.
- Page 20 Operating Instructions LP GAS CYLINDER (TANK) SPECIFICATIONS: The installation of this appliance must be in accordance with all applicable local codes, or the National Fuel Gas Code ANSI Z223.1 NFPA 54. When purchasing or exchanging a cylinder for your gas grill, it must be: 1.
-
Page 21: Leak Testing
Operating Instructions The cylinder must also be equipped with: • A shut-off valve terminating in a Type 1 gas cylinder valve outlet. • A Type 1 valve that prevents gas flow until a positive seal is obtained. • An arrangement for vapor withdrawal. •... - Page 22 Operating Instructions LEAK TESTING (Continued): CHECKING FOR LEAKS: CAUTION: Strong odors, colds, sinus congestion, etc. may prevent the detection of propane by smell. Use caution and common sense when testing for leaks. Note: The leak test must be performed in an area that is quiet, out of the wind, and has adequate lighting in order to see if bubbles are developing or so larger leaks can be detected by smell or sound.
-
Page 23: Hose & Regulator Installation
• Do not use any other pressure regulator/hose assembly other than the one supplied with your grill. Replacement pressure regulator/hose assembly must be part No SH9916-26, which can be obtained by contacting customer service at 1-866-475-5180 (Monday–Friday, 8:30 am–4:30 pm, CST) •... -
Page 24: Lighting The Grill
pray or and water. Spray or of detergent and water. Spray or Operating Instructions he LP Gas ction of the regulator to the LP Gas egulator to the LP Gas s up to the burner valves (which e connections up to the burner valves (which ts in the hose connections up to the burner valve LIGHTING THE GRILL sition). - Page 25 Operating Instructions CLEANING INTERIOR OF GRILL: • We recommend cleaning off food residue immediately after cooking by gently scrubbing grates with wire bristle brush and then turning burners to “HIGH” for approximately 5 minutes. The heat from the burners will burn off most food/grease residue from grates & heat tents and turn it to an ash like substance which will fall to the bottom of the firebox or grease tray.
- Page 26 Operating Instructions The charcoal offset Fire Box Grill & Smoker can be used to cook food either by: CHARCOAL AND DIRECT HEAT –OR- SMOKE AND INDIRECT HEAT Please read all steps before cooking TO COOK USING CHARCOAL AND DIRECT HEAT (The fire is in the Charcoal Cooking Chamber and the food is in the Charcoal Cooking Chamber.) Follow these steps for cooking with charcoal and direct heat in the Charcoal Cooking Chamber.
-
Page 27: Grilling Tips
Grilling Tips Cleanliness: • Always wash hands thoroughly with soap and hot water prior to handling food and after handling raw meat, uncooked poultry or seafood. • When using a platter to carry raw meat, uncooked poultry or seafood to the grill, make sure to wash the platter thoroughly with soap and hot water before placing cooked foods back on the platter or use different platters for raw and cooked foods •... - Page 28 Grilling Tips PORK FISH POULTRY BEEF Grilled Pork Chops Turn your grill on high and close the lid. Allow it to heat up for 15-20 minutes. Rule #1: Go thick, not thin. Don’t try to grill thin pork chops. Bread them and fry them, and they’ll taste great. But if you put them on the grill, they’ll cook too fast and end up tough and flavorless.
-
Page 29: Aluminum Foil
In a gas smoker, soaking the wood chips may prolong the life of the wood chips but it will also take longer to produce smoke so we will leave that decision up to you. Do not soak your wood chips when using your Smoke Hollow electric smoker. What you need to smoke meats: Internal Meat Thermometer An internal meat thermometer is a must to cook large pieces of meat to make sure it is done internally. -
Page 30: Smoking Recipes
Smoking Recipes PORK FISH POULTRY BEEF Smoked Pork Tenderloin Take outside wrapper off of meat and wash thoroughly in cold water. Place tenderloin on a paper towel to soak up excess water. Rub your favorite pork rub on the loin (we recommend Head Country Pork seasoning). Preheat smokers to 225 degrees and place loin in the center of the smoker. - Page 31 Smoking Recipes PORK FISH POULTRY BEEF Smoked Halibut Select a nice fresh ¾” thick filet. Wash filet thoroughly in cold water and lay on paper towel until water is not visible. Melt a whole stick of butter in the microwave and sprinkle a liberal amount of Dill weed in the melted butter. Lay filets on aluminum foil and fold a lip around edges to contain the butter.
-
Page 32: Limited Warranty
5400 Doniphan Drive Neosho, MO 64850 www.olp-inc.com © 2016 Outdoor Leisure Products, Inc. No part of this work may be reproduced, modified, distributed, or otherwise used without prior written permission. Smoke Hollow is a trademark of Outdoor Leisure Products, Inc. 12092016...
Need help?
Do you have a question about the SH9916 and is the answer not in the manual?
Questions and answers