Advertisement
Quick Links
New
a
l
F U R N I T U R E
Thank you for purchasing this quality product. Be sure to check all packing materials carefully
for small parts, which may have come loose inside the carton during shipment. Identify and
count all items and compare with the parts list and/or hardware list shown below.
Please read all instructions carefully. See the hardware and furniture part listing for guidance. Be
sure you have all parts listed before beginning assembly. Place all wooden parts on a clean, flat
surface to protect the finish from scratches. Follow the diagram to assemble.
CAUTION
1. Do not fully tighten the nuts or bolts until the table is fully assembled.
2. Please tighten by hand, not by a drill. Overtightening will damage threads. Do not
overtighten.
3. Keep all hardware out of the reach of children.
PARTS LIST
DESCRIPTION
ITEM
A
GLASS TOP
B
SHELF PANEL
C
BOTTOM BASE
D
SUPPORT LEG
STEP 1
Secure the other end of the L-Shape
STEP 3
bracket (9) to the Shelf Panel (B).
ASSEMBLY INSTRUCTION
c
PLATINA COLLECTION
ssi
®
MODEL:D3639-14 BAR TABLE
SKETCH
QTY
1PC
1PC
1PC
4pcs
5
HARDWARE LIST
DESCRIPTION
ITEM
BOLT Ø5/16"X2"
1
2
SPRING WASHER 5/16"
3
FLAT WASHER 5/16"
4
Allen wrench 5mm
5
BOLT Ø1/4"X3/4"
6
SPRING WASHER 1/4"
7
FLAT WASHER 1/4"
8
Allen wrench 4mm
9
L-Shape bracket
GLASS SUPPORT Ø35X12mm
10
11
GLASS SUPPORT BOLT 1/4"X20mm
12
ADJUSTER
Assemble the L-Shape bracket
STEP 2
(9) on to each support leg (D).
SKETCH QTY
8PCS
8PCS
8PCS
1PC
8PCS
8PCS
8PCS
1PC
4PCS
8PCS
8PCS
4PCS
MADE IN CHINA
Advertisement

Related Manuals for New Classic Furniture PLATINA D3639-14


Summary of Contents for New Classic Furniture PLATINA D3639-14
- Page 1 ASSEMBLY INSTRUCTION PLATINA COLLECTION ® MODEL:D3639-14 BAR TABLE F U R N I T U R E Thank you for purchasing this quality product. Be sure to check all packing materials carefully for small parts, which may have come loose inside the carton during shipment. Identify and count all items and compare with the parts list and/or hardware list shown below.
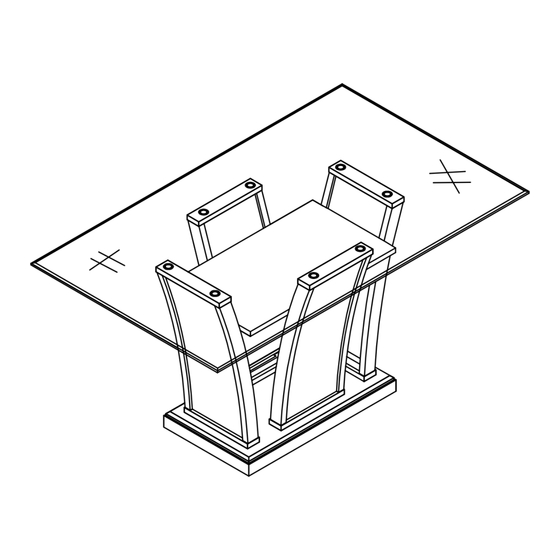
- Page 2 STEP 4 Secure the other end of the L-Shape bracket (9) to STEP 5 the Shelf Panel (B) and install the Glass Support Bolt (11) and Glass Support (10) on each leg. FULLY SET-UP Align the glass top & put on to table base with help of 2 people.
Need help?
Do you have a question about the PLATINA D3639-14 and is the answer not in the manual?
Questions and answers