Advertisement
Quick Links
Advertisement

Related Manuals for Diphano Link


Summary of Contents for Diphano Link
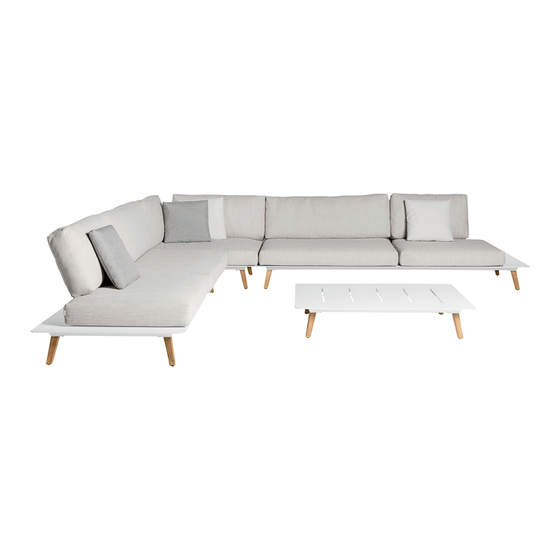
- Page 1 Link INSTRUCTION MANUAL...
- Page 3 INDEX how to assemble the base general assembly instructions for backrests how to assemble 2,5-seater 240 how to assemble corner seat 120 how to assemble corner seat 240 how to assemble middle seat 120 how to assemble middle seat 240 how to assemble end seat 120 how to assemble end seat 240 how to assemble the cushions...
- Page 4 (you can use the cardboard box for this). 4x teak leg 12x bolt (3/leg) 1x hex key 120cm 240cm 2x protection profile/base 1x topplate base 120 or topplate base 240 Diphano cannot be held responsible if the assembly instructions are not followed properly.
- Page 5 INSTALLING TEAK LEGS Place the ‘topplate base’ (E) upside down and fixate the teak legs (A) with the 3 supplied bolts (B) by using the hex key (C). Repeat for each teak leg.
- Page 6 TURN THE BASE Turn the base carefully to its normal position with at least 2 persons.
- Page 7 PREVENT DAMAGING To connect 2 or more bases we advise to use the supplied protection profiles (D) to prevent damaging of the bases. Place the 2 profiles +-8cm from the outside of the base before connecting the second module.
- Page 8 PLACE THE BASES IN THE DESIRED CONCEPT...
- Page 9 ADJUST FEET Check with a spirit level if the table is placed level. If not, (un)screw the adjustable feet till your table is completely level.
- Page 10 general assembly instructions for backrests CONTENT Start by unpacking everything carefully. Make sure to cover the floor to prevent any damage or scratching (you can use the cardboard box for this). 4x knurled nut/backrest 4x carriage bolt/backrest 49cm 98cm 67cm 1x backrest (71/89/120)
- Page 11 PLACE BACKREST Place your backrest on the top plate. Respect the order and distances of assembly explained on the next pages per module. MATCH SLOTS Make sure the slots in the backrest correspond with the slots in the base. Please make sure at least 4 slots are attached.
- Page 12 INSERT CARRIAGE BOLTS Insert the 4 carriage bolts (B) through both slots. Be sure that the head of the bolt fits perfectly flush with the backrest.
- Page 13 TIGHTEN WITH KNURLED NUTS Hold the carriage bolt (B) and fixate the supplied knurled nut (A) from below. Now tighten the knurled nut lightly. Wait until the very end of the assembly to fully tighten the knurled nut. Repeat for the 4 supplied nuts.
- Page 14 how to assemble 2,5-seater 240 STEP 1 First position BR71 as shown on the picture. A = ±11cm / B = ±22cm STEP 2 Now position BR89 as shown on the picture. C = ±22cm / D = ±42cm E = ±11cm (from the center line of the module) BR89...
- Page 15 STEP 3 Position the second BR89 ±22cm from the first BR89. 22cm BR89 BR89 STEP 4 Position second BR71 as shown on the picture. A = ±11cm / B = ±22cm BR89 BR89...
-
Page 16: Order Of Assembly
how to assemble corner seat 120 ORDER OF ASSEMBLY When assembling an ‘L-corner concept’, ALWAYS start assembling the corner backrests first before you fixate any other backrests. STEP 1 First position BR71 as shown on the picture. A = ±11cm / B = ±22cm... - Page 17 STEP 2 Now position BR89 as shown on the picture. C = ±22cm D = ±42cm E = ±11cm BR89...
- Page 18 how to assemble corner seat 240 ORDER OF ASSEMBLY When assembling an ‘L-corner concept’, ALWAYS start assembling the corner backrests first before you fixate any other backrests. STEP 1 First position BR71 as shown on the picture. A = ±11cm / B = ±22cm...
- Page 19 STEP 2 Now position BR89 as shown on the picture. C = ±22cm / D = ±42cm E = ±11cm (from the center line of the module) BR89 STEP 3 After positioning the corner (BR71 & BR89), position the next backrest (BR71/BR87/BR120) ±22 cm from the previous backrest.
- Page 20 how to assemble middle seat 120 STEP 1 Position BR120 as shown on the picture. A = ±11cm B = ±11cm 11cm 11cm BR120...
- Page 21 how to assemble middle seat 240 STEP 1 Position BR120 as shown on the picture. A = ±11cm 11cm 11cm BR120 STEP 2 Position the next backrest (BR71/BR87/BR120) ±22cm from the first backrest. 22cm BR120 BR...
- Page 22 how to assemble end seat 120 STEP 1 Position BR89 or BR71 as shown on the picture. A = ±11cm 11cm BR...
- Page 23 how to assemble end seat 240 STEP 1 Position BR120 as shown on the picture. A = ±11cm / B = ±11cm 11cm 11cm BR120 STEP 2 Position BR71 or BR87 ±22cm from BR120. 22cm BR120 BR...
- Page 24 how to assemble the cushions STEP 1 Add the sliding back cushions by sliding them over the backrests. Make sure the velcro hooks on the back cusions are in the right direction. STEP 2 Place the seat cushions as shown in the pictures.
- Page 25 STEP 3 Place the back cushions central to your sliding back cushions. Make sure the velcro hook (on the sliding back cushions) and loop (on the back cushion) fit propperly.
- Page 26 align and tighten Check if the ‘backrest + sliding back cushion’ is perfectly aligned with the ‘back cushion’. Once everything is in position, you can finally tighten the knurled nuts. Repeat for each backrest.
-
Page 27: Maintenance And Care
maintenance & care POWDERCOATED ALUMINIUM Simply brush away loose dirt, rinse, and clean with a mild, lukewarm soapy solution. Rinse thoroughly and pat dry with a cloth. NATURAL TEAK Simply brush away loose dirt, rinse, and clean with a mild, lukewarm soapy solution. - Page 28 Textielstraat 4 - 8790 Waregem - Belgium Tel. +32 (0)56 980 008 - info@diphano.com...
Need help?
Do you have a question about the Link and is the answer not in the manual?
Questions and answers